

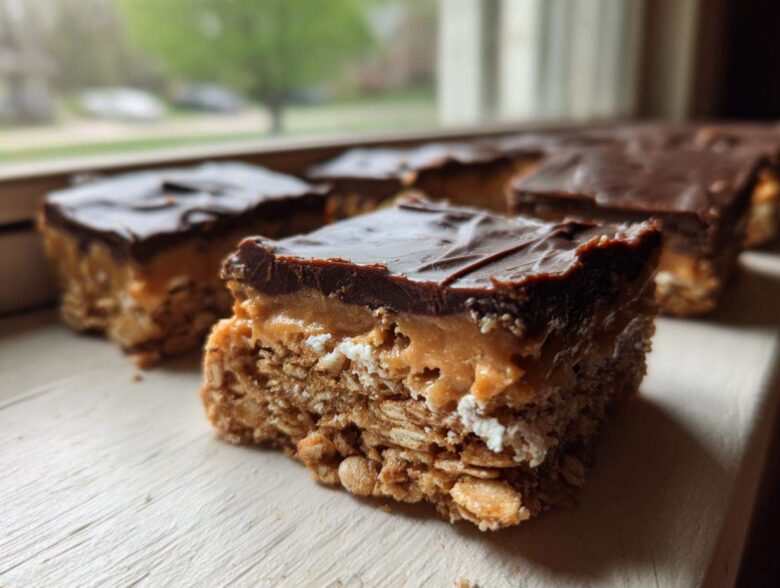
Oh, I know that feeling! It’s 3 PM, you’re halfway through a massive to-do list, and suddenly you *absolutely* need something sweet that tastes like a candy bar but won’t make you dirty a single pot (besides a microwave bowl, maybe). Trust me, I keep these ingredients stocked just for those emergencies. That’s why my recipe for the **Ultimate No-Bake Chocolate Peanut Butter Oat Bars** is practically legendary in my own kitchen. Forget waiting for an oven to preheat; these beauties come together in about fifteen minutes of active work. They’re chewy, they’re fudgy, and they nail that perfect chocolate and peanut butter combo every single time. You’re going to love how ridiculously easy these no-bake treats are!
Why These No-Bake Chocolate Peanut Butter Oat Bars Are Your New Favorite Easy No Bake Dessert
Seriously, what’s not to love? These chocolate peanut butter oat bars hit every single marker for a truly perfect, low-effort dessert. They satisfy that deep craving for something rich but give you the satisfying chew from the oats. Plus, they keep so well in the fridge! It’s my go-to solution when company shows up unexpectedly or when I just need something ready to grab tomorrow.
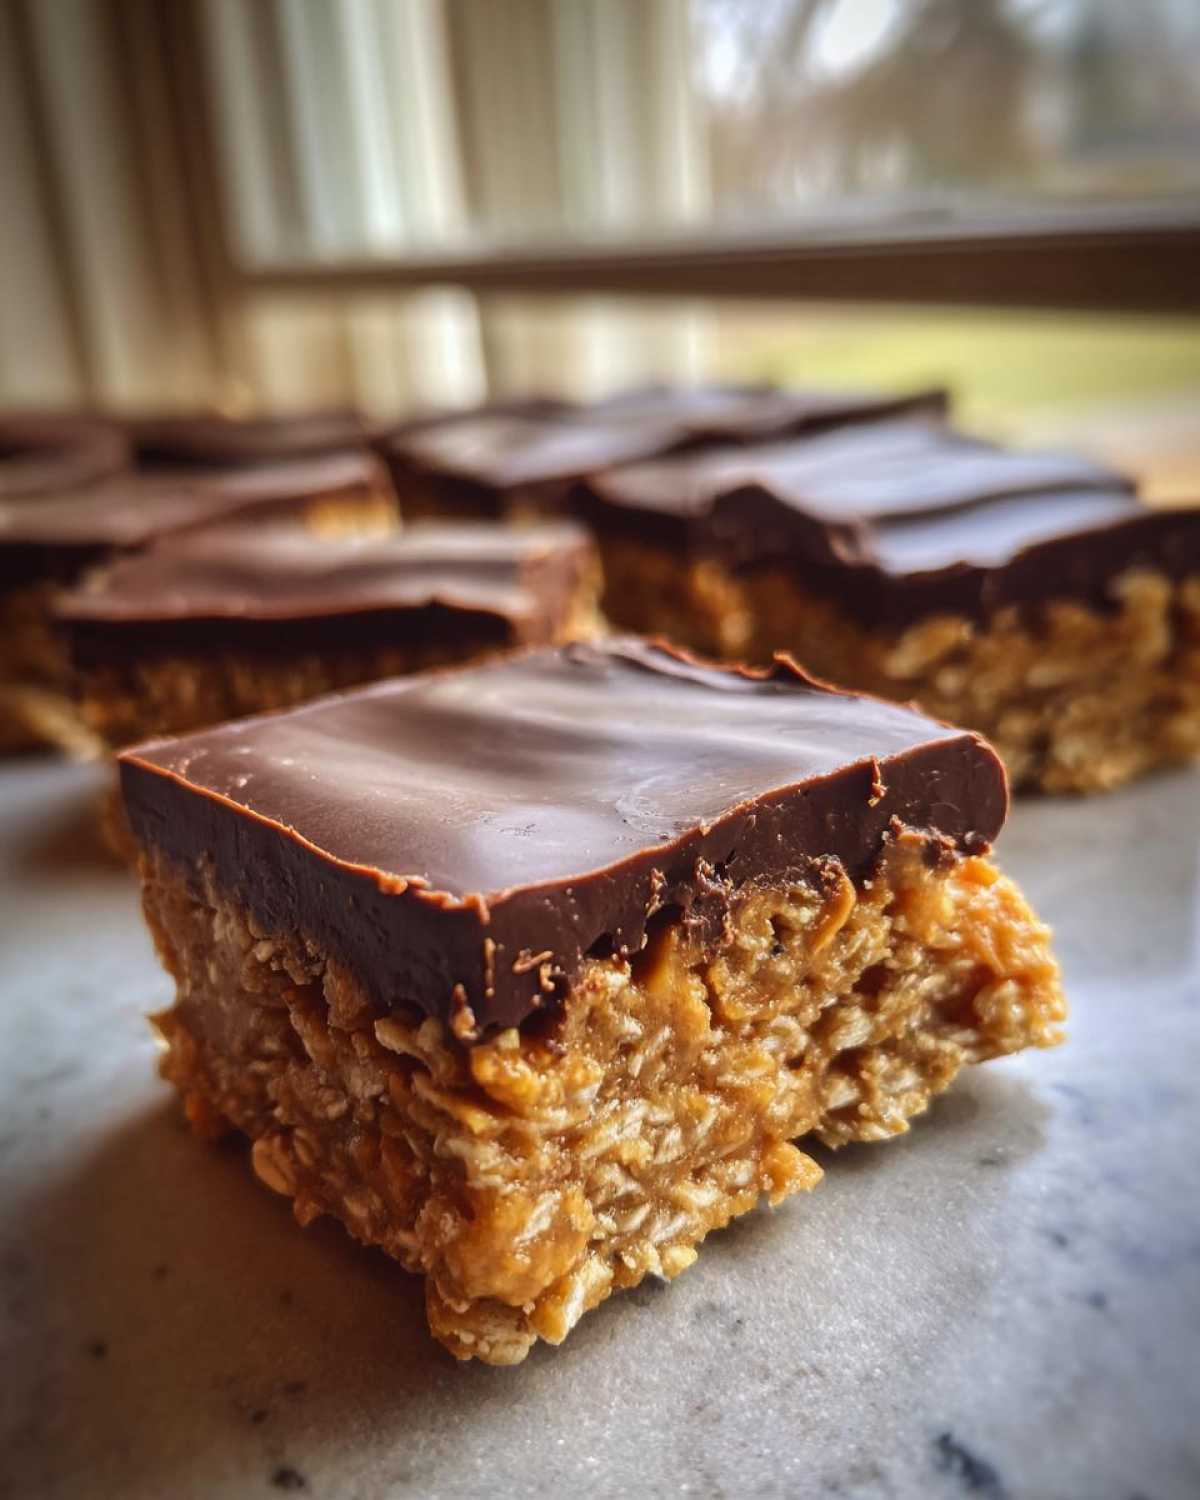
- They taste like homemade peanut butter cups mixed with a chewy granola bar—pure magic!
- Zero oven time means your kitchen stays cool, which is a huge win in the summer.
- They satisfy that craving for homemade candy bars without any fuss or complicated steps.
Quick Preparation Time for No Bake Energy Bars Recipe
When I say quick, I mean it. You are only looking at about 15 minutes of actual hands-on time to mix everything up. The longest part of this whole process is waiting for them to chill, which isn’t work at all! That’s why these work so well as a **quick chocolate snack recipe** when you need a boost fast.
Simple Layered Dessert Bars Using Pantry Staples
You probably have 80% of what you need right now! We’re using oats, peanut butter, sugar, butter, milk, and chocolate chips to create these **simple layered dessert bars**. It’s the best kind of recipe because you don’t have to run to the store for specialty items. If you’re looking for another great no bake dessert that uses similar staples, check out my pie recipe!
Gathering Ingredients for No-Bake Chocolate Peanut Butter Oat Bars
Okay, let’s get our supplies ready! The beauty of making these **peanut butter dessert bars no oven** required is that the ingredient list is super straightforward. You only need seven things to make the base and filling, and three more for that glorious chocolate topping. I just line everything up on the counter before I start mixing so I don’t forget anything crucial, especially the melted butter!
- 1 1/2 cups rolled oats (old-fashioned are best for texture here, trust me!)
- 1/2 cup peanut butter (for the oat layer)
- 1/2 cup butter, melted
- 1/2 cup granulated sugar
- 1/4 cup milk
- 1 teaspoon vanilla extract
- 1 cup semi-sweet chocolate chips
- 1/4 cup creamy peanut butter (for the middle layer)
Ingredient Notes and Substitutions for Peanut Butter Dessert Bars No Oven
While the measurements are pretty locked in for a good texture, I do have one substitution I often make. If I’m feeling like these should lean a little more toward a true “energy bar” vibe, I swap out half of that granulated sugar—about 1/4 cup—for pure maple syrup. It adds a slightly different, deeper sweetness, and it helps it bind nicely too. Just make sure whatever peanut butter you use isn’t super runny from the fridge; you want that good, shelf-stable kind for structure!
Step-by-Step Instructions for the Best Chocolate Peanut Butter No Bake Recipe
This is where the magic happens, and I promise, it’s truly foolproof. We’re building these in layers, just like a fancy dessert, but without the messy oven cleanup! You’ll need an 8×8 pan ready to go before we even start mixing, so make sure you whip up some liner first. It makes pulling these beautiful **no-bake oatmeal squares** out later so much easier. If you enjoy layered bar recipes, you might love my tips for making easy homemade cheese crackers, even though that’s savory!
Preparing the Chewy Oat Base for Your No-Bake Chocolate Peanut Butter Oat Bars
First off, line that 8×8 pan with parchment paper. Make sure you leave an overhang on two sides—that’s your built-in handle! In a dedicated mixing bowl, dump in your rolled oats, the first half-cup of peanut butter, the melted butter, sugar, milk, and vanilla. Mix it all up really well until everything is totally coated. Then, take this gorgeous, slightly sticky mixture and press it down firmly into the bottom of your prepared pan. I use the bottom of a measuring cup to get it super even and dense; that firmness is what keeps these bars from crumbling later!
Creating the Chocolate Peanut Butter Topping
Now for the best part! Grab a different microwave-safe bowl—we don’t want any oat residue in this beautiful chocolate layer now! Combine your one cup of chocolate chips and that remaining 1/4 cup of creamy peanut butter. Here’s the trick: don’t blast it on high for a full minute! Microwave it in 30-second bursts, stirring well after each one. This prevents scorching and keeps the chocolate silky smooth, not grainy. Stop just when it looks mostly melted, and stir until the residual heat smooths it out completely.
Layering and Chilling the No Bake Oatmeal Squares Recipe
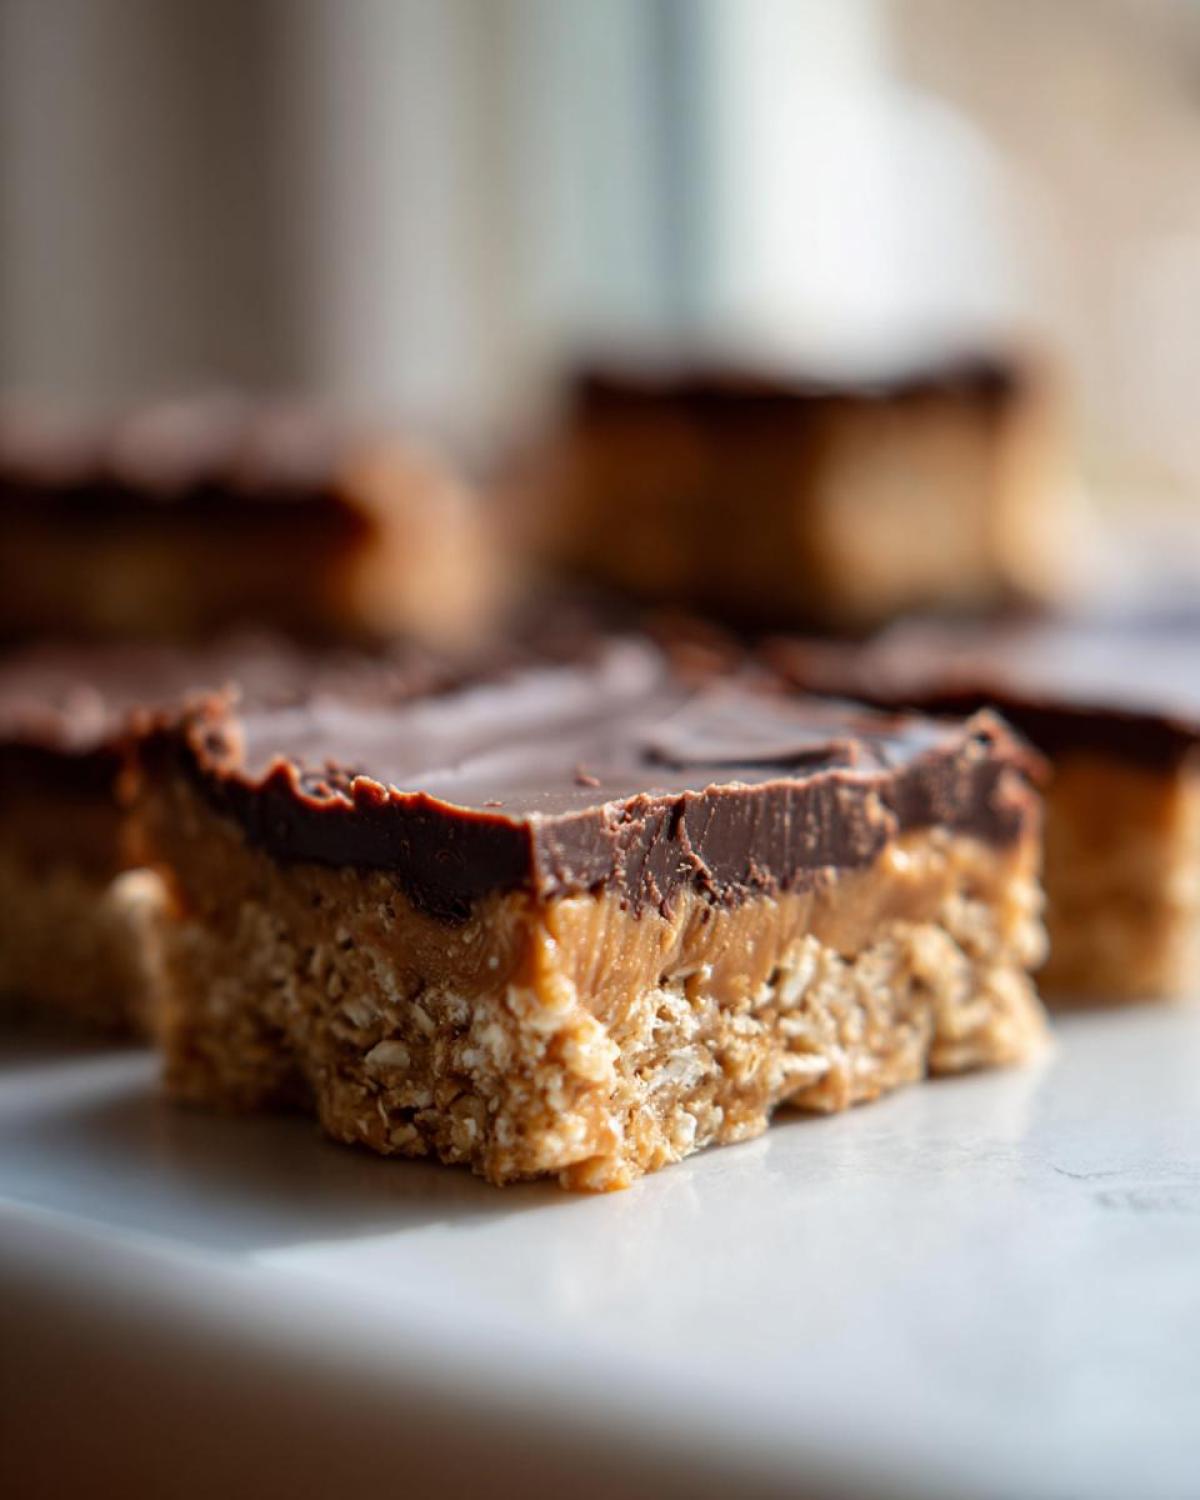
Gently pour that warm, melted chocolate mixture right over your pressed oat base. Use a spatula to spread it carefully right to the edges, making sure it’s perfectly level. Remember, this is the top layer, so make it look nice! Now the hardest part: you must refrigerate these. I strongly recommend a minimum of two full hours—that’s non-negotiable for getting clean cuts. If you can manage four hours, or even overnight, you’ll get those perfect, fudgy squares. Don’t try to rush it or you’ll end up with sticky messes!
Tips for Success When Making No-Bake Chocolate Peanut Butter Oat Bars
Even though these are no-bake, there are a few small things that can make the difference between a perfect, structured bar and a sticky pile of crumbs. I’ve definitely had batches crumble on me before I figured out the small secrets. If you follow these little pointers, your treats will hold together like a dream, making them fantastic for packing up as **make ahead sweet snacks**.
- Press That Base Firmly: This is the most important tip! When you’re pressing the oat mixture into the pan, really use a flat, heavy object—like the bottom of a glass or a sturdy metal spatula—and press down hard. That compression is what prevents the base from crumbling apart when you slice it later.
- The Peanut Butter Matters: Avoid using natural, oily peanut butter for this recipe unless you plan on adding extra dry ingredients, like a tablespoon or two of extra oats or powdered sugar. The oil separation in natural butters can prevent the layers from setting correctly, making for a softer melt.
- Let the Chocolate Cool Just Right: When you pull the pan out after chilling, let it sit on the counter for about 10 minutes before cutting. If the chocolate layer is rock-hard from the fridge, it will crack and snap off instead of slicing cleanly. A few minutes of warming makes the chocolate slightly pliable.
- Use Your Helper Liner for the Cut: When you finally slice them, use the parchment overhang to lift the entire block out of the pan first, then set it on a cutting board. This gives you stable footing to slice straight down, giving you those gorgeous edges you see in pictures. If you cut them while they are still inside the pan, the sides often get smeared.
- A Big Knife Helps: Use a large, sharp knife to cut the squares. Wipe the knife clean between cuts if the chocolate starts to stick too much. It sounds fussy, but it keeps your cuts looking professional! If you love fudgy results, you should look at my recipe for ultimate fudgy brownie cookies—it has a similar focus on good texture!
Storage and Make Ahead Sweet Snacks with No-Bake Chocolate Peanut Butter Oat Bars
One of the absolute best things about these **no-bake chocolate peanut butter oat bars** is that they are built to last. Unlike a gooey baked cookie that goes stale in two days, these guys thrive when you leave them alone! I honestly think they taste even better on day two when everything has really settled in and the layers have completely married.
When it comes to keeping them fresh, your refrigerator is your best friend. You need to store the leftovers in an airtight container. I usually place a layer of wax paper or parchment between layers just to be safe, especially because the chocolate topping can sometimes stick to the oat base underneath if they are stacked too tightly.
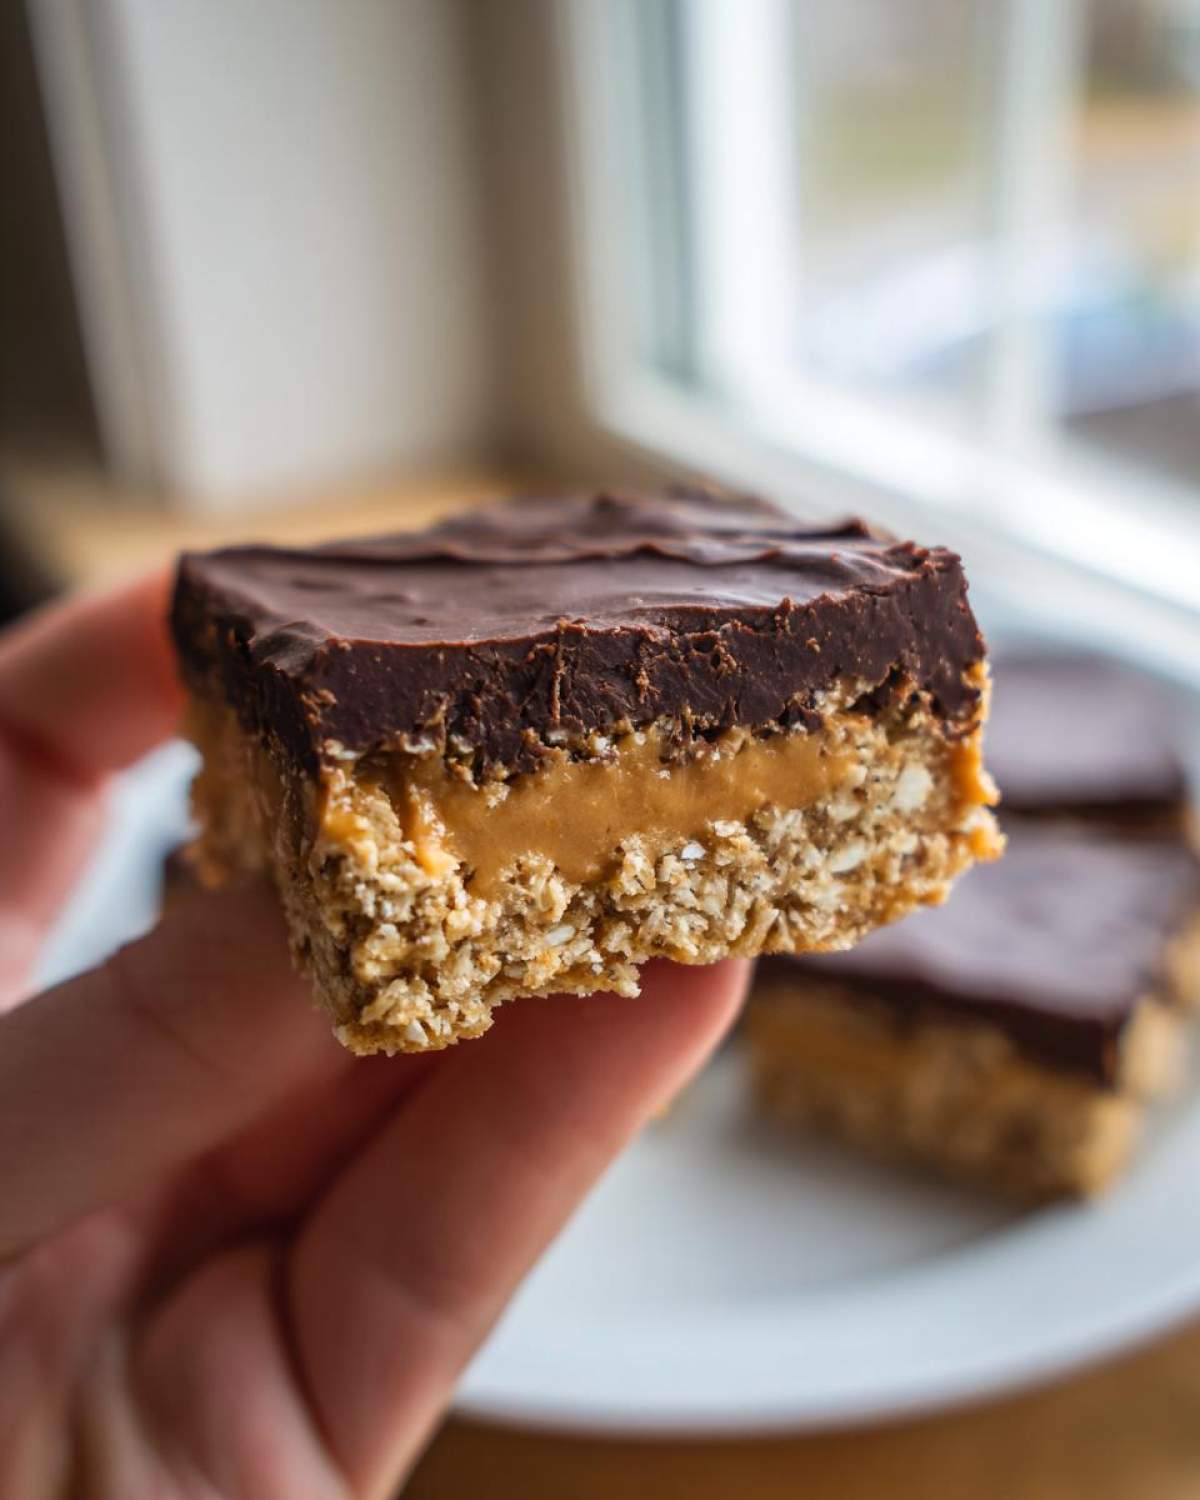
They are fantastic for meal prep! You can safely keep them stored in the fridge for up to one week. Honestly, they rarely last that long in my house, but it gives me peace of mind knowing I can whip up a batch on Sunday and have them ready for quick weekday afternoon snacks all week long. They truly shine as the easiest **make ahead sweet snacks** imaginable. If you’re looking for other great make-ahead ideas, check out my freezer-friendly recipes, like these freezer breakfast burritos—always good to have ready options!
Don’t even think about freezing them, though. While they *could* technically be frozen, the texture of the butter and chocolate topping tends to get a little weird once thawed back to room temperature. We want creamy and chewy, not sad and crumbly, so stick to the fridge for the best results!
Variations for Your Fudgy No Bake Oat Squares
Once you’ve mastered the classic, you know I can’t leave well enough alone! Part of the joy of these **fudgy no bake oat squares** is that they are so forgiving. Since we aren’t using yeast or baking powder, there’s very little that can truly “go wrong,” which means we can totally play around with them! I love tinkering with the base recipe to see what new things I can sneak in there.
Here are a couple of my favorite ways to switch things up without ever needing to touch that oven dial:
- The Salty Finish: Okay, this is the easiest upgrade, but maybe the one that changes the flavor profile the most. After you pour that gorgeous chocolate topping layer on, grab some flaky sea salt—like Maldon, if you have it—and just pinch a little bit over the top before it sets. The salt cuts through the sweetness of the chocolate and peanut butter instantly, making every bite taste richer. It elevates these from a simple snack to something you’d actually brag about serving!
- Nut Lover’s Dream: If you’re out of peanut butter or just craving something different, this works beautifully with almond butter or even cashew butter. Just swap the 1/2 cup in the base and the 1/4 cup in the topping for the alternative nut butter. Word of caution though: almond butter is usually a tad runnier than PB, so you might need to add just one extra tablespoon of oats to the base mixture to keep things firm.
- Hidden Crunch Factor: Want a little textural surprise inside your oat base? Before you press the base into the pan, stir in about 1/2 cup of mini chocolate chips or even chopped pretzels! The pretzels add a salty, savory crunch that contrasts perfectly with the creamy middle layer once everything sets. It makes these feel even more like those fancy, homemade candy bars we were aiming for back in the intro!
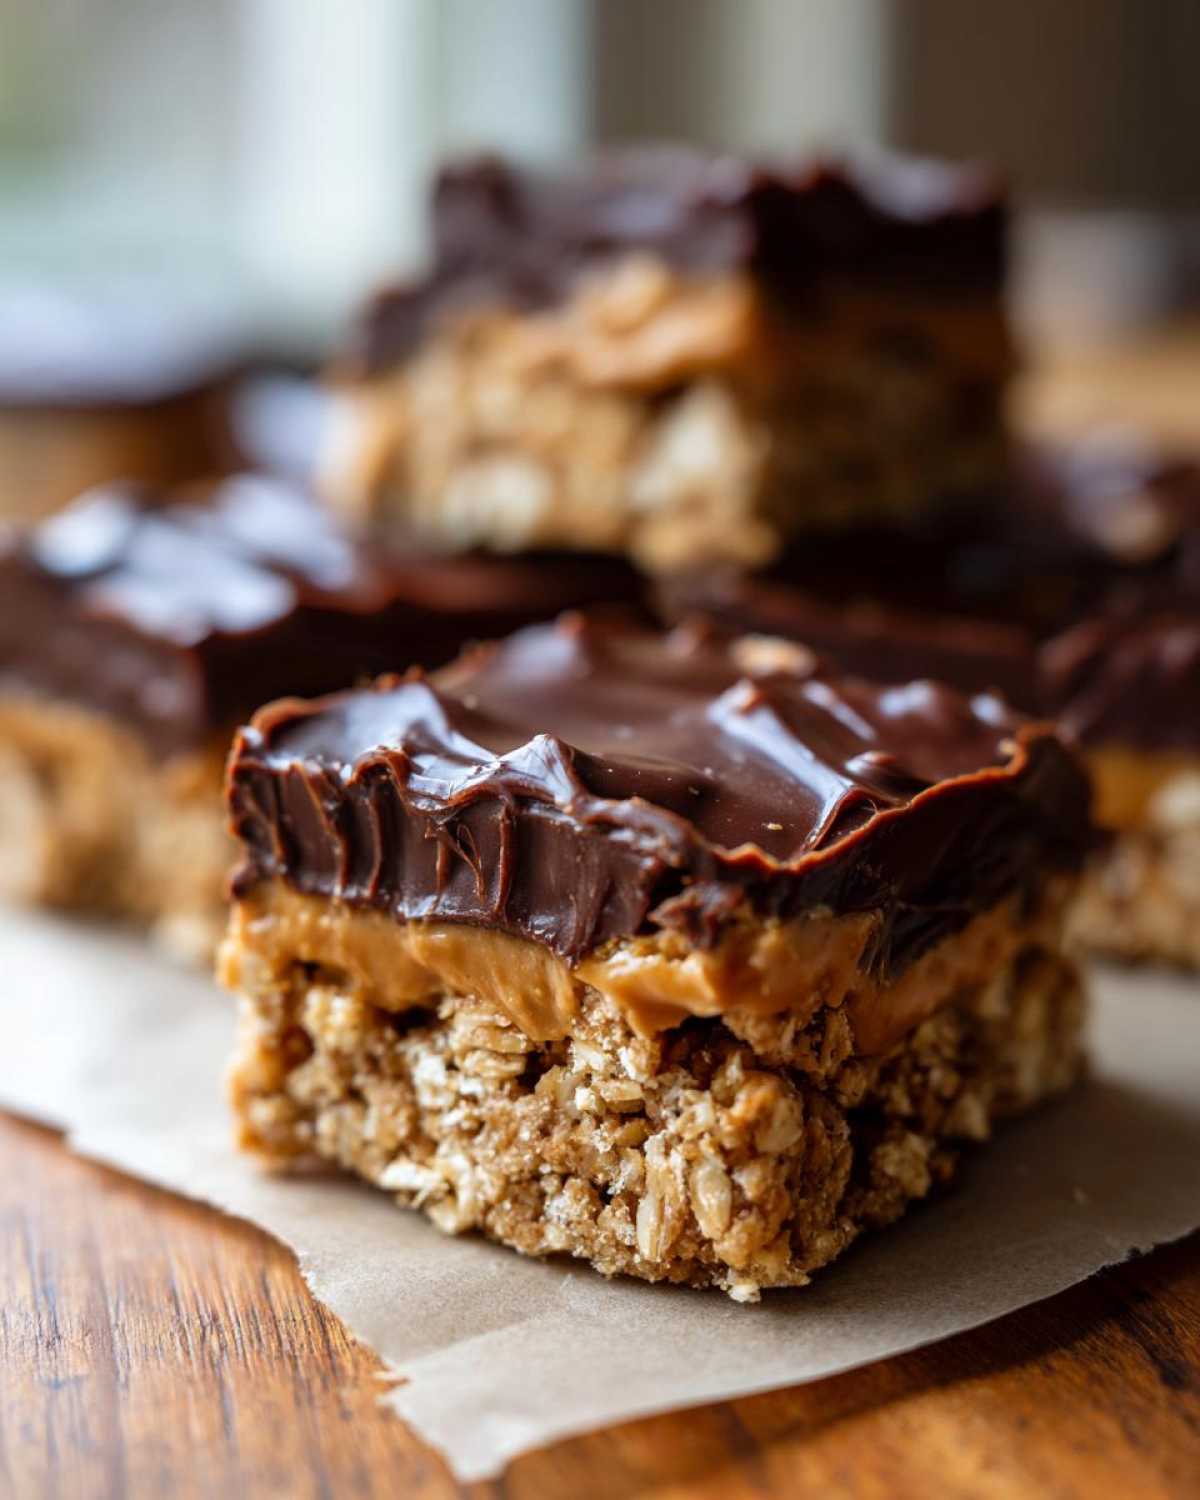
These little tweaks mean you can make a batch of the original one week and then try a salty batch the next, keeping things exciting. If you like these kinds of layered, crunchy/fudgy treats, you absolutely must try my recipe for cookies and cream puppy chow—it’s another total home run that requires zero baking!
Serving Suggestions for These Simple Layered Dessert Bars
Even though these **no-bake chocolate peanut butter oat bars** are absolutely perfect all on their own—straight out of the fridge—sometimes you want to dress them up a little or serve them differently, especially if you’re bringing them to a potluck or need a richer dessert experience. I rarely change the ingredients, but adapting how you serve them can make them feel totally new again!
Here are a few ways I like to serve these simple layered dessert bars, depending on the mood:
- The Morning Booster: These bars hold together so well that they are essentially a great makeup for an energy bar! I often slice them into slightly narrower pieces and pack one or two alongside a piece of fruit for my mid-morning snack. They give you a great hit of energy from the oats and peanut butter when you need it most. They pair beautifully with a strong, black coffee, too.
- Elevated Dessert Time: If you’re serving these after dinner as a proper dessert, take the bar out of the fridge about 15 minutes before you plan to eat them. This lets the layers soften just a hair. Try crumbling one square over a scoop of vanilla bean ice cream. The slightly soft base mixed with the cold ice cream and the set chocolate topping is just decadent. I usually add a tiny drizzle of honey over the top for a presentation win!
- The Packed Lunch Upgrade: When I pack these for lunch (yes, adults pack their own treats!), I like to cut them into smaller squares than usual. They are so rich this way that a small square is perfectly satisfying. Since they don’t contain any eggs or milk that spoil easily at room temperature for a few hours, they travel beautifully within a good lunchbox setup. They are definitely a step up from regular old crackers, that’s for sure!
No matter how you eat them, these bars are versatile! They are much easier to manage than a big messy bowl of something hot and saucy, which is why I rely on them so often!
Frequently Asked Questions About No Bake Oatmeal Squares Recipe
I know you might have a few lingering questions before you dive into making these, because rushing a recipe you’re trying for the first time never ends well! That’s why I pulled together the questions I get asked most often about these **no-bake oatmeal squares**. Knowing these little details upfront is what separates a good batch from a truly amazing one.
Can I make these No-Bake Chocolate Peanut Butter Oat Bars gluten-free?
That is a great question, especially for those of us managing sensitivities! The answer is yes, you absolutely can make these **gluten-free no bake option** bars, but you need to be mindful of just one ingredient: the oats. As long as you purchase certified gluten-free rolled oats—and double-check that your chocolate chips don’t have cross-contamination warnings—the rest of the ingredients are naturally GF. It’s a really easy swap!
How long do these bars take to set completely?
You have two timelines here, and it depends on how impatient you are! The instructions say two hours minimum, and that’s enough time for the chocolate topping to be firm enough that you can carefully lift the whole slab out of the pan and cut it. However, if you want them perfectly firm, less sticky, and ready to travel well, I really push waiting four hours or even overnight. For the absolute cleanest cuts, give them the full chill time. Don’t worry, they are worth the wait!
Can I use natural drippy peanut butter in this quick chocolate snack recipe?
Listen, I love natural peanut butter, but for these specific **peanut butter dessert bars no oven** method relies on the binders—the butter and the sugar—doing their job perfectly. Natural peanut butter releases oil way too easily, and that oil leaks into the oat base and acts like a softener. If you use it, you risk the entire bottom layer not staying compressed, leading to crumbs. If you must use it, I’d suggest draining off the excess oil first, or be prepared to add an extra 1 to 2 tablespoons of oats to the base mixture just to soak up that extra liquid. I usually stick to the standard creamy kind; it just guarantees success!
If you’re looking for a different kind of no-bake energy boost, check out my recipe for no-bake pumpkin oat energy bites! They are also super simple.
Estimated Nutritional Data for No-Bake Chocolate Peanut Butter Oat Bars
I always have to throw this little disclaimer in here because, let’s be honest, these aren’t exactly health food—they are a delicious indulgence! These numbers are just my best guess based on standard pantry ingredients, so your exact mileage might vary depending on the brands of chocolate chips or peanut butter you use. But hey, knowing the rough breakdown helps, right?
Think of this as the general guideline for one square serving of these amazing **no-bake chocolate peanut butter oat bars**:
- Calories: About 220 each
- Sugar: 18g (Yep, they’re sweet, but worth every bit!)
- Fat: 14g total (That’s coming from the butter and peanut butter doing their delicious binding work!)
- Carbohydrates: 22g
- Protein: 6g (Thanks to that peanut butter!)
- Sodium: 95mg
- Saturated Fat: 5g
We’re keeping that cholesterol low, which is nice, and they bring a little fiber from the oats! They feel like homemade candy bars, but with fewer mysterious ingredients, which is a definite win in my book. Enjoy them responsibly—or not so responsibly, I won’t tell!
PrintUltimate No-Bake Chocolate Peanut Butter Oatmeal Bars
Make these simple, layered bars featuring a chewy oat base, a creamy peanut butter filling, and a rich chocolate topping. No oven is required.
- Prep Time: 15 min
- Cook Time: 0 min
- Total Time: 2 hr 15 min
- Yield: 16 servings
- Category: Dessert
- Method: Chilling
- Cuisine: American
- Diet: Vegetarian
Ingredients
- 1 1/2 cups rolled oats
- 1/2 cup peanut butter
- 1/2 cup butter, melted
- 1/2 cup granulated sugar
- 1/4 cup milk
- 1 teaspoon vanilla extract
- 1 cup semi-sweet chocolate chips
- 1/4 cup creamy peanut butter (for the middle layer)
Instructions
- Line an 8×8 inch baking pan with parchment paper, leaving an overhang for easy removal.
- In a medium bowl, combine the rolled oats, 1/2 cup peanut butter, melted butter, sugar, milk, and vanilla extract. Mix until fully combined.
- Press the oat mixture evenly into the bottom of the prepared pan.
- In a separate microwave-safe bowl, combine the chocolate chips and the remaining 1/4 cup peanut butter. Microwave in 30-second intervals, stirring between each, until smooth.
- Pour the chocolate mixture over the oat base and spread it evenly.
- Refrigerate the bars for at least 2 hours, or until the chocolate topping is firm.
- Lift the bars out of the pan using the parchment paper overhang and cut into squares.
Notes
- For a firmer bar, chill the bars for 4 hours or overnight.
- If you want a slightly healthier version, substitute half the sugar with maple syrup.
- Store leftovers in an airtight container in the refrigerator for up to one week.
Nutrition
- Serving Size: 1 square
- Calories: 220
- Sugar: 18g
- Sodium: 95mg
- Fat: 14g
- Saturated Fat: 5g
- Unsaturated Fat: 9g
- Trans Fat: 0g
- Carbohydrates: 22g
- Fiber: 2g
- Protein: 6g
- Cholesterol: 10mg