

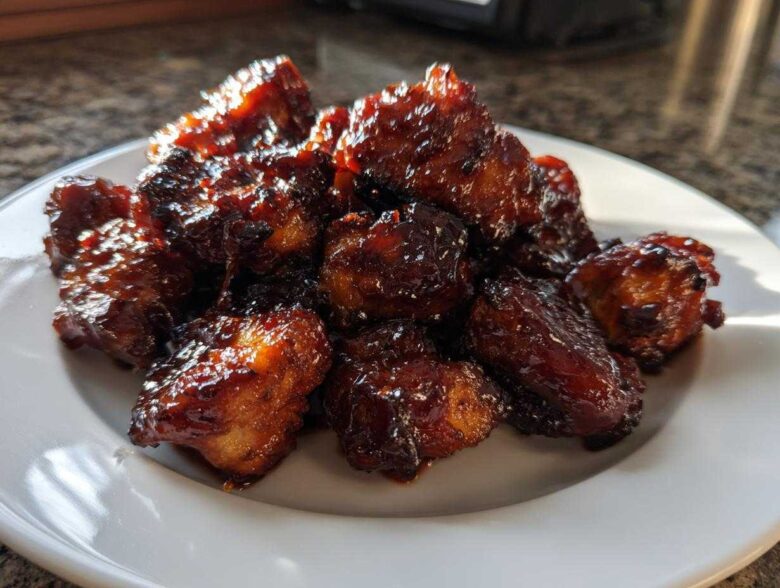
Oh my gosh, stop what you are doing right now, because I have cracked the code on the most ridiculously addictive snack you will ever make. Forget dry, lackluster chicken pieces; we are talking about pure, sticky, sweet, smoky heaven here. The key isn’t just the sauce—it’s the final finish! Seriously, once you master making these Sticky BBQ Chicken Bites with Caramelized Edges, they will become your go-to for every single gathering, game day, or weeknight rescue meal. I spent way too many weekends messing up batches that were either too wet or just plain burnt, but I finally nailed the texture we all crave: tender and juicy on the inside, with that perfect, lacquered, almost crackly crust on the outside. Trust me, tasting these makes going through my old recipe failures totally worth it. If you want to know more about my philosophy on perfecting simple recipes, check out our About Us page!
Why You Will Love This Sticky BBQ Chicken Bites with Caramelized Edges Recipe
I know you’ve had BBQ chicken before, but this one hits different. Why I insist you drop everything and make this batch right now:
- The Texture Trio: We guarantee juicy meat from using thighs, but the real star is that exterior—it’s sticky, slightly sweet, and those caramelized edges just sing.
- It’s Shockingly Easy: It’s mostly hands-off time! A quick bake and a fast, intense broil are the only secrets needed for these amazing party bites.
- Flavor Bomb: We layer sweet brown sugar, tangy vinegar, and smoky paprika. It hits every single BBQ craving you have!
- Perfectly Bite-Sized: No messy cutting or serving required. Grab a toothpick and go!
Essential Ingredients for Sticky BBQ Chicken Bites with Caramelized Edges
Okay, let’s talk what goes into making those incredible bites! The ingredient list looks simple, but every element plays a huge role in getting that signature sticky texture. Seriously, the quality of your BBQ sauce makes a big difference here, though you can always level it up by making a batch from scratch; I’ve got a recipe for that if you’re feeling ambitious! Check out my homemade sauce guide if you want to go all in.
For the chicken itself, don’t even think about skipping the thighs. They just hold up so much better to high heat than breasts do!
- 1.5 lbs boneless, skinless chicken thighs, cut into 1-inch pieces
- 1 tablespoon olive oil
- 1 cup quality store-bought BBQ sauce (we need that sugar content!)
- 1/4 cup brown sugar, packed (this is key for caramelization!)
- 2 tablespoons apple cider vinegar
- 1 tablespoon Worcestershire sauce
- 1 teaspoon smoked paprika
- 1/2 teaspoon garlic powder
- 1/4 teaspoon black pepper
The Secret to Caramelized Edges: How to Prepare Sticky BBQ Chicken Bites
This is where the magic happens, friends. We skip the slow cooker nonsense because when you want those dark, slightly crunchy, sticky bits, you need high heat, but you need it carefully managed. Because we’re using those gorgeous boneless thighs—which stay juicy forever—we can afford to put them through some serious heat stress later on. My whole trick revolves around a two-stage cooking plan. First, we bake to get them cooked through gently, and second, we use the broiler to blast that sauce into submission. If you’re looking for more crispy chicken mastery in general, you might also enjoy my guide on getting the best crispy skin on roasted chicken; the principle is similar!
Step 1: Seasoning and Initial Bake for Juicy Chicken with Crispy Edges
First things first: get your oven cranked up to 400 degrees Fahrenheit. Line that baking sheet—trust me, you want foil here for cleanup later! Toss your seasoned chicken pieces with just a tiny bit of oil, the paprika, garlic powder, and pepper. We aren’t saucing yet; that would just burn during this stage. Spread them out so they have room to breathe; overcrowding is the enemy of a good initial bake. Pop them in for about 15 minutes. We just want them mostly cooked through so they can handle the sticky sauce next.
Step 2: Creating the Thick, Sticky Glaze for Sticky BBQ Chicken Bites with Caramelized Edges
While those nuggets are baking, we build the backbone of our stickiness. Pour your BBQ sauce, that packed brown sugar, cider vinegar, Worcestershire, and any other flavorings into a small saucepan. Bring this mixture up to a low simmer. Now, you need patience for about five to seven minutes. You’ll see it start to bubble slowly and thicken up. Keep stirring! We are reducing this down so that when you dip a spoon in it, the coating clings immediately. This is the difference between soupy BBQ chicken and true Sticky BBQ Chicken Bites with Caramelized Edges.
Step 3: Glazing and Broiling to Achieve Caramelized Chicken Bites
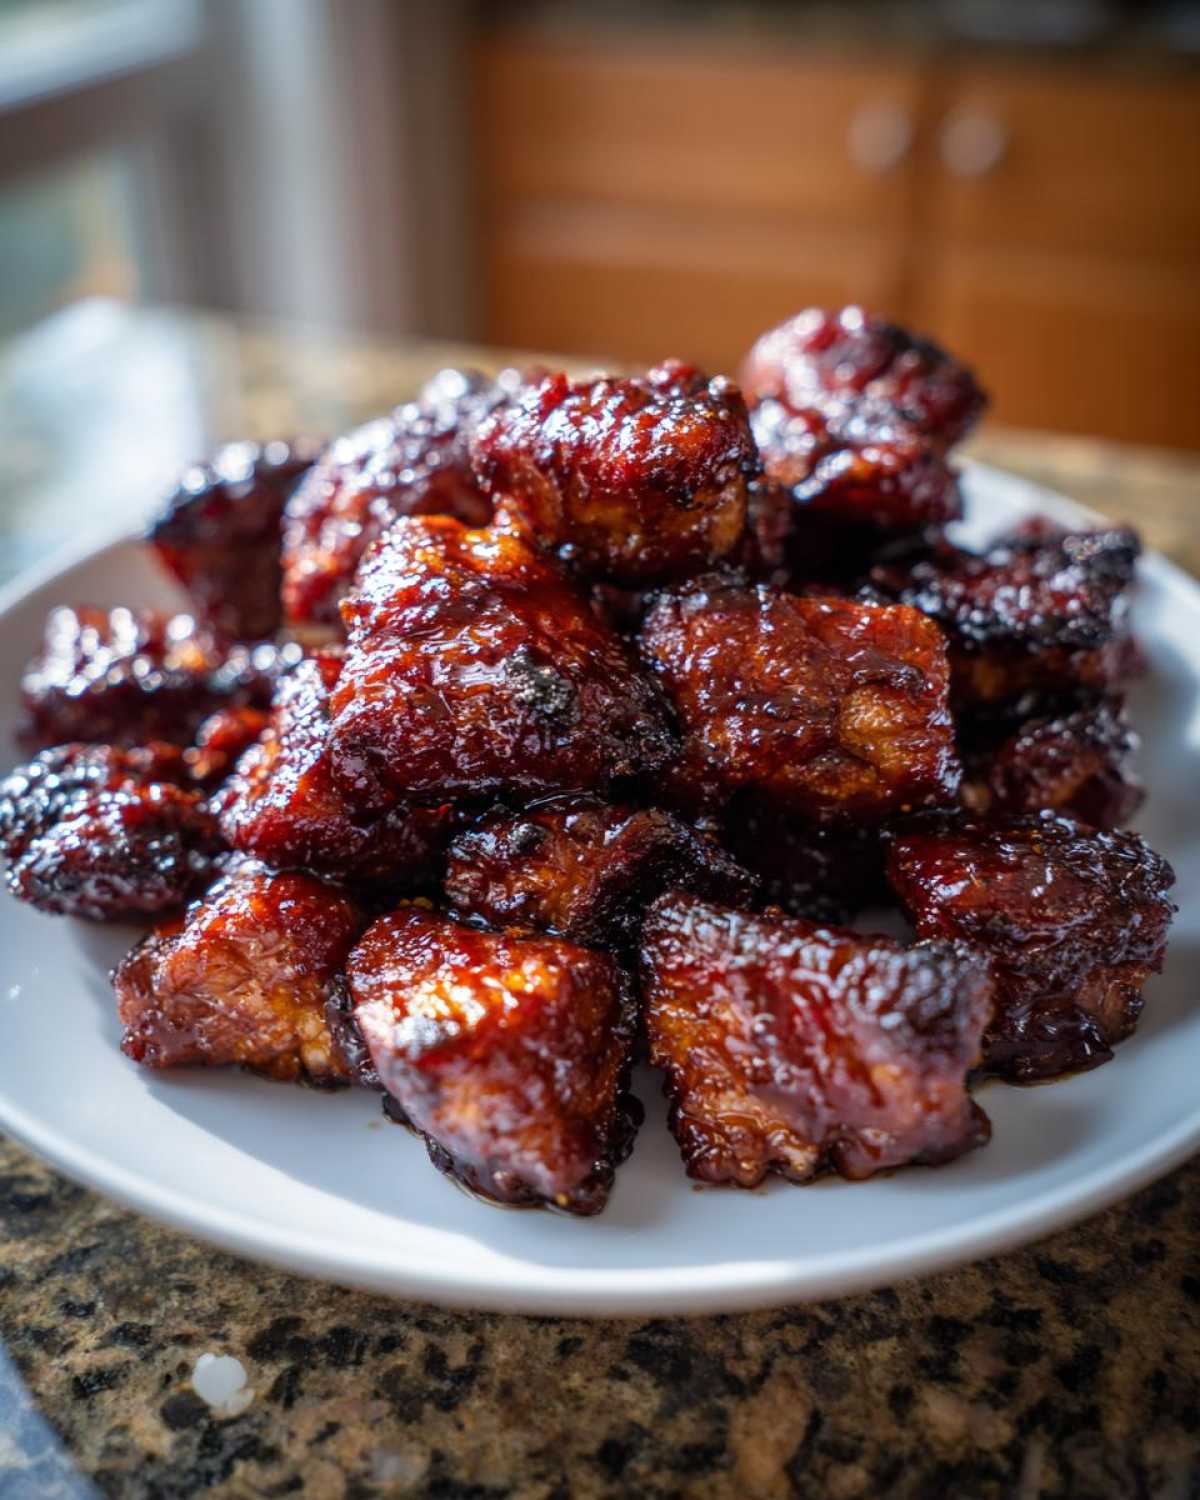
Once the sauce is thick and the chicken is ready, drain off any extra juices from the pan. Toss your hot chicken in a bowl using about two-thirds of that amazing glaze—make sure everything is coated well! Then, put the pieces back on the tray, single layer, ready for their final transformation. Switch your oven setting to the broiler, top rack! This is where you learn How to Caramelize Chicken Edges: Broil for just 2 to 4 minutes. You have to watch it like a hawk because the sugar burns fast! You are looking for dark brown, bubbly spots. Pull them out, immediately toss them in the last bit of glaze for shine, and get them on the plate fast!
Expert Tips for Perfect Sticky BBQ Chicken Bites with Caramelized Edges
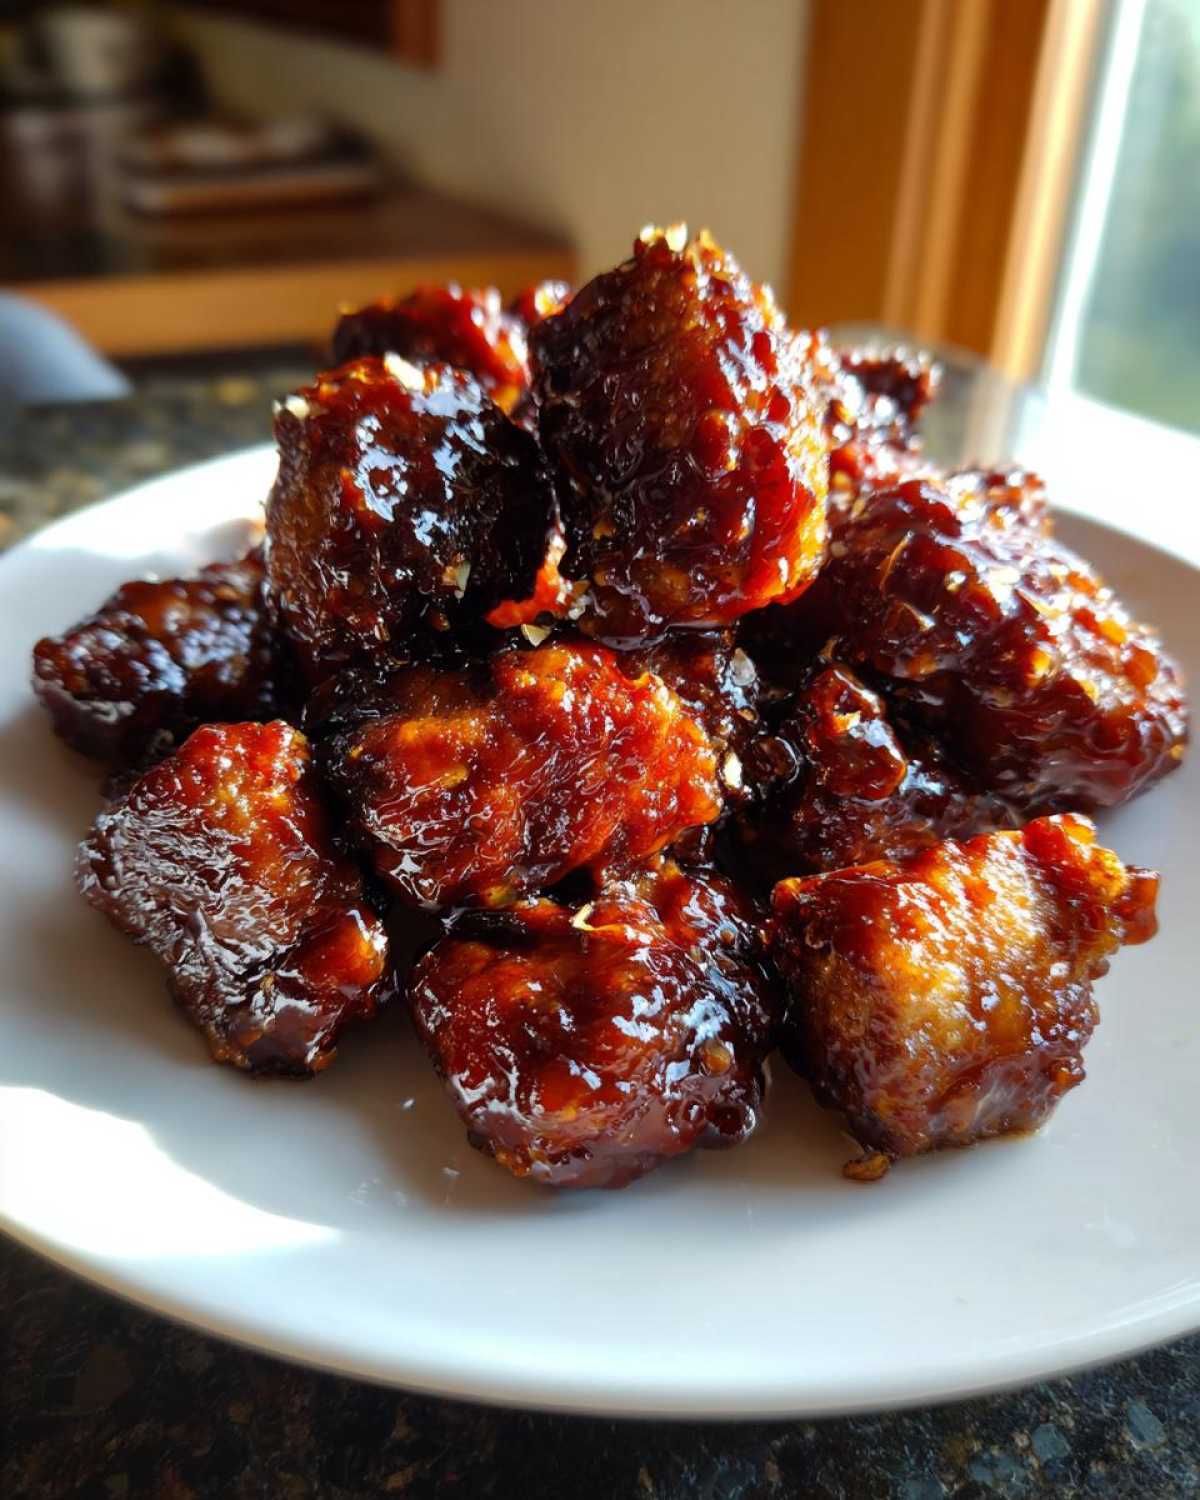
Look, I love this recipe because it’s forgiving, but I learned a few tricks the hard way that will take your sticky bites from “great” to “call the catering company.” Pay attention to these details; they are the difference between a perfectly glazed appetizer and a messy sauce puddle!
First off, let’s reiterate why chicken thighs are the absolute best choice here. Chicken breast is lean, and when you blast it under a broiler after baking—even if you sauce it—it tends to dry out quickly. Thigh meat has more fat, which keeps the meat tender and juicy while the outside gets beautifully caramelized. It’s hardier, which means it handles the slow bake *and* the fast broil like a champ. If you’re already a big fan of thigh meat because of its flavor, I have a whole series on it you should check out—you can read my thoughts on why Thigh Meat is BBQ Royalty.
My biggest non-negotiable tip revolves around the pan management during that final broiling stage. You absolutely cannot overcrowd the baking sheet. I know it’s tempting, especially if you’re making a huge batch for a party, but if the bites are touching, they steam instead of caramelize. They need that direct, intense heat hitting the edges individually to get that dark, sticky crust we are aiming for. Think individual islands of chicken, not a chicken island chain!
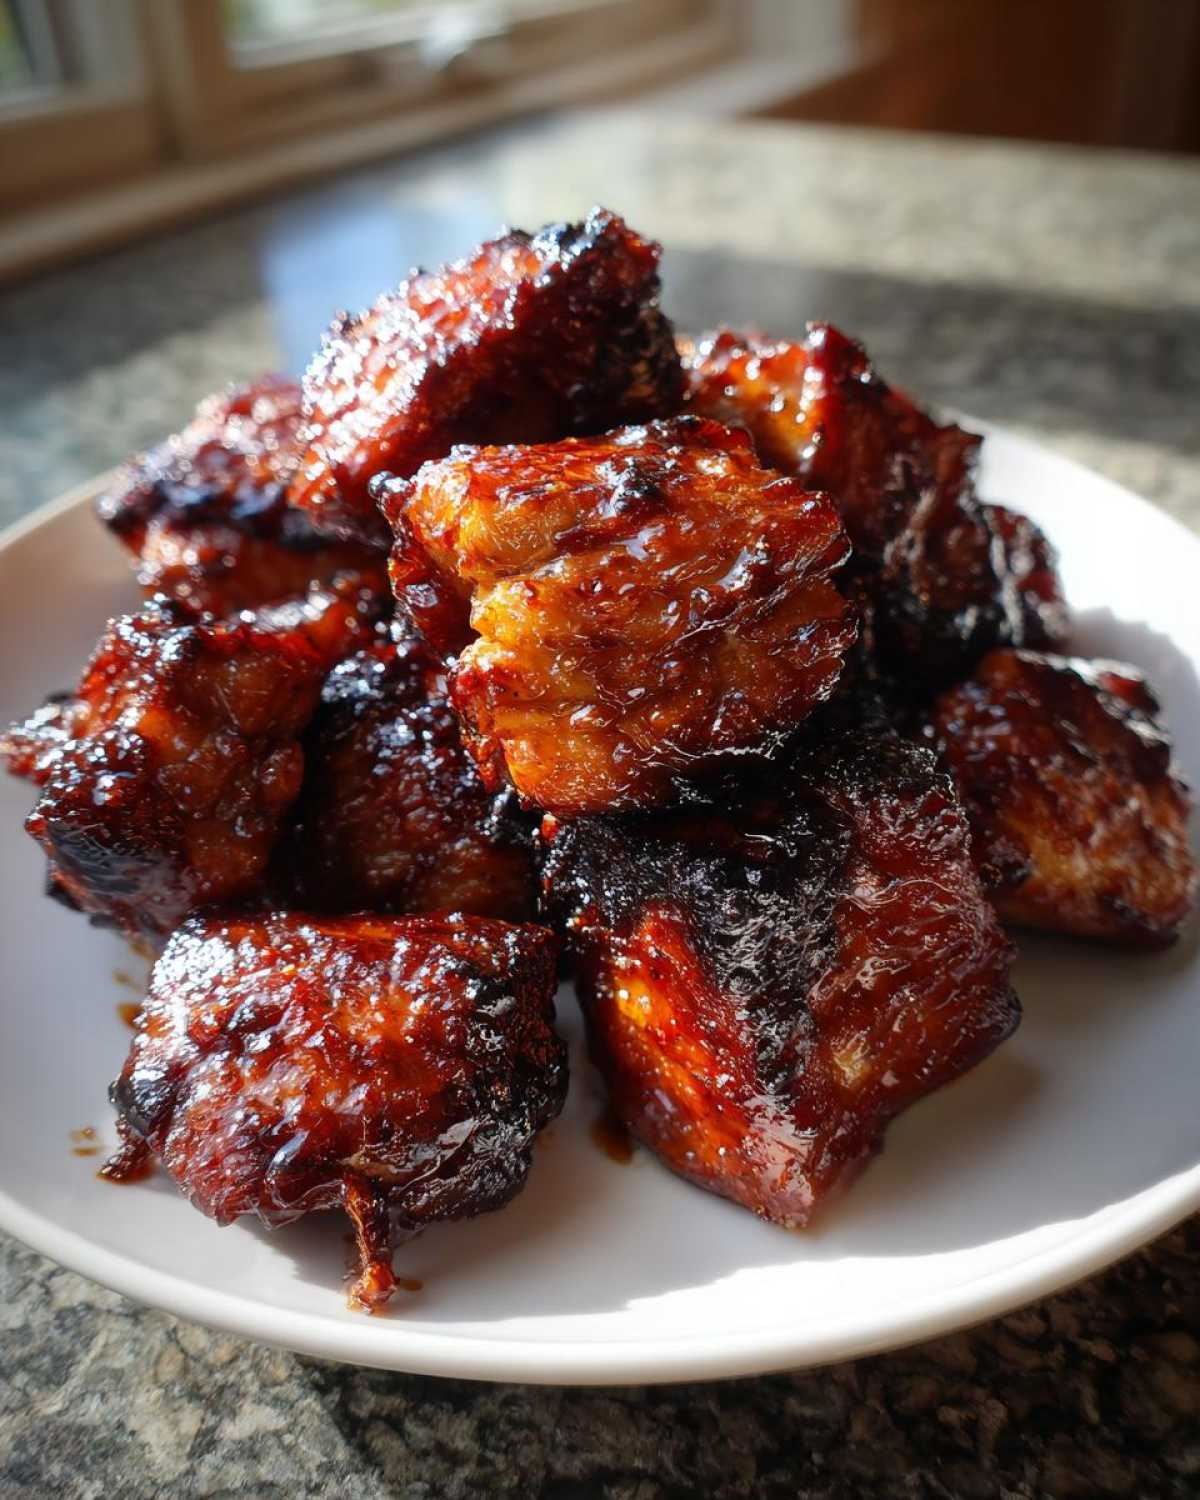
Also, remember when tossing them in the glaze (Step 3)? Only use about two-thirds of the reduced sauce initially. If you use all of it immediately, you smother the chicken and steam it right before it hits the broiler. We want a coat on it, but we need that final toss with the reserved sauce right after it comes out of the heat. That last coating gives you that incredible sheen and extra punch of stickiness right before serving. Don’t skip that final little toss; it truly seals the deal for a gorgeous presentation!
Variations: Making Sweet and Smoky Chicken Bites Your Way
The basic recipe is already a winner, I promise, but isn’t it fun to tweak things just a touch? Once you master that base sticky sauce, you can customize your Sticky BBQ Chicken Bites with Caramelized Edges effortlessly for different crowds or moods. I love switching things up depending on what I have in the pantry.
If you want to add a little fire—maybe you’re serving this while watching a big game—just toss in a teaspoon of chipotle powder when you’re mixing your main seasonings in Step 1. That smoky heat blends beautifully with the paprika and doesn’t change the overall sticky texture at all. It just gives it a nice little kick! If you prefer extreme sweetness over tang, try swapping out some of that brown sugar for honey when you reduce the sauce in Step 2. Honey gives an almost glossy finish that looks amazing!
Another quick swap I use when I want to get adventurous is swapping the Worcestershire sauce for a splash of balsamic vinegar if I’m out. It deepens the flavor profile slightly, adding a little bit of dark fruit background note that pairs surprisingly well with the smoky paprika. Honestly, none of these changes will ruin the recipe, they just give you another way to enjoy these amazing bites. Feel free to experiment; that’s the fun part of cooking!
Serving Suggestions for Your Easy BBQ Chicken Appetizer
Okay, now that you have your perfectly glazed, caramelized beauties cooling just slightly, the only remaining question is: what do we serve them with? These Sticky BBQ Chicken Bites with Caramelized Edges are flexible! They shine as the main event for a party, but they’re also amazing as part of a bigger spread. Since they are so rich and sticky, you’ll want things around them to cool the palate or soak up any extra sauce.
For a classic game day setup, you absolutely need cool, creamy counterpoints. Think crisp celery sticks and plenty of good blue cheese dressing—the sharpness cuts right through the sweetness of that thick BBQ glaze. It’s the perfect pairing, really. If you’re whipping up a whole spread of appetizers, these meaty bites go fantastic alongside something salty and spicy, like my super popular bacon-wrapped jalapeno poppers. The heat level balances nicely!
If you’re turning this into a quick weeknight dinner (because why not?), serving them over a simple bed of fluffy white rice is heaven. The rice soaks up any trailing glaze. You could also toss them into a big, crunchy salad for a satisfying lunch. Whatever you choose, just make sure you have plenty of napkins ready. These things are not neat, and that’s exactly why we love them!
Storage and Reheating Instructions for Caramelized Chicken Bites
You know how it is—sometimes you just can’t finish the whole batch, or maybe you intentionally made extra because, let’s be honest, they taste even better the next day! Storing and reheating these Caramelized Chicken Bites requires a little care because we worked so hard to get that amazing crust. You can’t just microwave them—that’s a one-way ticket to squishy, sad chicken, and we absolutely refuse to let that happen!
The key to storage is making sure they cool down completely before they ever see the inside of an airtight container. Once they are totally cool, store them in a single layer in a container or use parchment paper between layers if you have to stack them slightly. They should be good for about 3 to 4 days tucked away in the fridge.
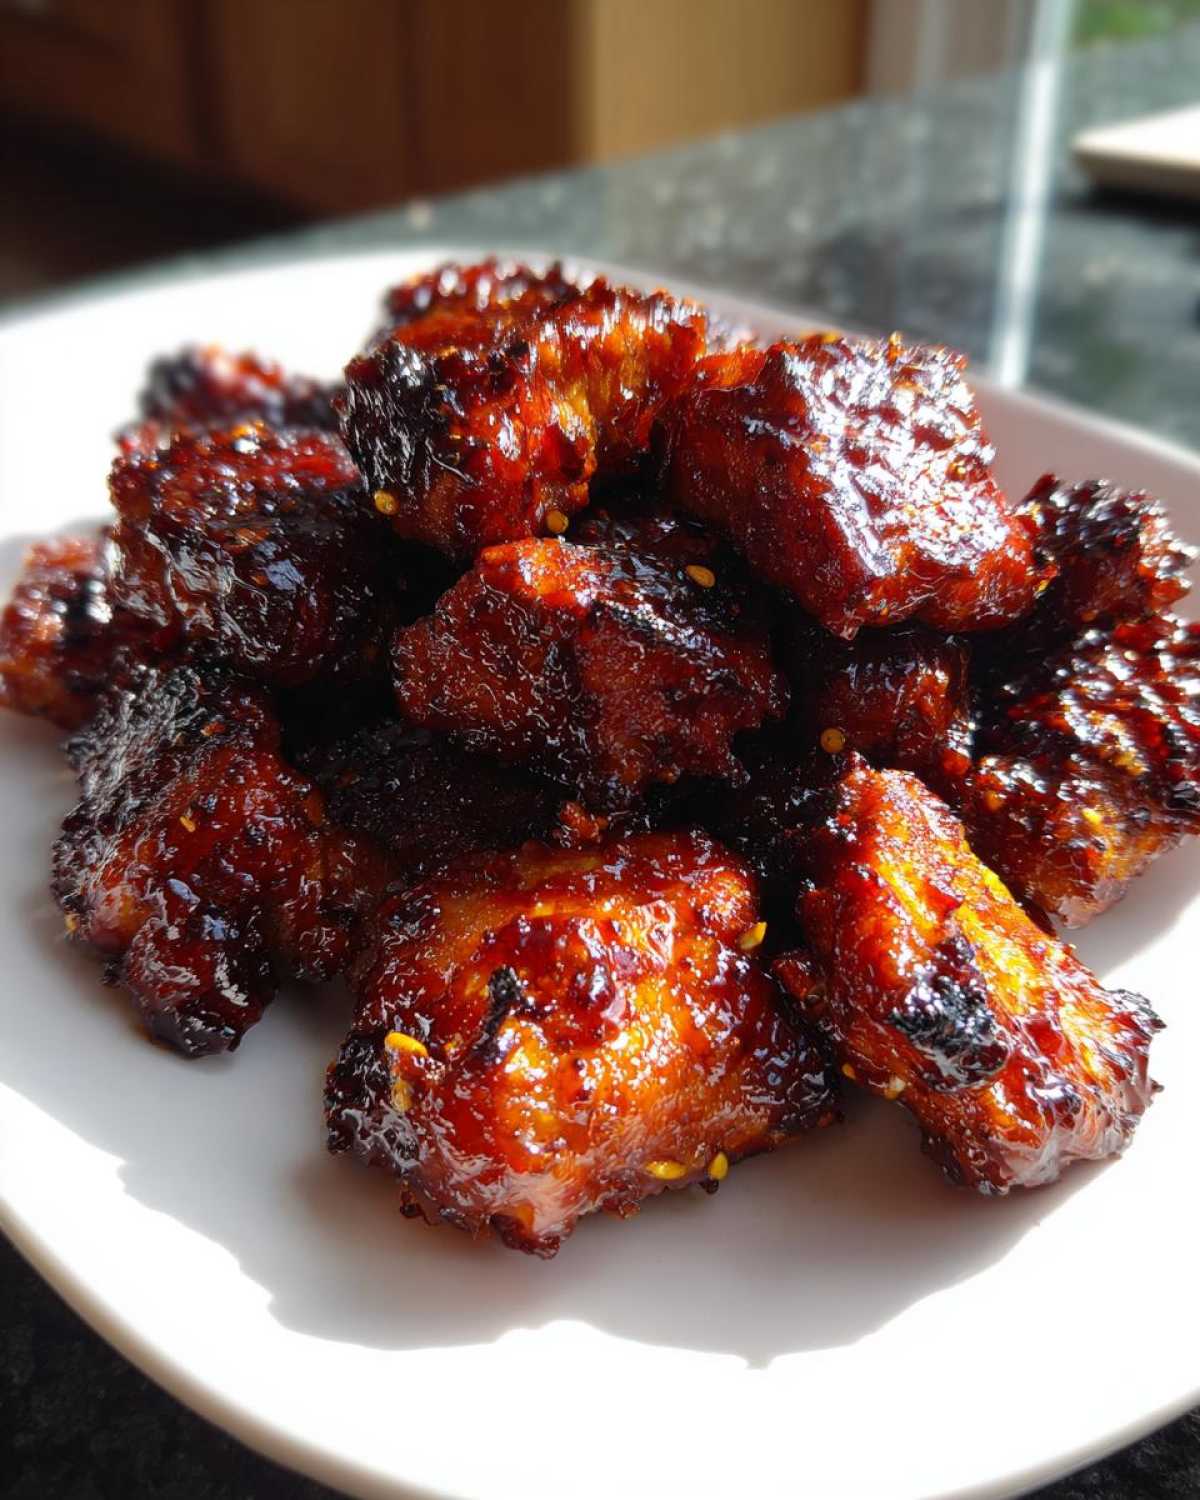
Now for the important part: reviving that crust! If you want those wonderfully sticky, caramelized edges back, the oven is your best friend. Spread the chilled bites onto a foil-lined baking sheet—yes, foil again, cleanup is life! Pop them into a 350-degree oven for maybe 8 minutes. This gentle heat warms them through without burning the sauce. If you’re feeling fancy, you can even finish them with two minutes under the broiler again, but watch them like a hawk if you do that!
However, if you happen to have an air fryer (and honestly, who doesn’t these days?), that’s my absolute favorite method for quick reheating. I pop them in using the air fryer sticky chicken bites method I use, set at 350 degrees for about 3 minutes. That convection power blasts the moisture right out of the sauce exterior, crisping it up perfectly without drying out the inside meat. Seriously, reheating in the air fryer is almost better than when they were first made!
Frequently Asked Questions About Sticky BBQ Chicken Recipe
I always get tons of questions about this recipe because everyone wants that perfect balance of juicy meat and sticky crust! I’ve gathered the most common worries down below so you can approach your next batch with total confidence. Remember, these are the tips I wish someone had told me when I started experimenting with the best easy BBQ chicken appetizer!
Can I use chicken breast instead of thighs?
You certainly can try, but I have to give you a fair warning! If you make these Sticky BBQ Chicken Bites with Caramelized Edges using breast meat, you are playing with fire. Breast meat dries out so much faster than thigh meat does, and since we are using high heat for the broiling step to get those amazing caramelized edges, the breast pieces often come out chewy or tough. Thighs have that extra fat content which guards the meat during those intense final minutes. If you must use breast, cut them slightly larger than what I recommend and skip the broiling step entirely; just toss twice with the glaze until they reach 165°F internally.
Can I make this recipe entirely in the air fryer?
Oh, I love this question because I have a whole separate guide just for that! Yes, you absolutely can turn this into Air Fryer Sticky Chicken Bites! The method is slightly different because the air fryer cycles heat so fast. You’ll bake the seasoned chicken pieces (no sauce yet!) at 380°F for about 12 minutes. Then, toss them in the reduced sticky glaze, and air fry again at 390°F for about 5 to 7 minutes, shaking the basket halfway through to ensure maximum caramelization. It’s faster, but you lose a little bit of that smoky oven flavor. For the full dedicated method, check out my Air Fryer sticky chicken bites guide!
How do I prevent the sauce from burning during the broiling step?
This is the number one fear people have, and it’s totally valid! Sugar burns fast under a broiler. The trick to achieving those gorgeous, dark spots without turning the whole batch into charcoal comes down to two things: proximity and timing. Make sure your baking sheet is on the top rack, but pull it down a notch if your broiler runs intensely hot. More importantly, set a timer for 2 minutes and watch them constantly. The sauce needs to bubble up, darken beautifully, and maybe get a couple of almost-black spots right on the edges—those are your caramelized gems! Pull them the moment they look *almost* done to you, because they will keep cooking for a split second after leaving the oven. Never walk away during the broiling stage!
What makes these the Best Sticky Chicken Thighs for an appetizer?
I think what makes these the Best Sticky Chicken Thighs is the commitment to reducing the sauce separately. Most recipes just mix the raw sauce onto already-cooked chicken, which results in a thin, weeping glaze. By simmering that sugar, vinegar, and BBQ sauce down until it’s ridiculously thick, you create a syrup that adheres like glue and crisps up properly when blasted with heat. It’s that intentional thickening that guarantees you get a truly sticky coating, not just a saucy one!
Nutritional Estimates for Sticky BBQ Chicken Bites with Caramelized Edges
Now, I’m not a certified nutritionist, so please take these numbers with a grain of salt! These estimates are calculated based on the ingredients I listed above, assuming a standard yield of four servings. When you’re making something this delicious, especially when you are tossing it in that glorious, sticky glaze, calories and sugar definitely add up, but hey, that’s what making amazing comfort food is all about, right?
These values are based on roughly 6 to 8 bites per person. Remember, the use of chicken thighs pulls the fat content up slightly, but that’s what gives us those perfectly cooked, juicy centers!
- Serving Size: 1 serving (approx. 6-8 bites)
- Calories: 380
- Sugar: 28g
- Sodium: 650mg
- Fat: 14g
- Saturated Fat: 4g
- Unsaturated Fat: 10g
- Trans Fat: 0g
- Carbohydrates: 30g
- Fiber: 1g
- Protein: 35g
- Cholesterol: 110mg
If you’re tracking macros, the protein content here is fantastic thanks to the thigh meat! If you’re watching the sugar, that’s where the sugar in the BBQ sauce and brown sugar really hits the total. For a lighter option next time, maybe look at making a low-sugar sauce, though it might affect how well those edges caramelize!
PrintSticky BBQ Chicken Bites with Caramelized Edges

Prepare tender, bite-sized chicken pieces coated in a thick, sweet, and smoky BBQ sauce, finished under high heat to create deeply caramelized, sticky edges.
- Prep Time: 15 min
- Cook Time: 25 min
- Total Time: 40 min
- Yield: 4 servings
- Category: Appetizer
- Method: Baking and Broiling
- Cuisine: American
- Diet: Low Fat
Ingredients
- 1.5 lbs boneless, skinless chicken thighs, cut into 1-inch pieces
- 1 tablespoon olive oil
- 1 cup quality store-bought BBQ sauce (or homemade)
- 1/4 cup brown sugar, packed
- 2 tablespoons apple cider vinegar
- 1 tablespoon Worcestershire sauce
- 1 teaspoon smoked paprika
- 1/2 teaspoon garlic powder
- 1/4 teaspoon black pepper
Instructions
- Preheat your oven to 400 degrees Fahrenheit (200 degrees Celsius). Line a baking sheet with foil for easy cleanup.
- In a medium bowl, toss the chicken pieces with olive oil, smoked paprika, garlic powder, and black pepper.
- Arrange the seasoned chicken pieces in a single layer on the prepared baking sheet.
- Bake for 15 minutes until the chicken is mostly cooked through.
- While the chicken bakes, prepare the sticky glaze: In a small saucepan, combine the BBQ sauce, brown sugar, apple cider vinegar, and Worcestershire sauce.
- Bring the sauce mixture to a simmer over medium heat. Reduce the heat to low and let it cook for 5 to 7 minutes, stirring often, until the sauce thickens significantly and coats the back of a spoon. This reduction creates the stickiness.
- Remove the chicken from the oven. In a large bowl, toss the hot chicken pieces thoroughly with about two-thirds of the thickened BBQ glaze until every piece is coated.
- Return the glazed chicken pieces to the baking sheet, keeping them in a single layer.
- Set your oven to the broiler setting (high). Place the baking sheet on the top rack, about 6 inches from the heating element.
- Broil for 2 to 4 minutes, watching constantly, until the edges of the chicken start to bubble and form dark, caramelized spots. Do not let the sauce burn.
- Remove from the oven. Toss the caramelized bites with the remaining glaze for extra shine and stickiness. Serve immediately.
Notes
- Use boneless, skinless chicken thighs; they stay juicier than breast meat during the high-heat caramelization process.
- For reheating, place the bites on a baking sheet and bake at 350 degrees Fahrenheit for 8 minutes, or use an air fryer at 350 degrees Fahrenheit for 3 minutes to restore the crust.
- Serve these bites with celery sticks, blue cheese dressing, or over a bed of white rice.
Nutrition
- Serving Size: 1 serving (approx. 6-8 bites)
- Calories: 380
- Sugar: 28
- Sodium: 650
- Fat: 14
- Saturated Fat: 4
- Unsaturated Fat: 10
- Trans Fat: 0
- Carbohydrates: 30
- Fiber: 1
- Protein: 35
- Cholesterol: 110