

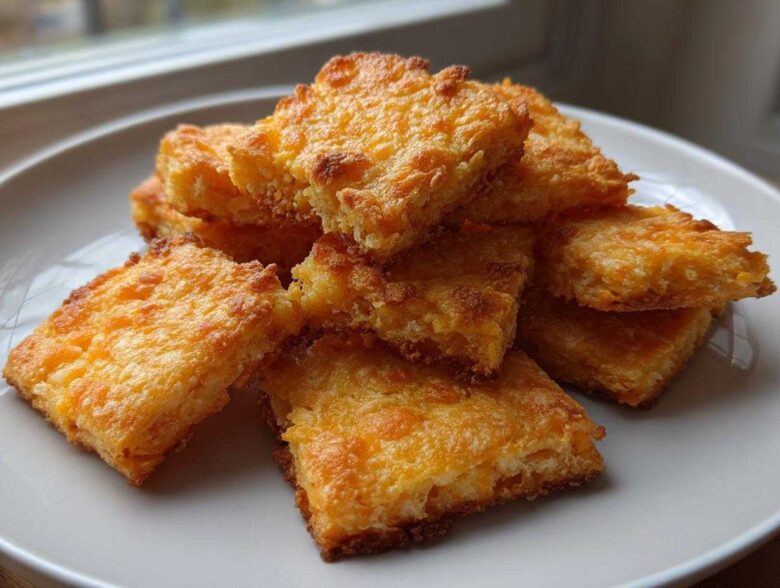
Oh my goodness, are you having one of those days where only something salty, cheesy, and incredibly crunchy will do? I totally get it! When that craving hits for something satisfyingly savory, I reach straight for the pantry instead of the grocery store aisle. Trust me, after testing just about every snack recipe out there, I’ve perfected the ultimate batch of homemade cheese crackers. Forget those dusty boxes sitting on the shelf; these are leagues better!
I’m talking about these incredible, shatteringly crisp cheddar beauties that rely on just four main ingredients. Yes, you read that right—four! This Easy Cheese Cracker Recipe means you can throw together an appetizer or lunchbox treat faster than you can drive to the store. They are genuinely the Better Than Store Bought Crackers that everyone asks you for the recipe to. Let’s get baking!
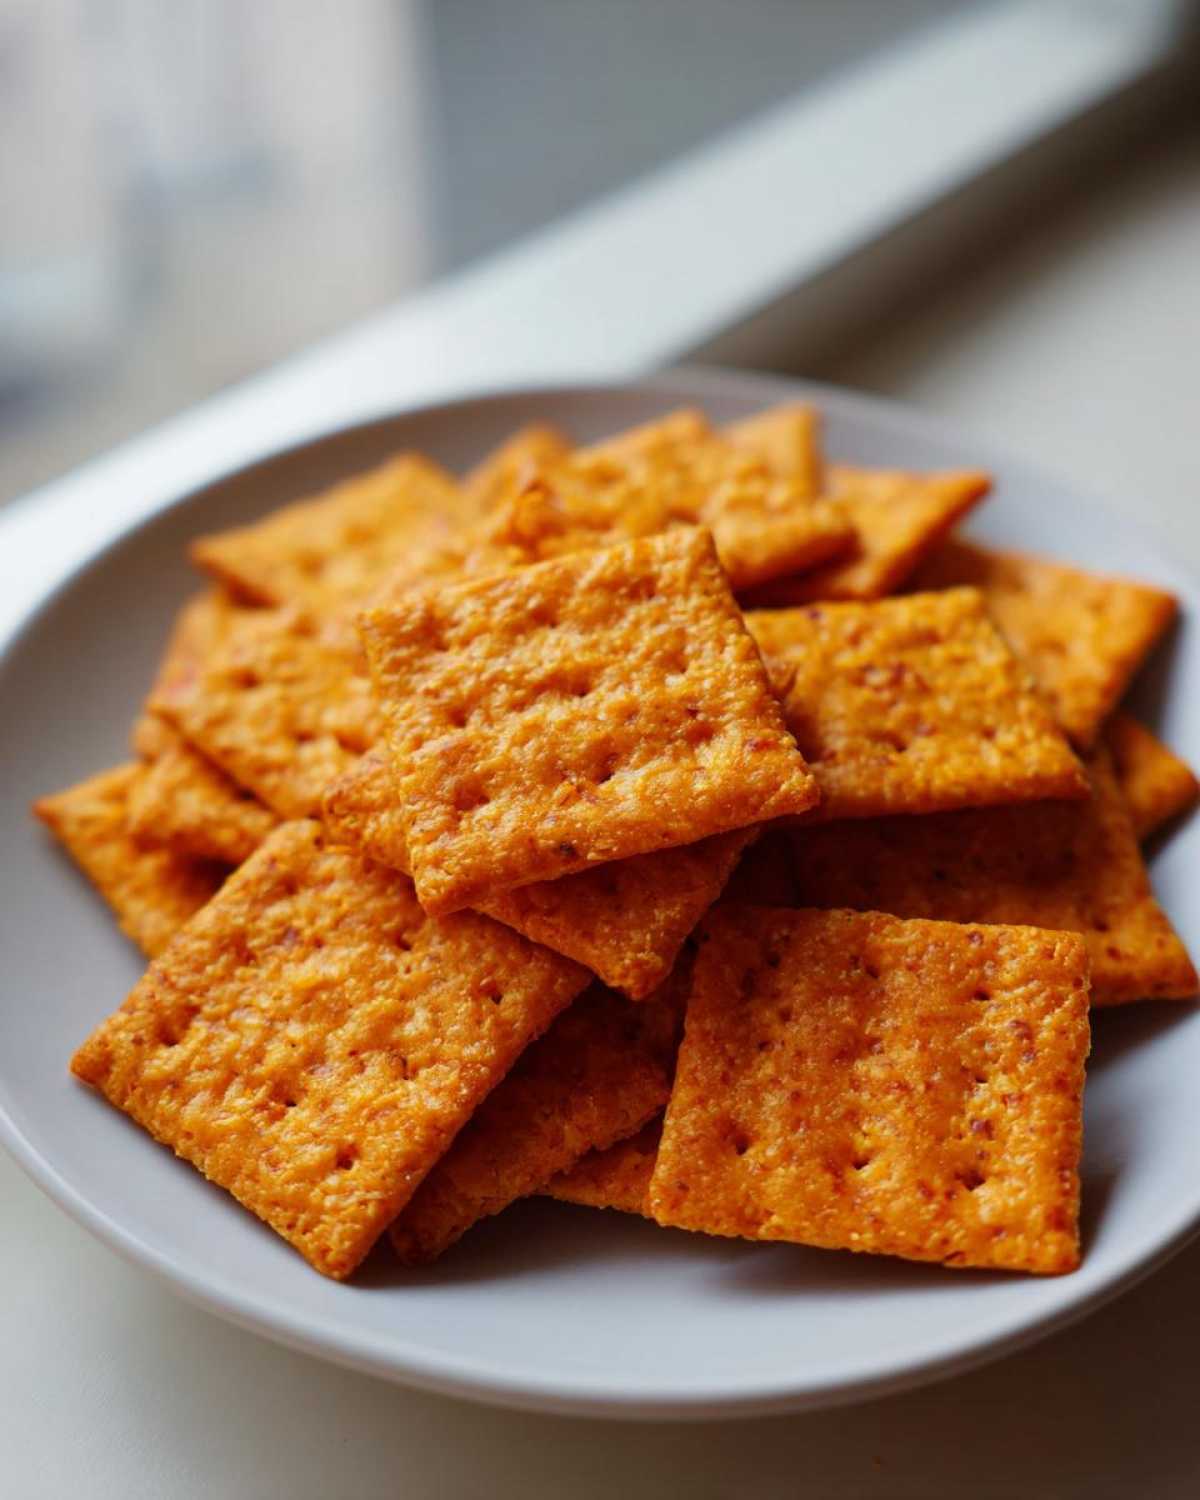
Why You Will Make These Easy Cheese Cracker Recipe
Honestly, once you make these, you’ll never go back to the box. They taste brighter because you’re using real cheddar, and the texture is just unmatched. Here’s why this batch of cheese crackers is about to become your new obsession:
- It’s seriously an Easy Cheese Cracker Recipe—we’re using just four main ingredients, which is fantastic for weeknight baking!
- The texture is everything; these bake up perfectly Crispy Cheese Crackers that snap delightfully when you bite them.
- Because they are made from scratch, you control the salt level, making them much less aggressively flavored than the store brand.
- They are incredibly versatile! You can easily season them up with whatever you have on hand (more on that later!).
- They freeze well—though they never last long enough in my house to test that theory extensively!
- Forget complicated steps; these are super fast to mix up, making them the perfect Simple Savory Snack solution.
Ingredients for Your Homemade Cheddar Cheese Crackers Recipe
Okay, here’s the short, glorious list. This is why this recipe is so brilliant; it keeps things super minimal. Don’t let the short list fool you, though—we need to chat about the quality of these items because that’s where the magic for truly Crispy Cheese Crackers happens.
- 1 cup all-purpose flour
- 1/2 teaspoon salt
- 1/2 cup (1 stick) cold unsalted butter, cut into small pieces
- 1 cup sharp cheddar cheese, finely shredded
See? Four items! When using so few ingredients in your cheese crackers, every single component has to pull its weight. My biggest non-negotiable rules are making sure your butter is ice cold and that you use sharp cheddar cheese. Mild cheese just doesn’t give you that signature savory punch we want!
Ingredient Notes and Substitutions for Perfect Cheese Crackers
If you want the absolute best results for your cheese crackers, please, please shred that cheese yourself! Pre-shredded bags have anti-caking agents that can make your dough greasy instead of wonderfully flaky. Sharp cheddar is best because its strong flavor shines through even after baking. If you need a gluten-free version, I’ve had success swapping the all-purpose flour for a good quality 1:1 gluten-free blend, but you might need to chill the dough just a touch longer to keep everything firm.
How to Prepare Crispy Cheese Crackers: Step-by-Step Instructions
This process is really fun, and it moves fast! Because we want those light, airy snaps, the food processor makes quick work of the initial mix. Toss in your flour and salt first, give it a couple of quick pulses, and then drop in that cold, cubed butter. You just pulse until it looks like rough sand or tiny peas—this is key to getting those flaky layers in your cheese crackers. Next, add your shredded cheddar and pulse just until the dough barely holds together near the blade; seriously, a few quick hits is all you need.
Get that dough out and give it a quick knead—maybe three times tops—just to bring it together into a ball. Then, divide it and get rolling! I mean really roll it thin. I aim for about 1/16 of an inch, which is super thin. If you roll it too thick, you’ll end up with cheesy shortbread, not Crispy Cheese Crackers! After rolling between parchment sheets, you must chill it for at least 30 minutes. Don’t skip this; cold dough equals crisp crackers!
Hot oven time! Preheat to 375°F (190°C) and get those sheets ready with parchment paper because melted cheese likes to stick sometimes. Cut your squares, poke each one a few times with a fork—that lets the steam escape so they bake flat—and slide them in. The baking from scratch part is quick, usually 10 to 14 minutes. They should look golden brown at the edges.
Achieving the Best Texture in Your Cheese Crackers Dough
The texture holy grail for these cheese crackers is all about restraint. Use the pulse function—don’t just turn the processor on high! Overmixing develops gluten, which makes them tough instead of tender. The chilling step is where the texture is sealed in. That cold butter creates steam pockets when it hits the oven, those pockets are what puff up slightly and result in that wonderful crispness in the final bite.
Baking Tips for Golden Brown Cheese Crackers
When you cut the shapes, don’t worry if they aren’t perfect! These are homemade, after all. Transfer them gently to your parchment-lined trays. The visual cue is your best friend here: look for light golden brown edges and a matte, dry-looking surface, but don’t wait till they turn dark brown! They continue to firm up as they cool down on the tray, so pull them out when they look just done. That waiting game is crucial for maximum crunch!
Making Better Than Store Bought Crackers: Flavor Variations
Now that you’ve mastered the basic, incredible, store-bought-destroying cheese crackers, we absolutely have to talk about taking them up a notch! This base recipe is perfect for playing around with flavors. If you want something totally different that still delivers that same crunch, try adding some seasonings right in before you pulse the cheese.
For a huge flavor boost, you should definitely try spices! Garlic powder and onion powder are my go-to additions; just a half teaspoon of each mixed with the flour makes them taste like a gourmet cracker. And if you are planning a party, you have to try making Ranch Flavored Cheese Crackers! Just add a tablespoon of ranch seasoning powder to the dry mix. Looking for another crunchy snack idea? I swear by my ranch Chex mix recipe too, but these crackers are just as addictive.
If you want something a little zesty, you can throw in some smoked paprika or even a pinch of cayenne for a kick. You can also try using different cheeses—half cheddar and half smoked gouda would be divine! These little tweaks are what transform this basic recipe into your signature savory snack.
Storage and Reheating Instructions for Homemade Cheese Crackers
I know you’re going to want to eat all of these cheese crackers immediately, but if you manage to save some, storage is super simple! Keep any leftovers in a truly airtight container right on the counter. They stay wonderfully crisp at room temperature for up to a full week. Seriously, no need to worry about the fridge!
If, somehow, they lose a tiny bit of that glorious snap after a few days, don’t panic! Just spread them single-layer on a baking sheet and pop them back into a 300°F oven for about five minutes. That little burst of heat will dry them out perfectly and bring back that fresh-from-the-oven crunch.
Serving Suggestions for Party Snack Crackers
Your amazing homemade cheese crackers are ready, and now the fun part begins—eating them! These aren’t just for quiet snacking; they are truly the ultimate Party Snack Crackers. They hold up really well, so they aren’t going to immediately dissolve when they hit a dip, which is a huge pro in my book!
They pair perfectly with my favorite cheesy spinach artichoke dip—the heat of the dip contrasts so nicely with the cool, crisp cracker. For serious cheese lovers, try serving them alongside a charcuterie board. They are honestly sturdy enough to stand up to thicker spreads like pâté or even some heavier hummus varieties.
And don’t forget the kids! These make a fantastic, wholesome Cracker Recipe for Lunchbox. Pack a small container alongside some grapes or apple slices. If you make squares, they even look a little like those famous orange ones, only these taste a gazillion times better, I promise!
Frequently Asked Questions About Making Cheese Crackers
I know trying a new recipe always brings up a couple of little questions! That’s totally fine; that’s how we learn to bake better, right? I’ve rounded up a few things folks always ask me about when they are making their first batch of these amazing cheese crackers.
Here are the answers to what I hear most often!
Can I make Keto Cheese Crackers using this 4 Ingredient Cheese Crackers base?
That’s a great thought, especially since everyone is looking for Low Carb Crackers these days! While this specific recipe uses standard all-purpose flour, you absolutely can convert it! You would need to swap the flour 1:1 for a finely ground almond flour or a specific keto blend. Keep in mind that keto flours absorb moisture differently, so you might need an extra tiny splash of cold water to get the dough to hold together. It won’t be exactly the same crispness as the classic version, but it’s still a fantastic Simple Savory Snack!
What makes these the Best Homemade Crackers?
In my humble opinion, it all comes down to the cheese! When you buy the packaged kind, they often use cheese powders or shelf-stable cheese extracts to get that color and flavor across long distances. When you use fresh, finely shredded sharp cheddar in these cheese crackers, the flavor is just brighter, richer, and far more authentic—it truly tastes cheesy, not just seasoned. That, combined with the fresh, melted butter, makes them superior every single time. They are truly the Best Homemade Crackers you can whip up.
Do I have to chill the dough, or can I skip that step?
Oh, please don’t skip the chilling! I know when that craving hits for Savory Homemade Bites, waiting feels impossible. But chilling is crucial if you want those Crispy Cheese Crackers! If you bake the dough right away when it’s slightly warm, the butter melts into the flour before it has a chance to create pockets. That results in flatter, greasy crackers instead of light, airy snaps. Thirty minutes in the fridge is the minimum!
Can I use pre-shredded cheese for this recipe?
I strongly advise against it for these cheese crackers! Pre-shredded cheese is coated in starches and cellulose so it doesn’t stick together in the bag. Those anti-caking agents make your dough harder to work with, and they can actually prevent that beautiful melted cheese from blending seamlessly into the crust, leading to a slightly gritty texture instead of that perfect melt. Grab a block of cheese and shred it fresh—your crackers will thank you!
How long do these last if I make a big batch of Party Snack Crackers?
If you manage to have leftovers—which, wow, good job!—store them in a container with a tight-fitting lid at room temperature. They stay perfectly crisp for about a week. If they sit out for a day or two and you notice they’ve softened slightly, just follow that quick five-minute refresh in a 300°F oven I mention elsewhere in the post! They’ll be crunchy again in no time, ready for your next snack session.
Nutritional Estimate for Cheddar Cheese Crackers Recipe
I always like to give folks a rough idea of what they are getting into when they devour a whole batch of these cheese crackers! Keep in mind that these numbers are just estimates, okay? If you swap out regular butter for something lighter, or use a different type of flour, the counts will definitely shift. This chart is based on using the exact ingredients listed in the recipe above for a standard serving size of 12 crackers.
Here’s the breakdown for roughly 12 crackers fresh out of the oven:
- Serving Size: 12 crackers
- Calories: 150
- Sugar: 0.5g
- Sodium: 180mg
- Fat: 11g
- Saturated Fat: 7g
- Unsaturated Fat: 4g
- Trans Fat: 0.3g
- Carbohydrates: 10g
- Fiber: 0.5g
- Protein: 4g
- Cholesterol: 25mg
So, while they are incredibly satisfying, we are definitely getting some richness from that cold butter and sharp cheddar! Great for a savory treat, but everything is best enjoyed in moderation. These Simple Savory Snacks are perfect for sharing, so hopefully, you won’t eat the entire batch yourself!
Share Your Savory Homemade Bites
Alright, that’s it! You have officially conquered the world of homemade cheese crackers. I’m so excited for you to try them; seriously, the sound of that first batch coming out of the oven is just the best reward after pulling that dough thin. I really hope these become your go-to crunchy addiction!
But hey, don’t just disappear with your bag of goodies! I want to know how they turned out for you. Did you go spicy with cayenne, or stick to the classic cheddar flavor? Did you manage to keep them perfectly thin? Drop a star rating right below the recipe card—it helps other snack-lovers know these are the real deal Simple Savory Snacks.
And if you made a killer batch of these irresistible cheese crackers, tell me about it! Snap a picture and tag me over on social media so I can ooh and aah over your perfect little squares. If you have any pressing questions after baking, or just want to send compliments (totally understood!), you can reach out to me directly through my contact page anytime. Happy crunching!
PrintEasy Homemade Cheddar Cheese Crackers
Make crispy cheddar cheese crackers at home that taste better than the store-bought kind using only four main ingredients.
- Prep Time: 20 min
- Cook Time: 14 min
- Total Time: 44 min
- Yield: 4 servings
- Category: Snack
- Method: Baking
- Cuisine: American
- Diet: Vegetarian
Ingredients
- 1 cup all-purpose flour
- 1/2 teaspoon salt
- 1/2 cup (1 stick) cold unsalted butter, cut into small pieces
- 1 cup sharp cheddar cheese, finely shredded
Instructions
- In a food processor, pulse the flour and salt together.
- Add the cold butter pieces to the flour mixture. Pulse until the mixture resembles coarse crumbs.
- Add the shredded cheddar cheese. Pulse until the dough just starts to come together. Do not overmix.
- Turn the dough out onto a lightly floured surface. Knead briefly a few times until it forms a cohesive ball.
- Divide the dough in half. Roll each half out very thinly between two sheets of parchment paper to about 1/16 inch thickness.
- Chill both dough sheets in the refrigerator for at least 30 minutes.
- Preheat your oven to 375 degrees Fahrenheit (190 degrees Celsius). Line baking sheets with parchment paper.
- Remove one dough sheet and peel off the top parchment paper. Cut the dough into small squares or desired cracker shapes using a knife or pizza cutter.
- Transfer the crackers to the prepared baking sheets. Prick each cracker a few times with a fork.
- Bake for 10 to 14 minutes, or until the edges are lightly golden brown and the crackers are crisp. Baking time varies based on thickness.
- Let the crackers cool completely on the baking sheet; they will crisp up as they cool.
Notes
- For extra flavor, you can add 1/2 teaspoon of garlic powder or onion powder to the dry ingredients.
- If you prefer a darker color, brush the tops lightly with an egg wash before baking.
- Store cooled crackers in an airtight container at room temperature for up to one week.
Nutrition
- Serving Size: 12 crackers
- Calories: 150
- Sugar: 0.5
- Sodium: 180
- Fat: 11
- Saturated Fat: 7
- Unsaturated Fat: 4
- Trans Fat: 0.3
- Carbohydrates: 10
- Fiber: 0.5
- Protein: 4
- Cholesterol: 25