

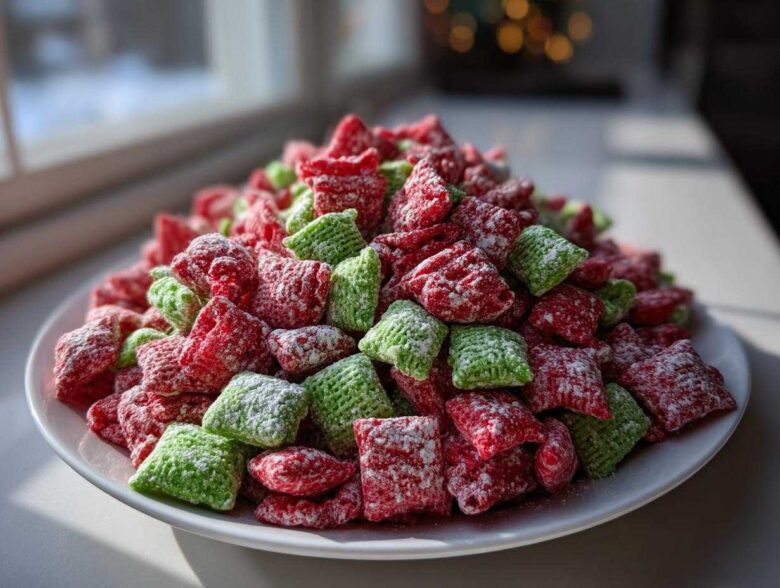
Oh my gosh, the holiday season is officially here, which means it’s time to pull out the tins of sprinkles and start making mountains of snacks that look as amazing as they taste! If you haven’t made a batch of this incredible **Christmas puppy chow** yet, you are truly missing out on the easiest, most festive treat you can whip up. Trust me, I’ve been making some version of this famous snack mix—or ‘Muddy Buddies’ if you grew up that way—since I was probably ten years old. It’s my absolute staple because there’s no oven involved, and you can get it done faster than you can wrap one present. This red and green version is just pure holiday magic in a bowl! For more of my quick holiday recipes, you can always check out my main blog page here: my latest posts.
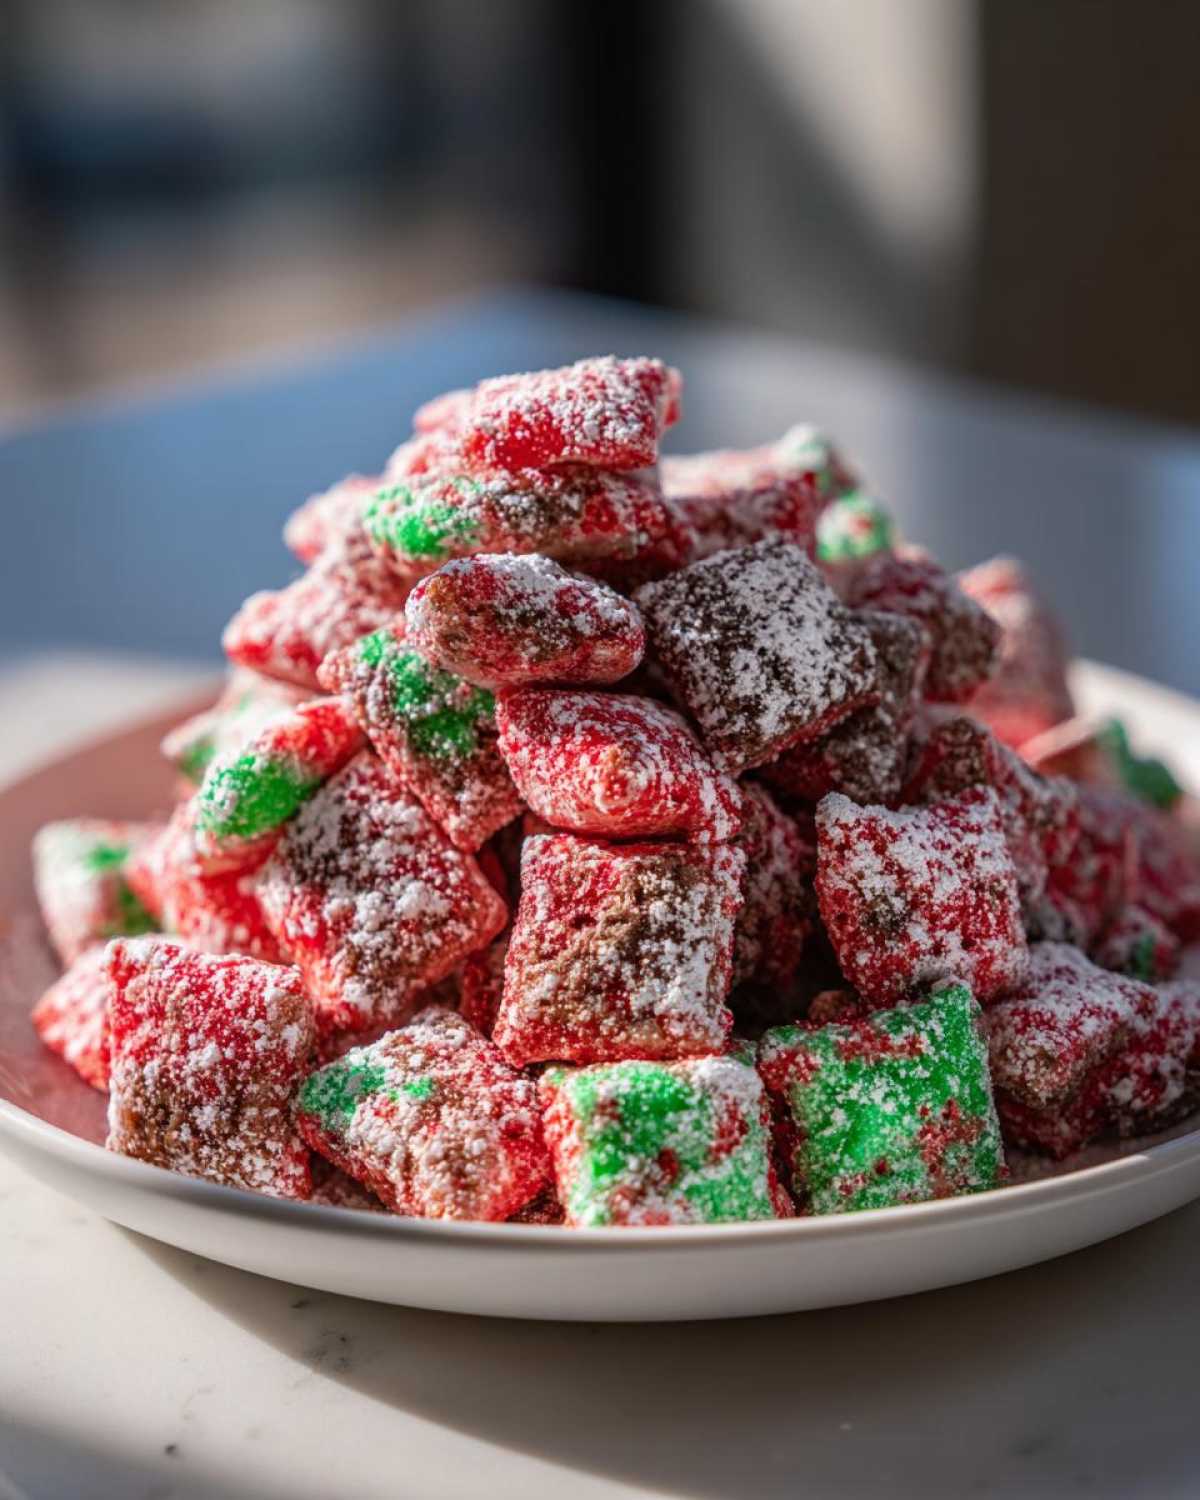
Why This Christmas Puppy Chow Recipe Is Your Holiday Go-To
I honestly think this is the best flavor blend for a party snack, and the look of it seals the deal! It just screams “Christmas” without needing any complicated baking skills. It’s the reason I can focus on making those fancy gingerbread cookies while knowing I already have the best sweet and salty mix ready to go.
- It’s speedy! You can have a giant bowl ready in under 30 minutes, active time, which is huge when the elves are busy.
- The red and green colors make it look like you spent hours—but shhh, that’s our secret!
- It stores beautifully, making it a perfect make-ahead dish for busy holiday weeks.
Speaking of making things ahead, if you ever need a quick energy boost snack, you have to check out my No-Bake Pumpkin Oat Energy Bites. They’re totally different, but just as easy!
Quick Prep Time for Easy Holiday Snack Mix
Seriously, we are talking minimal time here. Melting the coating takes five minutes, and the shaking part takes another five. You spend more time finding the right mixing bowl than actually cooking! That’s the beauty of any good **No Bake Christmas Treat**.
Perfect for Gifting: The Christmas Gift Snack Idea
Whenever I make this, I always set aside a portion just for gifting. Just toss it into cute cellophane bags, tie it with a shiny red ribbon, and boom—instant neighbor gift or teacher thank-you! The vibrant colors make it look so intentional and festive, easily earning it the title of a great **Christmas Gift Snack Idea**.
Gathering Ingredients for Your Festive Puppy Chow
Okay, let’s talk about what you need! The beauty of this **Christmas Puppy Chow** is that it uses pantry staples, but we do need a few specific decorative items to get that festive look just right. I always keep Rice Chex boxes stocked all year for this exact reason. If you haven’t made my Pumpkin Spice Puppy Chow, you are missing out, but this holiday version needs its own specific haul!
Coating Components for the Chocolate Coated Cereal
The base coating is classic Muddy Buddies, and it needs to be smooth! You’re going to grab 6 cups of Rice Chex cereal—don’t skimp on the actual cereal measurement! For the gooey magic, you need a cup of semi-sweet chocolate chips, a half cup of creamy peanut butter, and a quarter cup of real butter. Don’t even think about using substitutes here; the fat content really makes the texture perfect. Finish that mixture with just one teaspoon of vanilla extract. Honestly, the quality of the chocolate chips you use makes a huge difference in how shiny and easy the final **Chocolate Coated Cereal** becomes.
Coloring and Finishing the Christmas Puppy Chow
This is where the party starts! You need one and a half cups of powdered sugar, divided, for that signature dusty coat. But for the red and green pop, you really want to use candy coating wafers—either green and red ones, or just white ones that you color yourself. The wafers melt much cleaner than regular chocolate chips for drizzling, giving you a brilliant color payoff! Lastly, grab your favorite holiday sprinkles. A mix of red and green jimmies or nonpareils does the trick for the finishing touch on our **Christmas Puppy Chow**.
Step-by-Step: Making the Ultimate Christmas Puppy Chow Recipe
Alright, this is where the magic happens, and honestly, it’s so satisfying to watch! Don’t worry about crushing the cereal; just be gentle. We need to build up that chocolate base first. If you’re using my amazing fudgy brownie recipe, you already know I value simple melting techniques!
Melting the Coating and Initial Cereal Toss
First thing: get your 6 cups of Rice Chex into a big bowl and set it nearby. Now, grab a microwave-safe bowl for the coating. Combine your chocolate chips, peanut butter, and butter. You’re going to microwave this in short bursts—30 seconds at a time—and you *must* stir it well after every single round until it’s completely smooth and glossy. Seriously, stop microwaving before you think it’s ready. Then, stir in that vanilla. Once smooth, pour that dreamy mixture right over the Chex and use a large spatula to gently fold everything together. You want every piece coated, but no cereal shards, okay?
The Classic Powdered Sugar Coating Technique
This is the trick my friend taught me that keeps the coating even! Divide that chocolate-coated cereal precisely in half. Put one half into a large zip-top bag, add three-quarters of your powdered sugar, seal it up tight (press out the air!), and then shake it like you’re excited for vacation! This bagging method ensures everything gets coated evenly without making a huge mess everywhere. Spread that batch onto your parchment-lined sheet. Repeat with the second half of the cereal and the remaining sugar. This careful two-step process is the secret to the perfect **Powdered Sugar Snack** texture—not too dusty, not too sticky.
Adding Red and Green Accents for Red and Green Snack Mix
Now for the holiday sparkle! Melt your green candy wafers according to the bag directions—they melt faster than regular chocolate, so watch them closely! Drizzle or lightly toss half of your coated cereal (the stuff already tossed in white sugar) with the melted green. While it’s still wet, toss on half of your colorful sprinkles. That warmth helps them stick instantly! Do the exact same thing with the red wafers and the remaining cereal. Spread it all out so the colors don’t bleed into each other while they cool down. Wait about 30 minutes for everything to set hard, and then break up those nice big clumps!
Expert Tips for Perfect Muddy Buddies Holiday Edition
Making great **Christmas Puppy Chow** is super easy, but if you want it to go from great to seriously legendary—the kind people ask for the recipe for year after year—you need a couple of insider tricks. I learned these I learned these the hard way over many holiday baking sessions. Sometimes the coating gets a little thin, or you just need a flavor change, so hang onto these tips!
If you love deep, rich flavors, you should definitely check out how I make my Brown Butter Chocolate Chip Cookies; that browning technique applies here too, if you want to go next level!
Flavor Variations: Try Peppermint Puppy Chow Variation
The standard recipe is amazing, but sometimes you want that sharp wintery kick! For a super fun **Peppermint Puppy Chow Variation**, just add about half a teaspoon of pure peppermint extract into the warm chocolate mixture right before you pour it over the cereal. It totally transforms the snack! Or, if you want to explore texture, swap out half the Rice Chex for pretzels. That salty crunch makes for a fantastic **Sweet and Salty Christmas Mix** that everyone devours.
Troubleshooting Coating Issues and Storage
Look, coating issues happen! If your chocolate mixture seems too thick to coat the cereal well, just microwave it for another 10 seconds before pouring. If your powdered sugar coating looks patchy or sticky after shaking, don’t panic! You can always transfer it to a sheet and dust a tiny bit more sugar over it manually. The most important tip is storage: If you’re making this ahead—which you should, because it’s a **Make Ahead Holiday Dessert**—always keep it in an airtight container at room temperature. Never refrigerate it! Chilly temperatures make the sugar coating clump weirdly and ruin that perfect dusty texture.
Serving Suggestions for Holiday Party Food
This **Christmas puppy chow** is so versatile, but presentation really elevates it from a simple snack to genuine **Holiday Party Food**. I usually skip the big serving bowls and opt for smaller, festive containers instead. You can layer this in decorative red or green tins, or even pour it right into clear mason jars and top them with some burlap or plaid ribbon. It looks adorable!
If you’re serving it alongside savory things, it’s a great contrast. It goes perfectly next to something salty, like my favorite Cheesy Spinach Artichoke Dip if you need a savory anchor. It truly shines as a standalone **Winter Dessert Recipe** after a big meal, or piled high on a tiered dessert stand where those red and green colors really pop!
Frequently Asked Questions About Christmas Puppy Chow
I always get a ton of questions when I post this snack mix on social media because everyone wants to make sure theirs looks perfect for the holidays! If you’re wondering about tweaks or need help with substitutions, you’re probably in the right spot. Don’t forget, you can always browse all my snack-related ideas over at my snack category, too!
Can I make a Reindeer Chow Recipe using this base?
Absolutely! This is the perfect base for a proper **Reindeer Chow Recipe**. To make it a bit more rustic and chunky like true ‘reindeer food,’ I like to toss in about a cup of salty mini pretzels or some chopped pecans during the initial chocolate coating stage. That little bit of salty crunch balances the sweetness perfectly!
Is this a Kid Friendly Christmas Recipe?
Oh yes, this is one of the best **Kid Friendly Christmas Recipes** out there because the cleanup is minimal! The kids are fantastic at shaking the sugar bags—they love that part! However, you absolutely need adult supervision when melting the chocolate mixture in the microwave. That stuff gets seriously hot and you don’t want any little hands getting burned.
What is the best cereal to use for Christmas Chex Mix?
While the recipe calls specifically for Rice Chex because its light texture absorbs the coating so beautifully, you really have options for your **Christmas Chex Mix**! Corn Chex works wonderfully if you prefer a slightly sweeter base. Wheat Chex is great if you want something a little heartier, but stick to just one type per batch for the best overall coating consistency.
Estimated Nutrition for This Simple Holiday Baking Treat
Since this is technically a party mix and not dinner, nobody wants to deal with perfect counting, but it’s good to have a general idea! Here is the breakdown based on the ingredients listed above for a standard serving size. Remember, this is just an estimate because we all know how heavy-handed we get when we layer on those festive sprinkles!
For reference, here’s what the data looks like based on 10 servings:
- Serving Size: 2/3 cup
- Calories: About 250
- Sugar: 22g
- Fat: 14g
- Protein: 4g
Just a quick note that since ingredient brands vary so much—especially the peanut butter and chocolate—these numbers are just a guideline. For the official rundown and all my legal disclaimers about nutrition tracking, you can jump over to my disclaimer page here!
Share Your Festive Puppy Chow Creations
Okay, I’ve shared all my best secrets for making this **Festive Puppy Chow**, but now I absolutely need to see what you’re all up to! Baking, especially during the holidays, is meant to be shared, right?
Did you stick to the classic red and green? Maybe you tried a blue and silver theme? Or perhaps you went wild with citrus zest in the coating—I want to hear about it! Please leave a comment below telling me your favorite part of the process or how you served it up!
And if you snapped a picture of your beautiful **Christmas Puppy Chow** piled high in a tin or sitting next to your gingerbread men, please send it my way! You can always reach out via my contact page if you want to share photos or just tell me how much your family loved the snack mix. Happy holiday snacking, everyone!
PrintThe Ultimate Christmas Puppy Chow (Red & Green Muddy Buddies)

Make this easy, no-bake Christmas Puppy Chow featuring red and green colors perfect for holiday parties or gifting. This festive snack mix uses Chex cereal coated in chocolate and powdered sugar.
- Prep Time: 15 min
- Cook Time: 5 min
- Total Time: 20 min
- Yield: 10 servings
- Category: Dessert
- Method: No Bake
- Cuisine: American
- Diet: Vegetarian
Ingredients
- 6 cups Rice Chex cereal
- 1 cup semi-sweet chocolate chips
- 1/2 cup peanut butter
- 1/4 cup butter
- 1 teaspoon vanilla extract
- 1 1/2 cups powdered sugar, divided
- 1/4 cup green candy coating wafers or colored white chocolate
- 1/4 cup red candy coating wafers or colored white chocolate
- 1/4 cup Christmas colored sprinkles (red and green)
Instructions
- Place the Rice Chex cereal in a large bowl. Set aside.
- In a microwave-safe bowl, combine the chocolate chips, peanut butter, and butter. Microwave in 30-second intervals, stirring well after each, until smooth. Stir in the vanilla extract.
- Pour the chocolate mixture over the cereal and gently stir until all the cereal is evenly coated.
- Place half of the coated cereal into a large zip-top bag. Add 3/4 cup of the powdered sugar. Seal the bag and shake until the cereal is coated. Spread this portion onto a baking sheet lined with parchment paper.
- Repeat step 4 with the remaining coated cereal and powdered sugar.
- Melt the green candy coating wafers according to package directions. Drizzle or lightly toss half of the coated cereal with the melted green coating. Sprinkle immediately with half of the Christmas sprinkles.
- Melt the red candy coating wafers. Drizzle or lightly toss the remaining half of the coated cereal with the melted red coating. Sprinkle immediately with the remaining Christmas sprinkles.
- Allow all the cereal to cool and set completely, about 30 minutes. Break apart any large clumps before serving or packaging.
Notes
- For a peppermint flavor, add 1/2 teaspoon of peppermint extract to the chocolate mixture before coating the cereal.
- To make this mix ahead of time, store it in an airtight container at room temperature for up to one week. Do not refrigerate, as this can cause the powdered sugar coating to clump.
- If you do not have candy coating wafers, you can use white chocolate chips dyed with oil-based food coloring for the red and green accents.
Nutrition
- Serving Size: 2/3 cup
- Calories: 250
- Sugar: 22
- Sodium: 180
- Fat: 14
- Saturated Fat: 5
- Unsaturated Fat: 9
- Trans Fat: 0
- Carbohydrates: 30
- Fiber: 1
- Protein: 4
- Cholesterol: 5