

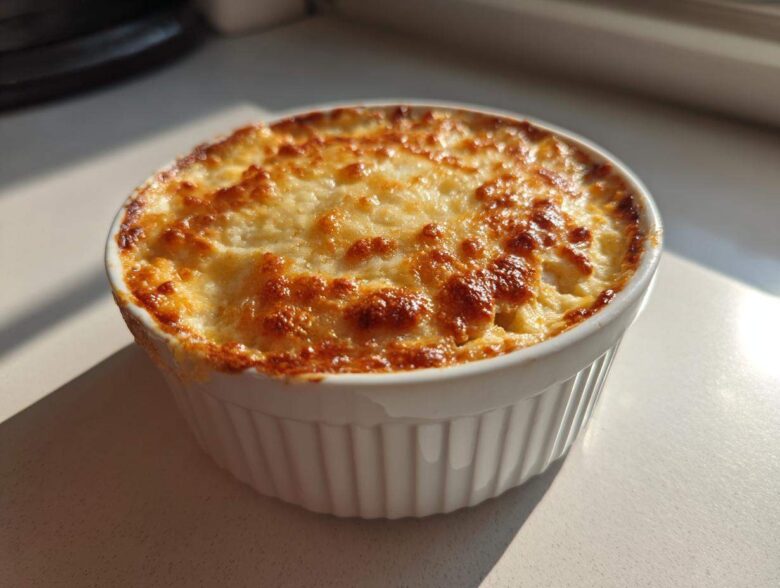
Listen, I’m going to tell you a secret: forget those sad, lukewarm dips sitting out at parties. When I bring a dish to a tailgate or a holiday get-together, I bring the showstopper. And nothing clears a room faster—in the best possible way—than my ultimate, over-the-top, game-winning popper dip. Trust me, this creamy, cheesy, spicy concoction hits every single craving you have. I’ve tested this recipe on skeptical crowds, football Sundays, and even my picky sister-in-law, and it disappears every time. Baking it hot and bubbly right before everyone arrives is my secret weapon!
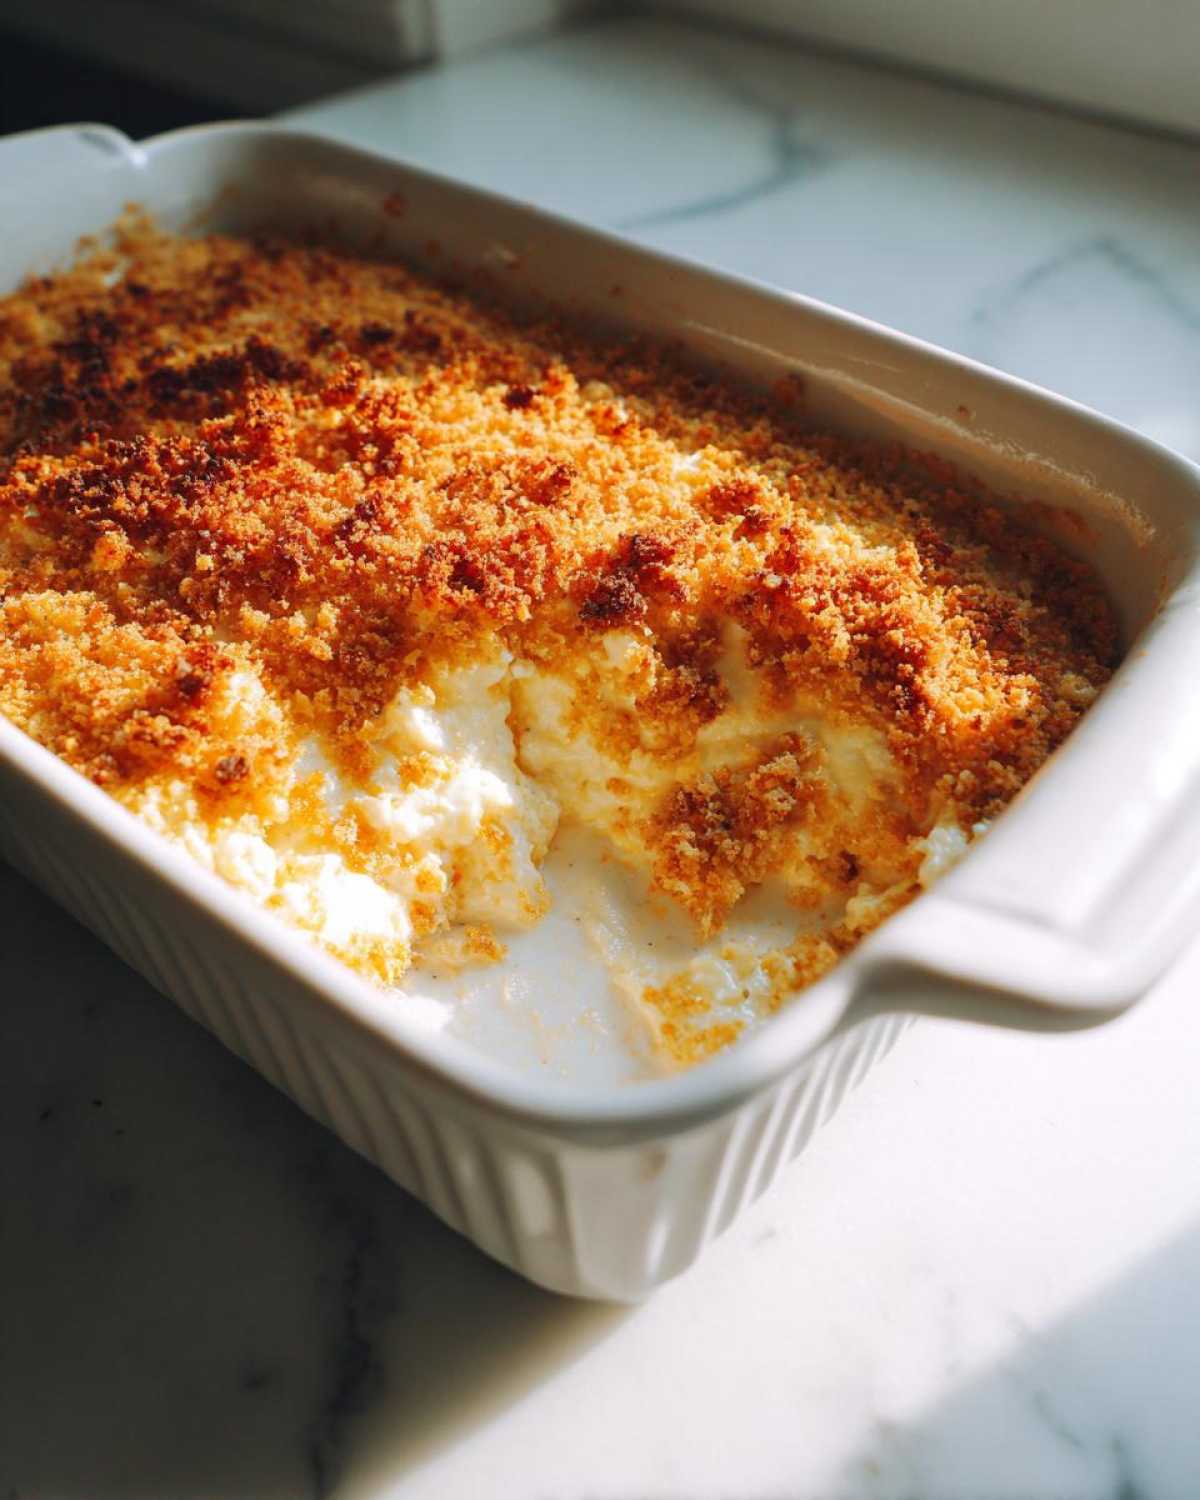
You really need to bookmark this recipe. It’s the hands-down best Jalapeño Popper Dip Recipe you’ll ever make, guaranteed to cement your status as the MVP of appetizers. We’re talking melt-in-your-mouth texture combined with that perfect little kick of heat. You’re going to want to use a sturdy chip for this one, by the way!
If you’re looking for another winner to fill out your spread, check out my recipe for Cheesy Spinach Artichoke Dip—it’s fantastic, but this popper dip is my number one.
Why This Creamy Cheesy Dip is the Best Party Appetizer
I promise you, once you bring this dip once, people will ask for it every single time there’s a gathering. It’s the definition of an Easy Game Day Dip, but it works just as well for fancy holiday parties!
- It’s so reliable! I’ve made this recipe dozens of times, and it comes out perfectly gooey and cheesy every single time. No failures here, folks.
- It just screams quality. This isn’t some bland, watery sauce; this is a proper Creamy Cheesy Dip that makes a statement.
- It’s truly the Best Party Appetizer because it travels well and bakes up hot and bubbly right when you need it.
If you need more easy inspiration for your next get-together, don’t forget to check out my guide on the Best Easy Game Day Dip collection!
Quick Prep Time for Your popper dip
This is the part I love most! You spend practically no time fussing around. We’re talking 10 minutes, max, to mix everything together. Seriously, 10 minutes! Once it’s in the oven, you just wait for that heavenly spicy aroma to fill your kitchen. That speed makes it the perfect emergency popper dip when you realize you forgot to make an appetizer.
Perfect Warm Cheesey Dip Texture
When this comes out of the oven, you’ll notice the top is golden brown from the buttered panko, but underneath? Oh my goodness. It’s bubbling hot, wonderfully rich, and velvety smooth. That perfect blend of creaminess and just enough chunky goodness from the chiles makes it the ultimate Warm Cheesey Dip. You’ll need a spoon to scrape the dish clean after the chips are gone!
Essential Ingredients for the Ultimate popper dip Recipe
Okay, since this is such a simple recipe, the quality of what you put in really, really matters. I want you guys to get that perfect texture—that gooey, cheesy heaven everyone raves about. I learned the hard way that using cold cream cheese or rushing the grating process just ruins the whole thing! If you follow what I list here, your popper dip will be spot on. For the full rundown, you absolutely must check out my friend’s guide on Bacon Wrapped Jalapeño Poppers for more inspiration on handling those peppers!
Dairy Base and Cheese Blend
This is the foundational richness. You need that soft, velvety texture, so preparation matters here. Don’t just pull it out of the fridge five minutes before mixing!
- You absolutely must use 8 ounces of cream cheese, and it has to be softened! Leave it out on the counter for at least an hour. If you try to mix it hard, you’ll end up with tiny lumps, and we don’t want that in our dip.
- One cup of sour cream adds that essential tanginess that cuts through the richness.
- For the cheese, I use a combo: one cup of Monterey Jack and one cup of sharp Cheddar. Shred your own if you can! Pre-shredded cheeses are coated in starches that make the dip slightly grainier, and we are aiming for smooth magnificence here.
The Jalapeño and Spice Components
This is where we turn a fun cheesy dip into amazing Spicy Appetizer Ideas. The key is balancing the heat without overwhelming the dairy.
- You’ll need about 4 ounces of canned diced green chiles, but make sure you drain them really well—we need flavor, not excess water!
- For the main punch, I specify chopped pickled jalapeño slices, drained. I love the pickled ones because they are soft and have a nice vinegar bite that balances the cheese. If you are making this for people who can’t handle much heat, you can substitute fresh ones, but you MUST seed and mince them very finely first.
- We finish the flavor profile with just half a teaspoon of garlic powder and a quarter teaspoon of onion powder. Keep it simple; the peppers should shine, not the seasonings!
Step-by-Step Instructions for Your popper dip
Don’t let the amazing flavor fool you; these steps are so straightforward, you could probably make this while half-watching the game. The key to success with any great Hot Dip Recipes is managing the heat and getting that topping crunchy. Follow these steps exactly, and you’ll have the ultimate cheesy snack ready in under 40 minutes total. If you’re looking for other fun, cheesy ideas, make sure you check out my recipe for Baked Pizza Dip next time you need a cheesy fix!
Preparation and Initial Mixing
First things first, we need the oven hot and ready to go. Preheat that bad boy to 375 degrees Fahrenheit. This dip loves a bit of heat to get it bubbling nicely. While it heats up, lightly grease whatever dish you are using—I usually grab an 8×8 inch square dish or a small cast iron skillet if I want that rustic look.
Now for the mixing! Grab your medium bowl. This is where you combine the already softened cream cheese—remember that step?—with the sour cream. You want to whisk or mix this until it’s completely, totally smooth. I mean it, no cream cheese lumps allowed! Once that base is silky, gently fold in all the shredded cheeses, the drained chiles, those tangy jalapeños, and all your seasonings. If you decided to add bacon (wise choice!), this is the time to mix it in gently so you don’t break up the chunks too much.
Baking the popper dip to Golden Perfection
Once everything is combined, spread that rich mixture evenly into your prepared dish. Don’t press it down too hard; we want it light enough to bake evenly.
Here’s my favorite part for texture: the topping! In a separate little bowl, take a tablespoon of melted butter and toss it with a quarter cup of Panko breadcrumbs. Panko is the secret ingredient for crispiness—regular breadcrumbs get soggy! Sprinkle this buttered goodness evenly over the entire top layer of the dip. It’s going to turn into a beautiful, savory crust.
Pop it in the oven—no peeking for at least 20 minutes! We are baking this for 20 to 25 minutes, or until it is bubbling hot all the way through the center and that Panko topping has turned a beautiful golden brown. Once it’s out, please, for the love of all things cheesy, let it rest for 5 minutes. It’s molten lava hot right out of the oven, and letting it set up slightly makes it easier to scoop.
Tips for Success with this Hot Dip Recipes
When you are making something as beloved as this popper dip, you want it to be perfect every single time. I’ve learned a few tricks over the years, especially for managing the spice level, since everyone’s threshold is different! These little secrets are what elevate this from just a good dip into one of the truly great Hot Dip Recipes for your party lineup.
Don’t worry about things going wrong; these tips are designed to make sure your effort pays off with maximum flavor and that incredible texture we’re aiming for!
Controlling the Heat Level
This is probably the most common question I get: “Is it too spicy?” The answer depends entirely on what you put in! If you’re using the pickled slices, the pickling process actually mellows the heat out a little bit, which is why I love them. If you want less fire, just use fewer jalapeño slices!
If you are using fresh jalapeños, you have total control. If you want just a hint of flavor without the burn, slice them open, scrape out all the white ribs and seeds, and then chop up just the green flesh. That white membrane holds about 80% of the heat, so removing it is your best friend for taming the spice. If you want the fire, leave everything in!
Achieving the Best Topping Crunch
That Panko topping is what stops this dip from just becoming a bowl of hot cheese, and we need it crisp! The biggest mistake people make here is using butter that is just barely soft or melted in chunks. We need liquid gold, people.
My top tip for crunch? Make absolutely sure your tablespoon of butter is fully melted—like liquid oil—before you toss it with the Panko breadcrumbs. If you have little clumps of unmelted butter in there, those spots will stay greasy or burn unevenly. Whisk your melted butter and Panko together quickly until every little crumb is lightly coated. That even coating ensures everything browns beautifully together in the oven for that incredible final crunch!
For even more amazing appetizer content, you have to peek at my guide on the Creamy Buffalo Chicken Dip—it’s another crowd-pleaser, though totally different flavor profile!
Make Ahead Dips and Storage for Your popper dip
We all know the chaos that ensues before a big party or Game Day, so I always preach the gospel of being prepared. This is one of my favorite Make Ahead Dips because you can do 90% of the work the day before! It saves your sanity, I promise you.
To prep this popper dip ahead of time, just follow the mixing instructions as normal, but stop right before you add the topping. Spread the dip mixture into your baking dish, cover it tightly with plastic wrap—make sure you press the wrap directly onto the surface of the dip to prevent a weird skin from forming—and pop it in the fridge. You can keep it covered and chilled for up to 24 hours.
When it’s time to serve, pull it out of the fridge about 30 minutes before you want to put it in the oven so it can warm up slightly. Remember, if you bake it straight from the cold fridge, you’ll need to add about 5 to 10 extra minutes to the baking time. Don’t forget to top it with that buttery Panko right before it goes in, or it won’t brown properly!
As for leftovers? Oh, honey, there are rarely any, but if you have some, cover the dish and keep it refrigerated for up to four days. Reheat smaller portions right in the microwave or pop the leftovers back in the oven for 10 minutes until gooey again. If you want to see other freezer-friendly meals that will save you time, check out my fantastic freezer breakfast burritos recipe!
Serving Suggestions: What to Dip in Your popper dip
Okay, the popper dip is out of the oven, golden brown, and smells incredible. Now comes the crucial step: deciding what vehicle you’re going to use to scoop up this cheesy goodness! Because this is such a rich, warm, and sturdy dip, you have so many great options. You want sturdy dippers, though, or you risk an epic cheese avalanche right onto your carpet!
My first go-to, naturally, is always a crunchy tortilla chip. We need something that can handle the weight of this decadent dip. I always keep a few bags ready specifically because I know I’m bringing this popper dip!
If you’re looking for heartier appetizer pairings, you absolutely must see how I make my Loaded Potato Skins—they disappear just as fast as the dip!
Here are my favorite ways to serve this amazing Dip for Tortilla Chips and beyond:
- Sturdy Tortilla Chips: Look for Restaurant Style or thicker scoops. Skip the flimsy chips!
- Pita Chips or Pretzels: Pita chips get perfectly crispy when baked, and the stronger crunch works wonderfully with the creamy texture.
- Fresh Veggies: For something lighter, go for sturdy choices like thick slices of bell pepper, celery sticks, or raw broccoli florets. They give you that great crunch without the carbs.
- Toasted Baguette Slices: Lightly brush baguette slices with olive oil, toast them quickly under the broiler, and serve them warm alongside the dip. This feels a little fancy but is super easy!
Honestly, once this hot, cheesy snack is on the table, people will make do with whatever they have nearby, but providing good options just makes you look like the organized host you are!
Variations on the Creamy Cheesy Snack
I love that this recipe is so versatile! Once you master the base, you can really customize it for any occasion or craving you have. It moves easily from a simple baked dish to something you can leave simmering on the buffet for hours. It’s easy to adapt this blend of cheese and spice to fit exactly what you need for your party spread.
Even though this recipe is fantastic coming right out of the oven, sometimes you just need a hands-off approach, especially if you are hosting a big crowd. I always keep my options open for different serving styles! If you’re already planning on using your slow cooker for another dish, you might want to check out my recipe for Crockpot Chicken and Dumplings for some truly easy cooking!
Adding Bacon Jalapeno Dip Flavor
If you want to take this dip straight to the next level—like, making it taste like something you ordered at a fancy steakhouse—you absolutely must add bacon. It brings this wonderful smoky, salty contrast to the bright heat of the peppers and the richness of the cream cheese.
The timing is crucial here, though! You need to fold the bacon in during the main mixing stage, right before you spread the mixture into the baking dish. Use about four slices of bacon that you’ve already cooked until crispy and then crumbled up. You want good, crisp pieces, not soft, oily bits. The little bits of bacon get suspended in the creamy cheese and provide little salty bursts in every bite. It really transforms this into a top-tier Bacon Jalapeno Dip experience!
Crockpot Jalapeno Dip Adaptation
For football Saturdays or holiday parties that last for hours, the Crockpot is your best friend because it keeps things perfectly warm without burning the bottom. You combine all your ingredients—cream cheese, sour cream, cheeses, peppers, and seasoning—right in the slow cooker liner. Do not add the buttered Panko topping yet!
Set it to LOW and let it cook for about two hours, giving it a good stir halfway through to help everything melt evenly. Then, for the last 15 minutes of cooking, sprinkle that buttered Panko right on top and switch the cooker to HIGH, or if yours has a simple ‘Keep Warm’ setting, just use that. That short blast of top heat will crisp up your topping beautifully while the body of the dip stays gorgeously heated for continuous dipping!
Frequently Asked Questions About popper dip
I know you might have questions swirling around, especially if this is your first time making a big, hot cheesy snack like this one! People always ask me about customizing the heat or how to keep it perfect once it’s out of the oven. This popper dip is pretty foolproof, but a few quick tips can make sure you serve the absolute best version possible. If you’re looking for yet another amazing dip idea, my Fried Pickle Dip is surprisingly addictive!
Can I make this a Keto Friendly Dip Option?
That’s a great question, especially since we’re loading this up with cheese and sour cream! The base recipe is actually naturally very low in carbs, which is fantastic. The only thing that bumps up the carbs? That delicious Panko breadcrumb topping. If you skip that topping entirely, this automatically becomes a fantastic Keto Friendly Dip Option. You’ll still get all the flavor from the cheese and jalapeños!
Just swap out your dippers! Instead of using regular tortilla chips, serve it warm with celery sticks, cucumber slices, or even those crunchy pork rinds. It keeps that richness but stays perfectly keto-compliant for everyone at your party!
How do I ensure my popper dip stays hot longer?
This is the eternal struggle with any Warm Cheesey Dip, right? It’s always best right out of the oven, but if you are hosting and people are grazing over an hour or two, it can start to cool down too fast. Serving it right after baking, resting for those five minutes, is the only way to start!
For keeping it piping hot on a buffet table, I have two secrets. First, if you happen to have a small slow cooker, you can transfer the dip into it right after baking (just scoop it in) and set it to the ‘Warm’ setting. Second, for a slightly fancier look—especially during the holidays—use a small chafing dish with a little bit of hot water underneath. That consistent, gentle heat keeps the cheese perfectly melted and gooey until the very last scoop!
Estimated Nutritional Data for This Crowd Pleaser Dip
I always feel a little guilty sharing the nutrition facts because, let’s be honest, this is indulgence food! But knowing where you stand calorie-wise can help you enjoy that extra chip or two, right? I’ve pulled the estimated numbers straight from my calculations based on the standard ingredients list we used. Remember, this is just an approximation—if you use low-fat sour cream or skip the bacon, your numbers will change!
These estimates are based on 6 generous servings, which is pretty substantial for this rich, cheesy snack. If you’re serving a huge crowd and people only take a tiny scoop, you’re looking at even better numbers per serving!
For another delicious, slightly lighter snack option that I love to pair with this, take a peek at my recipe for Pumpkin Hummus. But for pure decadent snacking, this dip can’t be beaten!
- Serving Size: 1/6 of dip
- Calories: Approximately 310
- Total Fat: 27 grams (Watch that saturated fat at 16g!)
- Carbohydrates: 6 grams
- Protein: 12 grams
- Sugar: Only about 3 grams—most of that is natural from the dairy!
It’s worth every single calorie when you see everyone grabbing for more! Just remember these values are estimates, so they are a guideline more than a hard rule for your Crowd Pleaser Dip!
PrintUltimate Creamy Jalapeño Popper Dip

Make this rich, cheesy, and spicy jalapeño popper dip for your next gathering. It is simple to prepare and serves well warm.
- Prep Time: 10 min
- Cook Time: 25 min
- Total Time: 35 min
- Yield: 6 servings
- Category: Appetizer
- Method: Baking
- Cuisine: American
- Diet: Vegetarian
Ingredients
- 8 ounces cream cheese, softened
- 1 cup sour cream
- 1 cup shredded Monterey Jack cheese
- 1 cup shredded cheddar cheese
- 4 ounces canned diced green chiles, drained
- 1/2 cup chopped pickled jalapeño slices, drained (or fresh, seeded and minced)
- 4 slices cooked bacon, crumbled (optional)
- 1/2 teaspoon garlic powder
- 1/4 teaspoon onion powder
- 1/4 cup panko breadcrumbs (for topping)
- 1 tablespoon melted butter (for topping)
Instructions
- Preheat your oven to 375 degrees Fahrenheit. Lightly grease an 8×8 inch baking dish or small oven-safe skillet.
- In a medium bowl, combine the softened cream cheese and sour cream until smooth.
- Stir in the Monterey Jack cheese, cheddar cheese, diced green chiles, drained jalapeño slices, garlic powder, and onion powder. If using bacon, fold it in now.
- Spread the mixture evenly into your prepared baking dish.
- In a small bowl, mix the panko breadcrumbs with the melted butter. Sprinkle this mixture evenly over the top of the dip.
- Bake for 20 to 25 minutes, or until the dip is hot throughout and the topping is golden brown.
- Let the dip cool for 5 minutes before serving warm with tortilla chips, crackers, or vegetable sticks.
Notes
- For a make-ahead option, assemble the dip in the baking dish, cover it, and refrigerate up to 24 hours. Add 5-10 minutes to the baking time if baking directly from the refrigerator.
- If you prefer a Crockpot version, combine all ingredients except the topping, place in a small slow cooker, and cook on LOW for 2 hours or HIGH for 1 hour, stirring halfway through. Top with buttered breadcrumbs for the last 15 minutes.
- Adjust the amount of jalapeños based on your desired spice level.
Nutrition
- Serving Size: 1/6 of dip
- Calories: 310
- Sugar: 3
- Sodium: 550
- Fat: 27
- Saturated Fat: 16
- Unsaturated Fat: 11
- Trans Fat: 0.5
- Carbohydrates: 6
- Fiber: 0.5
- Protein: 12
- Cholesterol: 75