

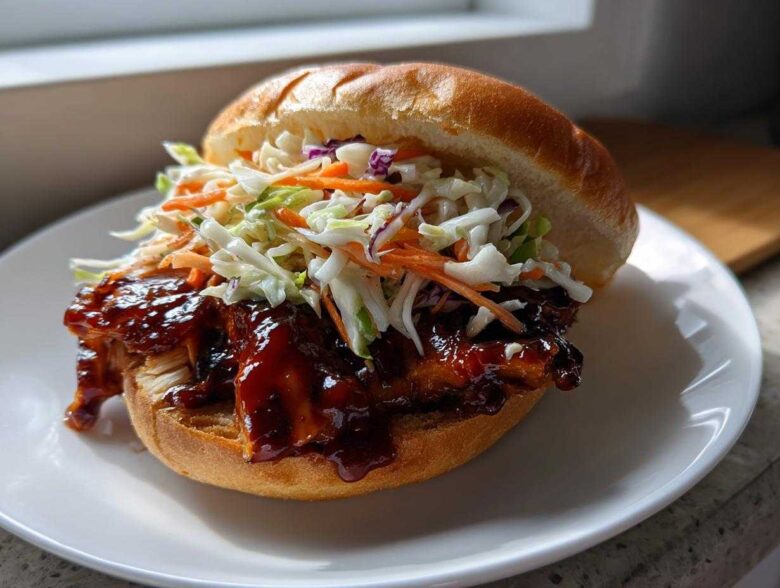
Oh my gosh, you know those nights when only a truly epic, messy, saucy sandwich will do? I get it. I spent *years* chasing down that perfect flavor and texture combination, failing miserably with runny sauces and soggy lettuce.
But trust me, I cracked the code! This Sticky BBQ Chicken Sandwich with Crunchy Slaw is the one that brings me back to that glorious backyard cookout every single time. It’s restaurant quality, I swear. The magic, as always, is in the texture—we need that thick, almost caramel-like glaze gripping the juicy chicken, perfectly contrasted by the sharp snap of fresh slaw.
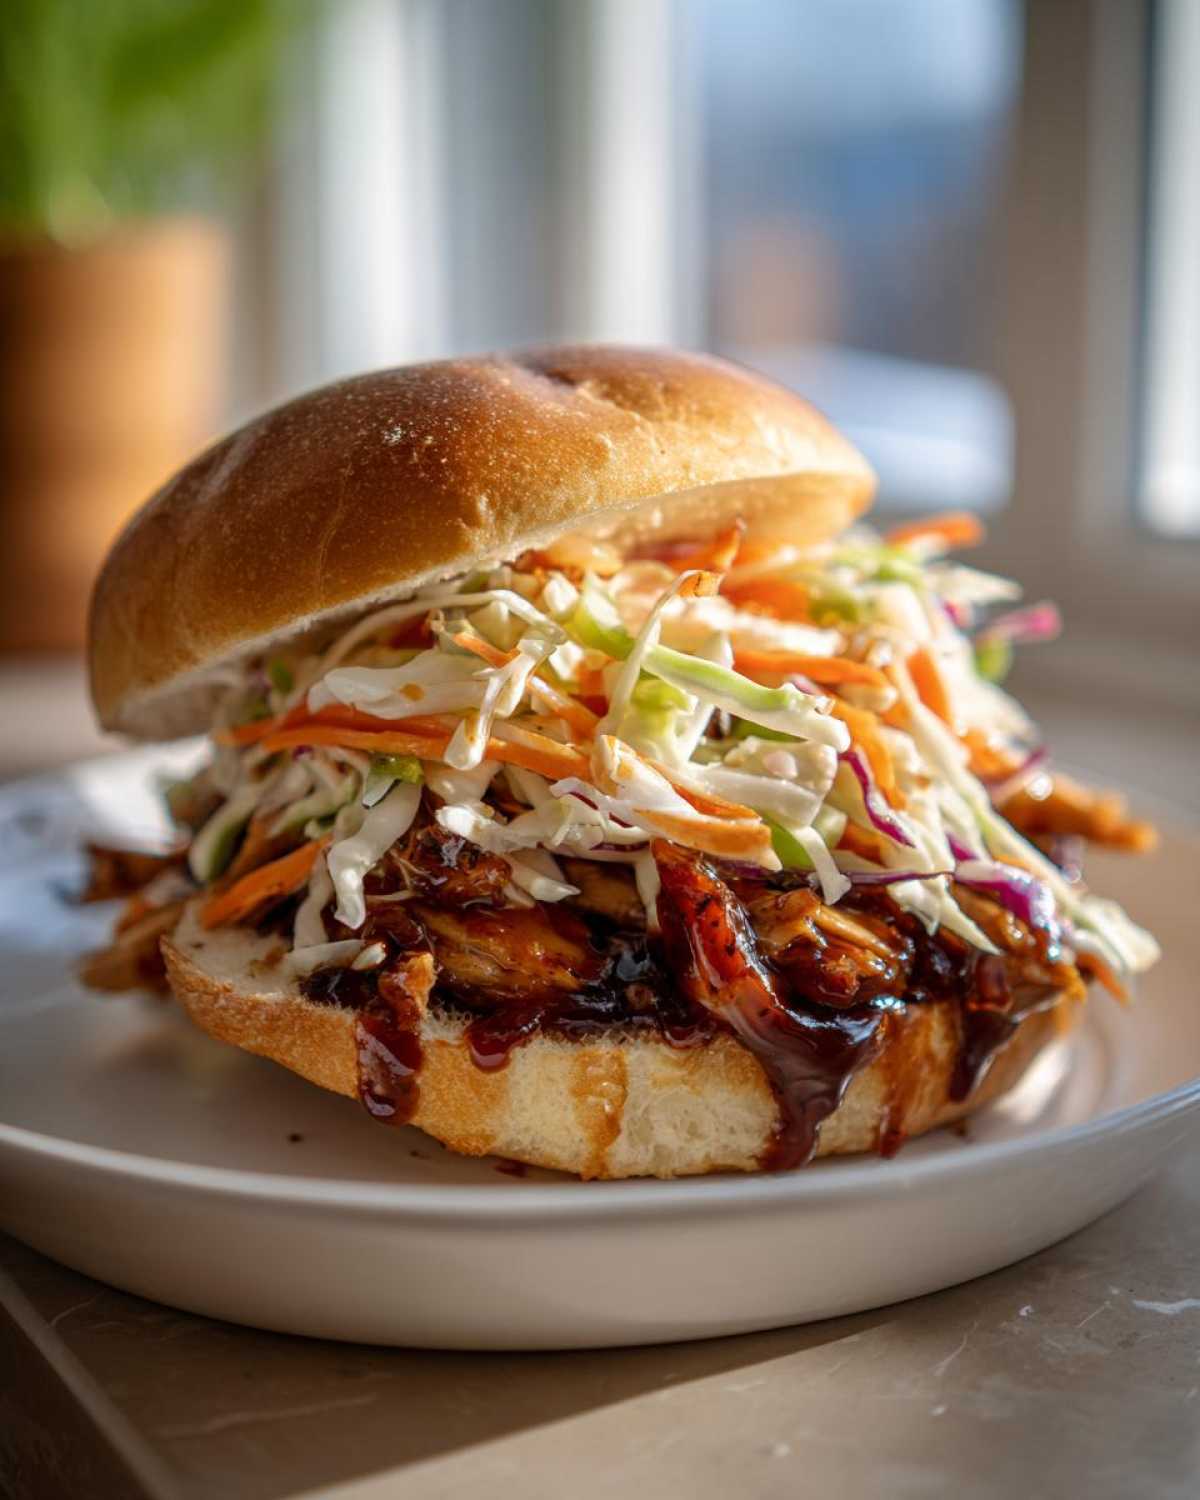
I tested my sauce reduction process probably a dozen times before I got that perfect, clingy consistency. If you’re ready to make the best homemade BBQ chicken sandwiches you’ve ever had, let’s get cooking! Check out our story about why we obsess over these details in the kitchen.
Why This Sticky BBQ Chicken Sandwich with Crunchy Slaw Recipe Works
Making a sandwich that holds up to all those incredible flavors takes a little planning, but it’s so worth the effort. We focus on contrast here—that sweet, thick glaze needs something sharp to cut through it. This setup guarantees flavor in every single bite, which is why I think this is the best version out there!
- The ultimate texture dance between the thick, sticky coating and the ridiculously crisp slaw.
- Perfect balance! The sweet and smoky BBQ hits the tangy, bright slaw exactly right.
- You get juicy chicken every time, never dry or stringy beneath that amazing glaze.
Achieving the Perfect Sticky Glaze
The absolute key to that satisfying, finger-licking messiness is reducing the sauce properly. You can’t just warm up bottled sauce; it’ll drip everywhere! When we simmer the ingredients until it shrinks down, we’re concentrating all that brown sugar sweetness and vinegar tang into something thick.
This technique is central to learning How to Make Sticky BBQ Sauce that actually clings to the chicken instead of sliding off. Patience during that simmer is essential!
The Secret to Juicy Chicken
No one wants a chewy sandwich, no matter how good the sauce is. I always rely on a quick sear over medium-high heat to make sure we hit that 165°F internal temperature right on time.
Resting the chicken for five minutes after cooking is non-negotiable! That traps all the moisture in. That, combined with slicing against the grain, is the core of this Juicy Chicken Sandwich Recipe. It ensures every strip is tender before it even touches the glaze.
Ingredients for Your Sticky BBQ Chicken Sandwich with Crunchy Slaw
Okay, pull out your bowls and measuring cups! Getting the ingredients right is half the battle, especially because we need the right ingredients to achieve that perfect sticky/crunchy dynamic. I always say, if you use cheap ketchup, you’ll get a thin, boring sauce. Stick to good quality stuff for the best results!
I’ve broken this list down so you can organize your prep station. You’ll notice the brown sugar and vinegar are crucial—they are the backbone of that sticky coating we’re aiming for. I made a batch of garlic butter last week, and honestly, slathering just a tiny bit on those buns before toasting makes everything taste like a gourmet burger joint.
For the Homemade Sticky BBQ Sauce
This is where the complexity comes from. Don’t substitute the dark brown sugar for white sugar; the molasses in the dark stuff is what gives you that deep, sticky chew!
- 1 cup ketchup
- 1/2 cup brown sugar, packed
- 1/4 cup apple cider vinegar
- 2 tablespoons Worcestershire sauce
- 1 tablespoon Dijon mustard
- 1 teaspoon smoked paprika
- 1/2 teaspoon garlic powder
- 1/4 teaspoon cayenne pepper
For the Chicken and Crunchy Slaw Assembly
The slaw needs good texture so it stays crunchy even under the warm, sticky chicken. That mix of cabbage and carrot is what earns this the title of the Best Crunchy Slaw for Sandwiches!
- 2 large boneless, skinless chicken breasts (about 1.5 lbs total)
- 1 tablespoon olive oil
- Salt and black pepper to taste
- 4 brioche or potato buns
- 2 tablespoons butter, softened
- 3 cups shredded green and purple cabbage mix
- 1 large carrot, shredded
- 1/4 cup finely chopped red onion
- For the Dressing: 1/2 cup mayonnaise, 2 tablespoons apple cider vinegar, 1 tablespoon granulated sugar, 1 teaspoon celery salt, 1/2 teaspoon black pepper
Step-by-Step Instructions for Sticky BBQ Chicken Sandwich with Crunchy Slaw
Alright, we’re moving from prep heaven to actual cooking! This whole process flies by once you get started, but you have to respect the stages. We start with the sauce because it needs that long, slow simmer to get truly sticky. Don’t rush it; that reduction time is flavor development time!
Preparing the Thick and Sticky BBQ Sauce
Grab a small saucepan, toss everything for the sauce—ketchup, the dark brown sugar, that sharp apple cider vinegar, Worcestershire, mustard, and all those spices—right in there. Bring it to a gentle simmer on medium heat, then drop the temperature way down to low. It needs a solid 15 to 20 minutes of cooking time, stirring every few minutes so nothing burns on the bottom.
When it’s done, the sauce should be visibly thicker—it should coat the back of a clean spoon without immediately dripping off. That’s your visual cue! Scoop out about 3/4 cup to glaze our chicken later, and keep the rest warm for dipping or drizzling on the side because trust me, you’ll want extra. We’re aiming for that perfect adherence, not a runny mess.
Cooking and Glazing the Chicken
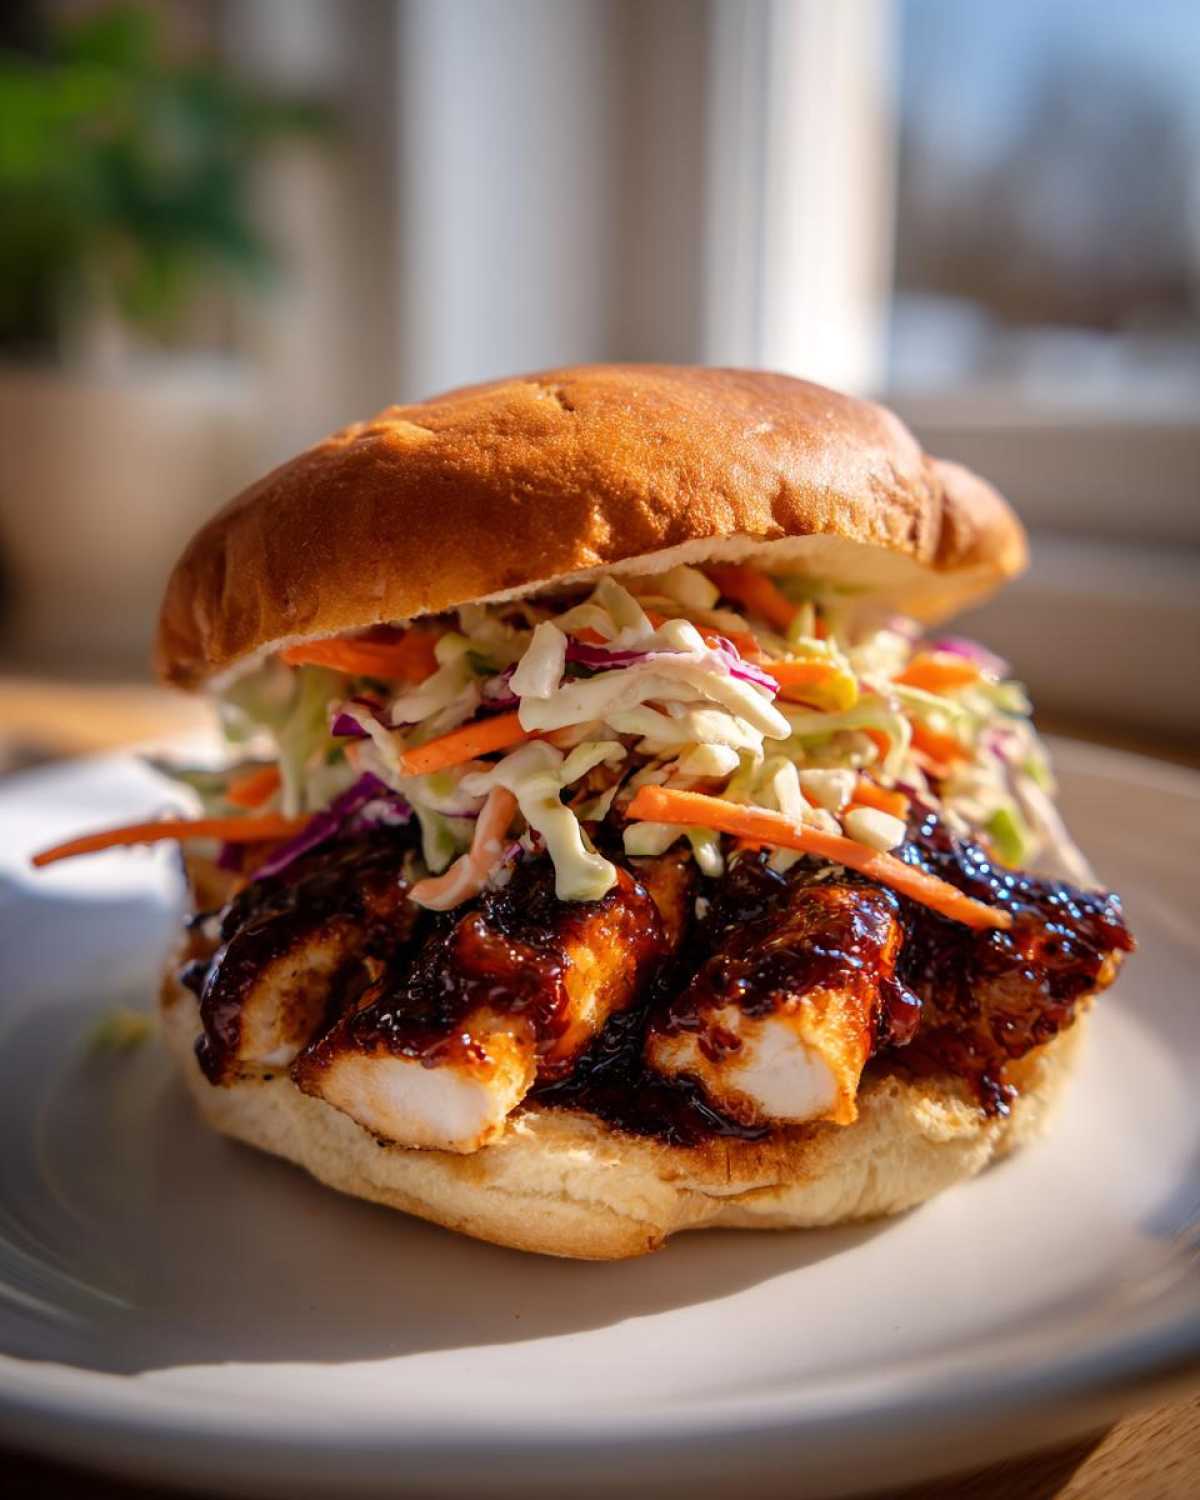
While that sauce is bubbling away, get your chicken breasts seasoned up. Heat a big skillet with a tablespoon of olive oil over medium-high. Cook the chicken pieces for about 6 to 8 minutes per side until they hit 165 degrees internally. Once they are done, pull them out immediately and let them rest on a cutting board for five minutes. Don’t skip the rest! Then, slice them into thick strips or shred them roughly.
Now for the fun part! Put the sliced chicken back into a skillet over *low* heat. Pour that reserved 3/4 cup of warm, sticky sauce over everything and gently toss until every piece is shiny and coated. This last minute or two over low heat is critical for setting that glaze tight on the meat. You can check out this other recipe where we use a similar low-and-slow glazing technique!
Mixing the Tangy Crunchy Slaw
While the chicken is cooking, whip up the slaw dressing first. In one bowl, whisk the mayonnaise, vinegar, sugar, celery salt, and pepper until it’s totally smooth. You don’t want lumps of sugar sitting there! Once the dressing is ready, toss in your shredded cabbage mix, carrots, and the red onion. Make sure everything gets coated evenly.
This is your Tangy Cabbage Slaw Recipe, and the trick is timing: stick this in the fridge for at least 15 minutes to let it chill down until you’re ready to build your sandwiches. That cold shock keeps everything super crisp!
Assembling Your Perfect Sticky BBQ Chicken Sandwich with Crunchy Slaw
We’ve made the sauce, we’ve cooked the chicken, and that slaw is perfectly cold and screaming for attention. Now comes the best part—the assembly! This is where the magic truly comes together, and trust me, the right bun makes a huge difference here. You want something that can soak up a little sauce without immediately falling apart.
I always reach for potato buns or soft brioche—their slight, buttery sweetness is the perfect counterpoint to the smoky sauce. My favorite little trick for maximizing the experience is to actually butter the cut sides of the bun before toasting! It creates a barrier against sogginess and adds so much wonderful flavor. You can find my thoughts on the Best Buns for BBQ Chicken over here.
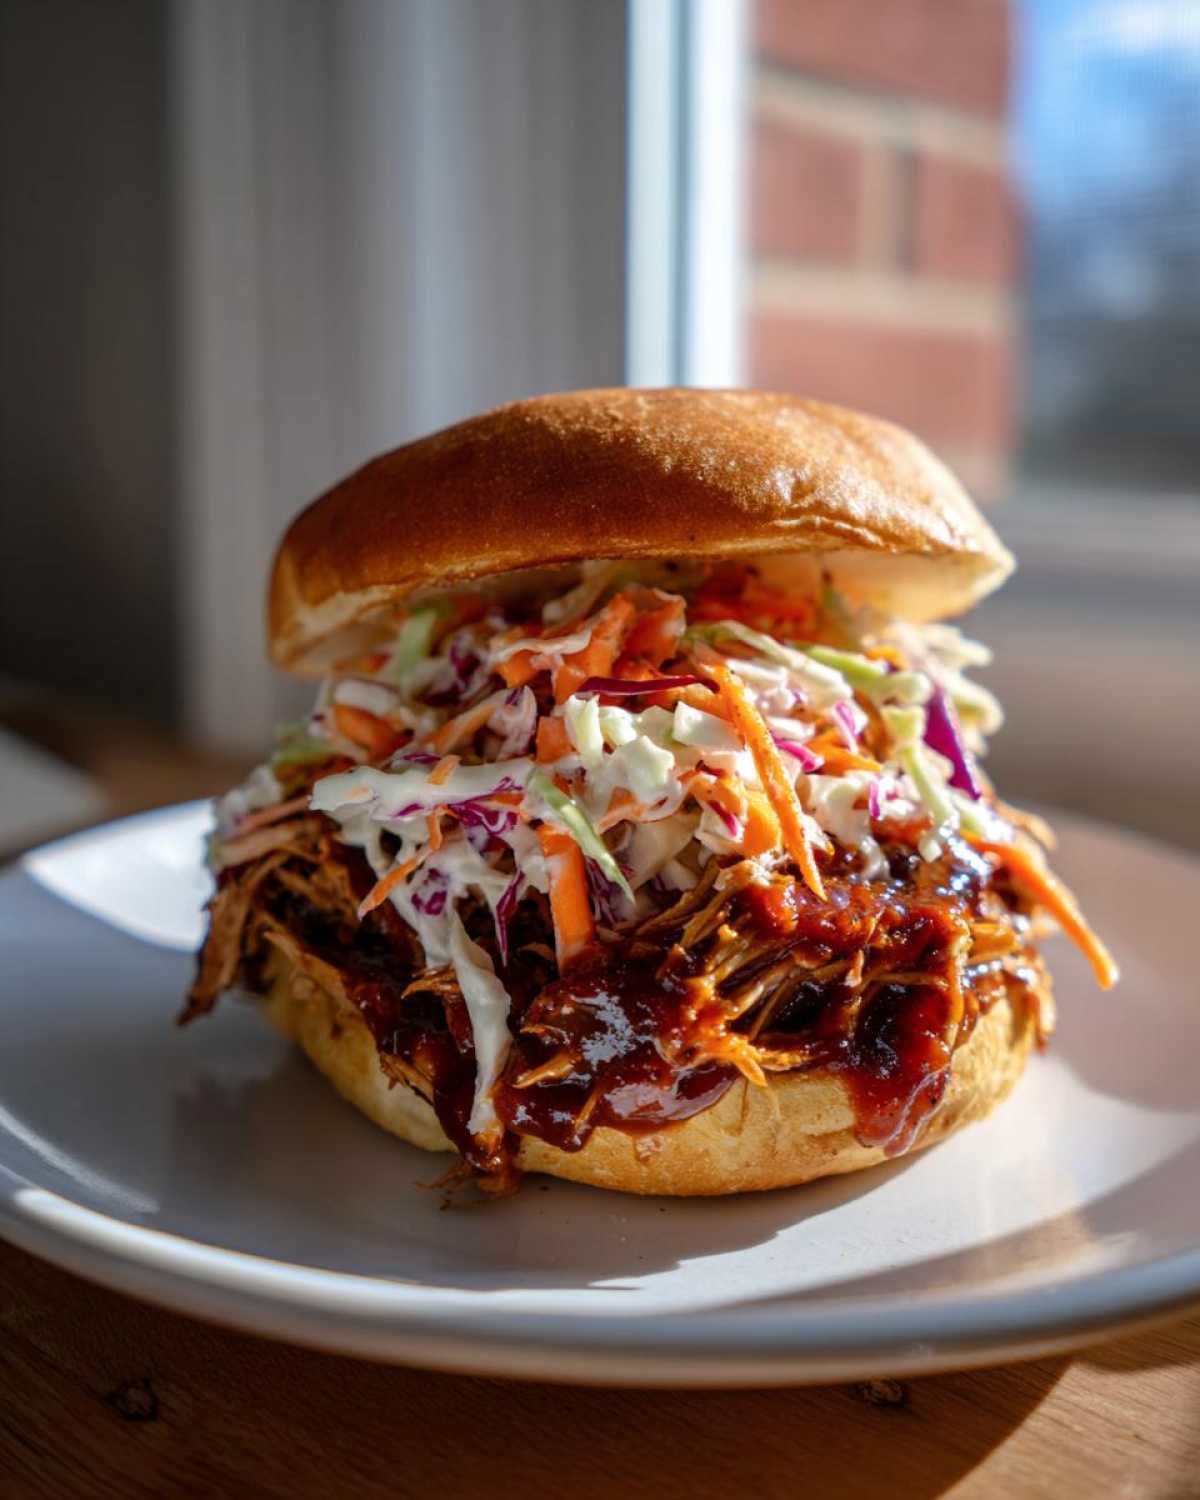
Follow this order precisely for the best structural integrity during your Glazed Chicken Sandwich Assembly:
- Bottom Bun Ready: Place your toasted, buttered bottom bun on a clean plate.
- The Sticky Layer: Pile a generous amount of that warm, sticky glazed chicken right onto the bottom half. Make sure you get lots of that good, thick glaze clinging to the meat!
- The Crunch Factor: Top the chicken immediately with a big scoop of that cold, tangy Crunchy Slaw. This contrast is everything—warm, gooey sauce next to cold, crisp vegetables.
- Cap It Off: Place the toasted top bun on top and gently press down. Don’t smoosh it too hard, or the slaw will explode out the sides (though sometimes that’s half the fun!).
Serve immediately! This sandwich doesn’t wait around; it needs to be eaten while the chicken is warm and the slaw is at peak crispness.
Tips for Success with Your Sticky BBQ Chicken Sandwich
Even though this recipe seems straightforward, those little extra steps—the ones you only learn through trial and, well, sometimes mess—are what take this from a good sandwich to a showstopper. I’ve learned a few tricks over the years to make sure every bite is exactly how it should be!
The biggest disaster I ever had was pre-glazing all the chicken and letting it sit while I made a huge batch of slaw for a party. By the time everyone lined up, the chicken was lukewarm, and the sauce had turned into this weird, sugary cement. Don’t be me! The key is getting that chicken coated right before it meets the bun.
Maximizing Flavor Integration
We talked about keeping the chicken warm when you add the sauce, but let’s really focus on *why* that works for the overall flavor experience. When you toss the thinly sliced or shredded chicken in that warm, thick BBQ sauce right off the heat, the residual warmth helps the sauce almost melt and adhere perfectly to every little ridge of the meat. It becomes one sticky, flavorful unit.
Then, you immediately place that warm, heavily coated chicken onto the toasted bun and top it with the ice-cold, sharp slaw. That immediate contrast—warm, intensely sweet, smoky glaze against the chilly, vinegary crunch—is what makes the whole thing sing! The cold slaw slightly cools the chicken just enough so you can actually eat it without burning your mouth, but the flavor pairing stays hot!
Make-Ahead and Storage for Your BBQ Chicken Sandwich Components
One of the best parts about whipping up a masterpiece like this Sticky BBQ Chicken Sandwich with Crunchy Slaw is knowing you can prep ahead! Because the crunch is so important here, you can’t just make the whole thing Tuesday night and expect perfection by Friday. But hey, easy prep is easy cooking, right?
The sauce comes together like a dream ahead of time! In fact, I think my special sticky BBQ sauce actually tastes better the next day; those spices really get a chance to marry up. You can easily double the batch and keep it airtight in the fridge for up to two weeks. It’s fantastic on ribs, too!
I usually focus on two main components that benefit most from advance prep. You can find lots of great ideas on how to streamline your kitchen efforts when you check out my notes on make ahead slaw dressing right here on the site!
Storing the Sauce and Dressing Independently
Make the full batch of the sticky BBQ sauce and keep it covered tightly in the fridge. When it’s time to eat, just reheat it gently on the stove until it’s pourable and warm again. Don’t try to glaze cold chicken with cold sauce; it won’t stick right!
The slaw dressing is another great item to prep early! Whisk up the mayo, vinegar, sugar, and spices and store that completely separate from the cabbage and carrots. You can keep the dressing in a jar for about a week. This way, when you’re ready for sandwiches, all you have to do is chop the veggies and toss them together.
Keeping the Slaw Crunchy Until Serving
This is my hard and fast rule for the slaw: Vegetables and dressing must live separately until about 15 minutes before serving. If you dress that cabbage mix too early—say, more than an hour—the salt and acid in the dressing will start to wilt those pretty cabbage shreds. Nobody wants a soggy crunch!
When you only dress it right before you build the sandwiches, you get that absolute snap and brightness you need to balance the heavy glaze. That moment of tossing is the final, quick act of prep before construction begins!
Storing Leftover Glazed Chicken
If you happen to have leftover chicken that’s already coated in the sticky sauce, that’s fine! Store the glazed chicken in an airtight container in the fridge. When you reheat it, you’ll want to use a dry skillet over medium heat—no water added. Low, slow heat allows the sauce to re-caramelize slightly without burning. If it seems too dry, you can add a tiny splash of water or extra BBQ sauce to loosen it up while heating.
Frequently Asked Questions About This Recipe
I know when I’m following a new recipe, I always have a few lingering questions swirling around—usually about swapping ingredients or adjusting the spice level. That’s totally normal! Since this is a template for the best comfort food, I want to make sure you nail it, whether you’re shooting for the ultimate Sticky BBQ Chicken Sandwich Recipe or just need a Tuesday night dinner solution.
Go ahead and peek through these common ones. I’ve pulled some of the most frequent questions I get about the sauce and the slaw structure right here. And hey, if I missed yours, hop over to the blog section and drop a comment, I always answer!
Can I use chicken thighs instead of breasts for this Sticky BBQ Chicken Sandwich Recipe?
Oh, absolutely you can! I almost always lean toward thighs myself when I’m aiming for maximum juiciness, and this recipe loves them. Chicken thighs have a bit more fat, which means they are extremely forgiving if you accidentally leave them on the heat for an extra minute.
The only thing you need to watch for is the internal temperature. Since thighs are usually a little thicker or have inconsistent shapes, they might take a few extra minutes to cook through compared to the breasts. Just use that meat thermometer—you still need to hit 165°F, but just keep them searing until they hit that mark. They’ll be unbelievably tender under that glaze!
How can I make this a Sweet Heat BBQ Sandwich?
Wanting a little kick in your sauce? I totally get it; sometimes I need that sweet heat balance! The recipe already has a little cayenne for warmth, but if you want it to really sing, you have a couple of great options for turning this into a Sweet Heat BBQ Sandwich.
First, you can sneak in some chipotle powder—maybe a teaspoon—along with the smoked paprika when you’re simmering the sauce. Chipotle gives you that wonderful smoky depth *plus* the heat! Alternatively, if you like clean, sharp heat, just double that initial 1/4 teaspoon of cayenne. Taste it right before you glaze the chicken, and don’t be afraid to add a tiny pinch more until it makes your lips tingle just a bit!
Estimated Nutritional Data for One Serving
Now, I need to give you a little heads-up before you dive into this glorious sandwich. Because this recipe involves cooking chicken and making sauce from scratch—and because we’re using brioche buns which are naturally a bit higher in sugar—these numbers are just estimates. I ran the numbers based on using the 80/20 split of ingredients listed for one serving size, which is exactly one sandwich.
This totally depends on how heavily you load up on the extra sauce you saved, so treat this as a general guide for the meat, slaw, and bun components combined. For me, knowing the macros is half the battle when I’m about to demolish one of these!
Here is what the numbers look like based on what’s in the recipe card:
- Serving Size: 1 sandwich
- Calories: 550
- Sugar: 45g (Yes, that’s the sticky glaze talking!)
- Sodium: 850mg
- Fat: 20g
- Saturated Fat: 5g
- Protein: 40g
- Carbohydrates: 55g
- Fiber: 3g
If you’re looking to cut back, you could easily swap the brioche/potato buns for a low-carb option, or lean heavier on the slaw ratio, but honestly, you mess with the bun, you mess with the structure!
Share Your Sticky BBQ Chicken Sandwich Creations
Whew! If you made it this far, I’m genuinely so proud of you. You’ve successfully navigated the essential steps for creating a truly restaurant-quality Sticky BBQ Chicken Sandwich with Crunchy Slaw. The biggest compliment I can ever get is knowing one of my recipes made it onto your dinner table, especially when it involves as much delicious mess as this one does!
Now that you’ve tasted the perfection of that thick, sticky glaze contrasting with that icy crunch, I absolutely need to know what you thought! Did the sauce reduce perfectly for you? Did your family fight over the last sandwich? Don’t be shy—tell me everything in the comments below.
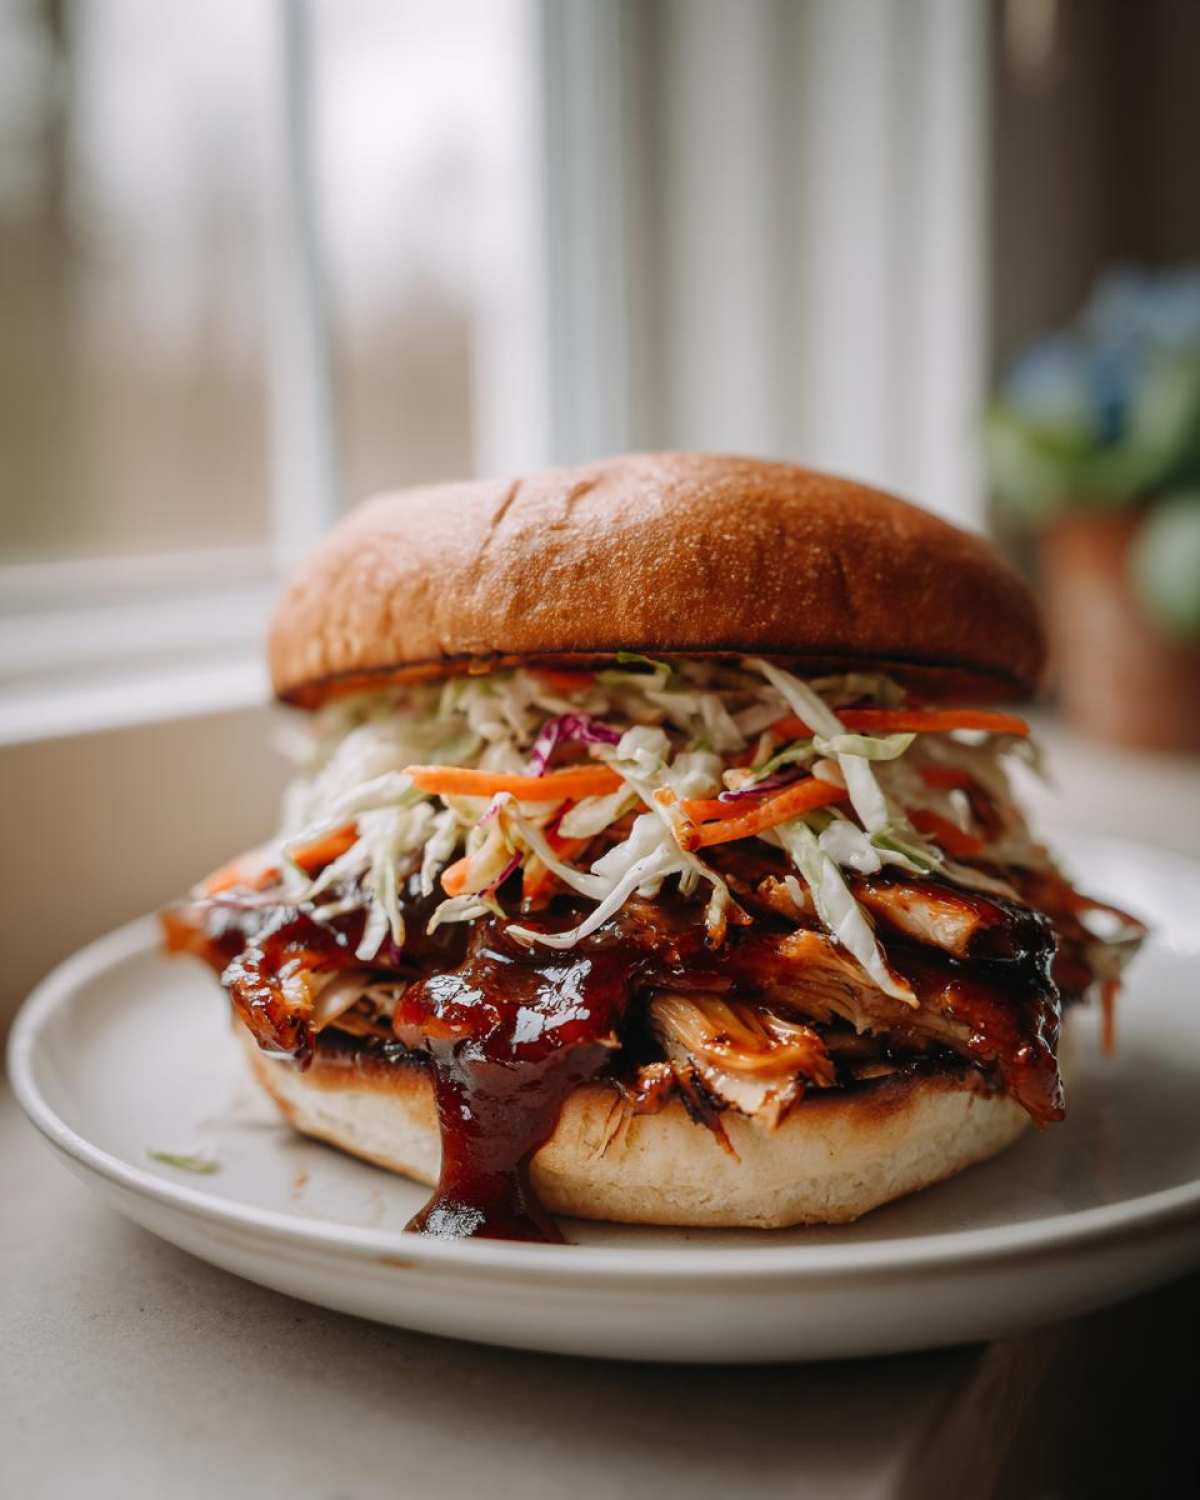
I absolutely love seeing your creations pop up on social media. When you post a picture of your magnificent, sauce-dripping sandwich masterpiece, tag us! It seriously makes my day to see the incredible food you all are making in your own kitchens. Plus, I often get great behind-the-scenes insights from your comments that help me fine-tune things even further.
If you have any lingering questions about substitution or technique after trying it out, please feel free to reach out through the contact page. Happy cooking, and enjoy soaking up every last drop of that sticky sauce!
PrintSticky BBQ Chicken Sandwich with Crunchy Slaw
Make a restaurant-quality BBQ chicken sandwich featuring juicy chicken coated in a thick, sticky glaze, balanced by a crisp, tangy slaw.
- Prep Time: 20 min
- Cook Time: 25 min
- Total Time: 45 min
- Yield: 4 servings
- Category: Main Course
- Method: Stovetop
- Cuisine: American
- Diet: Low Fat
Ingredients
- 2 large boneless, skinless chicken breasts (about 1.5 lbs total)
- 1 tablespoon olive oil
- Salt and black pepper to taste
- 4 brioche or potato buns
- 2 tablespoons butter, softened
- 1 cup ketchup
- 1/2 cup brown sugar, packed
- 1/4 cup apple cider vinegar
- 2 tablespoons Worcestershire sauce
- 1 tablespoon Dijon mustard
- 1 teaspoon smoked paprika
- 1/2 teaspoon garlic powder
- 1/4 teaspoon cayenne pepper
- 3 cups shredded green and purple cabbage mix
- 1 large carrot, shredded
- 1/4 cup finely chopped red onion
- 1/2 cup mayonnaise
- 2 tablespoons apple cider vinegar
- 1 tablespoon granulated sugar
- 1 teaspoon celery salt
- 1/2 teaspoon black pepper
Instructions
- Prepare the BBQ Sauce: Combine ketchup, brown sugar, apple cider vinegar, Worcestershire sauce, Dijon mustard, smoked paprika, garlic powder, and cayenne pepper in a small saucepan. Bring to a simmer over medium heat. Reduce heat to low and cook for 15 to 20 minutes, stirring occasionally, until the sauce thickens significantly and coats the back of a spoon. Remove from heat and set aside.
- Cook the Chicken: Season chicken breasts lightly with salt and pepper. Heat olive oil in a large skillet over medium-high heat. Cook chicken for 6 to 8 minutes per side, until internal temperature reaches 165°F and juices run clear. Remove chicken from the skillet and let rest for 5 minutes. Slice the chicken breasts against the grain into thick strips or shred them coarsely.
- Make the Crunchy Slaw: In a medium bowl, whisk together mayonnaise, apple cider vinegar, granulated sugar, celery salt, and pepper until smooth. Add the shredded cabbage mix, shredded carrot, and red onion. Toss well to coat. Refrigerate for at least 15 minutes to allow flavors to meld and the slaw to crisp up.
- Glaze the Chicken: Return the sliced or shredded chicken to the skillet over low heat. Pour about 3/4 cup of the prepared sticky BBQ sauce over the chicken. Toss gently until every piece is thoroughly coated and heated through, about 2 minutes. Keep the remaining sauce warm for serving.
- Assemble the Sandwiches: Lightly butter the cut sides of the buns. Toast the buns in a clean skillet or under the broiler until golden brown. Place the glazed chicken mixture on the bottom half of each bun. Top generously with the crunchy slaw. Place the top bun on the sandwich.
- Serve immediately with extra warm BBQ sauce on the side if desired.
Notes
- For extra sticky glaze, brush the chicken with a thin layer of sauce during the last 2 minutes of cooking, then toss in the remaining sauce off the heat.
- To keep the slaw crunchy, do not dress it until just before you plan to assemble the sandwiches.
- Use potato buns; their slight sweetness complements the smoky, sweet BBQ sauce well.
Nutrition
- Serving Size: 1 sandwich
- Calories: 550
- Sugar: 45g
- Sodium: 850mg
- Fat: 20g
- Saturated Fat: 5g
- Unsaturated Fat: 15g
- Trans Fat: 0g
- Carbohydrates: 55g
- Fiber: 3g
- Protein: 40g
- Cholesterol: 110mg