

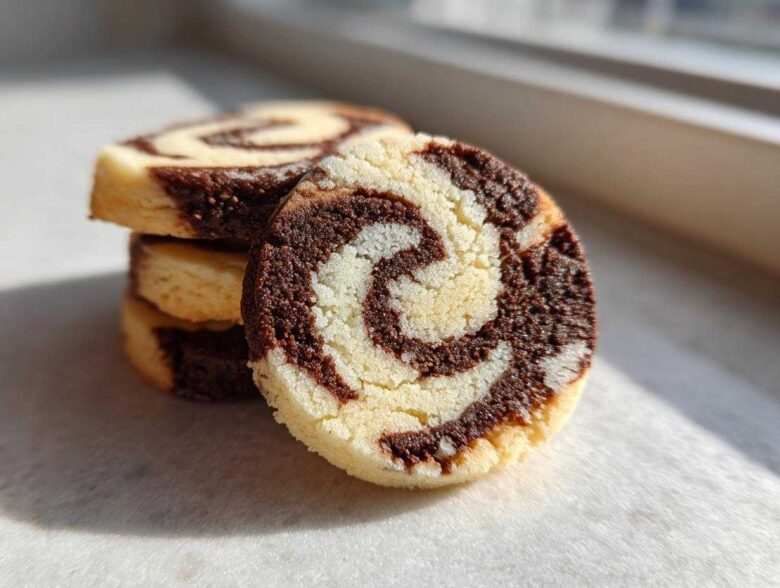
I just have to tell you about the cookies that make everyone stop and stare at holiday parties. We’re talking about baked goods where the visual impact is almost as good as the taste! Forget fussy layering; we are making the most stunning geometric spirals using the easiest method possible. My Chocolate Vanilla Swirl Pinwheel Cookies are the ultimate slice-and-bake dessert you’ve ever tried. You might think these mesmerizing patterns take forever, but trust me, making perfect pinwheel cookies is ridiculously simple once you master the roll. You’re going to love how these buttery shortbread swirls come together!
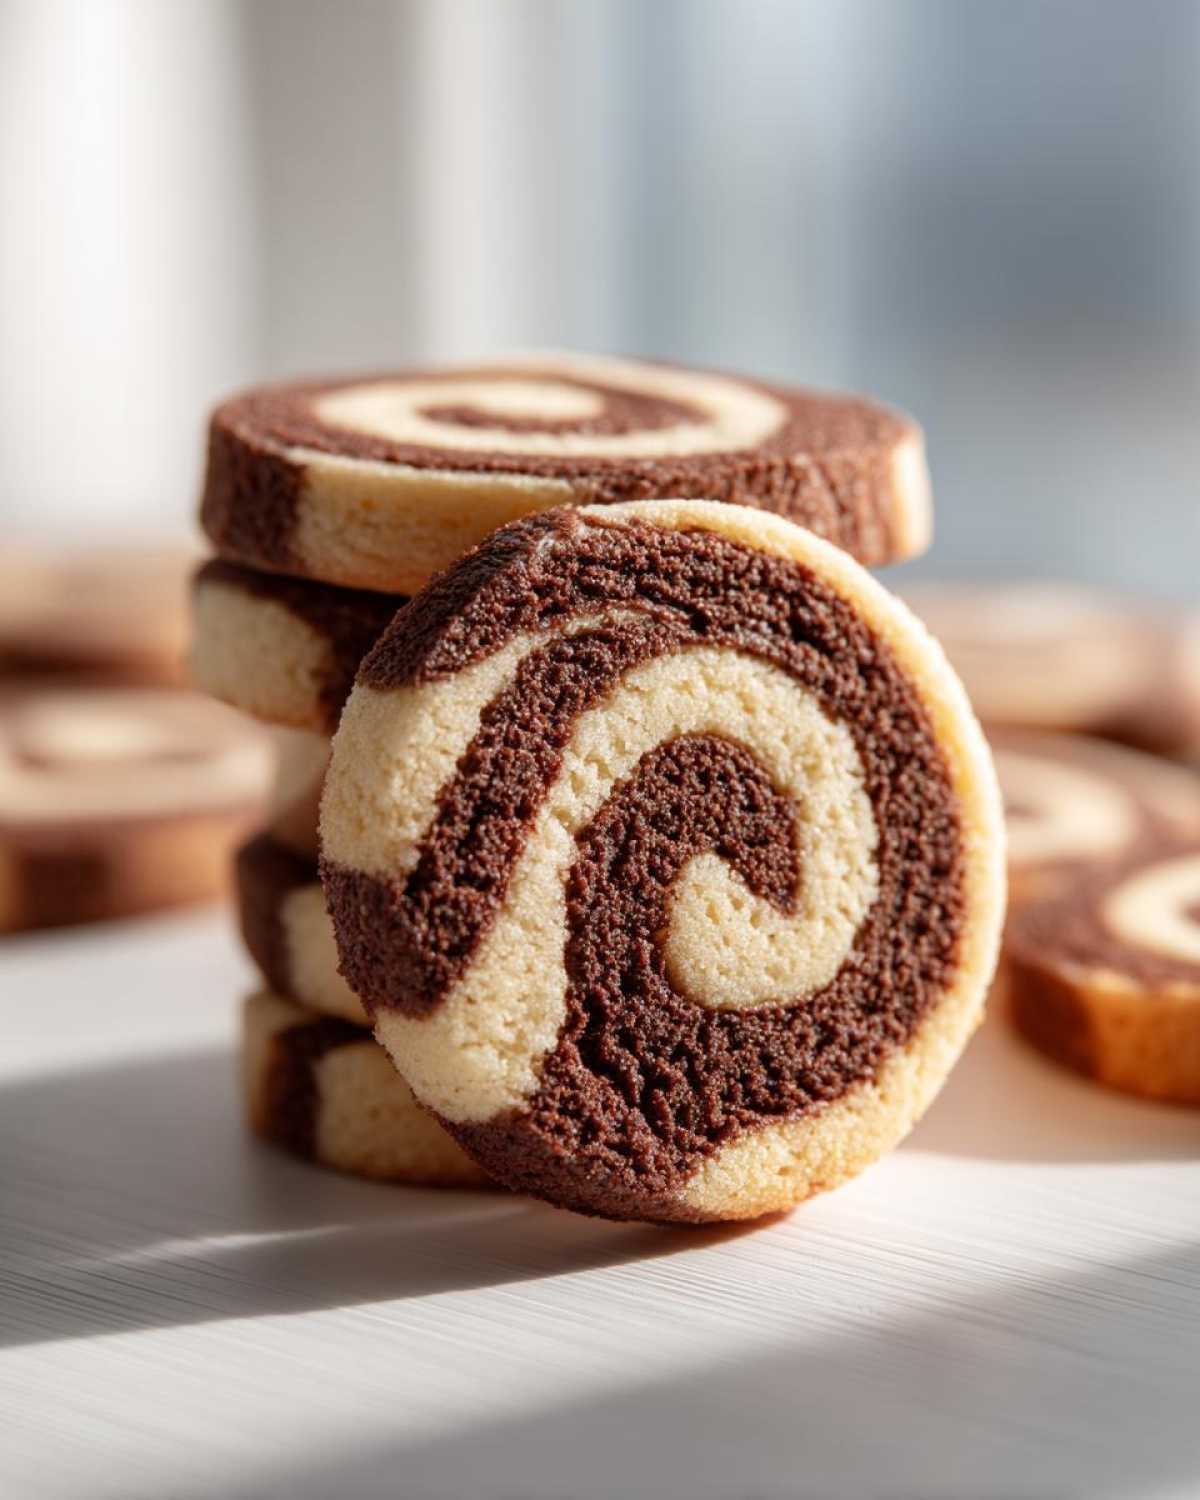
Why You Will Love These Chocolate Vanilla Pinwheel Cookies
Honestly, what’s not to love? These are completely fuss-free once the dough chills. The visual payoff you get from such simple steps is just amazing. They are the absolute definition of versatile baking. You get all the beauty of a complex cookie with none of the drama.
- They are the absolute definition of Slice and Bake Cookies—make ahead and enjoy!
- The alternating dark chocolate and vanilla dough creates a truly showstopping dessert cookie.
- The recipe is incredibly straightforward; anyone can master these beautiful spirals.
- These buttery pinwheels disappear instantly from any cookie exchange tray.
Gathering Ingredients for Your Pinwheel Cookies
Okay, let’s get organized. We need a few simple things to make this dough magic happen. You’ll need one full cup of unsalted butter, and please make sure it’s softened up nicely—we are creaming it, not melting it! Grab the granulated sugar, eggs, vanilla, and the flour too. Don’t forget the baking powder and salt for balance. Then, for our two distinct doughs, we need unsweetened cocoa powder and just a splash of milk for the chocolate side.
Ingredient Notes and Substitutions for Perfect Pinwheel Cookies
Listen, for these buttery pinwheels to succeed, ingredient quality matters. The butter MUST be truly softened so it creams beautifully; cold butter equals lumpy dough, and we don’t want that! Always use unsweetened cocoa powder here; the sweetened stuff messes with the sugar ratios big time. And honestly, splurge a little on good vanilla extract—it really makes the vanilla part of the swirl sing.
Step-by-Step Instructions for Slice and Bake Pinwheel Cookies
This is where the real fun starts! Since these are slice and bake cookies, we need to create two distinct doughs and then marry them perfectly. Don’t rush through the creaming step we talked about earlier—that sets up the texture perfectly. Once the dough bases are mixed, we move right into flavoring and then, the most important part, the chilling phase. Good chilling equals gorgeous, clean spirals in your final pinwheel cookies!
Creating the Two Doughs for Your Spiral Cookie Dough
First, take that perfectly mixed base dough and split it right down the middle. One half stays vanilla—that’s easy! For the other half, you’ll gently mix in two tablespoons of cocoa powder and that single tablespoon of milk. Mix it just until you see that gorgeous, uniform chocolate look. Don’t overwork the chocolate side, or it gets tough! Then, wrap each half separately. It’s crucial they chill now so they roll out without sticking to each other too much later on.
The Rolling and Chilling Process for Best Pinwheel Cookies
This takes a little bit of geometry, but you can do it! On a floured surface, roll your vanilla dough into a rectangle, aiming for about a quarter-inch thick. Don’t panic if it looks a bit messy around the edges. Repeat that with your chocolate dough. Now, carefully place the chocolate sheet right on top of the vanilla sheet and gently press them together—smoosh them lightly so they bond. Starting from one long side, roll that whole thing up as tightly as you can into a log, just like rolling up a rug. Wrap that log tightly in plastic wrap and put it in the fridge for at least two hours. Seriously, don’t cheat this step; that chill time solidifies the whole thing for perfect slicing!
When it’s time to bake, remember to preheat that oven to 375 degrees F (190 degrees C). Line your sheets up too! Grab your sharpest, thinnest knife when you slice the log into rounds—that’s our secret weapon for clean cuts. Aim for 1/4-inch thickness for each slice, and give them about two inches of space on the baking sheet so they have room to breathe.
Baking Tips for Showstopping Dessert Cookies
Getting those spirals perfect in the oven is just as important as getting them rolled correctly! Make sure your oven is fully preheated to 375 degrees F (190 degrees C). Line those baking sheets with parchment paper—it’s the easiest way to guarantee no sticking. These cookies bake fast; watch them closely! They only need 8 to 10 minutes. You want the edges to just barely look golden brown. Pull them out before they look fully done in the center!
Once they come out, don’t disturb them for about five minutes. They’re still setting up! If you try to move these tender Buttery Pinwheels right away, they might slump or crack. After 5 minutes on the warm sheet, gently move them over to a wire rack to cool completely. That slight cooling period is what locks in their tender, melt-in-your-mouth texture!
Making Ahead and Freezing Your Pinwheel Cookies Dough
One of the absolute best things about these pinwheel cookies is that they are designed for make-ahead holiday baking! Seriously, they are fantastic Freezable Cookie Dough. You have two options, and both save you serious time later.
You can definitely freeze the whole wrapped log right after you finish rolling it up tight. When you’re ready to bake, just take it out and let it sit on the counter for maybe 15 minutes so you can slice it. Or—and this is my preferred method for quick holiday mornings—slice the frozen log into rounds first!
Lay those sliced rounds in a single layer on a baking sheet, flash freeze them until solid, and then toss them into a big freezer bag. When you bake from frozen slices, just remember to add about 2 or 3 extra minutes to the baking time we discussed. Easy peasy! It’s like having built-in dessert security for when unexpected guests show up. You can check out my tips for whipping up other freezable recipes too!
Variations on Classic Roll Out Cookies: Flavor Twists
Now that you’ve mastered the basic Chocolate Vanilla Swirl, you absolutely have to play with the base dough. Since these cookies are so popular around Christmas, I always have a batch ready to turn into festive treats! It’s so easy to swap out elements. If you want amazing Christmas Swirl Cookies, ditch the cocoa powder in one half and instead mix in about a teaspoon of peppermint extract and a drop or two of red food coloring.
For something totally different, like a savory twist—though I usually stick to sweet for these—you could check out how they handle a savory dough over at jalapeno popper pinwheels. But for our sweet swirls, that bright red and white combo is totally showstopping on a holiday cookie tray. For other times of the year and truly Colorful Swirled Cookies, you can divide the plain dough into two portions and color them blue and yellow for bright spirals, or even pink and green. Remember, the key to success is making sure the flavor extracts—like peppermint or lemon—are measured carefully so they don’t affect the dough’s texture too much. This base dough is absolutely perfect for experimentation!
Serving Suggestions for Your Buttery Pinwheels
These beautiful Buttery Pinwheels look fancy, but they go perfectly with the simplest drinks! I always serve them alongside a big glass of cold milk, which really lets that vanilla and chocolate shine through. If you’re doing a big dessert spread, these are an absolute must for your Holiday Cookie Tray Ideas; their defined pattern really stands out next to plain drop cookies. They’re also phenomenal with a strong cup of black coffee!
Frequently Asked Questions About Pinwheel Cookies
Of course, sometimes you get stuck right in the middle of baking! Here are the things I hear most often about making incredible pinwheel cookies. Don’t worry if you run into any little hiccups; we can usually fix them right up!
Why are my swirls messy or blurry instead of sharp?
This happens when you don’t chill the dough long enough before slicing, or if you try using a dull knife! If the dough is even slightly soft, the chocolate and vanilla sides smear into each other when you cut. For super sharp designs, you need that dough as firm as possible—that’s why going for that 3-hour chill or even a quick 30-minute freeze helps!
Can I skip the chilling time altogether? I want cookies now!
Oh honey, I know the feeling, but please don’t skip it! Seriously, skipping the chill is the number one reason people end up with flat, undefined cookies that look more like pancakes than spirals. The chilling time allows the butter to solidify, which keeps the cookie shape perfect when it hits the heat of the oven. It’s worth the wait, trust me!
What is the absolute best way to store finished pinwheel cookies?
Because these are shortbread-based slice and bake cookies, they keep really well. Store the completely cooled cookies in an airtight container at room temperature. They actually taste better on Day Two! If you need to keep them for a super long time, you can freeze the baked cookies for up to three months, but keep them in a very well-sealed container so they don’t pick up any weird freezer smells. You can read more about our site on our About Us page!
Can I use this base dough for other shapes?
Yes! Since the dough is sturdy, you can absolutely use it for other things. You can press it into a square and dust it with powdered sugar before baking for a checkerboard look, or you can use cookie cutters, but you’ll have to chill the cutouts for at least 30 minutes before baking so they don’t melt into puddles.
Estimated Nutritional Data for Chocolate Vanilla Pinwheel Cookies
Now, I know you bakers out there love to see the numbers, but keep in mind these are just estimates based on the ingredients I used here. Because we use a generous amount of butter in these Buttery Pinwheels, they aren’t exactly diet food, but wow are they worth it!
- Serving Size: 1 cookie
- Calories: 120
- Fat: 6g
- Carbohydrates: 15g
- Protein: 1.5g
- Sugar: 8g
This data is based on serving size information from my kitchen; for precise details, reference packaging. You can always check out our full disclaimer for more information on these fun estimates!
PrintChocolate Vanilla Swirl Pinwheel Cookies

Make easy slice-and-bake pinwheel cookies featuring contrasting chocolate and vanilla dough for a striking spiral pattern.
- Prep Time: 30 min
- Cook Time: 10 min
- Total Time: 160 min
- Yield: 3 dozen
- Category: Dessert
- Method: Baking
- Cuisine: American
- Diet: Vegetarian
Ingredients
- 1 cup unsalted butter, softened
- 1 cup granulated sugar
- 2 large eggs
- 1 teaspoon vanilla extract
- 3 cups all-purpose flour
- 1 teaspoon baking powder
- 1/2 teaspoon salt
- 2 tablespoons unsweetened cocoa powder
- 1 tablespoon milk
Instructions
- Beat the butter and sugar together until light and fluffy. Add the eggs one at a time, beating well after each addition. Stir in the vanilla extract.
- In a separate bowl, whisk together the flour, baking powder, and salt. Gradually add the dry ingredients to the wet ingredients, mixing until just combined.
- Divide the dough in half. Mix the cocoa powder and milk into one half until fully incorporated, creating the chocolate dough. Leave the other half plain for the vanilla dough.
- Wrap each dough half separately in plastic wrap and chill in the refrigerator for at least 1 hour.
- On a lightly floured surface, roll the vanilla dough into a rectangle approximately 1/4 inch thick. Repeat with the chocolate dough.
- Place the chocolate rectangle directly on top of the vanilla rectangle. Press them together gently.
- Starting from one long edge, tightly roll the dough into a log. Wrap the log tightly in plastic wrap and chill for at least 2 hours, or until firm enough to slice.
- Preheat your oven to 375 degrees F (190 degrees C). Line baking sheets with parchment paper.
- Remove the dough log from the refrigerator and slice it into 1/4-inch thick rounds. Place the rounds about 2 inches apart on the prepared baking sheets.
- Bake for 8 to 10 minutes, or until the edges are lightly golden. Do not overbake.
- Let the cookies cool on the baking sheet for 5 minutes before transferring them to a wire rack to cool completely.
Notes
- For sharper swirls, chill the dough log for 3 hours or freeze it for 30 minutes before slicing.
- You can freeze the sliced cookies on a baking sheet before baking; transfer them to a freezer bag and bake directly from frozen, adding 2-3 minutes to the baking time.
- To achieve a cleaner cut, use a sharp, thin knife when slicing the chilled log.
Nutrition
- Serving Size: 1 cookie
- Calories: 120
- Sugar: 8
- Sodium: 65
- Fat: 6
- Saturated Fat: 3.5
- Unsaturated Fat: 2.5
- Trans Fat: 0
- Carbohydrates: 15
- Fiber: 0.5
- Protein: 1.5
- Cholesterol: 30