

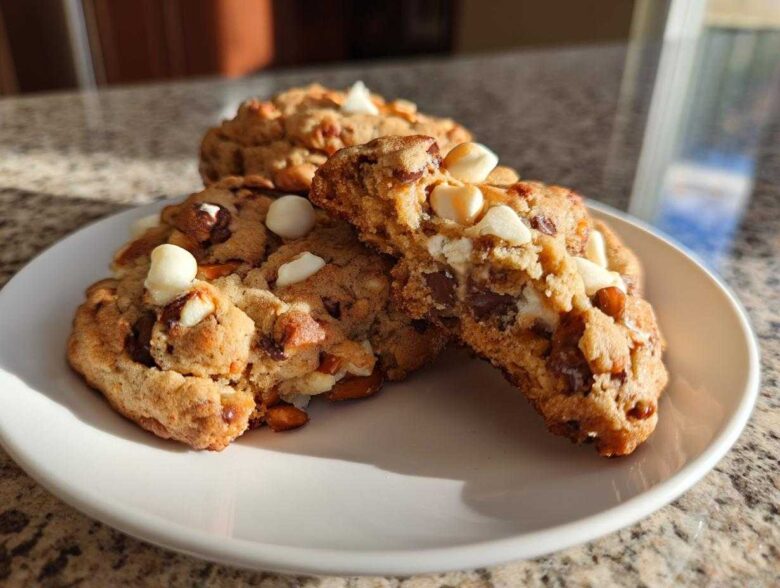
Forget cookies that are good—we are making cookies that are absolutely epic! If you love the idea of throwing everything but the actual kitchen sink into a batch of dough, you are in the right place. I spent way too many weekends tinkering with ratios to figure out the perfect blend of sweet, salty, chewy, and crispy. Trust me when I say that this kitchen sink cookies recipe is the one you’ll keep forever. It’s so simple to whip up, especially when you need last-minute treats, and the chewy center combined with those salty pretzel bits is just unforgettable. Whether it’s for Christmas cookie platters or just a Tuesday night craving, these loaded cookies always disappear first. I’m finally sharing the secrets that made these my absolute favorite batch ever. Grab your butter and let’s get rolling!
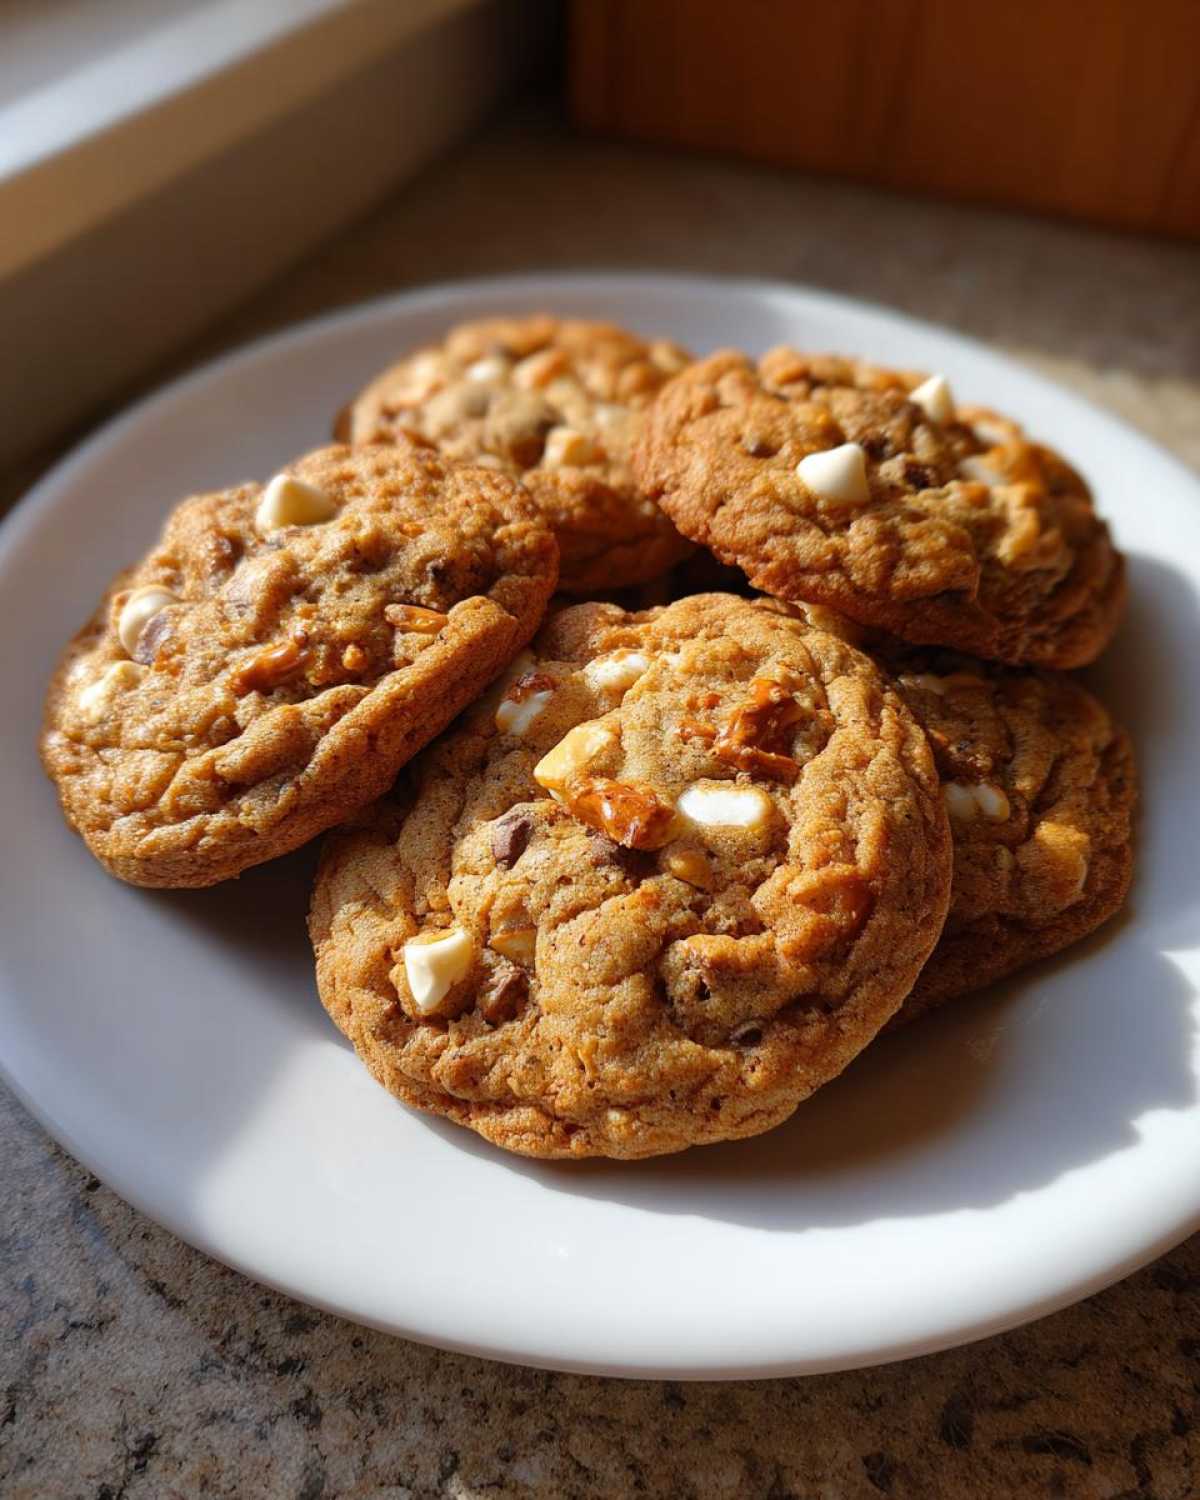
For more cookie inspiration, you should definitely check out my recipe for brown butter chocolate chip cookies—it adds such a nutty depth!
Why You Will Love These Ultimate Kitchen Sink Cookies
Honestly, these aren’t just cookies; they are a whole mood. I keep coming back to this recipe because it solves every cookie craving I have at once. Here’s the scoop on why you absolutely need to try my batch:
- They hit that perfect sweet and salty balance. That crunch from the pretzels mixed with the white chocolate? Seriously addictive.
- This is the definition of an easy kitchen sink cookies recipe. You don’t need fancy techniques, just a good mixer and a willingness to throw a lot of good stuff in there.
- We guaranteed a chewy kitchen sink cookies center with just the right amount of crisp on the outside. That 5-minute rest on the hot pan is crucial for this!
- They are ultra-customizable, which is why they work year-round. If you prefer peanut butter chips over M&M’s, go for it! It’s your cookie canvas.
- They are an essential part of my holiday baking routine now. They look so festive piled high on a platter, making them one of my best christmas cookie ideas.
If you’ve been searching for a no fail cookie recipe that tastes like an explosion of your favorite candy aisle finds, this is it. You won’t regret making this batch!
Essential Ingredients for Perfect Kitchen Sink Cookies
Okay, listen up! Because these are kitchen sink cookies, you’re going to see a lot of ingredients, but don’t panic! The magic of this loaded cookies recipe relies on having the right base dough before we toss in all the fun stuff. I’ve listed exactly what you need below. Also, a quick note—since we are using brown sugar, make sure it’s packed tight in your measuring cup for that deep, rich flavor that makes them so amazing. If you want to dive deep into how browning butter changes the game, you might want to check out my brown butter chocolate chip cookies post, but for these, softened butter straight from the fridge works perfectly well!
- 1 cup (2 sticks) unsalted butter, softened
- 3/4 cup granulated sugar
- 3/4 cup packed light brown sugar
- 2 large eggs
- 1 tablespoon vanilla extract
- 2 1/4 cups all-purpose flour
- 1 teaspoon baking soda
- 1/2 teaspoon salt
- 1 cup semi-sweet chocolate chips
- 1 cup white chocolate chips
- 1 cup crushed pretzels
- 1/2 cup M&M’s candies (or holiday colors if desired)
- 1/2 cup chopped nuts (optional)
Equipment Needed for Your Kitchen Sink Cookies Recipe
You don’t need a professional setup to make the best kitchen sink cookies, thank goodness! I usually just pull out my trusty stand mixer, but if you’re mixing by hand, just make sure you have a sturdy wooden spoon or a heavy whisk for the creaming stage—your arm will get a workout, but it’s worth it.
Here is the short list of tools I always grab before I start the mixing process for these loaded cookies recipe:
- Large mixing bowls (one for wet, one for dry, though you can combine them later!)
- Electric mixer (handheld or stand mixer) or a strong arm!
- Measuring cups and spoons
- Rubber spatula for scraping down the sides
- Baking sheets
- Parchment paper or silicone baking mats (I strongly prefer parchment for easy cleanup!)
- Cookie scoop or two spoons for portioning the dough
- Wire cooling rack
That’s it! Having these items ready means we can move straight into making the dough without having to stop and hunt for something mid-recipe. Quick prep means faster cookies, right?
How to Make Kitchen Sink Cookies Step-by-Step
Getting these ultimate kitchen sink cookies assembled is fun because it feels like you’re just piling goodness into a bowl! We are going to use the standard creaming method, which is vital for that chewy texture we are chasing. If you’ve ever made my one-bowl fudgy brownies, you know how much I value a smooth initial stage. Let’s walk through these crucial steps together so you get it perfect every time.
Creaming Fats and Sugars
First thing, get your oven preheated to 375 degrees Fahrenheit and line those sheets—we want to move fast once the dough is ready! Now, grab your softened butter, the granulated sugar, and the brown sugar. I beat these together until the mixture is genuinely light and fluffy. I mean it! When it looks paler and cloud-like, you are ready for the eggs. Beat them in one at a time, followed by that beautiful vanilla extract. This process traps all the air we need for those perfect, slightly puffy centers.
Combining Wet and Dry Mixtures for Your Kitchen Sink Cookies
In a separate bowl, quickly whisk your flour, baking soda, and salt together. This keeps everything evenly distributed. Now, add the dry stuff to the wet stuff gradually, mixing on low speed. Do not overmix! Seriously, stop mixing as soon as you can’t see any more streaks of white flour. Overmixing develops the gluten, and that’s how you get tough cookies instead of our intended soft, chewy ones.
Once it’s just combined, grab all those wonderful mix-ins—the semi-sweet chips, white chips, crushed pretzels, and M&M’s! Gently fold them all in with your spatula until they are evenly spread throughout the dough. You should have a heavily studded, glorious mess of cookie dough now!
Baking and Cooling for Chewy Kitchen Sink Cookies
Scoop rounded tablespoons of dough onto your prepared sheets, giving them about two inches of space to spread out. Bake these gems for 9 to 11 minutes. You’re looking for the edges to turn just slightly golden brown, but the centers should still look a little soft and underdone when you pull them out. That’s the secret to the chewiness! Leave them sitting on that hot baking sheet for five full minutes to finish setting up. Then, carefully transfer them over to a wire rack to cool completely. Don’t skip that initial rest, or they might crumble on you!
Expert Tips for the Best Kitchen Sink Cookies
When you’re trying to nail that perfect texture in a cookie this loaded up, sometimes you need a little insider knowledge. I’ve made a ton of batches of these kitchen sink cookies recipe, and over time, I’ve picked up small tricks that make the difference between a good cookie and an absolutely legendary one. These aren’t complicated; they just require a little patience so you can ensure this is a no fail cookie recipe for you!
First up: chilling! I know we all want cookies immediately, but if you find your cookies are spreading too thin—especially if your kitchen is warm or you are using softer butter—you absolutely must chill the dough. Just plop that mixed-up dough (after you’ve folded in all those chips and pretzels) into the fridge for about 30 minutes. It firms up the butter again, which means the cookies hold their shape better in the oven. This results in a thicker, doughier cookie.
To really enhance that chewy factor, remember what I said about pulling them out slightly early. They should still look gooey in the middle. That residual heat on the baking sheet is doing crucial work; it’s setting those edges while steaming the inside to perfection. If you like a deeper flavor profile overall, you might want to look into how I use browned butter sometime in my brown butter chocolate chip cookies—it adds such an amazing, toasty undertone that pairs wonderfully with the salty pretzels.
Also, don’t forget to rough-chop anything that is too big! If you use whole pecans or huge chunks of toffee, they might fall out or cause the cookie to bake unevenly. I usually give my nuts and any large candy pieces a quick chop with a knife before folding them in. This ensures every single bite gets a little bit of everything, which is the whole point of these loaded cookies recipe, isn’t it?
Customizable Cookie Recipe: Kitchen Sink Cookie Mix-Ins
This is my favorite part about making these kitchen sink cookies—they are designed to use up whatever incredible things you have hiding in your candy cabinet! If you don’t have exactly what I listed, don’t worry for a second. That’s why we call this the customizable cookie recipe; it’s really just a perfect base dough waiting for your personal touch.
When I’m deciding what to toss in, I always try to balance textures and flavors. You need something crunchy, something sweet, and ideally, something just a little salty unless you are going for a pure dessert blast. Always try to keep your total addition volume—the chips, nuts, candies, etc.—around 3 to 3.5 cups total, so you don’t overwhelm the dough.
Here are some swaps and additions that I have successfully tested out over the years:
- For Saltiness Upgrade: Instead of plain pretzels—though pretzels are king—try using crushed potato chips (yes, seriously!) or even crushed shortbread cookies for a buttery crunch.
- Chip Variations: If semi-sweet is too strong, swap half for milk chocolate. Dark chocolate lovers, you can use those! Butterscotch chips or peanut butter chips are fantastic here if you want that savory-sweet combination.
- Something Chewy or Fruity: If you need more chew, fold in some chopped dried cherries or cranberries. They soak up a little dough flavor and become delightfully soft when baked.
- Extra Sparkle: If you are making these for a birthday or holiday, use festive sprinkles! I love rainbow nonpareils or even seasonally colored M&M’s mixed in. Just remember to add them in during the final fold so they don’t bleed their color into the whole dough batch.
- Caramel/Toffee Boost: Chopped up toffee bits—the good squares—are incredible in these everything cookies recipe. They melt slightly and give you these wonderful little pockets of chewy caramel.
The beauty of this recipe is that you are pairing the classic vanilla and brown sugar base with whatever grabs your attention. Don’t be afraid to experiment! That’s how we ended up loving the pretzel in the first place, I bet!
Storing Your Homemade Kitchen Sink Cookies
The hardest part about making these kitchen sink cookies is successfully leaving a few left over, but if you manage it, you need to know how to store them! These cookies are great because, unlike those airy sugar cookies, they actually taste *better* the next day once the flavors have settled in. Because of all those fats and sugars we added, they stay wonderfully soft in the right environment.
You should store your cooled cookies in a completely airtight container at room temperature. Stay away from the fridge! The fridge tends to dry cookies out faster, and we worked so hard to get that chewy center, remember? If stored correctly, they should stay soft and delicious for a good five to seven days. Just stack them carefully—maybe put parchment squares between layers if you’ve made giant ones so they don’t start sticking together.
Now, if you pull one out on day four and it seems just a tiny bit stiff, don’t panic and don’t throw it out! Reheating them is the simplest fix in the world to bring back that gooey, just-baked experience. Microwave one cookie for about 10 to 15 seconds. That short blast warms up the chocolate chips and softens the butter again, making it taste like you just pulled it out of the oven. Seriously, it turns them back into heaven instantly. They freeze beautifully too, wrapped tightly in plastic wrap, though I doubt any of my batches ever make it past day four!
Frequently Asked Questions About Kitchen Sink Cookies
I know when you look at a recipe jam-packed with delicious things, you end up with a million little worries wondering if you messed up the one thing that matters most! I’ve gathered some of the questions I usually get asked about trying how to make kitchen sink cookies for the first time. Stick around, and I’ll make sure you nail that perfect texture.
Can I use different types of flour in my kitchen sink cookies recipe?
That’s a great question, especially if you have dietary needs! The 2 1/4 cups of all-purpose flour is really fundamental to holding all those heavy mix-ins together without becoming dense or crumbly. If you are doing a general swap, I suggest leaning on a good quality 1-to-1 gluten-free baking blend. That way, you keep the structure, which is key when you have salty pretzels and chocolate chips fighting for real estate in the dough! If you try substituting things like almond flour or oat flour, you’ll probably end up with cookies that spread way too much and lose that wonderful, thick center.
What makes these the ultimate kitchen sink cookies?
For me, what elevates these from just ‘a lot of stuff mixed together’ to the *ultimate* batch comes down to texture balance. See, most loaded cookie recipes end up being too soft or too crunchy. We have specifically engineered this one to have that soft, slightly underbaked-tasting center where all the chocolate melts beautifully. Then, you get that sharp, satisfying crunch and saltiness from the pretzels mixed right in. It’s that perfect marriage of sweet and salty cookies that makes you take another bite before you even realize you did it! It’s about high quality, diverse mix-ins paired with the perfect creaming method.
If you’ve got questions about finding more tips or just want to know more about keeping this site running, you can always check out the About Us page!
Nutritional Estimates for This Loaded Cookies Recipe
Now, I know what you might be thinking. When you load up a cookie with this much goodness—chocolate, pretzels, sugar, butter—it isn’t exactly diet food! And you’d be right! These kitchen sink cookies are definitely an indulgence, but knowing the general numbers is always helpful, right? I always say if you’re going to have a treat, make it count!
Keep in mind that because this is such a customizable cookie recipe—one person might skip the nuts and add extra M&M’s, while another uses peanut butter chips instead of white chocolate—these figures are just estimates based on the exact recipe I listed above. Your mileage *will* vary, especially depending on the brands of chocolate and pretzel you use, but this gives you a good ballpark for one cookie.
Here is the estimated breakdown for one single cookie, assuming the recipe yields about 3 dozen:
- Serving Size: 1 cookie
- Calories: 180
- Sugar: 15g
- Sodium: 110mg
- Fat: 10g
- Saturated Fat: 6g
- Carbohydrates: 22g
- Protein: 2g
If you’re tracking things closely, remember that the sugar content is heavily influenced by the brown sugar, and the sodium will jump up a bit if you use heavily salted pretzels. But hey, everything in moderation, including moderation itself! For more details on how these nutrition figures are calculated and what they mean overall, you can always take a look at my general site disclaimer page. Enjoy these sweet and salty cookies guilt-free!
PrintUltimate Kitchen Sink Cookies

Make these easy, customizable cookies packed with sweet and salty mix-ins for a chewy texture.
- Prep Time: 15 min
- Cook Time: 11 min
- Total Time: 26 min
- Yield: About 3 dozen
- Category: Dessert
- Method: Baking
- Cuisine: American
- Diet: Vegetarian
Ingredients
- 1 cup (2 sticks) unsalted butter, softened
- 3/4 cup granulated sugar
- 3/4 cup packed light brown sugar
- 2 large eggs
- 1 tablespoon vanilla extract
- 2 1/4 cups all-purpose flour
- 1 teaspoon baking soda
- 1/2 teaspoon salt
- 1 cup semi-sweet chocolate chips
- 1 cup white chocolate chips
- 1 cup crushed pretzels
- 1/2 cup M&M’s candies (or holiday colors if desired)
- 1/2 cup chopped nuts (optional)
Instructions
- Preheat your oven to 375 degrees Fahrenheit. Line baking sheets with parchment paper.
- In a large bowl, cream together the softened butter, granulated sugar, and brown sugar until light and fluffy.
- Beat in the eggs one at a time, mixing well after each addition. Stir in the vanilla extract.
- In a separate bowl, whisk together the flour, baking soda, and salt.
- Gradually add the dry ingredients to the wet ingredients, mixing on low speed until just combined. Do not overmix.
- Fold in all the mix-ins: semi-sweet chips, white chips, crushed pretzels, and M&M’s.
- Drop rounded tablespoons of dough onto the prepared baking sheets, spacing them about 2 inches apart.
- Bake for 9 to 11 minutes, or until the edges are golden brown and the centers look slightly soft.
- Let the cookies cool on the baking sheet for 5 minutes before transferring them to a wire rack to cool completely.
Notes
- For chewier centers, slightly underbake the cookies.
- You can substitute any mix-ins you prefer, such as peanut butter chips, toffee bits, or different colored sprinkles.
- Chill the dough for 30 minutes before scooping for thicker cookies.
Nutrition
- Serving Size: 1 cookie
- Calories: 180
- Sugar: 15g
- Sodium: 110mg
- Fat: 10g
- Saturated Fat: 6g
- Unsaturated Fat: 4g
- Trans Fat: 0g
- Carbohydrates: 22g
- Fiber: 1g
- Protein: 2g
- Cholesterol: 30mg