

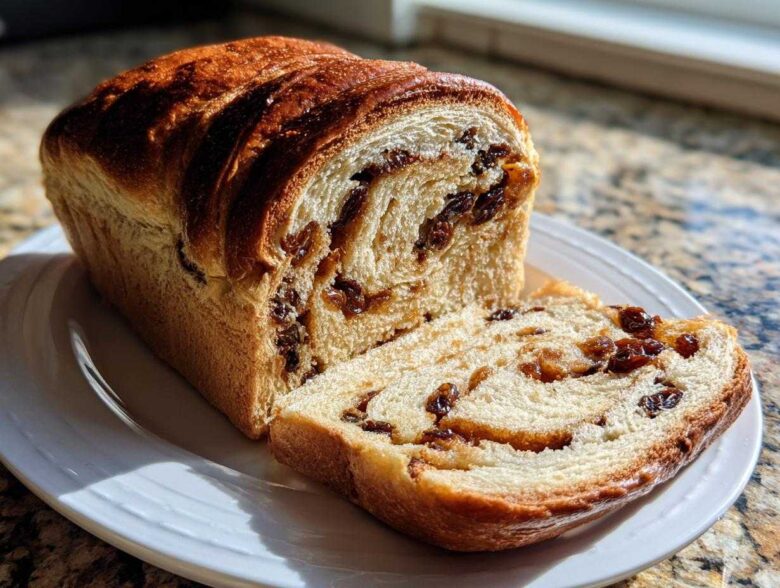
Oh, the absolute *smell* that fills my kitchen when a loaf of this is baking! Seriously, it’s therapy. Forget those dry, store-bought slices; I’m handing you the keys to the softest, fluffiest homemade raisin bread recipe you will ever try. It took me ages to nail the perfect balance of sweet dough and plump, juicy fruit, but trust me, we nailed it. Mastering this yeast dough ensures every bite of this homemade raisin bread screams comfort. It’s sweet, it’s perfectly spiced, and it’s unbelievably tender. Get ready for your new favorite breakfast staple!
Why This Homemade Raisin Bread Recipe Stands Out
When you’re making bread from scratch, you want payoff, right? This recipe delivers that bakery-style result right on your countertop. We’re not settling for stiff slices here! I absolutely guarantee this will become your go-to for any sweet breakfast bread craving.
- It stays wonderfully soft for days—if you have any left, that is!
- That golden, buttery crumb is just irresistible when toasted.
- The cinnamon swirl is intensely flavorful without being gritty or clumpy.
Achieving Truly Soft Raisin Bread Texture
The secret to that marshmallowy texture isn’t magic; it’s the liquids! We skip water and use a mix of warm milk and two full room-temperature eggs. That extra fat and protein keeps the dough tender during the whole rising and baking process. A proper 8-minute knead is key too—it develops the gluten enough to hold the air, but not so much that it gets tough.
The Perfect Cinnamon Swirl in Your Raisin Bread
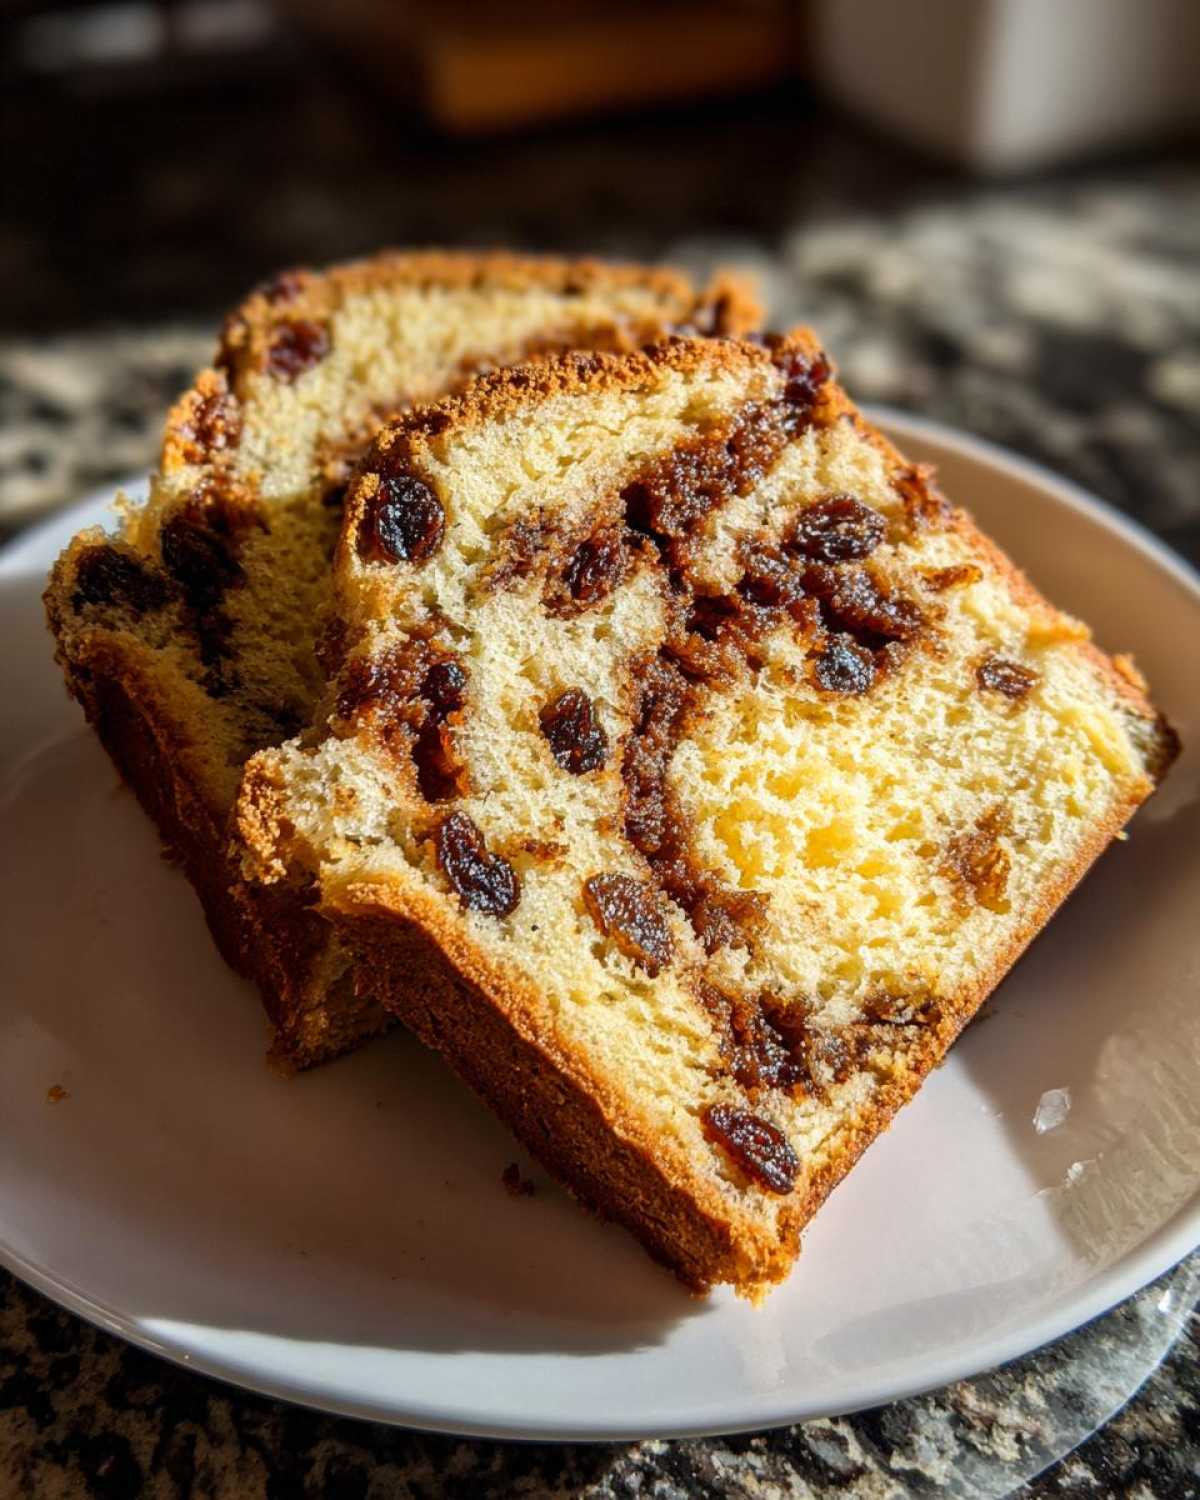
I use dark brown sugar mixed right into the filling alongside the cinnamon. That molasses in the brown sugar melts beautifully when it bakes, creating this gooey, perfectly spiced ribbon that runs right through the middle of the loaf. Honestly, it’s what makes this loaf addictive!
Gathering Ingredients for Your Soft Raisin Bread
We need a few things to get this gorgeous loaf off the ground, but don’t let the list scare you! Most of this is standard pantry fare. Remember, quality matters here if you want that soft, buttery result. Set your butter and eggs out now so they can come to room temperature—that makes a real difference later on. If you want more tips on flavor pairings, check out my recipe for apple cinnamon muffins!
- Warm Milk: This has to be between 105 and 115°F. Too cool and the yeast won’t wake up; too hot and you kill it dead.
- Yeast: We use active dry yeast here, blooming it in the warm milk and a tiny bit of the sugar.
- Butter: Make sure it’s softened, not melted! We need structure when we cream it.
- Flour: Four cups of all-purpose flour is the baseline, but keep extra nearby just in case.
- Raisins, Cinnamon, and Brown Sugar: These become our glorious filling!
Ingredient Notes and Substitutions for Raisin Bread
When it comes to raisins, I always reach for Thompson seedless myself. They plump up perfectly once they go into the wet dough. Some people like to plump them first in hot water for five minutes—you can totally do that if your raisins seem a little dry! Also, if you can find bread flour, you are welcome to swap out about half the all-purpose load for it. It gives it a slightly chewier, more substantial bite!
Step-by-Step Instructions: How to Make Raisin Bread from Scratch
Alright, deep breath—we’re making yeast bread! It looks intimidating, but honestly, this is where the fun starts. We activate the yeast first; give it that warm milk and sugar bath and let it get foamy. That means your yeast is alive and ready to make your dough rise beautifully. While that’s happening, we get the butter and sugar creamed really well until it looks pale and fluffy—that traps the air we need for a soft texture!
Once the yeast wakes up, we mix everything together and knead. You want that smooth, elastic dough, which typically takes about 8 minutes by hand. If you’re using a stand mixer, keep an eye on it so you don’t overwork it! After kneading, we work on that gorgeous filling. I know you love recipes with a little kick, so check out my cinnamon maple whiskey sour if you need a break from baking!
Preparing the Dough and Cinnamon Raisin Filling for Your Raisin Bread
Once your dough is kneaded smooth, it’s time to roll it out into a big rectangle. You want it thin enough so you get lots of layers of filling but thick enough so it doesn’t tear. Mix up your raisins, cinnamon, and brown sugar until it looks like damp sand. Now, spread that mixture edge-to-edge across your dough. Roll it up tight—like you mean it! Pinch that final seam really well so the filling stays locked inside during the rise and bake. A tight roll equals defined swirls later on, I promise.
Proofing and Baking Your Fluffy Raisin Bread Loaf
Grease up a 9×5 inch loaf pan really well, then gently place your rolled dough inside. Cover that pan loosely; you don’t want a tight lid stopping the dough from doubling. Let it rest in a warm spot for an hour, maybe an hour and a half. Preheat your oven to 375°F. When it looks beautifully puffy, slide that loaf in! Bake it for about 35 to 40 minutes. The best test is actually using a meat thermometer—a perfect bake is 200°F inside. Pull it out right away so your amazing **raisin bread** doesn’t steam and get soggy on the bottom!
Tips for the Best Homemade Raisin Bread Success
Baking bread is a little bit of science and a whole lot of feel, so let me save you from a couple of rookie mistakes I made way back when I was first learning how to make **raisin bread**! First off, watch that rise time like a hawk. If you try to bake it before it’s doubled, you end up with a dense brick instead of fluffy comfort. Trust your eyes more than the clock on that first rise.
Second, dealing with sticky dough is inevitable when you’re working with fruit and sugar, but don’t just dump in more flour! That’s how you make it dense. Instead, lightly oil your hands before you start rolling and shaping the swirl. It makes handling that sticky dough so much easier. And never, ever skip pulling the loaf out of the hot pan right after baking. Seriously, move it immediately to a rack to cool completely. If you leave it sitting in that hot metal, the steam gets trapped and ruins that lovely, crisp crust we worked so hard for!
If you’re looking for other easy baking projects, my chocolate chip banana bread recipe is a total winner, and these banana nut muffins are perfect for grab-and-go breakfasts!
Exploring Variations of Raisin Bread
Once you master the basic soft loaf, you are totally free to start experimenting! That’s the best part about making **raisin bread** at home; you control the flavor profile. If you love texture, try folding in about a half cup of toasted walnuts or pecans when you add the cinnamon filling—it gives such a nice crunch against the soft dough.
For spice lovers, I sometimes swap out a teaspoon of the cinnamon for nutmeg and a pinch of allspice. It makes it taste unbelievably festive! If you’re in a huge rush and don’t want to deal with yeast, you can absolutely turn this into a **Quick Raisin Bread** by swapping the yeast for 3 teaspoons of baking powder and mixing it up like a cake or standard quick bread. It won’t be quite as fluffy, but it’s ready way faster!
If you enjoyed the spiced notes in this bread, take a peek at my recipe for pumpkin spice cake—it uses a similar warm spice profile!
Glazed Raisin Bread Topping Ideas
Okay, so I mentioned the simple powdered sugar dusting grandma used, but sometimes you just need that sweet drizzle. Making a simple glaze is silly easy; you just whisk a cup of powdered sugar with about two tablespoons of milk and a tiny splash of vanilla until it’s smooth enough to drizzle but thick enough to stay put.
If you want it glossy, use a bit of orange juice instead of milk—the acidity helps keep the glaze from crystallizing too hard. If you’re not feeling the glaze, a little brush of melted butter right when the loaf comes out of the oven smells heavenly and keeps the crust slightly tender as it cools.
Serving Suggestions for Your Sweet Breakfast Bread
Now that you’ve mastered the best **raisin bread** ever, the real fun begins: eating it! Honestly, I love it sliced thick and simply toasted with a generous smear of salted butter melting right into the warm crumb. That’s classic perfection.
However, if you’re feeling fancy, cream cheese is mandatory—especially the whipped kind! It clings perfectly to the nooks and holds up against the cinnamon spice. For something different, try spreading it thick with apple butter or my homemade orange marmalade. And if you want one of my favorite brunch ideas, you absolutely must check out these apple cinnamon crepes for a weekend spread!
Storage and Reheating Instructions for Raisin Bread
It’s a sad day when the loaf is nearly gone, but thankfully, this **raisin bread** keeps really well! For up to three days, just wrap the entire loaf—or what’s left of it—tightly in plastic wrap, and then maybe foil over that. Keep it on the counter at room temperature. Don’t refrigerate it unless your kitchen is super humid, because cold air dries out bread fast, and we worked so hard to make it fluffy!
If you need it to last longer, you can actually freeze slices! Wrap individual slices well and pop them in a freezer bag. To reheat those frozen slices, forget the toaster—it gets too hard. Just pop the frozen slice onto a baking sheet and warm it in a 350°F oven for about 5 minutes. It comes out almost fresh-baked! If you like making things ahead, you should check out my recipe for freezer breakfast burritos too!
Frequently Asked Questions About Making Raisin Bread
I get so many questions every time I post pictures of this loaf, so let’s clear up some common hang-ups before you even start mixing!
Why did my yeast dough deflate after I added the raisins?
This usually happens because the filling was too cold or damp when tossed into the dough. If the raisins weren’t mixed with the sugar and cinnamon first, or if they were too cold, they act like little ice cubes sinking to the bottom and knocking the air bubbles out before the dough can set. Always make sure your fruit mixture is room temperature before folding it in gently!
Can I make this a Quick Raisin Bread instead of using yeast?
Oh yes, absolutely! If you’re short on time and don’t want to deal with shaping and rising, you can totally make a **Quick Raisin Bread**. Swap out the yeast and milk for about 1 cup of buttermilk and 3 to 4 teaspoons of baking powder. Mix it roughly like a muffin batter, pour it into your loaf pan, and bake it right away! It won’t have that same airy, stretchy crumb as the yeast version, but it’s delicious and much faster.
My dough is too dry and crumbly during kneading; what gives?
Don’t panic and don’t add too much liquid! Remember the dough is supposed to look soft and slightly tacky even after kneading. If it feels completely dry and won’t come together after a few minutes, add liquid just one teaspoon at a time. Sometimes flour brands vary greatly in how much they absorb. Another tip: use slightly warmer milk next time to ensure full hydration. For more helpful tips on ingredients, you can always read more in our About Us section!
What’s the best way to get those thick, bakery-style swirls?
It all comes down to rolling technique. When you flatten the dough into that rectangle, you want it relatively thin—think about half an inch thick before spreading the filling. Then, roll it up as tightly as you physically can, like you’re rolling up a yoga mat! Make sure you pinch that final seam closed really well, because if it pops open during the rise, your delicious cinnamon swirl will just end up glued to the side of your pan.
Estimated Nutritional Data for This Raisin Bread
I always feel a little nerdy putting this part together, but you should know what you are enjoying! Since everyone slices their bread differently—some thick, some paper-thin—these numbers are just an estimate based on 16 even slices of the finished loaf, including that optional nice sweet glaze.
- Calories: About 240 per slice
- Fat: Around 7g (that’s the butter doing its job!)
- Carbohydrates: Roughly 42g
- Sugar: This comes in around 15g, mostly from the raisins and brown sugar blend.
- Protein: Nearly 5g.
Keep in mind this is homemade goodness, so these estimates are subject to the natural variations in your own ingredients! For the most accurate details about our general recipe guidelines, you can always check out our disclaimer page.
Share Your Homemade Raisin Bread Experience
Seriously, I hope this batch of **raisin bread** brightens up your morning! If you’re happy with how soft and cinnamon-swirly yours turned out, please leave me a rating below—it helps other bakers find the best recipes. I’d love to see your loaves! If you snapped a picture of your beautiful breakfast spread, send it over through the contact page. Happy baking, friends!
PrintSoft Homemade Cinnamon Raisin Bread
Make a soft, fluffy loaf of homemade cinnamon raisin bread from scratch. This recipe yields a sweet breakfast bread perfect for toasting.
- Prep Time: 25 min
- Cook Time: 40 min
- Total Time: 165 min
- Yield: 1 loaf
- Category: Breakfast
- Method: Baking
- Cuisine: American
- Diet: Vegetarian
Ingredients
- 1 cup warm milk (105-115°F)
- 2 1/4 teaspoons active dry yeast
- 1/4 cup granulated sugar plus 1 teaspoon for yeast
- 1/2 cup unsalted butter, softened
- 2 large eggs, room temperature
- 1 teaspoon salt
- 4 cups all-purpose flour, plus more for dusting
- 1 cup raisins
- 2 tablespoons ground cinnamon
- 1/4 cup packed brown sugar
- For optional glaze: 1 cup powdered sugar, 2 tablespoons milk, 1/2 teaspoon vanilla extract
Instructions
- Activate the yeast: In a small bowl, combine the warm milk, 1 teaspoon of granulated sugar, and the yeast. Let it sit for 5 to 10 minutes until foamy.
- In a large bowl or stand mixer, cream together the softened butter and 1/4 cup granulated sugar until light and fluffy. Beat in the eggs one at a time, then mix in the salt.
- Add the yeast mixture to the butter mixture and mix well. Gradually add the flour, mixing until a soft dough forms.
- Knead the dough on a lightly floured surface for about 8 minutes until smooth and elastic.
- Flatten the dough into a rectangle. In a small bowl, mix the raisins, cinnamon, and brown sugar. Sprinkle this mixture evenly over the dough.
- Roll the dough up tightly like a jelly roll. Pinch the seam closed.
- Place the dough in a greased 9×5 inch loaf pan. Cover the pan loosely with plastic wrap and let it rise in a warm place for 1 to 1.5 hours, or until doubled in size.
- Preheat your oven to 375°F (190°C).
- Bake for 35 to 40 minutes, or until the top is golden brown and the internal temperature reaches 200°F (93°C).
- Remove the bread from the pan immediately and let it cool completely on a wire rack.
- If using the glaze, whisk together the powdered sugar, milk, and vanilla extract until smooth. Drizzle over the cooled loaf.
Notes
- For a no-knead version, mix all ingredients until just combined, let it rise for 2 hours, then proceed with the cinnamon-raisin swirl and baking steps.
- To toast, slice the cooled bread thickly and toast until edges are crisp. Serve with butter or cream cheese.
- You can substitute half the all-purpose flour with bread flour for a slightly chewier texture.
Nutrition
- Serving Size: 1 slice
- Calories: 240
- Sugar: 15g
- Sodium: 280mg
- Fat: 7g
- Saturated Fat: 4g
- Unsaturated Fat: 3g
- Trans Fat: 0g
- Carbohydrates: 42g
- Fiber: 2g
- Protein: 5g
- Cholesterol: 35mg