

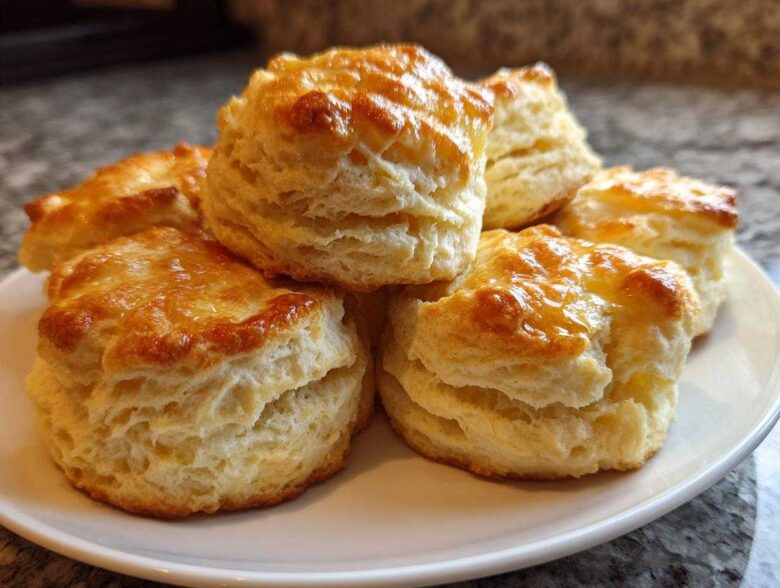
Oh my goodness, is there anything better than the smell of fresh baking filling your entire house? It’s like the kitchen itself is turning the volume up on happiness, isn’t it? Owen and I found out the hard way that focusing only on the hustle meant missing out on these small, crucial moments of joy. That’s why I’m so thrilled to share this definitive guide to making the most incredible, melt-in-your-mouth buttermilk biscuits. Forget dry, flat hockey pucks. These are the real deal—classic Southern comfort in the form of the most wonderfully fluffy Tender Breakfast Bread you’ll ever make. For the full story on how we found our way back to the kitchen dance floor, you can read all about us over at Hungry Herald.
Why This Recipe Delivers the Best Buttermilk Biscuits
I’m going to be 100% honest with you: I used to dread making buttermilk biscuits. I’d follow recipes, and they’d come out flat, tough, or just…sad. I once tried making a batch for a Sunday brunch, and they baked up looking more like dense coasters than light, airy clouds. Owen joked they were hard enough to skip rocks with! That failure finally made me dive deep into the science behind a perfect Southern Biscuits Recipe. This method, where we treat the ingredients just right, changed everything.
What makes these Fluffy Buttermilk Biscuits so different? It all comes down to respecting the butter. We are aiming for pockets of cold fat that steam open during baking, creating those gorgeous, separate layers. If the butter gets warm, it melts into the flour, and poof—no rise. This recipe simply nails the textural science every single time, making them the most Tender Breakfast Bread you’ll ever make. I’m so glad I figured out the trick, because now we don’t have to settle for anything less than perfection! If you’re looking for another recipe that just nails the technique, check out our guide for the Best Crispy Skin Roasted Chicken Recipe; consistency in the kitchen is what it’s all about!
Achieving Tall, Flaky Layers Baking
This is where we earn our height! Everything has to be ice-cold—your butter, your buttermilk, even your mixing bowl if you live somewhere hot like we do. When you cut the butter in, you want visible, pea-sized chunks left in the flour. Don’t overwork it trying to make it look smooth!
Then, the absolute most important rule for height: when you use your biscuit cutter, press straight down and lift straight up. Seriously, do not twist! Twisting seals the edges of the dough, locking in the rising power and giving you squat, sad biscuits. We want tall, proud layers, remember?
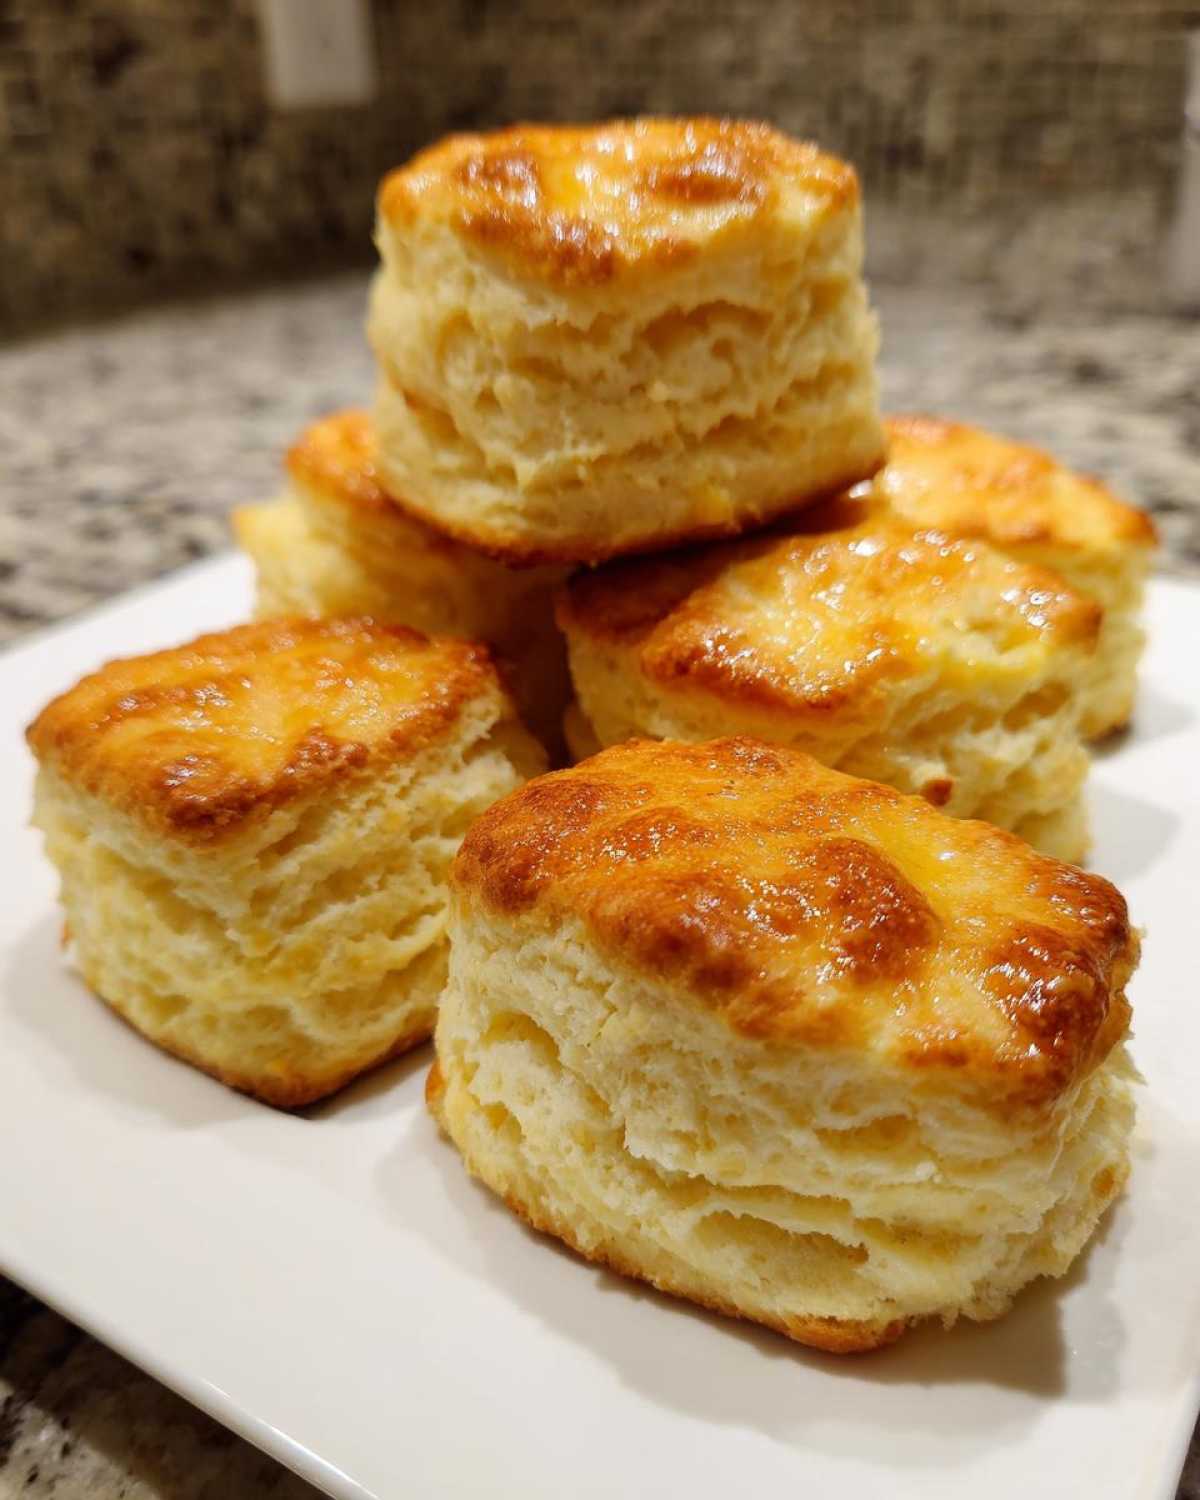
Gather Your Ingredients for Fluffy Buttermilk Biscuits
Alright, let’s talk about what you need to pull this off, because the ingredients aren’t just thrown together—they have rules! If you follow this short list exactly, you are halfway to Biscuit Heaven. Remember, we are making buttermilk biscuits today, so pay close attention to the state of your fat and dairy!
- 2 cups all-purpose flour (The standard workhorse!)
- 1 tablespoon baking powder (This is our lift helper!)
- 1 teaspoon baking soda (Works with the buttermilk acid for great lift)
- 1 teaspoon salt (Don’t skip this, it brings out the flavor!)
- 1/2 cup (1 stick) cold unsalted butter, cut into small pieces (Emphasis on COLD!)
- 3/4 cup cold buttermilk (Like the butter, it needs to be frigid.)
- 2 tablespoons melted butter, for brushing (This is for that golden finish and extra richness!)
Buttermilk Baking Secrets: Ingredient Notes
Regarding the buttermilk—if you run out or forget to buy some, don’t panic and don’t go running to the store! We have a super easy backup trick. Just take 3/4 cup of regular milk—any kind works—and stir in 3/4 teaspoon of white vinegar or fresh lemon juice. Let that mixture sit on the counter for about five minutes. It’ll thicken up a bit, and boom, you have a perfect cultured buttermilk substitute! That little bit of extra acid is vital for reacting with the baking soda.
But the biggest rule, remember this: if you’re feeling warm, your butter and buttermilk need to be colder. I mean it! Keep that butter in the freezer for ten minutes if your kitchen is fighting you. Cold ingredients mean steam, and steam means the fluffiest buttermilk biscuits possible. It’s the absolute foundation of this whole plan.
The Best Buttermilk Biscuit Method: Step-by-Step Tutorial
Now we move to the fun part—the mixing! This really is a Quick Biscuit Tutorial, but the method requires a gentle hand, which is what separates truly great From Scratch Baking from just okay. Remember, we are trying to build flaky layers, not a dense loaf. Preheat your oven to 425 degrees Fahrenheit right now and get that baking sheet ready with parchment paper so everything is set. For every great recipe, we keep our whole archive of kitchen adventures ready to go right here on the blog!
We start by combining our dry ingredients—the flour, baking soda, powder, and salt—in that big bowl. Give it a quick whisk to make sure everything is distributed evenly. Then comes the cold butter we talked about! You need to incorporate that using a pastry blender or just your fingertips until it looks like coarse sand with some definite, visible chunks of butter still hanging around. Those butter chunks are your ticket to the fluffiest results, so don’t try to blend them away!
Mixing the Dough for Tender Breakfast Bread
Here’s the make-or-break moment for your buttermilk biscuits. With the butter cut in, pour that cold buttermilk in all at once. Grab a fork—yes, a fork, not an electric mixer!—and gently mix the ingredients until the flour is just moistened and the dough starts looking shaggy. I mean it: stop mixing when you still see some dry spots!
Why so gentle? If you mix too much, you immediately start developing gluten in the flour. Overmixing creates tough, chewy biscuits where you want soft, tender crumb. We are looking for Tender Breakfast Bread, not bread that fights back! Just mix until the dough barely holds itself together. It will look messy, kind of like a sloppy oatmeal cookie mix, but resist the urge to clean it up with more mixing.
Cutting and Shaping Your Homemade Biscuits
Turn that messy dough out onto a lightly floured surface. Handle it minimally! We only need to gently fold or knead it about four or five times until it just gangs together into a loose mass. If it fights you or tears, just press it back together. Now, pat or roll it out to about 3/4-inch thick. A little thicker means taller biscuits, which is always my goal!
Take your 2-inch biscuit cutter—and this is the big secret for height—plunge it straight down through the dough and lift it straight up. Do not, under any circumstances, twist the cutter as you pull it out. Twisting seals the edges of the dough, locking in the rising power and giving you squat, sad biscuits. We want tall, proud layers, remember? This technique is the heart of making perfect Homemade Biscuits.
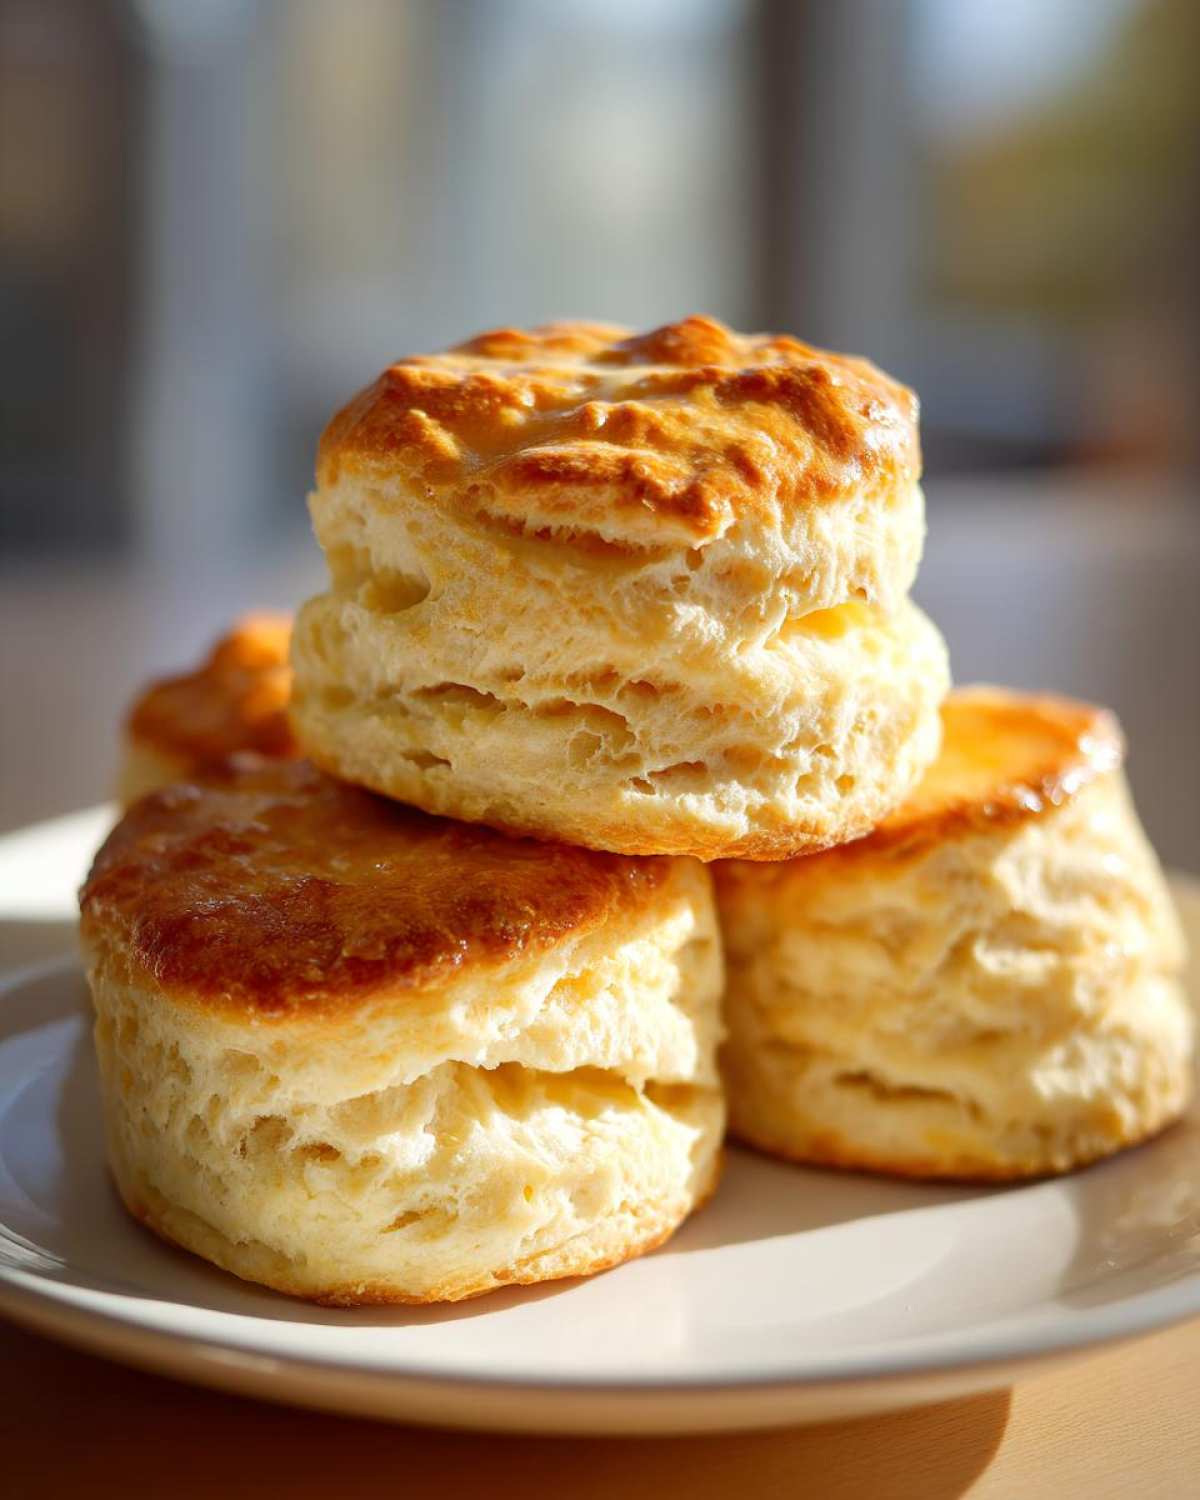
Baking Time and Achieving Golden Brown Biscuits
Okay, you’ve done the hard part: you’ve kept everything cold, you’ve gently mixed, and you haven’t twisted that cutter! Now we need the heat to work its magic. Preheat your oven to a hot 425 degrees Fahrenheit. Biscuits love a hot oven; that initial blast of heat is what causes the butter inside to vaporize quickly, creating the steam that pushes those layers apart, giving us that incredible height we are famous for!
Arrange your cut biscuits on that parchment-lined sheet. I like to place mine fairly close together. If you place them touching, the sides will bake up softer and lighter—perfect for soaking up gravy. If you like those crispy, golden edges, space them an inch or two apart. Either way works for a fantastic batch of buttermilk biscuits!
They usually bake up beautifully in about 12 to 15 minutes. Keep an eye on the tops! You are looking for that perfect sweet spot: deeply golden brown on top, but still tender near the edges. They should look proud and tall when you take them out.
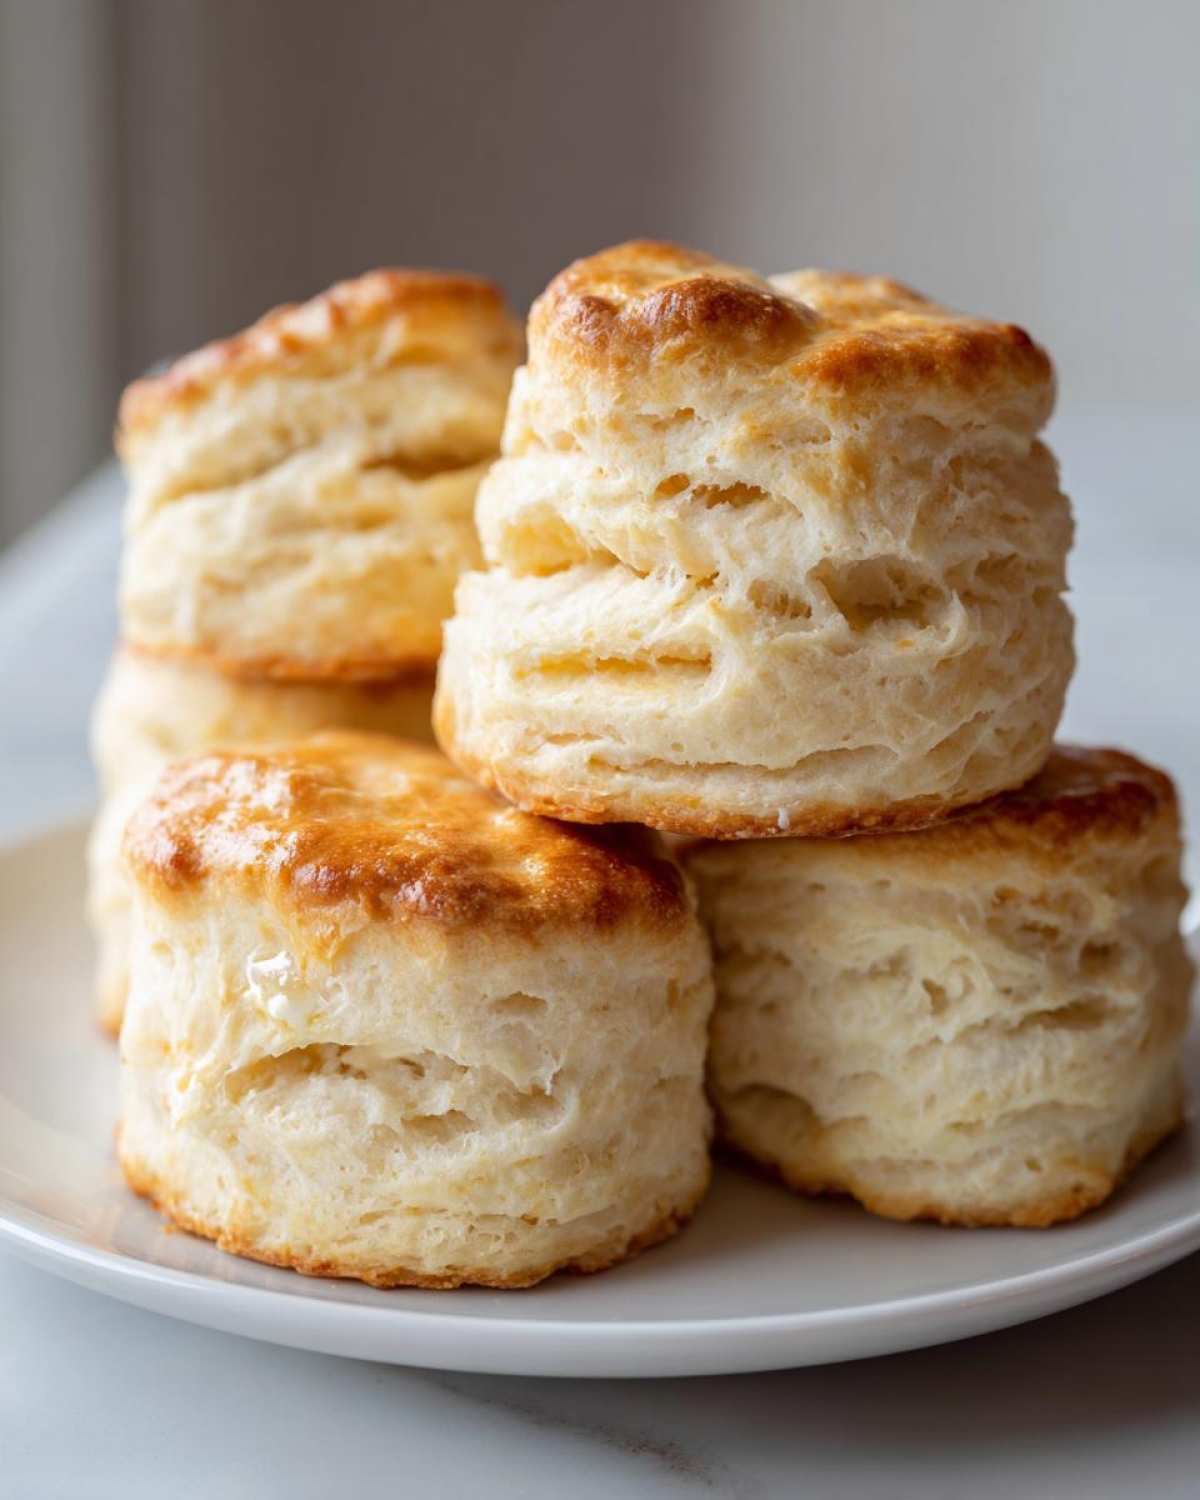
But wait, don’t serve them yet! This next step is non-negotiable if you want that rich, savory punch that makes people ask for seconds. As soon as those beauties come out of the oven, grab the 2 tablespoons of melted butter we set aside earlier and brush it generously over the tops. This seals in moisture, gives them a gorgeous sheen, and ensures those Golden Brown Biscuits taste utterly rich and buttery. Seriously, don’t skip the butter bath—it’s the final headline for your culinary news report!
Tips for Success with Buttermilk Biscuits
I know I’ve told you this a few times already, but when it comes to achieving those tall, fluffy beauties, consistency matters! We pour so much love into these buttermilk biscuits, and I want to make sure your results are always top-tier. Think of this section as your quick-reference cheat sheet so you never have a flat biscuit day again. Owen says consistency in baking is just as important as having a good playlist for a party!
First and foremost, remember the temperature rule: COLD. Cold butter, cold buttermilk. If you skip this, you are giving up that rise before you even get to the oven. And if your butter starts looking greasy while you’re cutting it in, just pop the whole bowl in the freezer for ten minutes. It sounds extreme, but trust me when I say it works wonders.
Next, the cutter technique. If you take away only one piece of advice from this entire article, let it be this: Do Not Twist the Biscuit Cutter. Press straight down, lift straight up. Twisting seals the edges, and that seal is what traps the steam inside, forcing the biscuit to rise tall. We want those flaky layers baking up sky-high!
Finally, never stress if you run out of that cultured milk. That little trick we talked about—milk plus a splash of acid—is genuinely my favorite backup plan for buttermilk baking secrets. It saves me nearly every time I think I’m out of ingredients for my Homemade Biscuits. For another quick kitchen fix that always delivers richness, check out my recipe for Easy Homemade Garlic Butter Recipe; sometimes the simple additions make the biggest culinary headlines!
Serving Suggestions for Your Buttermilk Biscuits
Here’s the good news about achieving a perfect batch of buttermilk biscuits: they’re masters of versatility! They aren’t just for breakfast; they truly deserve a spot at every single meal we serve. When Owen and I have a hearty soup or stew simmering on the stove, these flaky beauties are often what we reach for instead of bread. They are fantastic for dunking!
Of course, the classic Southern presentation is essential. You absolutely cannot talk about buttermilk biscuits without mentioning sawmill gravy. Ladle that thick, peppery goodness right over the center of a split biscuit. It’s comfort food royalty, and you’ve earned that crown after baking these perfectly!
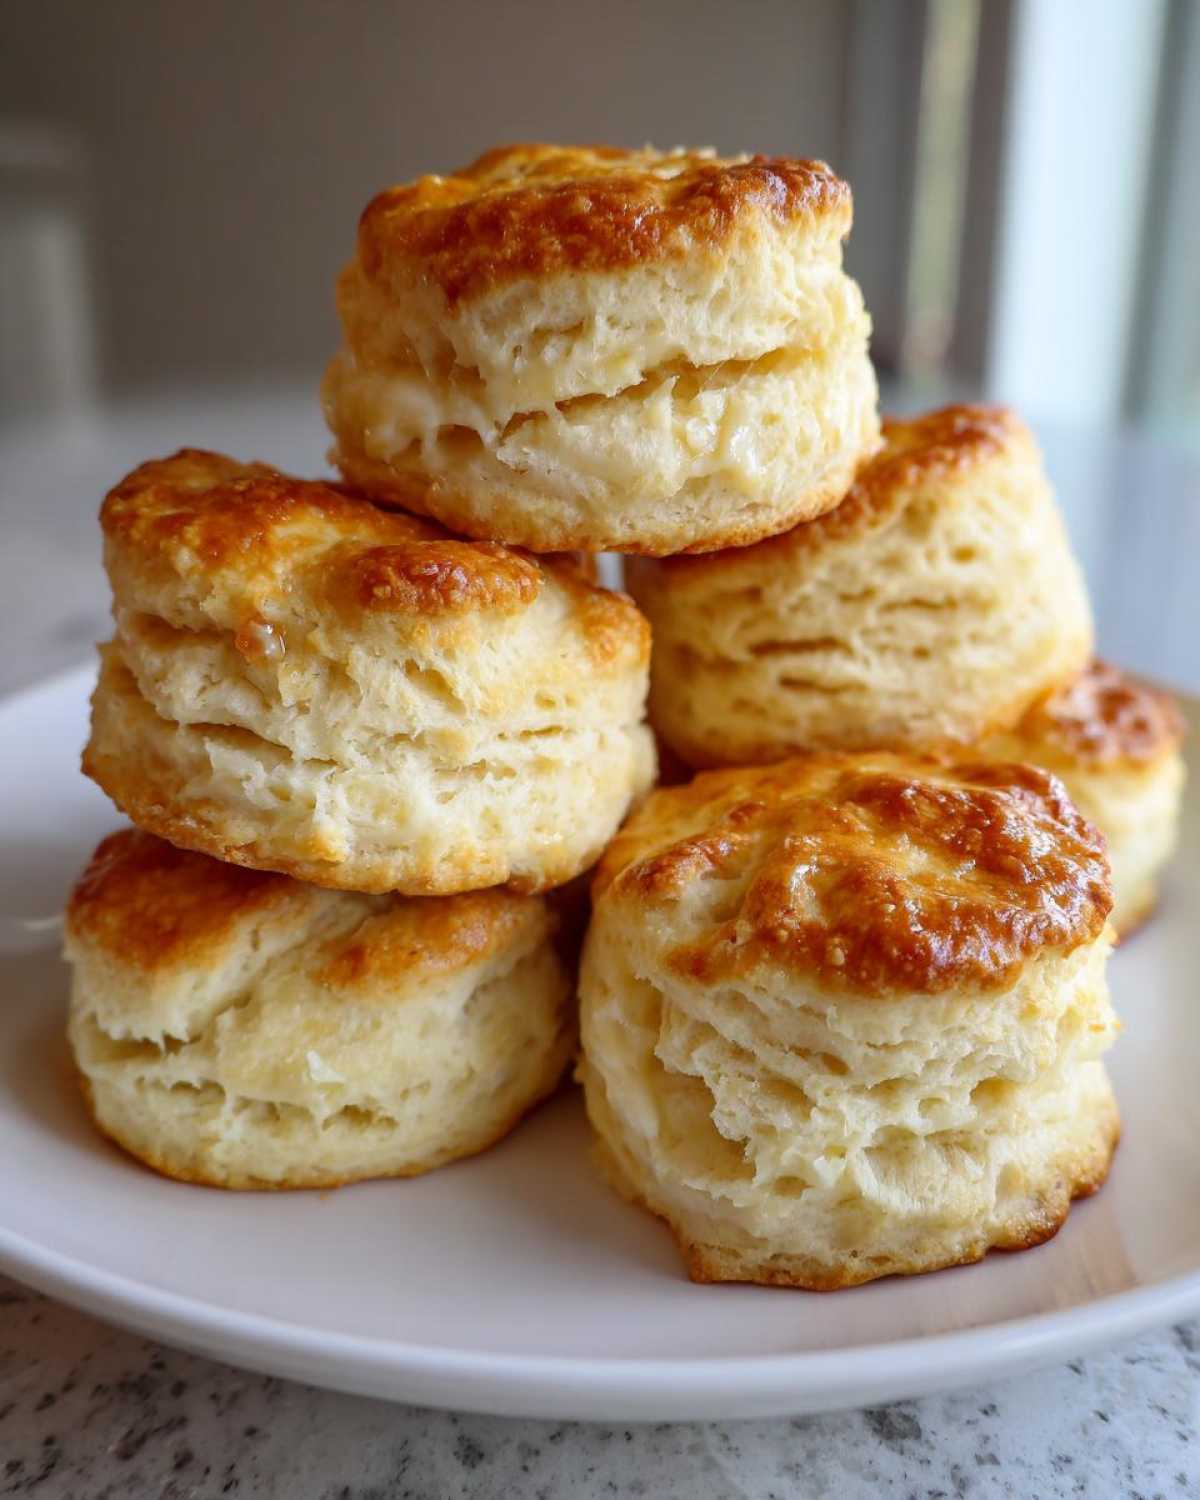
But don’t limit them just to the savory side of things. While jam and honey are eternally welcome, if you’re hosting brunch, try serving them alongside something sweet like my recipe for Candied Yams for a beautiful sweet-and-savory contrast. These biscuits are so tender they blend seamlessly whether you’re looking for a side for your roast chicken or just need simple Dinner Roll Recipes for impromptu weeknight meals. They always steal the show!
Storage and Reheating Instructions for Buttermilk Biscuits
I know you won’t have many leftovers because these things disappear instantly, but on the off chance you manage to save a few of your perfect buttermilk biscuits, you need to treat them right. We worked so hard to get that fluffy texture, and we certainly don’t want to ruin it by storing them improperly!
The best way to keep them fresh is to let them cool completely on a wire rack first. Once they’re room temperature, you need to seal in all that goodness. Transfer your biscuits to an airtight container—plastic or glass works fine—and keep them on the counter, not in the fridge. Honestly, they are best within 24 hours, but they hang in there pretty well for two days.
Waking Up Your Biscuits
If you try to eat a day-old biscuit cold, you’re just going to be disappointed. The magic happens when you reheat them properly! Don’t even think about the microwave unless you want a chewy experience you’ll regret. We need that quick blast of heat to reactivate the steam inside those lovely layers.
Preheat your oven—or toaster oven, if it’s just one or two—to about 350 degrees Fahrenheit. Place the biscuits directly on the rack or on a small baking sheet. Heat them for just about 5 to 7 minutes. This short burst of dry heat brings back that wonderful exterior texture and makes the inside feel like it just came out of the oven moments ago. Trust me, reheating them this way is almost as good as the first batch. That buttery tenderness comes right back to life!
Frequently Asked Questions About Making Buttermilk Biscuits
When you’re diving into a new recipe, especially something as classic as buttermilk biscuits, the questions always pop up! Owen usually has the most practical ones, while I’m always wondering about substitutions. Here are the top things people ask me after they’ve decided to try making their own Homemade Biscuits that bake up light and fluffy.
Why are my biscuits flat instead of tall and fluffy?
Oh, this is the ultimate heartbreak, isn’t it? Nine times out of ten, flat biscuits mean one of two things happened during the process. First, your butter or buttermilk wasn’t cold enough, so the fat melted before it could create steam pockets. Second, and this is a big one for the Fluffy Buttermilk Biscuits we are aiming for: you twisted your biscuit cutter! Remember what I said? You must press straight down and lift straight up. Twisting seals the edges and prevents that beautiful vertical rise. If you’re looking for more technical perfection tips, you might enjoy this great resource I found:
How To Make Fluffy Buttermilk Biscuits.
Can I use milk instead of buttermilk?
Yes, you absolutely can, and I explained the trick earlier! If you don’t have true buttermilk, take 3/4 cup of regular milk—whole milk works best for richness—and stir in 3/4 teaspoon of white vinegar or lemon juice. Let it sit for about five minutes. It’ll curdle slightly and give you that necessary acid to react with the baking soda we added. This acts just like buttermilk and ensures you get a good lift in your Easy Biscuit Recipe.
Can I make these biscuits ahead of time?
You sure can get a head start! For make-ahead Dinner Roll Recipes, you have two great options. You can cut the biscuits out, place them on the baking sheet as directed, cover the whole pan tightly with plastic wrap, and chill them in the fridge for up to 24 hours. When you’re ready to bake, just add about 5 extra minutes to the baking time, since they are going in colder than room temperature. For longer storage, you can freeze the cut, unbaked rounds directly on the sheet pan until solid, then transfer them to a freezer bag. Bake them straight from frozen, adding a few minutes to the bake time as needed!
Can I make this recipe without baking powder?
I really, really wouldn’t recommend it if you want fluffy results. We use both baking powder AND baking soda here because they serve different jobs, and both are crucial for getting that high rise we want in hearty Southern Biscuits Recipe. The baking soda reacts with the acid in the buttermilk, while the baking powder gives an extra chemical lift during the baking process. If you ditch the baking powder, you lose half your lift potential, and you’ll end up with something denser than we are aiming for today!
If you’re looking for more of my tried-and-true tips for making kitchen magic happen at home, check out the guide on Easy Egg Bites; mastering those little details makes all the difference in your home cooking headlines!
Announce Your Success: Share Your Kitchen Dance Party
When you pull these incredible buttermilk biscuits out of the oven, you’ve officially made the good news headline for your day! I want to hear all about it. Did they stand tall? Did they melt right in your mouth?
Don’t keep the joy to yourself! Leave a comment below letting Owen and me know how they turned out. Tell us what you served them with—gravy, honey, or maybe just eaten plain while standing over the sink (I’ve been there, friend!). Your success is the best story we could report. We can’t wait to see you announcing the arrival of your perfect batch soon!
Announce Your Success: Share Your Kitchen Dance Party
When you pull these incredible buttermilk biscuits out of the oven, you’ve officially made the good news headline for your day! I want to hear all about it. Did they stand tall? Did they melt right in your mouth?
Don’t keep the joy to yourself! Leave a comment below letting Owen and me know how they turned out. Tell us what you served them with—gravy, honey, or maybe just eaten plain while standing over the sink (I’ve been there, friend!). Your success is the best story we could report. We can’t wait to see you announcing the arrival of your perfect batch soon!
If you have any burning questions—maybe about doubling the recipe or finding the right pan—feel free to reach out to us directly through our contact page. We are always here to help you get that headline-worthy result!
PrintFluffy Southern Buttermilk Biscuits: Your New Comfort Food Headline

Learn how to make incredibly fluffy, tender Southern buttermilk biscuits that melt in your mouth. This easy recipe delivers buttery flavor and perfect flaky layers every time you bake.
- Prep Time: 15 min
- Cook Time: 15 min
- Total Time: 30 min
- Yield: 8 servings
- Category: Breakfast
- Method: Baking
- Cuisine: American
- Diet: Vegetarian
Ingredients
- 2 cups all-purpose flour
- 1 tablespoon baking powder
- 1 teaspoon baking soda
- 1 teaspoon salt
- 1/2 cup (1 stick) cold unsalted butter, cut into small pieces
- 3/4 cup cold buttermilk
- 2 tablespoons melted butter, for brushing
Instructions
- Preheat your oven to 425 degrees Fahrenheit. Line a baking sheet with parchment paper or lightly grease it.
- In a large bowl, whisk together the flour, baking powder, baking soda, and salt.
- Add the cold butter pieces to the dry ingredients. Use a pastry blender or your fingertips to cut the butter into the flour until the mixture resembles coarse crumbs with some pea-sized pieces of butter remaining. This step is key for flaky layers.
- Pour in the cold buttermilk all at once. Use a fork to gently mix until the dough just comes together. Do not overmix.
- Turn the shaggy dough out onto a lightly floured surface. Gently knead the dough 4 to 5 times until it holds together.
- Pat or roll the dough out to about 3/4-inch thickness.
- Use a 2-inch biscuit cutter to cut out rounds. Press the cutter straight down without twisting to keep the biscuits tall. Gather the scraps, gently press them together, and cut out any remaining biscuits.
- Place the biscuit rounds close together on the prepared baking sheet for softer sides, or farther apart for crispier edges.
- Bake for 12 to 15 minutes, or until the tops are golden brown.
- Immediately brush the tops of the hot biscuits with the melted butter. Serve warm.
Notes
- For the fluffiest biscuits, make sure your butter and buttermilk are very cold before you start mixing.
- Do not twist the biscuit cutter; press straight down to keep the layers from sealing shut, which helps them rise tall.
- If you do not have buttermilk, mix 3/4 cup of milk with 3/4 teaspoon of white vinegar or lemon juice and let it sit for 5 minutes before using.
Nutrition
- Serving Size: 1 biscuit
- Calories: 220
- Sugar: 1
- Sodium: 350
- Fat: 12
- Saturated Fat: 7
- Unsaturated Fat: 5
- Trans Fat: 0
- Carbohydrates: 26
- Fiber: 1
- Protein: 4
- Cholesterol: 25