

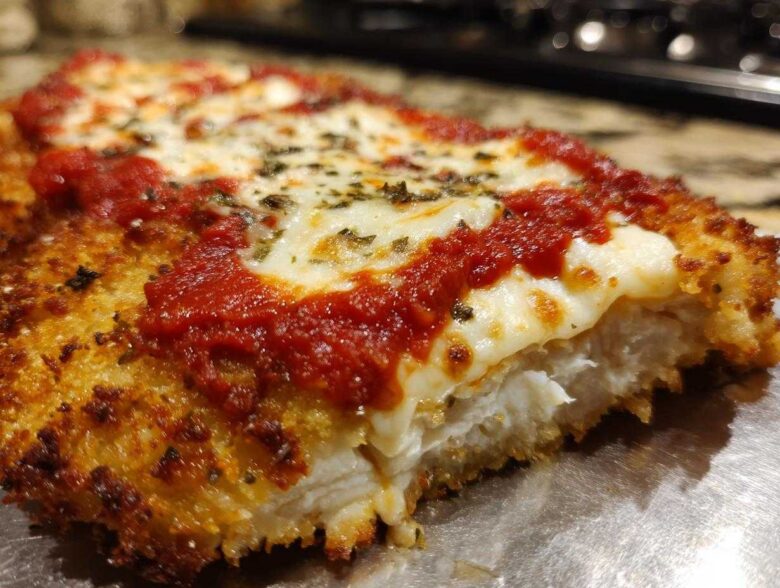
Oh, friend, let me tell you, making Italian night special demands more than just tossing sauce on something vaguely chicken-shaped. We’re talking about texture! I used to struggle so much. My first attempts at homemade Chicken Parmesan always ended up soggy, the cheese sliding off mournfully. It was tragic!
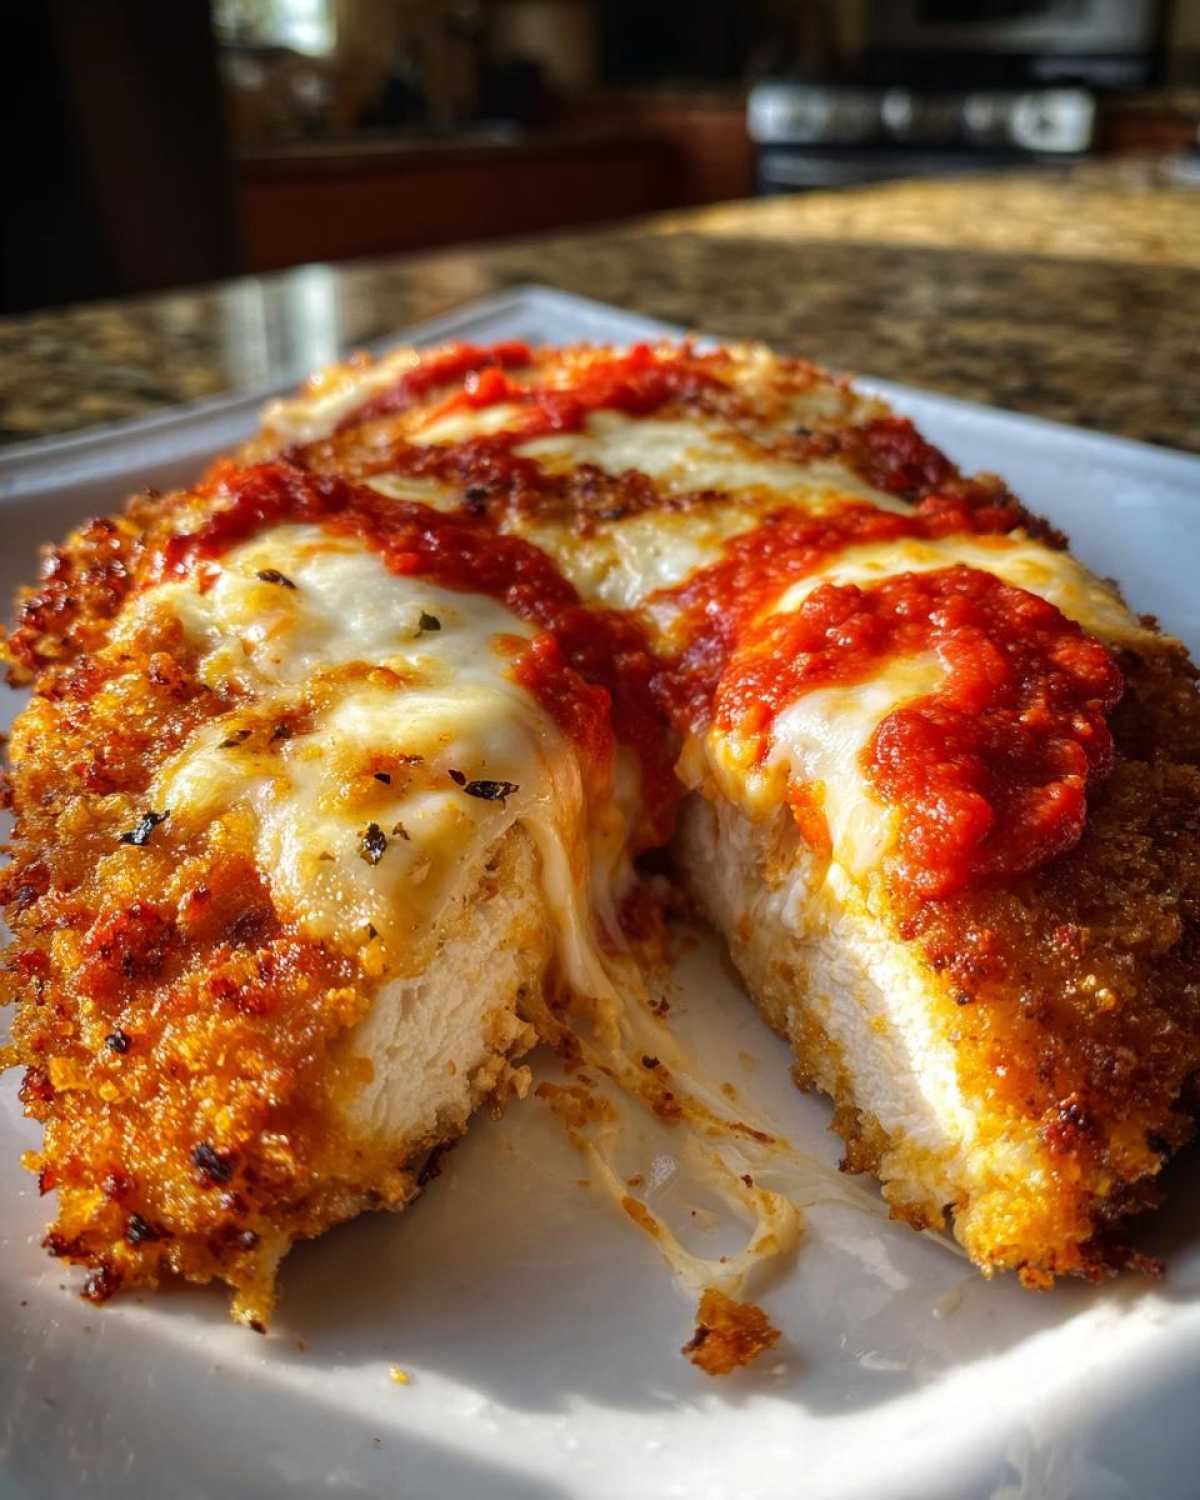
But I cracked the code. I really did. This isn’t just another chicken recipe; this one sets out to give you that glorious, restaurant-quality bite every single time. Trust me when I say this Crispy Chicken Parmesan with Melty Cheese is the benchmark we’re aiming for. We’re tackling the crust drainage, the breading structure, and the cheese melt all at once.
After far too many limp attempts, I figured out the secret lies in a few tiny, non-negotiable steps related to moisture control and breading density. Stick with me, and you’ll never go back to that flimsy imitation stuff again. If you want the ultimate guide to this classic comfort food, check out my deep dive here: The Best Crispy Chicken Parmesan Recipe.
Why This Crispy Chicken Parmesan with Melty Cheese Works
Honestly, achieving that perfect crunch that stands up to sauce and cheese is like a culinary magic trick, but it’s really just about controlling moisture at every single stage. We’re prioritizing texture here, which means our approach is slightly different from your standard breaded chicken.
When you’re after true restaurant-style results, you need three things locked down:
- Exceptional, all-over crispiness that lasts past the first bite.
- A gooey, bubbly topping that melts beautifully without separating.
- A barrier between that glorious crust and the warm marinara sauce.
And it all starts with the chicken itself. If you skip patting those cutlets bone-dry, forget about maximum crunch. It’s the first commandment of perfect frying! You can see more about my breading philosophies over here: Parmesan-Crusted Chicken Recipe.
The Secret to Crispy Breading Techniques for Chicken
Standard breadcrumbs are fine, but they disappear quickly under pressure. That’s why we rely on Panko! Panko breadcrumbs are flakier and lighter, which means they absorb less oil and create way more surface area for crunch. We even give these cutlets a double-dip treatment of egg and Panko.
This layering process builds walls around the thin chicken, ensuring that when it hits the hot oil, that texture sets hard and fast. It’s the difference between a coating and armor!
Best Cheese Blend for Chicken Parmesan
For the topping, we aren’t messing around. You need low-moisture mozzarella—this is key. Fresh mozzarella has too much water content, and it seeps out, immediately turning your crisp crust soft. The low-moisture kind melts beautifully into that classic, stretchy blanket we all love.
We mix Parmesan in both the breading *and* the topping because it adds that salty, nutty punch that balances the milder mozzarella. Quick tip: if you have a microplane for grating your Parmesan for the topping, do it! Freshly grated melts smoother than anything pre-shredded.
Gathering Ingredients for Crispy Chicken Parmesan with Melty Cheese
Alright, before we get to the actual cooking—which is the really fun part—we need to make sure our pantry is set up right. If you’re shopping for this, remember that quality matters here because we are keeping the ingredient list tight. We want that maximum flavor payoff from just a few components!
Here’s what you’ll need for four beautiful servings of restaurant-style Chicken Parm. Don’t skimp on pounding those breasts thin; that’s how we control the cook time and keep everything juicy inside!
- 4 boneless, skinless chicken breasts (about 6 oz each), pounded to 1/2 inch thickness
- 1 cup all-purpose flour
- 2 large eggs, lightly beaten
- 1 1/2 cups panko breadcrumbs
- 1/2 cup grated Parmesan cheese (this goes into the breading mix!)
- 1 teaspoon salt
- 1/2 teaspoon black pepper
- 1/2 teaspoon garlic powder
- 1/4 cup vegetable oil, just for getting that perfect fry going
- 1 cup marinara sauce, warmed up and ready to go
- 8 ounces low-moisture mozzarella cheese, sliced or shredded—remember, low moisture!
- 1/4 cup grated Parmesan cheese (this is the final dusting on top)
- Fresh basil, chopped, for that pop of color right at the end.
See? Not complicated! But those details, like using Panko and opting for low-moisture cheese, are what separate a good dinner from an unforgettable one.
How to Prepare Homemade Italian Chicken Cutlets
Before we even think about turning on the stove, we have to get our chicken ready. The goal here is thin, even cutlets that cook fast without drying out, and a breading station set up so efficiently you feel like a pro line cook! First up: pounding. Take those breasts and put them between two sheets of plastic wrap or inside a big zip-top bag. Get your rolling pin or the flat side of a meat mallet and just gently (but firmly!) pound them down to about a 1/2-inch thickness.
Because they are thinner now, the chicken cooks quickly in the hot oil, ensuring we get that great crust before the inside has a chance to overcook. Then, set up your assembly line: Plate one for flour, dish two for the whisked eggs, and dish three for the Panko/Parmesan mix. Don’t forget to add a little salt and pepper right into that flour dredge, too—it’s a little secret that truly deepens the flavor before the crust even starts forming. It really does make a difference!
You can find a great recipe for a comforting casserole using similar flavors here: Homemade Reuben Bake Casserole Recipe.
Patting Chicken Dry: The Key to Non-Soggy Crispy Chicken Parmesan
I cannot stress this enough: I want those cutlets dry! Like, desert dry! Moisture is the absolute mortal enemy of crispiness. If there is surface moisture on the chicken (we call that residual water), what happens when it hits hot oil? Steam! Steam immediately makes your breading soft and pasty because it prevents that beautiful, hard crust from setting up quickly.
So, take several layers of paper towels and just press, press, press until the surface of the meat feels tacky, but not wet. This one small action in our journey to achieve Crispy Chicken Parmesan with Melty Cheese guarantees a superior crunch when we finally fry them up!
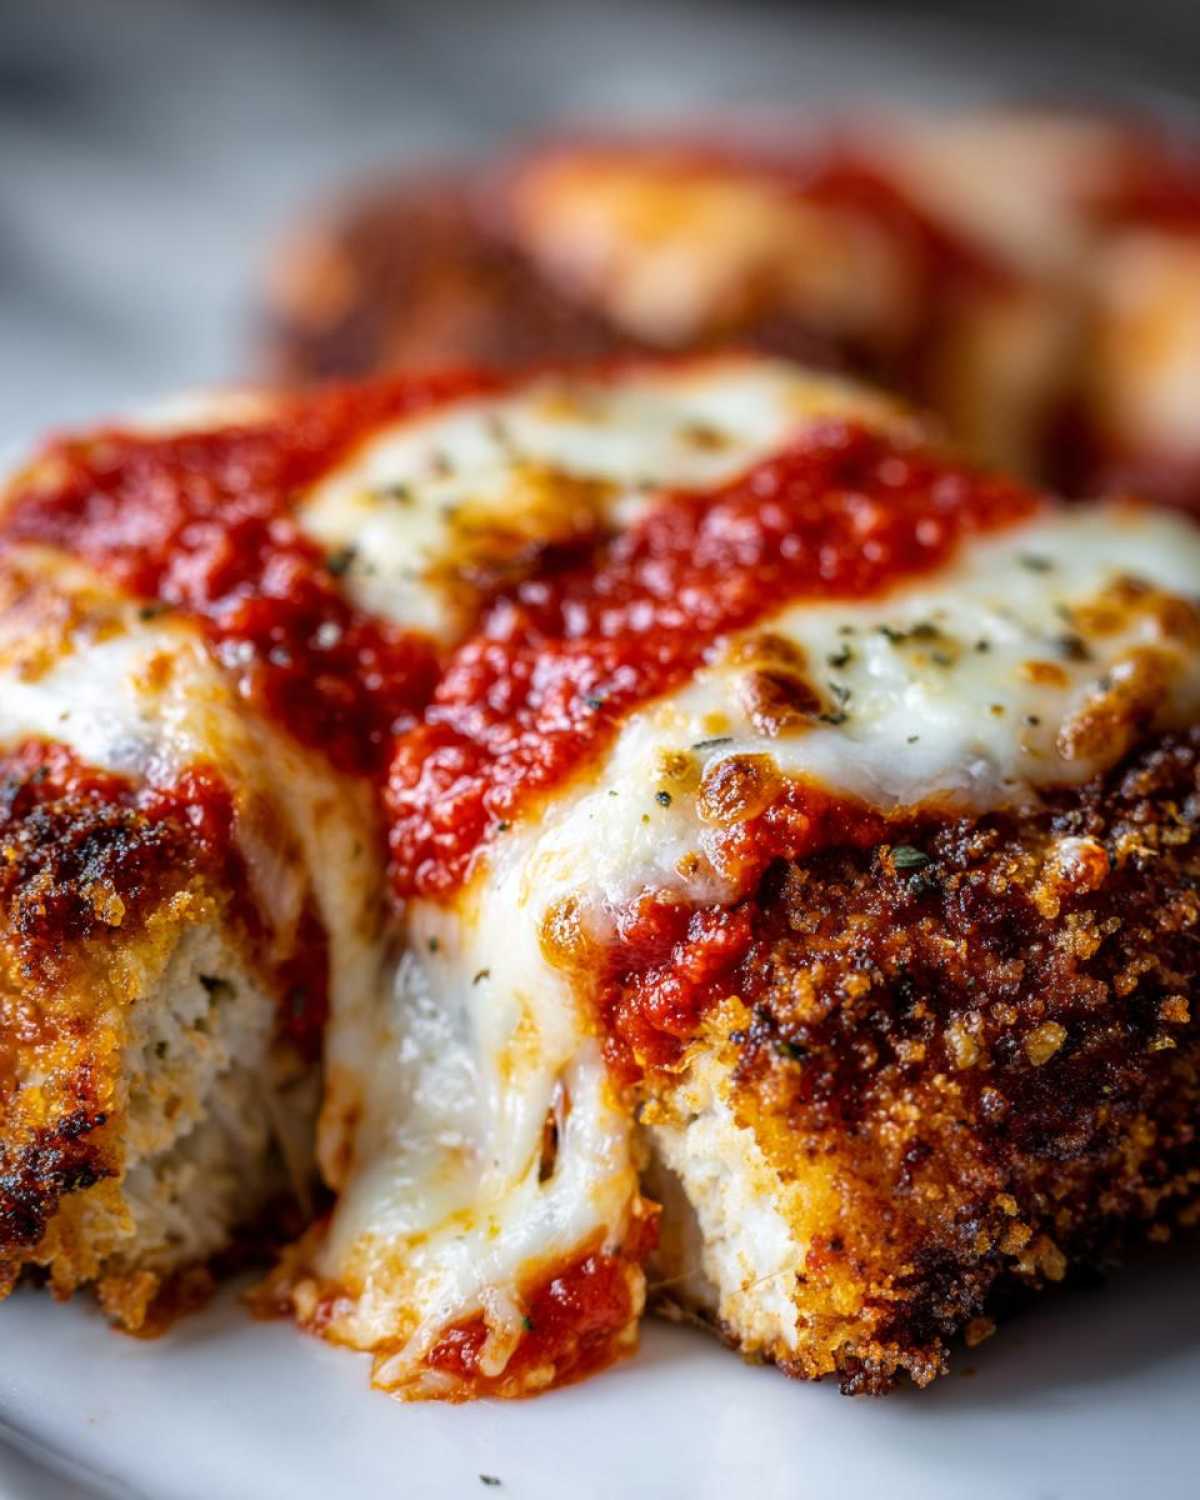
Perfectly Fried Chicken Parmesan Technique
Frying is where we lock in that incredible Panko crust. Using too little oil means the chicken sits in grease; using too much oil means the temperature drops too low whenever you add the meat, leading to soggy absorption. We need that sweet spot!
Get about a quarter-inch of vegetable oil in your skillet—just enough to coat the bottom nicely—and heat it over medium-high heat. You’re looking for shimmering oil, often around 350°F, but you don’t always need a thermometer! If you flick a tiny pinch of breadcrumb into the oil and it immediately sizzles enthusiastically, you’re good to go.
When you place the breaded cutlets in, don’t be tempted to cram them all in there at once. Overcrowding drops the oil temperature immediately, which is the number one cause of greasy, limp chicken. We fry two at a time, letting them get deep golden brown—about three to four minutes per side. They should be cooked through, but remember, they’re going back into the oven later!
Once they’re golden perfection, pull them out and place them right onto a wire rack set over a baking sheet. Please, resist the urge to put them on paper towels! Paper towels trap steam underneath the crust, and that steam will soften your beautiful work. The wire rack lets air circulate all around, keeping the bottom crisp while the excess oil drips away completely. It’s these small details that make the difference between good and best crispy skin roasted chicken recipe vibes on your chicken parm!
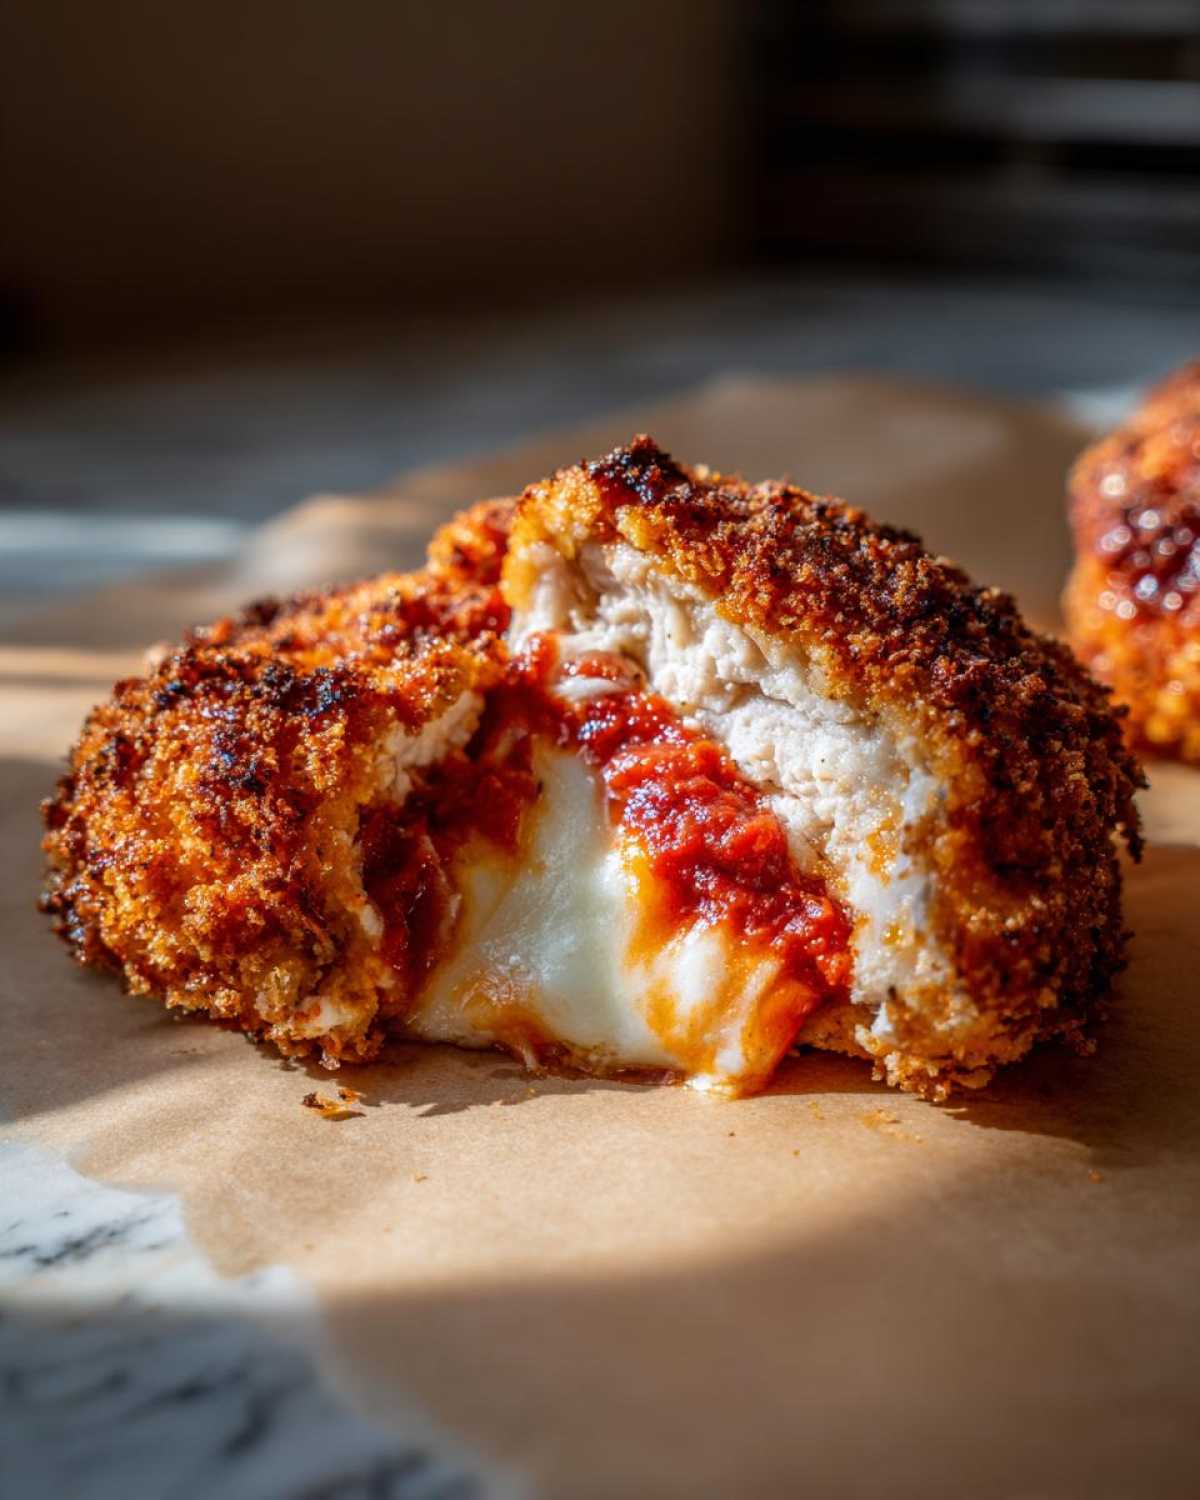
Assembly for Crispy Chicken Parmesan with Melty Cheese Topping
This is it! This is the moment where we either guarantee that phenomenal crunch or accidentally create lukewarm chicken swimming in sauce. If you follow this assembly sequence, you’re nailing that restaurant-style finish every single time. Remember how we fried those cutlets until they were deeply golden? Don’t let the sauce ruin that hard work!
The trick to keeping the bottom crust crisp is creating a tiny protective layer. Preheat your broiler—it gets hot fast, so be ready to move! Lightly spread just enough of that warm marinara sauce across the bottom of your baking sheet or small oven-safe dish. You just need a thin smear; we aren’t drowning it! This acts as a moisture buffer.
Then, place your beautifully golden, fried cutlets right on top of that thin sauce layer. Now, lightly sauce the top of the chicken—don’t dump a huge ladleful!—and immediately cover it with your low-moisture mozzarella and that final dusting of Parmesan cheese. You can find my favorite related recipe here if you’re feeling ambitious: Chicken Parmesan Meatballs.
Broiling for the Ultimate Melty Cheese Chicken Parm
The broiler is your best friend for achieving that perfect, bubbly, slightly browned topping without continuing to cook the chicken steak underneath for too long. Slide that baking sheet onto the top rack—but pay attention! Seriously, watch it like a hawk because broilers can go from perfect to burnt in about 20 seconds flat.
You are looking for the cheese to be fully melted, bubbling around the edges, and maybe just starting to get little kisses of golden brown color on the peaks. This usually only takes one to three minutes! Pull it out immediately once it hits that perfect melt. Garnish with some fresh, bright basil for a little freshness, and serve it piping hot! That crispness is waiting for you!
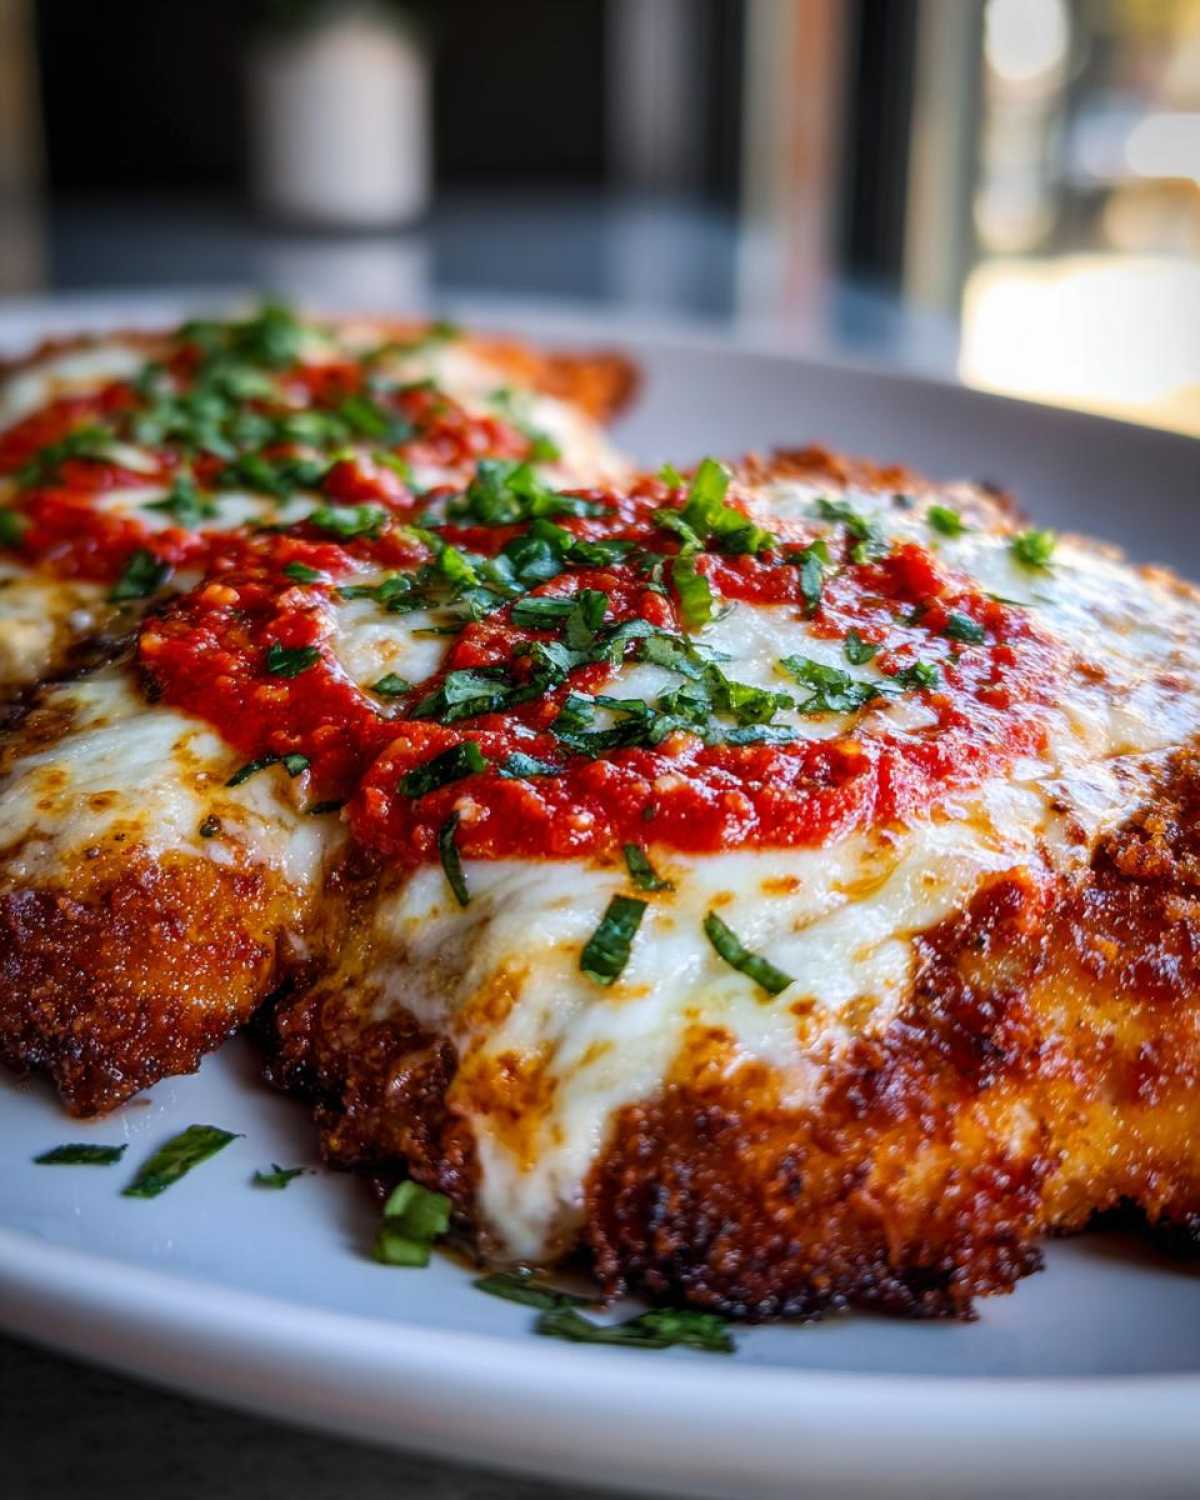
Tips for Success: How to Keep Chicken Parm Crispy
Even though we fried this chicken to perfection, saving that crunch when you reheat leftovers is always a challenge, right? The biggest pitfall with this dish is moisture, moisture, moisture! If you’re dealing with leftovers, I strongly suggest skipping the microwave entirely unless you enjoy texture surprises.
Your best bet for reviving the crispness is hitting it with dry, high heat. An air fryer is absolutely phenomenal for this—just a couple of minutes at 375°F works wonders. If you don’t have one, pop it back on a wire rack in a 400°F oven until the cheese is bubbly again. That wire rack is vital, even for reheating!
Also, remember that little note about baking versus frying? If you want to ditch the oil entirely, you absolutely can. Bake those breaded cutlets at 400°F for about 15 minutes first. Once they look golden, then add the sauce and cheese and broil. They won’t be *quite* as craggy as the fried version, but they are still wonderfully crisp! Speaking of other amazing chicken dishes, you have to try my Chicken Lasagna Recipe Creamy White sometime soon!
Serving Suggestions for Your From Scratch Chicken Parm Dinner
Now that you’ve mastered achieving what I deem the absolute best Crispy Chicken Parmesan with Melty Cheese, you need the perfect supporting cast! Because this dish is so rich, you want sides that are bright or simple enough to let that crunchy cutlet shine.
My go-to for soaking up that delicious sauce is always simple spaghetti tossed light with a little olive oil and maybe some fresh parsley. If you want something greener to cut the richness, you can’t beat a simple arugula salad dressed with lemon juice and maybe a tiny drizzle of olive oil.
For something heartier that still cooks fast, try my amazing Garlic Butter Steak Bites and Potatoes—they’re perfect for scooping up stray bits of that gooey cheese! Seriously, keep the sides straightforward, and enjoy digging into that crunch!
Storing and Reheating Leftover Crispy Chicken Parmesan
Even though we fried this chicken to perfection, saving that crunch when you reheat leftovers is always a challenge, right? The biggest pitfall with this dish is moisture, moisture, moisture! If you’re dealing with leftovers, I strongly suggest skipping the microwave entirely unless you enjoy texture surprises.
Your best bet for reviving the crispness is hitting it with dry, high heat. An air fryer is absolutely phenomenal for this—just a couple of minutes at 375°F works wonders. If you don’t have one, pop it back on a wire rack in a 400°F oven until the cheese is bubbly again. That wire rack is vital, even for reheating!
If you can manage it during storage, keeping the cooked chicken separate from the sauce for a day helps immensely. When you are ready to eat, just reheat the sauce separately and then crisp up the chicken before spooning the warmed sauce and cheese over just before serving. That way, you get that wonderful snap every single time!
Common Questions About Making Chicken Parmesan
Even after all those tips and tricks, folks always have a few lingering questions when they try to make restaurant-style food at home. Don’t worry, I’ve been there! Getting that combination of texture and perfect melt takes a little fine-tuning, but these answers should clear up any last doubts you have about nailing this Classic Italian American Comfort Food.
I gathered up the questions I hear most often from bakers trying this for the first time. If you have one I missed, drop it in the comments! And if you’re looking for another *Family Favorite Chicken Recipe* for another night, check out these Easy White Chicken Enchiladas Recipe.
Can I bake this instead of frying for a lighter option?
You totally can, and I listed it as an alternative in the notes! Baking is a perfectly good option if you’re trying to cut back on oil. However, you won’t get that signature, deep, rugged crunch we perfected today. If you bake, you must coat the breaded chicken first with a quick spray of oil before putting it in the 400°F oven for 15 minutes. Then, you add the sauce and cheese and broil. It keeps it crispy enough for a great dish, but frying just gives you that ultimate crunch!
What if I don’t have Panko breadcrumbs?
Oh, that’s a common kitchen emergency! While Panko is my number one choice for the Best Crispy Chicken Parmesan Recipe because of its shape, you can substitute it, but you need to help it along. If you only have standard fine breadcrumbs, mix them with about 2 tablespoons of cornstarch before you put them in the breading station. The cornstarch helps dry out the surface just a hair more, which gives you a better chance at achieving that crunch we are aiming for when making these Double Breaded Chicken Cutlets.
How do I know when the chicken is done frying?
Color is your best indicator here! Since the chicken is pounded thin, it cooks pretty fast. You’re looking for a deep, even golden-brown color, usually taking about 3 to 4 minutes per side depending on your stovetop heat. Since we are finishing it under the broiler anyway, we aren’t trying to cook it 100% through in the oil. We just want that crust set and the inside mostly cooked. If you cut into the thickest part and the juices run clear, you’re good to take it out!
Does the sauce really need to be warmed up before assembly?
Yes, please warm that sauce! This is part of the “how to keep chicken parm crispy” effort. Putting cold, thick sauce onto hot, freshly fried chicken is a bad idea. It cools the chicken crust down immediately, making it seize up in an unpleasant way, and it adds unnecessary moisture. Warm sauce spreads easier, melts the cheese quicker during the broil, and doesn’t shock the crispy coating!
PrintCrispy Chicken Parmesan with Melty Cheese
Follow these steps to make restaurant-style Chicken Parmesan with an extra crispy coating and perfectly melted cheese topping. This recipe focuses on keeping the crust from getting soggy.
- Prep Time: 20 min
- Cook Time: 20 min
- Total Time: 40 min
- Yield: 4 servings
- Category: Dinner
- Method: Frying and Broiling
- Cuisine: Italian American
- Diet: Meat
Ingredients
- 4 boneless, skinless chicken breasts (about 6 oz each), pounded to 1/2 inch thickness
- 1 cup all-purpose flour
- 2 large eggs, lightly beaten
- 1 1/2 cups panko breadcrumbs
- 1/2 cup grated Parmesan cheese (for breading)
- 1 teaspoon salt
- 1/2 teaspoon black pepper
- 1/2 teaspoon garlic powder
- 1/4 cup vegetable oil, for frying
- 1 cup marinara sauce, warmed
- 8 ounces low-moisture mozzarella cheese, sliced or shredded
- 1/4 cup grated Parmesan cheese (for topping)
- Fresh basil, chopped, for garnish
Instructions
- Set up a standard three-stage breading station. Place flour in the first shallow dish. Whisk eggs in the second dish. In the third dish, combine panko breadcrumbs, 1/2 cup grated Parmesan, salt, pepper, and garlic powder.
- Pat the pounded chicken cutlets completely dry with paper towels. This step is crucial for crispiness.
- Dredge each cutlet first in the flour, shaking off excess. Dip into the egg mixture, letting excess drip off. Finally, press firmly into the panko mixture, ensuring the entire surface is coated. For extra crispiness, repeat the egg and panko dip once more (double breading).
- Heat the vegetable oil in a large, heavy-bottomed skillet over medium-high heat until it shimmers (about 350°F).
- Carefully place two cutlets in the hot oil. Fry for 3 to 4 minutes per side until golden brown and cooked through. Do not overcrowd the pan. Remove chicken and place on a wire rack set over a baking sheet to drain excess oil. Repeat with remaining chicken.
- Preheat your oven broiler. Lightly spread about 2 tablespoons of warm marinara sauce on the bottom of a small, oven-safe baking dish or baking sheet lined with parchment paper. This prevents the crust from touching the sauce directly.
- Place the fried cutlets on top of the sauce layer. Top each cutlet with a spoonful of marinara sauce, followed by the mozzarella cheese, and then sprinkle with the remaining 1/4 cup of grated Parmesan cheese.
- Place the baking sheet under the broiler for 1 to 3 minutes, watching closely, until the cheese is fully melted, bubbly, and slightly golden.
- Remove from the oven, garnish with fresh basil, and serve immediately.
Notes
- To prevent sogginess, use low-moisture mozzarella and avoid putting too much sauce on the chicken before broiling.
- If you prefer baking over frying, bake the breaded cutlets at 400°F for 15 minutes before adding sauce and cheese, then broil.
- Use a blend of mozzarella and provolone for a sharper flavor profile in the cheese topping.
Nutrition
- Serving Size: 1 cutlet
- Calories: 550
- Sugar: 8
- Sodium: 750
- Fat: 30
- Saturated Fat: 12
- Unsaturated Fat: 15
- Trans Fat: 0.5
- Carbohydrates: 35
- Fiber: 3
- Protein: 42
- Cholesterol: 150