

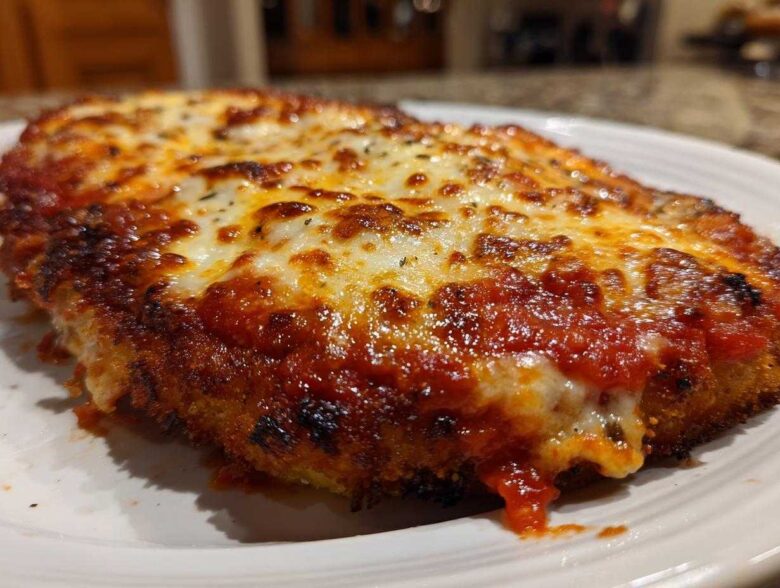
Listen, if you’ve ever made Chicken Parmesan only to slice into it and find a sad, soggy layer of breading clinging for dear life, I get it. That happened to me constantly! It’s heartbreaking when you’re aiming for that incredible, shatteringly crisp crust, but ending up with mush instead. Well, I finally cracked the code. This isn’t just another recipe; this is the best chicken parmesan recipe because it guarantees that restaurant-level crispiness, even after we add the sauce and cheese, all ready in under 45 minutes. Trust me, the secret lies in a quick pan-fry before the short trip to the oven. We’re going to make an Italian classic that tastes like it took all afternoon when really, it’s a perfect weeknight lifesaver. Come see how easy it is to bake a keeper!
Why This Crispy Chicken Parmesan Recipe Works (Expert Tips)
The reason this **chicken parmesan recipe** turns out so amazing while yours might turn out floppy is pure technique, plain and simple. We are borrowing a trick from the best Italian joints to create true **Restaurant Style Chicken Parmesan**. The main thing you must know is that we are treating the chicken like a delicate protein that needs high heat for a quick crust, not a long bake for doneness. We only pan-fry it long enough to set that golden shell. It’s a game-changer, honestly!
We always finish it in the oven, but that oven time is just for melting the cheese perfectly and making sure the center is safe to eat. If you skip the initial fry, you just get steamed breading! This method guarantees that shatteringly crisp texture we all crave. We also use Panko, which is a huge part of the magic, so don’t try to swap that out if crispiness is your main goal! For more great weeknight ideas using chicken, check out my Sheet Pan Chicken and Veggies.
Achieving the Perfect Pan Fried Chicken Cutlets
Look, we are starting with full chicken breasts, which are thick and uneven. If you bread them thick and uneven, you get burnt edges and raw centers. That’s why step one is pounding them out! You need them all to be about a 1/2-inch thick. This guarantees they cook both in the pan and in the oven quickly and evenly. Remember, the thicker the piece, the harder it is to keep that crust from getting sad.
Once they are pounded thin, we go straight to the three-step breading station, but the real star is the Panko breadcrumbs. Panko flakes are lighter and absorb less oil than standard crumbs, which means they get unbelievably crisp when they hit that hot oil. Press them on there firmly! You want full coverage so you don’t get any bare spots of chicken peeking out before they hit the fryer. This solid armor is what protects the chicken from getting soggy later.
Making This Chicken Parmesan Recipe Weeknight Friendly
I know you’re busy, I’m busy too! That’s the beauty of this method. Even though we have a two-step cooking process—pan-fry then bake—it’s lightning fast. The total time you’re looking at for this **chicken parmesan recipe** is only about 40 minutes, with less than 20 minutes of actual hands-on cooking time. We prep the chicken while the oil heats up, fry two pieces at a time (so the pan stays hot!), and then everything goes into the 400°F oven together.
Because the initial pan-fry takes just 3-4 minutes per side, you get that deep flavor locked in fast. You can even use a great jarred marinara sauce here to save even more time—it cooks down beautifully in the oven alongside the chicken. This is how we manage to get such a comforting, full-flavored meal on the table before homework is even finished!
Ingredients for the Best Chicken Parmesan Recipe
Getting the ingredients right is half the battle, as you saw when we discussed the Panko! For this absolute favorite **chicken parmesan recipe**, I’ve listed exactly what you need. Don’t sweat the substitutions too much, except for those breadcrumbs—trust me on the Panko! We’re keeping the cheese simple but effective for maximum melt and flavor in this classic dish.
You’ll need about four good-sized boneless, skinless chicken breasts to get four nice servings. If yours are giants, you might want to slice them horizontally to make four pieces, or just accept that you’ll have some amazing leftovers! We need simple seasonings, of course: salt and pepper to start. For the dredging station, we rely on standard flour, two eggs, and then that gorgeous Panko mixture enhanced with some grated Parmesan, oregano, and garlic powder. Don’t forget the olive oil for frying—you need enough to coat the bottom of the pan nicely! Lastly, you need about two cups of your favorite warm marinara sauce, and the cheese topping: that beautiful, slightly soft fresh mozzarella slices topped with the remaining Parmesan.
It feels like a lot of components, but once everything is laid out, assembly for this **Classic Chicken Parmesan** is totally smooth. You can check out my favorite recipe for Chicken Parmesan Meatballs later for a fun spin on these ingredients!
Step-by-Step Instructions for Your Chicken Parmesan Recipe
Right, you’ve got your ingredients ready, and your oven is warming up to 400°F—that’s 200 Celsius, just for reference! Now we put it all together. Follow these steps carefully, especially the timing, and you’ll see why this **chicken parmesan recipe** is superior. We prep the dish first, which keeps things running smoothly once the chicken comes out of the hot oil.
First things first: grab your baking dish and give it a light grease. Then we deal with the chicken itself. Take those pounded cutlets we talked about and season both sides with a sprinkle of salt and pepper. I like to do this right on the counter while I set up the assembly line. Everything flows better if you’re prepared! You can find more comfort food inspiration in my Cajun Chicken Alfredo Recipe later on if you need it!
Setting Up the Breading Station
This is where the magic armor gets built! You need three shallow dishes lined up in order: flour, then eggs, then the crumb mix. The first dish gets your plain flour—just shake off the excess after dipping the chicken. That flour helps the egg stick, see?
Next, dip that floured piece completely into the beaten eggs. Don’t let it sit; just a quick dip and let the extra drip off back into the bowl. Now for the star: the Panko mixture we made with the other Parmesan, oregano, and garlic powder. When you press the cutlet into this dish, you must press firmly! I mean it—use your palm to really make sure that Panko sticks everywhere. That firm crust is 100% what keeps your breading intact and crispy all the way through the bake. If it’s loose, it’ll fall off in the sauce!
Pan-Frying for Golden Color and Crispness
We need medium-high heat for this part. Put your olive oil in a big skillet and let it get nice and shimmering—you’ll know it’s ready when a tiny drop of water sizzles immediately. Now, work in batches! This is crucial. If you pile too many cutlets in there, the oil temperature drops instantly, and you end up steaming them instead of frying them. That leads straight to sogginess, and we aren’t having that!
We are only aiming for 3 to 4 minutes on each side. We are looking for a deep golden brown color. The chicken won’t be cooked all the way through, and that’s okay! As soon as they look gorgeous and brown, pull them out immediately. Don’t put them on paper towels; that traps steam! Place the hot cutlets on a wire rack set over a baking sheet. This lets the air circulate underneath, keeping the bottom crust crisp while they wait for their swim in sauce.
The Final Bake: Melting Cheese on Your Chicken Parmesan Recipe
Once all your gorgeous, golden cutlets are resting on the rack, time to bring them home! Move them carefully into the prepared baking dish. Now, put just a nice dollop—about a quarter cup—of the warmed marinara sauce right on top of each piece. Remember that tip? Don’t drown them! Too much sauce equals mushy crust, even with the Panko.
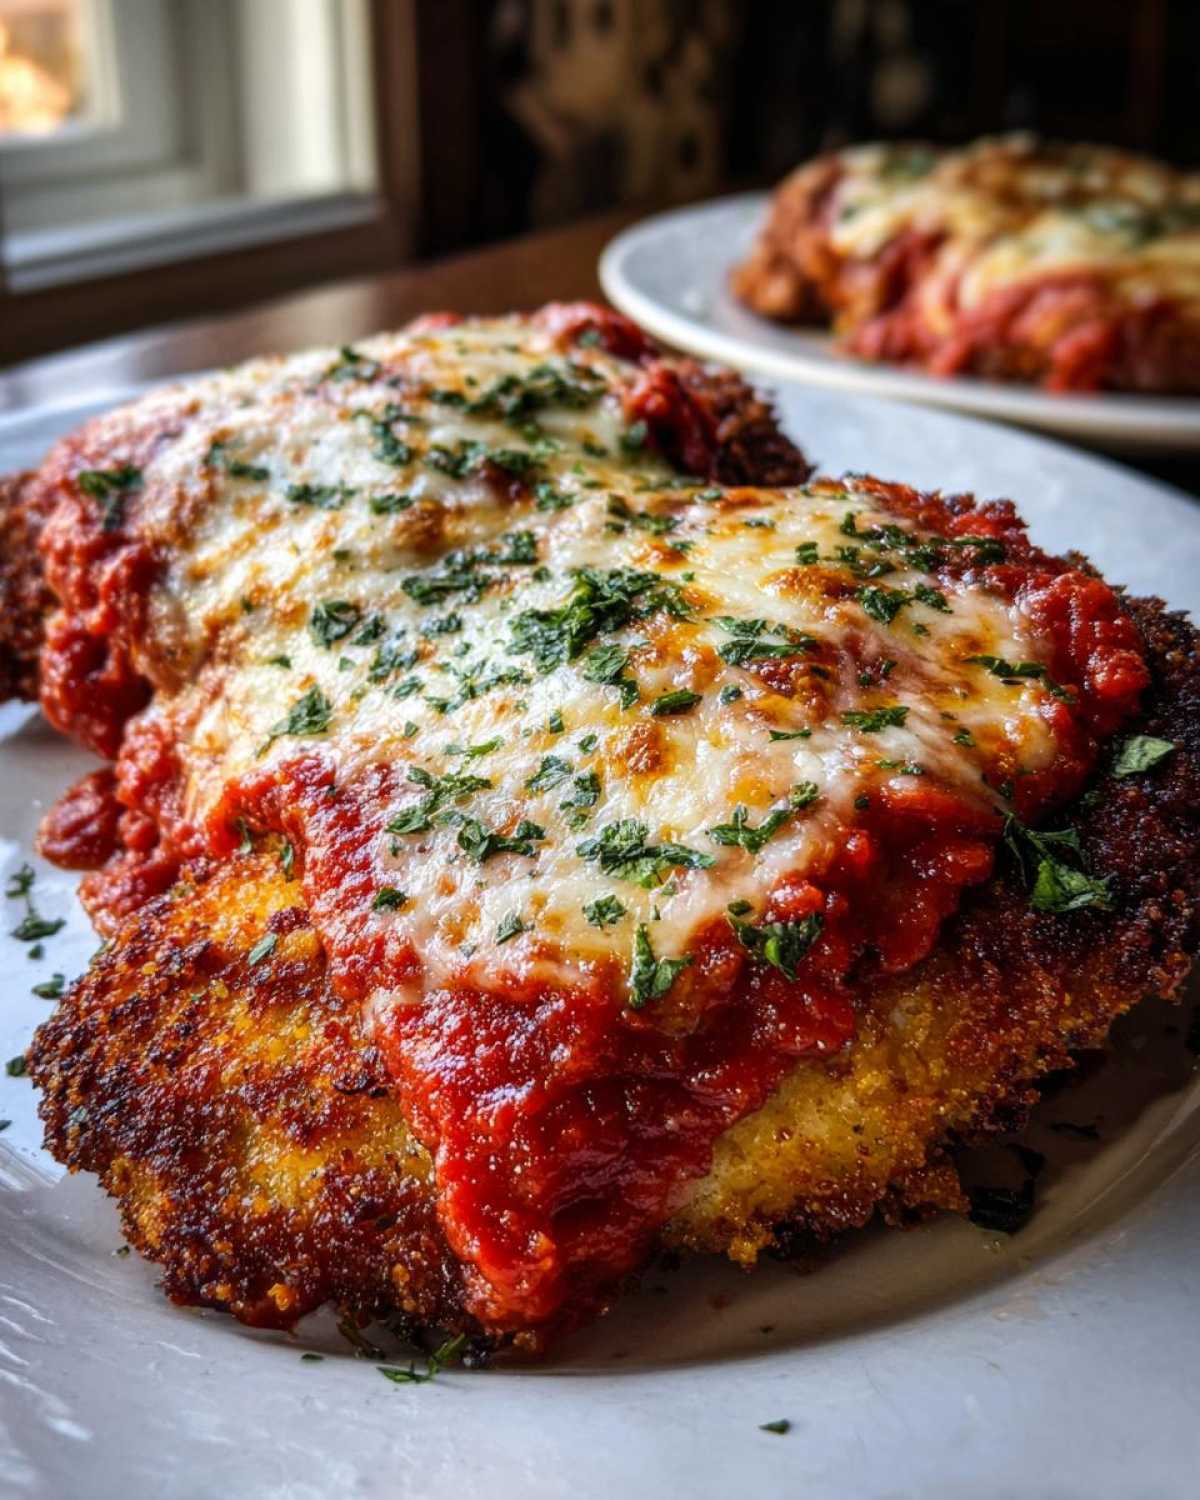
Layer the fresh mozzarella slices evenly over the sauce, and then sprinkle the remaining Parmesan cheese over the top of that mozzarella blanket. Pop the whole thing in that 400°F oven for about 10 to 12 minutes. You’re looking for that cheese to be totally melted and bubbly, and you want the chicken’s internal temperature to hit that safe 165°F mark. Pull them out, sprinkle on some fresh basil, and that’s it! Dinner is served!
Ingredient Notes and Substitutions for Chicken Parmesan
I always get questions about substitutions when people try this recipe, which is totally normal! Cooking is personal, right? But there are a few places where I really need you to stick to the script for the best results, especially if you are chasing that crispy dream. The biggest non-negotiable here is the breadcrumb situation.
If you try to use standard dried breadcrumbs instead of the Panko we called for, prepare for a different outcome. Panko crumbs are Japanese-style breadcrumbs that stay lighter and airier. They act like tiny sponges that crisp up beautifully instead of compacting down into a dense, heavy layer when they hit the oil. I learned this the hard way; using regular crumbs for my **Classic Chicken Parmesan** left the crust feeling heavy and greasy. Stick with Panko for that airy crunch!
Now, let’s talk about the sauce. My recipe uses 2 cups of warmed marinara sauce. Are you lucky enough to wake up early enough to simmer your own tomato sauce all morning? Great! Use it! But if you don’t have time, there is absolutely no shame in grabbing a good quality, thick jarred sauce. Just make sure it’s a good brand that tastes rich; after all, it’s coating something so delicious! For dipping material, try this Creamy White Chicken Chili next week if you’re looking for something totally different!
Finally, the cheese! We specify fresh mozzarella slices, and here is why: fresh mozzarella has more moisture, which is great for that glorious, gooey melt when it hits the oven. Low-moisture, pre-shredded mozzarella is designed not to clump, so it often ends up stringy rather than beautifully melted over the top of your **Melty Mozzarella Chicken**. For the Parmesan, make sure it’s freshly grated from the block if you can—it just disperses better and tastes so much sharper than the green can stuff! It really elevates the whole flavor profile.
Making a Healthier Baked Chicken Parmesan Recipe
I know sometimes we aren’t looking for a total fryer-level indulgence, right? We want that same incredible comfort food experience but maybe without frying in oil during the week. Good news! This **chicken parmesan recipe** is surprisingly versatile, and you can absolutely make a fantastic, lower-fat version just by skipping the initial pan-fry step. It’s one of those easy swaps that keeps this dish in rotation even when I’m trying to be a little lighter on the oils.
The key here is treating the breaded cutlets gently when they bake dry for the first time. Remember how I said the pan-fry sets the crust? When baking from raw, we just need to set that shell enough so the sauce doesn’t soak straight through it, turning it to paste. It won’t get *quite* as deep brown or shatteringly crisp as the fried version—let’s be honest about that—but it’s still delicious and achieves that lovely golden bake on the cheese!
To make this the healthier, **Baked Chicken Parmesan**, you just follow steps 1 through 4 in the instructions (pounding, seasoning, setting up the station, and dredging). Then, stop! Skip heating the oil.
Instead, grab a baking sheet, line it with parchment paper (or a silicone mat if you have one!), and lightly spray the breaded cutlets with a good quality cooking spray. Don’t skip the spray; it’s crucial for helping that Panko brown slightly.
Bake those sprayed cutlets at 400°F for about 15 minutes until they feel dry under the spray. Carefully take them out, add your sauce and cheeses as normal (Steps 7-9), and return them to the oven for about 10 more minutes until the cheese is melted. Done! You just saved yourself a good chunk of fat, and you can still enjoy a fantastic **Weeknight Chicken Dinner**! If you love quick meals like this, make sure to check out my Maple Glazed Salmon recipe next!
Serving Suggestions for This Italian Dinner Idea
So, you’ve got this glorious, cheesy, crispy masterpiece sitting hot on the counter, and now you need the perfect partner for it! Serving this is almost as much fun as making it. Our instructions mentioned serving it straight over spaghetti, and that is the pure, classic route, right? It’s the ultimate **Italian Comfort Food Dinner** experience. If you go the pasta route, make sure you have plenty of extra marinara sauce on hand, because you’ll want to swirl that glorious chicken juice right into your noodles!
If you want to go the pasta route, I always recommend a sturdy noodle that can hold up to the rich sauce and the weight of the chicken. Thick spaghetti, fettuccine, or even rigatoni work perfectly. Just remember to save some of that starchy pasta water when you drain it, because adding a splash of it to your serving bowl before tossing the pasta ensures the sauce clings beautifully to every strand. No sad, dry noodles allowed here!
But what if you’re eating low-carb or just want something lighter to balance out all that glorious cheese? Then we pivot to the salad! A simple, bright, non-creamy side salad is the perfect foil. Think crisp, cool greens, maybe some thinly sliced cucumber, and a punchy lemon vinaigrette. That acidity cuts right through the richness of the mozzarella and Parmesan so you can actually eat another bite! A simple shaved Parmesan salad with good olive oil is my go-to for cutting the richness.
For another amazing, slightly different, one-pot Italian experience, you have to try my One-Pot Tuscan Chicken Pasta sometime next week. But for tonight, stick to the classics. Whether you serve this incredible **Italian Dinner Idea** with pasta or a fresh side, just make sure you have a big fork ready!
Storage and Reheating Instructions for Leftover Chicken Parmesan
Okay, let’s talk about the inevitable: leftovers! If you’re lucky enough to have any of this fantastic chicken left over—and honestly, I usually have to hide a piece from my husband just so I can test this—the goal is keeping that crust alive. The enemy here is moisture, and the refrigerator is a damp cave, so we have to be strategic about storage.
First, you absolutely must let the chicken cool down completely on the counter before you even think about putting it in the fridge. Putting warm food straight into the fridge creates condensation, which is just liquid breading waiting to happen! Once it’s fully cooled, try your best to store the components separately if you can manage it. If you can keep a piece without the sauce and cheese layered on top, that’s ideal. If you can’t, just stack the pieces with a little bit of parchment paper or wax paper between each cutlet to prevent them from sticking into one giant, cheesy brick overnight.
Now for the reheating. Please, please, please skip the microwave! Microwaving leftovers is the fastest way to turn that beautiful Panko crust into rubber cement. We want crispy, remember? We have two paths to salvation here, and both prioritize dry heat.
Path one, my favorite for restoring maximum crispness, is the air fryer. If you have one, toss the cold chicken in there for about 4 to 6 minutes at 350°F. It brings the crust right back to life without drying out the chicken inside. If you don’t have an air fryer, the oven is your next best friend. Simply place the leftover chicken (sauce and cheese intact is fine for the oven) on a small baking sheet, maybe even pop it on a wire rack again if you’re feeling fancy, and bake it at 350°F for about 10 to 12 minutes. It heats evenly and lets the cheese melt one last time without making everything soggy!
If you’re looking for great make-ahead meals in general, you should totally check out my tips for Freezer Breakfast Burritos—sometimes you just need something ready to go!
Frequently Asked Questions About the Chicken Parmesan Recipe
I know you might still have a couple of burning questions floating around after reading all the nitty-gritty details about getting that perfect crust. That’s totally fine! When you’re dedicated to making a truly **Restaurant Style Chicken Parmesan**, you have to have all your doubts cleared up. Here are the things I get asked most often about making this **chicken parmesan recipe** a success!
How to Make Chicken Parmesan Crispy and Prevent Sogginess?
This is the million-dollar question, isn’t it? I harp on this because it’s the key! If you follow the recipe closely, you’re already ahead of the game because we are using Panko breadcrumbs, which are designed to crisp up perfectly. But the biggest secret to preventing sogginess happens right at the baking stage. Do NOT cover your browned chicken cutlets with too much marinara sauce before they go into the oven! A light coating on top is perfect. Too much sauce sitting underneath that beautiful crust is just going to steam it silly. Remember, we are just finishing the cook and melting the cheese; the hard work of crisping happened in the hot oil!
Can I use chicken thighs instead of breasts in this chicken parmesan recipe?
You absolutely can use thighs! Thighs are naturally more flavorful and stay much juicier, which is a huge bonus when cooking poultry. However, chicken thighs are almost always thicker and more irregular than the breasts we pound down to a uniform size. Because they are thicker, you need to adjust your cooking times. If you decide to use thighs, stick to the pan-frying step for the same 3-4 minutes per side just to color and set the crust, but expect the final baking time in the oven to increase by probably 5 to 8 minutes to ensure they hit that safe internal temperature of 165°F. Keep an instant-read thermometer handy for this swap!
What is the best cheese combination for Melty Mozzarella Chicken?
For the ultimate gooey, stretchy texture that looks amazing when you slice into it, you’ve got to use fresh mozzarella. I know sometimes it comes packed in liquid, but drain it really well! That fresh mozzarella melts into that perfect, creamy layer. We combine that with the grated Parmesan—which is where we get that sharp, salty punch that cuts through the richness. The Parmesan is sprinkled both into the Panko mix *and* on top of the mozzarella for that double layer of flavor. This specific pairing guarantees you get that **Melty Mozzarella Chicken** look and taste perfectly, hitting on all the best parts of this **Comfort Food Dinner Recipe**.
I hope that helps you get cooking! If you have extra time later or need something different for dinner next week, you should peek at my Shakshuka Recipe—it’s so fun to make!
Estimated Nutritional Data for This Chicken Parmesan Recipe
Okay, here’s the deal on the nutrition breakdown for this amazing **chicken parmesan recipe**. I’ve pulled the numbers based on the ingredients we used—four servings total—but I want you to take this section with a big grain of salt, because honestly, who measures exactly how much oil they use when frying? Or exactly how thick that slice of mozzarella is?
These figures are just estimates, a general idea of what you’re looking at per serving, which is one cutlet, as we listed. The exact values will totally change depending on the brand of marinara you use, how much oil your Panko totally soaks up (hopefully not much, since we drained it well!), and the exact thickness of your chicken breast. It’s a great baseline, but treat it as such!
For example, if you decide to skip that initial pan-fry and go for the healthier baked version we talked about earlier, your fat and calorie counts will drop significantly. But if you load up on extra oily toppings, those numbers creep up fast! We tried to keep it balanced in the main recipe, aiming for that sweet spot where comfort food still feels somewhat manageable.
Here is the breakdown we calculated based on those standard ingredient assumptions. If you decide to make these alongside my Avocado Toast with Smoked Salmon recipe later, you can see how wildly different your macro profiles look! Just remember, this is a rich, classic **Italian Comfort Food Dinner**, so we aren’t breaking any diet records here, but it certainly hits the spot!
- Serving Size: 1 cutlet
- Calories: 550
- Fat: 30g
- Saturated Fat: 12g
- Cholesterol: 150mg
- Sodium: 750mg
- Carbohydrates: 25g
- Fiber: 3g
- Sugar: 8g
- Protein: 48g
See that high protein number? That’s that beautiful chicken breast delivering! That’s usually the best part of any good dinner recipe. Enjoy knowing what you’re eating, but more importantly, enjoy how incredible it tastes!
PrintThe Best Crispy Pan-Fried Chicken Parmesan
Make restaurant-quality Chicken Parmesan at home. This recipe focuses on achieving a crispy crust by pan-frying the cutlets before baking them with sauce and cheese.
- Prep Time: 15 min
- Cook Time: 25 min
- Total Time: 40 min
- Yield: 4 servings
- Category: Dinner
- Method: Pan-Frying and Baking
- Cuisine: Italian-American
- Diet: Meat
Ingredients
- 4 boneless, skinless chicken breasts (about 6 oz each)
- 1 teaspoon salt
- 1/2 teaspoon black pepper
- 1/2 cup all-purpose flour
- 2 large eggs, lightly beaten
- 1 cup Panko breadcrumbs
- 1/2 cup grated Parmesan cheese, divided
- 1/2 teaspoon dried oregano
- 1/4 teaspoon garlic powder
- 1/4 cup olive oil, for frying
- 2 cups marinara sauce, warmed
- 8 ounces fresh mozzarella cheese, sliced
- 1/4 cup fresh basil, chopped (for garnish)
Instructions
- Preheat your oven to 400 degrees Fahrenheit (200 Celsius). Lightly grease a baking dish large enough to hold the cutlets.
- Prepare the chicken: Place each chicken breast between two sheets of plastic wrap. Pound them to an even 1/2-inch thickness using a meat mallet. Season both sides with salt and pepper.
- Set up a three-stage breading station. In the first shallow dish, place the flour. In the second, place the beaten eggs. In the third dish, combine the Panko breadcrumbs, 1/4 cup of the grated Parmesan cheese, oregano, and garlic powder.
- Dredge each cutlet first in the flour, shaking off excess. Dip it completely into the egg mixture, letting excess drip off. Finally, press the cutlet firmly into the Panko mixture to coat both sides thoroughly.
- Heat the olive oil in a large, heavy-bottomed skillet over medium-high heat until shimmering.
- Carefully place two cutlets in the hot oil (do not overcrowd the pan). Pan-fry for 3 to 4 minutes per side until golden brown and crispy. The chicken will not be fully cooked through at this stage. Remove the cutlets and place them on a wire rack set over a baking sheet to drain excess oil. Repeat with the remaining cutlets.
- Place the browned cutlets in the prepared baking dish. Spoon about 1/4 cup of warm marinara sauce over the top of each cutlet.
- Top each cutlet with slices of mozzarella cheese. Sprinkle the remaining 1/4 cup of Parmesan cheese over the mozzarella.
- Bake for 10 to 12 minutes, or until the internal temperature of the chicken reaches 165 degrees Fahrenheit (74 Celsius) and the cheese is melted and bubbly.
- Garnish with fresh basil before serving. Serve immediately over spaghetti or alongside a fresh green salad.
Notes
- To keep the crust crispy, avoid covering the chicken with too much sauce before baking.
- For a healthier, baked-only version, spray the breaded cutlets lightly with cooking spray and bake at 400 degrees Fahrenheit for 15 minutes before adding sauce and cheese, then bake for another 10 minutes.
- Use Panko breadcrumbs instead of regular breadcrumbs for the best crisp texture.
Nutrition
- Serving Size: 1 cutlet
- Calories: 550
- Sugar: 8
- Sodium: 750
- Fat: 30
- Saturated Fat: 12
- Unsaturated Fat: 15
- Trans Fat: 0.5
- Carbohydrates: 25
- Fiber: 3
- Protein: 48
- Cholesterol: 150