

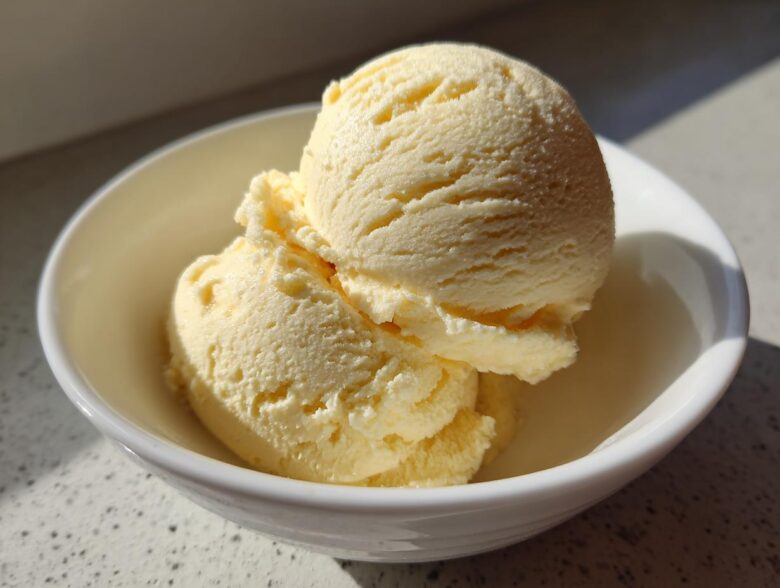
Listen, sometimes you just need ice cream, and you need it *now*. Seriously, forget waiting for delivery or fussing with salty ice baths. The absolute pinnacle of my quick dessert arsenal is this unbelievably creamy banana ice cream. And here’s the best part? You absolutely do not need that big, clunky ice cream machine sitting in your cupboard collecting dust.
After years of testing blenders and processors, I perfected this method for the ultimate creamy banana ice cream. It’s magic because it works beautifully for both the super-clean, healthy ‘nice cream’ version, or you can bulk it up slightly for a richer frozen treat. Trust me, the texture just hits different.
If you are looking for the easiest way to satisfy that frozen craving using fruit alone, stick around. We’re making the best frozen banana dessert you’ve ever had!
Why This Creamy Banana Ice Cream Recipe Works So Well
What separates my recipe from the mushy messes others end up with? It’s all about how we treat those frozen bananas! This isn’t just throwing fruit in a blender; it’s about applying enough sheer force—quick, intense processing—to mimic what churning does in a machine. That’s why this is the Creamy Banana Ice Cream Recipe you’ll want to rely on.
When you blend the frozen slices at high speed, the structure of the fruit changes immediately. It goes from hard chunks to a thick paste, and then, wow, it suddenly transforms into that light, airy soft-serve. This is the Best Banana Ice Cream Method because it avoids adding heavy dairy unless you specifically want extra richness.
The Importance of Ripe, Frozen Bananas for Banana Ice Cream
You simply cannot cheat on the starting ingredients here. I only use bananas that are spotted—the browner the better! Those brown spots mean the starches have converted into natural sugars, which gives us maximum sweetness without needing to pour in tablespoons of maple syrup. Always peel, slice them into discs, and freeze those slices until they are rock solid, usually overnight. If they aren’t frozen solid, you end up making banana soup, and nobody wants that!
Essential Ingredients for Delicious Frozen Banana Dessert
Okay, let’s talk supplies! To nail that perfect texture for this Delicious Frozen Banana Dessert, we need to keep our ingredient list short and sweet, but we absolutely need to respect the quality of what goes in. Unlike baking, where flour counts matter intensely, here it’s about what you leave out as much as what you put in. I’ve broken down what you need below so you can quickly check your freezer stash!
Base Ingredients for Creamy Banana Ice Cream
These are the non-negotiable items for the base recipe that works for both the super-simple nice cream and the blender dessert. Remember, the magic relies heavily on the bananas themselves!
- Four large, wonderfully ripe bananas, peeled, sliced up nicely, and then frozen rock solid.
- One-quarter cup of milk. If you want the super healthy/vegan route, use any non-dairy milk like oat or almond.
- One teaspoon of vanilla extract—this is optional, but honestly, why skip it? It just makes everything taste more like real ice cream!
- One tablespoon of sweetener—only add this if your bananas weren’t super ripe, or if you need an extra little kick. Maple syrup or honey works great here.
Optional Additions and Richer Substitutions
This is where you customize the flavor profile. If you are looking for something decadent, this is your spot. For those who want a true, richer, high-fat dessert, the substitution here is key.
If you’re making a traditional treat, swap out the quarter cup of milk for a full half cup of heavy cream—that gives you an amazing, classic Banana Ice Cream with Cream texture. Then, make sure you remember to add an extra two tablespoons of plain white sugar when you blend everything up!
For flavor boost, vanilla is great, but I also love stirring in peanut butter or cocoa powder later on. Don’t mix these into the main base initially; we save those flavor additions for the final blending stage, which I detail in the next section!
How to Make Banana Ice Cream Without Machine: Step-by-Step Instructions
This is where the magic happens, folks! If you’re making Banana Ice Cream Without Machine, you need to pay close attention to power and patience. I have found that a good, strong food processor handles this task slightly better than a standard blender, but either will work if you are patient. Trust me, you’ll need to keep stopping and scraping, but don’t let that frustrate you! That stopping and starting is actually part of the process.
A little tip from me: If your processor is really struggling to grab the bottom pieces, just let the frozen slices sit on the counter for about two minutes before you start blending. That brief thaw is usually enough to help it get going!
Processing the Frozen Fruit Base
First thing’s first, get those rock-solid, sliced bananas into your powerful food processor or high-speed blender. You need to pulse them first. We are trying to break down those hard chunks into little crumbles. Stop the machine frequently—like every 10 seconds—and use a spatula to scrape down the sides. You want everything moving toward the blade evenly.
Achieving the Perfect Banana Ice Cream Texture
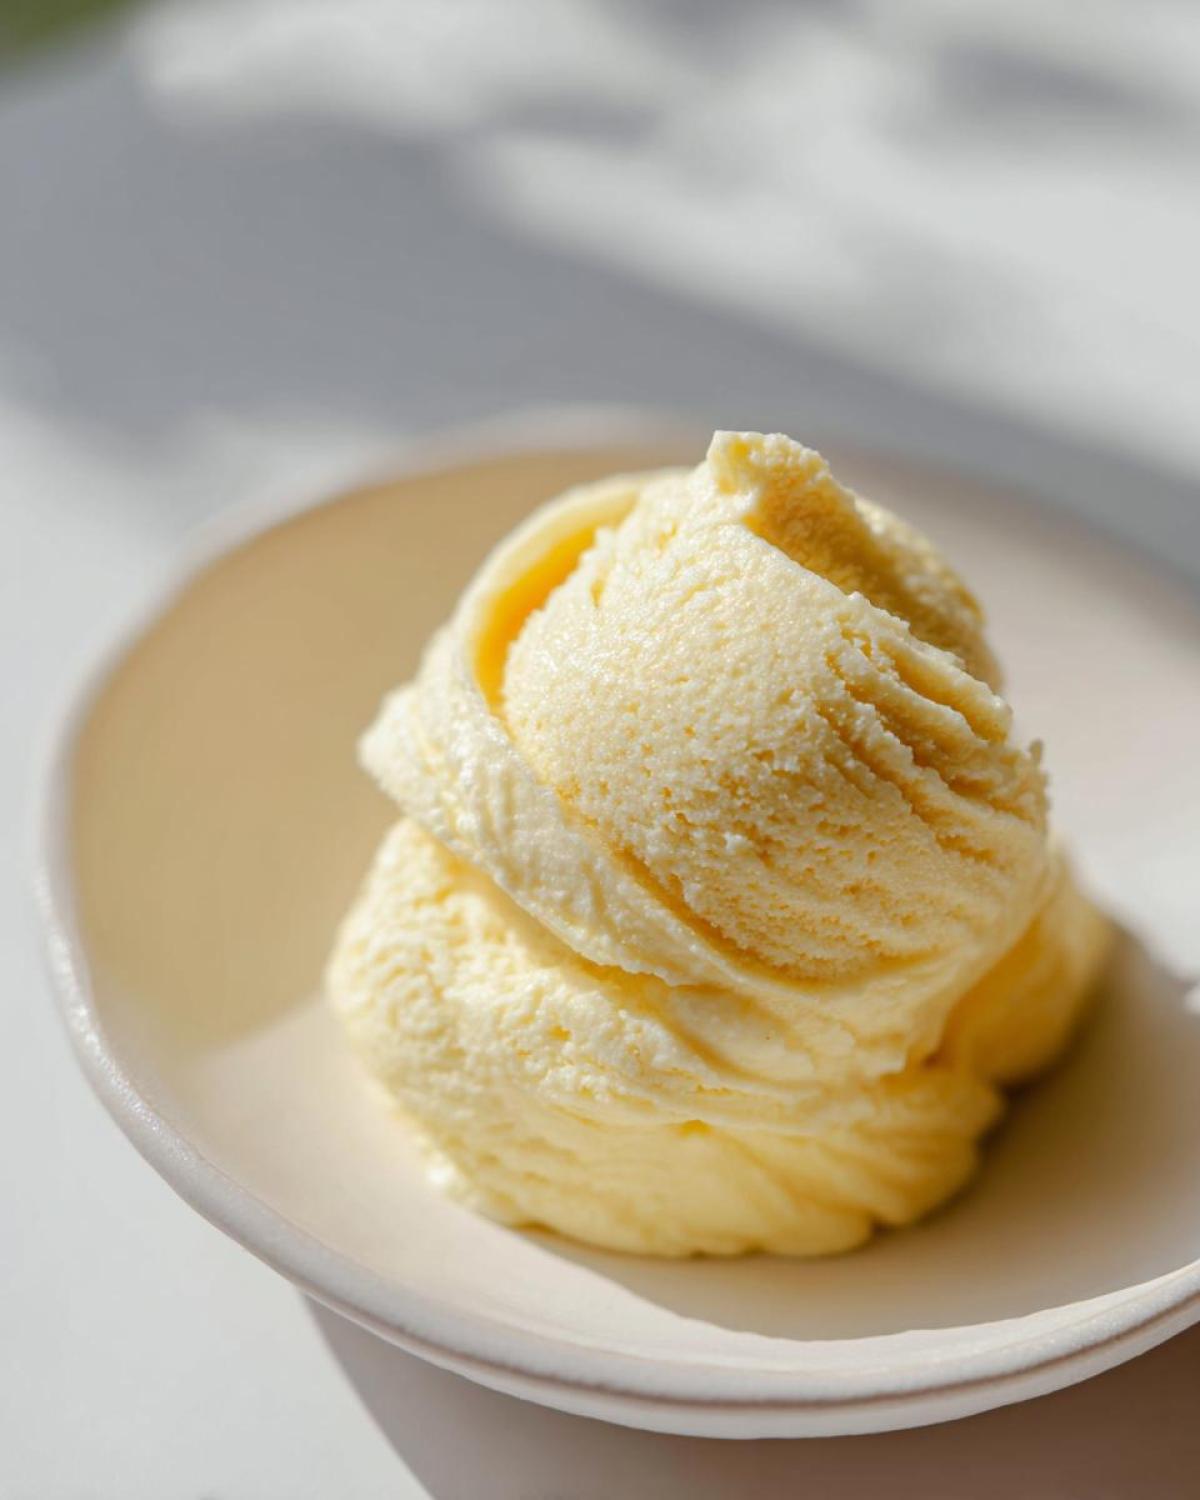
Keep going with the pulsing and scraping. It will look messy—first like crumbly snow, then like a thick, sticky paste. Don’t panic! Keep processing. After about three to five minutes of continuous work, you will notice a profound change. Suddenly, it goes from paste to smooth, luxurious soft-serve. That’s the sign you’ve reached peak creaminess!
Once it’s smooth, that’s when you quickly add in your liquid (milk or cream), the vanilla, and any sweetener. Process only long enough for it to mix in, maybe five more seconds. We don’t want to overheat it once we hit that perfect texture!
Finishing and Freezing for Harder Banana Ice Cream
If you’re like me and want that classic scoopable ice cream texture rather than soft-serve, you need to transfer everything into a freezer-safe container right away. Press a piece of plastic wrap directly onto the surface of the mixture—this prevents those nasty ice crystals from forming on top.
Pop that container into the freezer for at least two hours. If you are serving it instantly, you can skip the freezer step entirely and serve it right out of the machine for a delicious, quick frozen treat!
Variations for Your Banana Ice Cream
Now that you have mastered the base recipe—which, frankly, is amazing on its own—it’s time to start turning this into a true dessert masterpiece! I love having a couple of these flavor variations ready to go for guests. Because we are using the soft-serve stage before the final freeze, adding mix-ins is so simple; they integrate perfectly without destroying that beautiful smooth texture we worked so hard to create.
Creating Peanut Butter Banana Ice Cream
If you love that classic combination, this is the easiest one to tackle. Once your bananas are perfectly smooth and creamy in the processor—right after you’ve added your milk or cream—you’re going to drop in two tablespoons of smooth peanut butter. That’s all it takes! Process only until it’s completely incorporated.
You want to make sure the peanut butter is fully blended in so you don’t get one big chunk of salty, nutty flavor in one bite. I used this mixture on the kids the other day, and they asked if I ordered it from a fancy shop. Don’t forget to check out my chocolate chip banana bread recipe for another fantastic use of those brown bananas!
Making a Chocolate Swirl Banana Ice Cream
This variation takes just a little more effort, but it looks so fancy when you serve it up. First, make your base batch of soft-serve banana ice cream, just like usual. Now, scoop out about a quarter cup of that finished soft-serve mixture into a separate small bowl.
In that small bowl, stir in just one tablespoon of cocoa powder until it’s a rich, dark brown color. Now, take your main freezer container. You’re going to layer the mixtures: put a layer of the plain banana ice cream in, then drizzle some of the chocolate mixture over that. Repeat until both bowls are empty. Use a butter knife to gently swirl the layers together—don’t mix too much, or you lose the swirl effect! Then, seal it up and freeze for at least two hours.
Making Healthy Banana Nice Cream: The One Ingredient Banana Ice Cream Option
Okay, if you’re aiming for my favorite guilt-free, naturally sweet indulgence, we are stripping this down to bare bones. This is where we talk about true Healthy Banana Nice Cream. Honestly, the pure, one-ingredient version blows my mind every single time. If your bananas are perfectly ripe—those almost black ones—you might not need anything else at all!
This method is the definition of One Ingredient Banana Ice Cream. You just toss those frozen slices into the processor and let it run. You’ll be amazed at how sweet and perfectly creamy it gets just from the fruit itself. Since we aren’t adding any heavy cream or sugar, this is totally vegan and dairy-free too, which is fantastic for everyone!
Now, I have to be honest: sometimes my blender just gets stubborn, especially if I forget to slice the bananas thinly enough. If your machine is really struggling to turn them into that smooth, soft-serve magic after a couple of minutes, just add a couple of splashes—like a tablespoon at a time—of cold water or even non-dairy milk just to help the blades catch. Don’t go crazy with the liquid, or the texture changes too much!
It’s the quickest dessert hack ever. When I make this ultra-simple version, I usually end up dusting it with a little cinnamon or maybe folding in some walnuts, sort of inspired by my banana nut muffins. It’s proof that you don’t need fancy equipment or weird stabilizers to get amazing, creamy results!
Tips for Success with No Churn Banana Ice Cream
Getting that perfect, scoopable texture for your Easy Homemade Banana Ice Cream really relies on listening to your equipment and watching the mixture closely. I have a few little tricks that I always follow to make sure I don’t end up with icy disappointment. You’ll find these essential if you are trying to avoid using a machine!
First, be honest about your machine! A standard, cheaper blender might just not have the horsepower to get that final creamy texture without overheating or stalling. If you have a weak blender, you absolutely must let the frozen bananas thaw for about three or four minutes before even starting to pulse. That brief thaw is often enough to help the blades catch, making it much easier!
Second, when transferring the finished soft-serve to the freezer container, take an extra step to smash down that plastic wrap directly onto the surface. That air gap is where ice crystals form, and we do not want any of those lurking around. If you hate the thought of having to wait for it to soften up later, try freezing it in small, shallow containers instead of one big deep tub—it speeds up the hardening process!
Finally, if you followed my tip earlier about mixing in peanut butter or cocoa, make sure those flavor additions are at room temperature before you drop them in. Cold ingredients shock the mixture and can cause it to seize up instead of blending smoothly. Like my banana oat pancakes, every great recipe depends on using ingredients at the right temperature for the best results!
Storage & Reheating Instructions for Banana Ice Cream
Storing this creamy banana ice cream is super important, especially if you make the pure nice cream version, because it doesn’t have added stabilizers. You absolutely must keep it airtight to fight off freezer burn. I press a sheet of plastic wrap right down onto the surface before I put the lid on the container. That seals out the air!
If you used heavy cream, it stays pretty scoopable, but if you made the one-ingredient version, it can freeze up like a rock. Don’t panic if that happens! Just pull it out of the freezer about ten minutes before you plan on serving it. That slight warm-up time is all you need to get perfect scoops again. Enjoy!
Frequently Asked Questions About Banana Ice Cream
I get so many messages asking little clarifying questions, which is wonderful! It just means you all are serious about getting this right. Here are the main things people ask me about making this quick 5-minute ice cream magic happen.
Can I use fresh bananas instead of frozen ones?
Oh, honey, please don’t try it! If you use fresh bananas, you will end up with banana pudding or a thick smoothie, not ice cream. The entire structural integrity of this dessert relies on the frozen banana slices shattering under the power of the machine, which releases the natural creaminess. They have to be frozen rock solid!
I only have a standard blender; can I still make this?
You *can* try, but I definitely recommend a high-powered blender or, even better, a sturdy food processor. Standard blenders often struggle with the sheer density of frozen fruit. If you must use one, you’ll need to stop and scrape down the sides every 15 seconds, and you will probably need to let the bananas thaw out for just a few minutes longer than I suggest to help the blades move freely. Be patient, or you might burn out your motor!
Is this recipe dairy-free or vegan?
The core recipe, using just the bananas, vanilla, and perhaps a touch of maple syrup, is totally vegan and dairy-free! However, remember that if you want that richer, heavier texture—like a traditional scoop you can really dig into—you need to swap the milk for heavy cream. That substitution takes it out of the vegan category, so just be mindful of what liquid you add.
Why does my nice cream turn into a liquid puddle so fast?
That’s the joy and pain of using only fruit for sweetness—it melts fast! Once you make the soft-serve stage, you need to work quickly. If you want scoopable ice cream, get it into an airtight container and into the coldest part of your freezer immediately for those two hours. If it starts getting soft while you are serving, just pop the whole bowl back in for 20 minutes to firm up again!
Estimated Nutritional Profile for This Banana Ice Cream
Alright, let’s talk numbers! I always want you guys to know exactly what you’re putting into your bodies, especially when you’re digging into what feels like a truly indulgent scoop. But here’s the deal:
The nutritional breakdown I’m sharing here is **strictly an estimate** based on the base recipe where we used non-dairy milk and skipped any optional added sweetener. If you go the route of adding heavy cream or extra maple syrup for that richer, more decadent dessert, these numbers are definitely going to jump up, particularly in the fat and sugar categories. So, consider this your baseline for the super light, healthy version!
For reference, this estimate applies to about a half-cup serving size, which is perfect for a guilt-free frozen dessert!
- Serving Size: 1/2 cup
- Calories: Approximately 180
- Carbohydrates: 45g
- Protein: 2g
- Total Fat: 1g (mostly healthy unsaturated fats!)
- Sugar: 15g (all natural from the fruit, unless you add maple syrup)
It’s wild how low the fat content is when you stick to just the frozen fruit, right? That’s another reason why this is my go-to quick summer treat. It satisfies that sweet craving almost instantly without the heavy aftermath you get from traditional store-bought tubs!
PrintCreamiest No-Churn Banana Ice Cream
Make incredibly creamy banana ice cream without an ice cream maker. This recipe offers a base for both a simple, healthy ‘nice cream’ and a richer, dairy-based version.
- Prep Time: 10 min
- Cook Time: 0 min
- Total Time: 10 min
- Yield: 2 servings
- Category: Dessert
- Method: Blending/Freezing
- Cuisine: American
- Diet: Vegan
Ingredients
- 4 large ripe bananas, peeled, sliced, and frozen solid
- 1/4 cup milk (dairy or non-dairy for nice cream; heavy cream for richer version)
- 1 teaspoon vanilla extract (optional)
- 1 tablespoon sweetener (optional, maple syrup or honey)
Instructions
- Place the frozen banana slices into a strong food processor or high-powered blender.
- Pulse the bananas until they break down into small crumbles. Stop and scrape down the sides as needed.
- Continue processing. The mixture will look crumbly, then paste-like, and finally, it will suddenly turn smooth and creamy, resembling soft-serve ice cream. This may take 3 to 5 minutes of continuous processing.
- Add the milk (or cream), vanilla, and sweetener (if using). Process until just combined and fully smooth. Do not over-process once smooth.
- For soft-serve consistency, serve immediately.
- For hard ice cream, transfer the mixture to a freezer-safe container, press plastic wrap directly onto the surface, and freeze for at least 2 hours.
Notes
- For a richer, traditional flavor, substitute the milk with 1/2 cup of heavy cream and add 2 tablespoons of sugar before blending.
- To make Peanut Butter Banana Ice Cream, add 2 tablespoons of smooth peanut butter during the final blending stage.
- For Chocolate Swirl Banana Ice Cream, reserve 1/4 cup of the finished soft-serve mixture, mix it with 1 tablespoon of cocoa powder, then layer the plain and chocolate mixtures in the freezer container before freezing.
Nutrition
- Serving Size: 1/2 cup
- Calories: 180
- Sugar: 15
- Sodium: 5
- Fat: 1
- Saturated Fat: 0
- Unsaturated Fat: 1
- Trans Fat: 0
- Carbohydrates: 45
- Fiber: 4
- Protein: 2
- Cholesterol: 0