

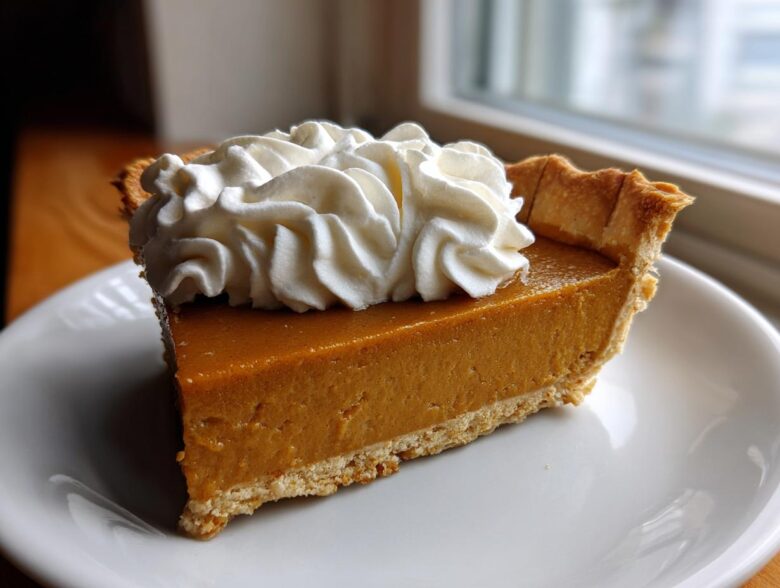
When you need a dessert that just wraps you up in a warm hug, nothing beats a classic, rich pie. Forget those flimsy, artificial-tasting things; we’re going straight for true comfort here. This Old-Fashioned Homemade Creamy Butterscotch Pie is my absolute gold standard. Trust me, once you nail this silky-smooth filling and pair it with a flaky, all-butter crust, you won’t look at any other butterscotch pie recipe twice. If you want to know more about my kitchen philosophy, check out my About Us page!
This recipe reminds me so much of my grandmother’s kitchen—that deep, slow-cooked brown sugar smell is just unbeatable. We are making a true custard-style pie here, one that sets up perfectly every single time so you get that beautiful, velvety slice for your holiday table or just because it’s Tuesday!
Why This Old-Fashioned butterscotch pie Recipe Stands Out
Look, I’ve tasted my share of lackluster pudding pies, and frankly, they’re a waste of good oven time. This recipe is different, and I want you to know exactly *why* it’s worth the few extra steps. It delivers on texture and flavor every single time, making it one of my go-to Classic Pie Recipes for special gatherings.
- Deep, authentic butterscotch flavor—nothing artificial here!
- A filling that is guaranteed silky smooth and never grainy.
- It uses a sturdy, all-butter crust that actually tastes like something.
Achieving the Perfect Creamy Pie Filling Texture
The texture is everything in a good pudding pie, right? We skip the sad, thin stuff by using a careful combination of cornstarch and egg yolks. The cornstarch sets the structure beautifully, but tempering those yolks slowly is what gives us that incredible, decadent mouthfeel. That’s the true secret to a great Creamy Pie Filling that melts in your mouth.
The Secret to Velvety Butterscotch Flavor
You simply cannot fake the flavor of good ingredients here. I insist you use packed light brown sugar; that molasses content is non-negotiable for that classic taste. Plus, we add plenty of real unsalted butter right at the end. This high-quality fat carries all those beautiful caramelized notes, resulting in that unmistakable Velvety Butterscotch Flavor.
Ingredients for the Ultimate butterscotch pie
Okay, let’s talk about what you need to gather up. Get yourself organized before you hit the stovetop, because once those sugars are melting, we need to move quickly! Remember, for this recipe, the success hinges on having your crust ready to go—it *must* be completely cooled down before we pour in the hot filling.
For that unforgettable, silky filling, here is exactly what you need to pull out:
- 1 recipe for a single 9-inch all-butter pie crust, blind-baked (yes, baked empty first!)
- 1 1/2 cups packed light brown sugar
- 1/2 cup granulated sugar
- 1/4 cup cornstarch (this is our thickening workhorse!)
- 1/4 teaspoon salt
- 1 1/2 cups whole milk
- 1/2 cup heavy cream
- 4 large egg yolks, lightly beaten (don’t miss this step, they add richness!)
- 4 tablespoons unsalted butter, cut into little pieces
- 1 teaspoon vanilla extract
- Whipped cream, for topping (don’t skimp here!)
- Toasted pecans, for garnish (optional, but honestly, they add a great crunch!)
Expert Tip: I know some recipes call for 2% or skim milk, but really—don’t do it! Using whole milk combined with that heavy cream gives the filling the necessary fat content to feel luxurious instead of thin. It just makes for richer Homemade Dessert Recipes overall.
Notes on Crust and Substitutions for your butterscotch pie
Regarding that crust: you absolutely must blind-bake it until it’s golden brown and cool. If you’re having a crazy week and need a shortcut, you can absolutely grab a pre-baked shell or even my favorite graham cracker crust if you want a true “quick dessert recipe.” Just try to make the crust yourself when you have time—that flaky texture is half the fun!
Now, for substitutions in the filling, the recipe calls for light brown sugar, which gives you that clean butterscotch flavor. But if you want to deepen it up and make it taste aged, take that advice from my notes: swap out about 1/4 cup of the light sugar for dark brown sugar. It adds a lovely molasses punch that just shouts Old Fashioned Desserts!
Step-by-Step Instructions for Creamy butterscotch pie Filling
Alright, this is where the magic happens, and I need you to pay attention to the heat settings! We are creating a velvety custard here, and anything too hot too fast means scrambled eggs, and nobody wants that in their Silky Smooth Pudding Pie. This process might take a few minutes longer than you think, but sticking to the timeline ensures you get exactly the right consistency for a perfect slice.
If you’ve made my brown butter cookies, you know I love taking things slow for the deepest flavor, and it’s the same thing here with this filling! Let’s get to work.
Preparing the Sugar Base and Thickening the butterscotch pie Custard
First thing: Grab that cooled, blind-baked crust and set it somewhere safe; it can’t get warm yet! Now, in a saucepan, whisk together both sugars (light brown and granulated), the cornstarch, and salt. Whisk it really well so there are no little clumps hiding. Next, slowly pour in the whole milk and heavy cream while you keep whisking until it looks completely smooth—you want zero resistance when you drag your whisk through it.
Put that pan over medium heat. Now, this is crucial: stir constantly. I mean it! Use a whisk or a sturdy spatula and scrape the bottom and sides because the sugars love to stick and burn. You cook this until it starts bubbling thickly, which takes about 8 to 10 minutes. Once it’s bubbling, keep stirring for one full minute more, then pull that hot pan right off the stove!
Tempering Yolks and Finishing the Rich and Smooth Pies Filling
Here’s the balancing act! Take about a cup of your hot sugar goo and drizzle it *very slowly* into your lightly beaten egg yolks while you whisk the yolks like mad. That’s called tempering, and it stops the yolks from turning into little yellow crumbs when they meet the heat. Once that’s steady, pour that warm yolk mixture right back into the saucepan with the rest of the filling.
Put the pan back on medium-low heat. You’re cooking this again, stirring constantly, just until it thickens enough to coat the back of a spoon—maybe another minute or two. Do NOT let it boil once the eggs are added! When it’s coated, remove it from the heat for good. Stir in those chunks of butter until they melt completely shiny, and drop in the vanilla. Pour that gorgeous filling right into your prepared crust immediately. Wow, smell that? That’s the smell of a successful one of my favorite Rich and Smooth Pies!
Tips for a Show Stopping butterscotch pie
We’ve cooked that beautiful custard filling, and now we need to make sure it sets up perfectly and looks like the star of the show. Presentation matters, especially when you call something one of your Show Stopping Desserts! The next 12 hours are almost as important as the cooking time itself.
The biggest enemy of any pudding-style pie is that gross skin that forms on top while it cools. I learned this the hard way! The first time I made this pie for Thanksgiving, I left it cooling on the counter uncovered, and when I came back, it had a thick, slightly rubbery film on top. Don’t let that happen to you!
Here is my non-negotiable trick for a perfectly smooth, skinless surface: Immediately after pouring that hot filling into your cooled crust, take a piece of plastic wrap—I mean really thin cling film—and gently press it directly onto the surface of the filling. Keep it in light contact without squishing the edges of the crust. This traps the steam right where it is, but it stops any air from hitting the surface and forming that ugly film. When you take the plastic off hours later, you’ll have a gleaming, smooth surface ready for topping! If you love caramel flavors like this, you should check out my recipe for caramel apple crisp sometime soon.
Next comes the chilling! You must let this pie sit in the refrigerator for a minimum of four hours, but honestly, six to eight hours is better, especially if you’re planning to slice it thick. If you try to cut it early, you’ll end up with a runny mess, and nobody wants hot butterscotch pooling on the plate! I sometimes make this entire pie the day before I need it, which is a lifesaver during holidays. That long, slow chill is what sets the filling into that perfect, dense custard consistency.
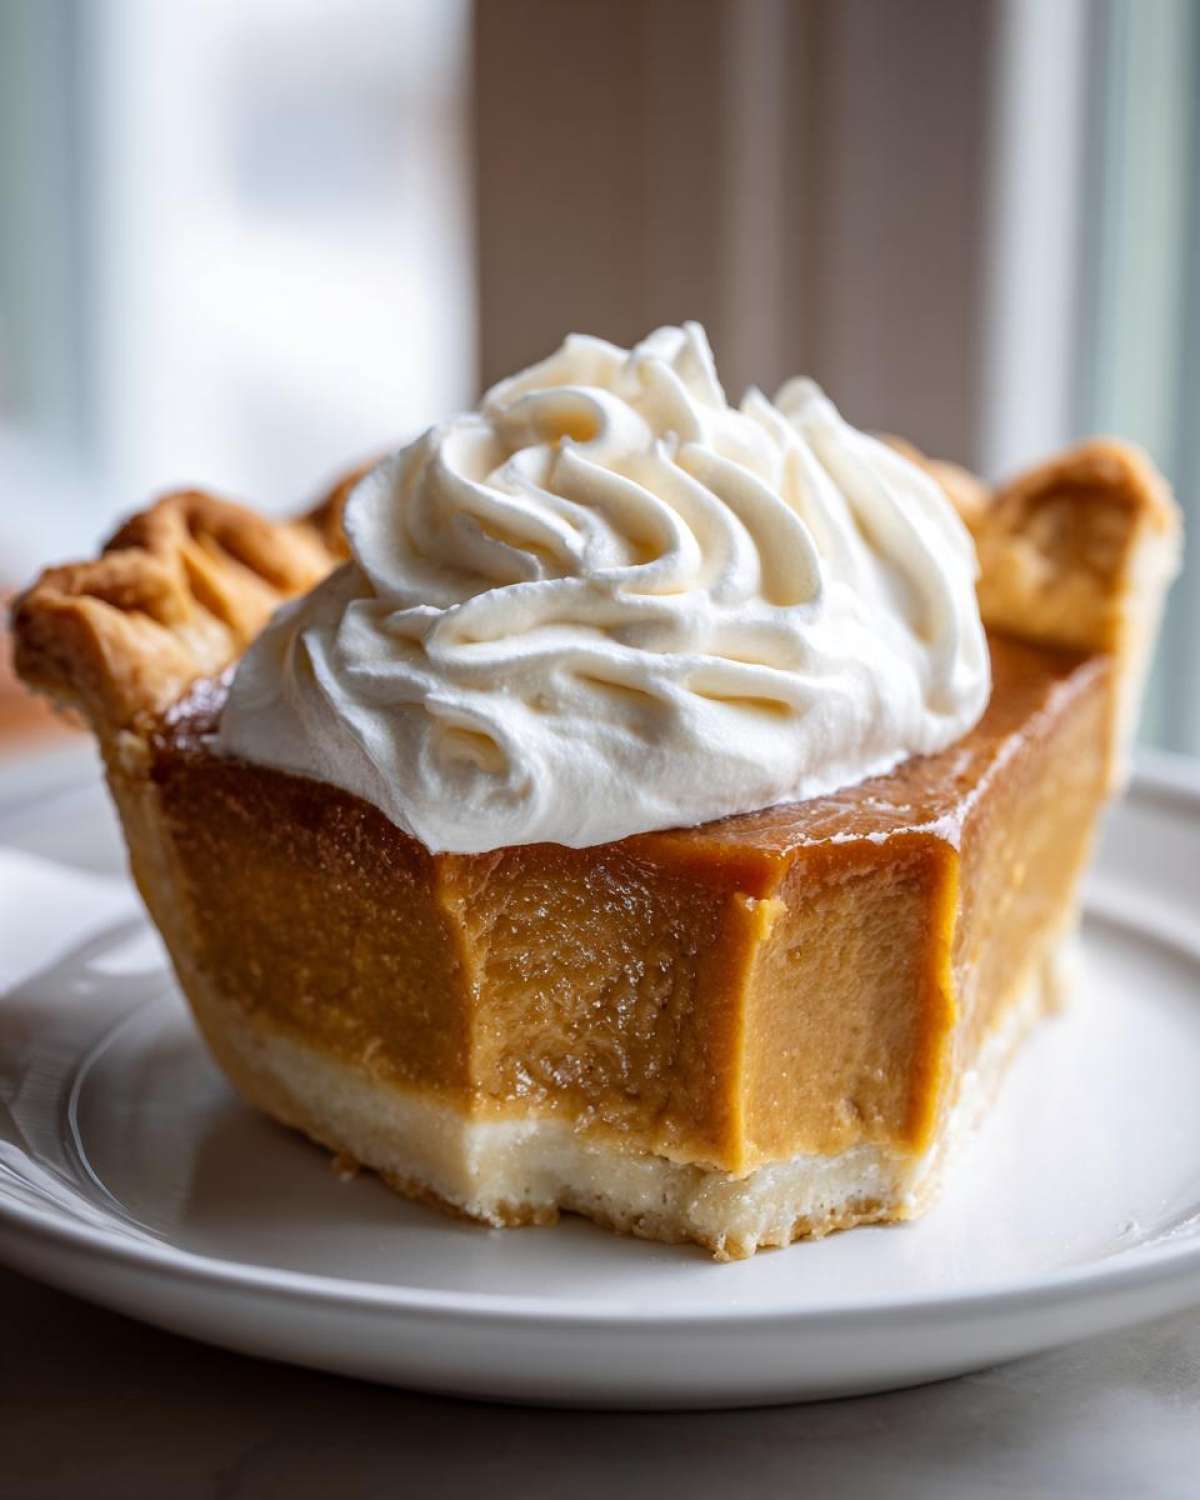
Once it’s fully set and ready to serve, you can peel off that plastic wrap and go wild with the toppings! A huge cloud of freshly whipped cream looks amazing, and a sprinkle of those toasted pecans I mentioned before adds that final, professional touch. You’ll be so proud when you show this homemade beauty off!
Making this butterscotch pie a Make Ahead Dessert
Listen up, fellow holiday warriors and people who just hate the last-minute rush—this butterscotch pie is an absolute dream for planning ahead! If you’re tackling a huge Thanksgiving menu or just want one less thing stressing you out on party day, you have great news. This filling is perfect for making in advance, which is why this recipe totally qualifies as one of my favorite Make Ahead Desserts.
The key here is separating the construction. You absolutely cannot assemble the whole pie the day before if you want that crust to stay flaky, but the filling? Oh, the filling is sturdy!
You can easily follow all the stovetop instructions and get that hot custard mixed up, buttered, and vanilla-flavored just like we talked about in the steps before. Once it’s made, you pour it into a prepared baking dish or even a covered container—just remember, if you’re not pouring it into the crust yet, you must cover the mixture directly with plastic wrap so no skin forms.
I usually make the filling one full day ahead of time. I let it cool slightly on the counter, cover it tightly, and pop it into the fridge. It sets up beautifully overnight without losing any of its silkiness. The next day, I just take out my pre-baked, cooled crust, pour in the perfectly chilled filling, and let it chill for the final few hours to firm up the top layer before adding that delicious whipped cream.
If you store the filling separately, it lasts wonderfully in the fridge for up to two days, honestly. Just make sure it’s chilled through before you introduce it to the crust. This trick has saved my sanity more times than I can count, letting me focus on the turkey or the cranberry sauce instead of worrying about tempering egg yolks at 4 PM on the big day! If you’re looking for other great make-ahead ideas, I have some amazing recipes for freezer breakfast burritos that are great for busy mornings too!
Serving Suggestions for Your Classic Pie Recipes
Once your beautiful butterscotch pie has set up perfectly—and remember, patience is key here!—it’s time for the best part: dressing it up for its big reveal. This pie is rich, it’s decadent, and honestly, it doesn’t need much convincing, but a few finishing touches turn it into one of the grandest Classic Pie Recipes you’ll ever serve.
Of course, the standard operation is a towering blanket of freshly whipped cream. I mean, seriously, go heavy on it. Don’t use that aerosol can stuff unless you absolutely must. Whip up some heavy cream with just a touch of powdered sugar and a tiny splash of vanilla—it keeps the buttery sweetness of the pie from being overwhelmed. And those toasted pecans? They are mandatory in my house! That little bit of crunch cuts through the silkiness of the custard so well.
But let’s think beyond the standard garnish, especially if you are serving this at a holiday gathering or as a major finale to a big meal. Because this pie has such deep, caramelized undertones, it pairs amazingly well with other rich flavors. Have you ever tried finishing it with just a very light drizzle of something chocolatey? Not a heavy sauce, just a light zig-zag of melted dark chocolate across the whipped cream—it’s sophisticated!
If you serve coffee alongside your slice, you are in for a treat. The slight bitterness of a good strong brew or even an espresso cuts through the sweetness perfectly. In fact, this pie loves coffee so much that I often make a batch of my favorite pumpkin spice latte copycat recipe (just skip the pumpkin spice during fall!) to serve alongside it. It’s basically a perfect pairing!
For Christmas or special winter events, try adding a tiny sprinkle of cinnamon or even a pinch of finely ground cardamom over the whipped cream right before serving. It complements the brown sugar notes beautifully without overpowering that signature butterscotch essence. This pie asks for a showstopper moment, so don’t be afraid to make it look as indulgent as it tastes!
Storage and Reheating Instructions for butterscotch pie
This is a question I get all the time! When you put this much love into making that perfect butterscotch pie, you want to make sure you store it correctly so it tastes just as good the next day, or even three days later! Since we put so much care into getting that texture just right—that beautiful, rich, silky-smooth custard—we really need to treat it respectfully in the fridge.
The short and sweet answer is: always serve this pie cold. Always. It needs that chill time to keep that custard set firm. If you try to serve it even slightly warm after it’s been refrigerated, it tends to slump on the plate. Trust me, you want that clean slice every time!
Once the pie is completely chilled and set (remember those 4 to 6 hours we talked about?), you need to cover it loosely. I use a large cake dome or just wrap the whole dish in plastic wrap—but make sure the wrap doesn’t touch the whipped cream topping! If you added the whipped cream topping right before serving, you’ll just pop the leftover slices back into the fridge covered.
How long does it last? Because of the egg yolks and milk, and assuming you’ve kept it properly chilled, this butterscotch pie is generally safe and delicious for about three to four days in the refrigerator. That’s great for holiday leftovers!
Now, let’s talk about reheating, because this is where we have to be careful. You absolutely cannot reheat this pie filling. If you try to microwave or warm up the custard, the texture will break down completely, it will get soupy, and it will taste grainy—we worked too hard for that!
However, sometimes the humidity gets to the bottom of the crust, and you want that flaky texture back. If that happens, here’s a little trick that sometimes works for the crust only: Carefully remove all the filling and topping. Take your empty crust, place it directly on the oven rack at 300°F (150°C) for just about 5 to 7 minutes. Keep an eye on it so it doesn’t dry out. Once it’s warm and crisped just slightly, take it out, let it cool for a minute, and then you can refill it with the cold filling. It’s the only way to revive a crust without ruining that silky smooth pudding pie filling underneath.
But honestly? Nine times out of ten, just eat it cold straight from the fridge. It’s designed to be a chilled Indulgent Sweet Treats experience!
Frequently Asked Questions about butterscotch pie
I figured you might have a few lingering thoughts running around because making a perfect custard pie can feel a little daunting sometimes. Don’t worry, that’s what this section is for! I’ve grabbed the questions I get asked the most about perfecting my butterscotch pie Recipe. We’re aiming for zero confusion here so you end up with a gorgeous, successful pie!
If you love these kinds of quick troubleshooting sessions, make sure you check out my guide on the pumpkin pie smoothie next—it’s all about fast, great flavor!
Can I skip baking the crust for this butterscotch pie Recipe?
This is a great question that touches on the whole No Bake Butterscotch Options desire! Here’s the reality check: Because our filling is a cooked custard (we cook it right on the stove!), it needs to go into a crust that is already totally cooked and firm, otherwise, you’ll end up with a soupy mess pooling onto a raw, gummy bottom layer. That mandatory step is called blind-baking.
So, for the recipe as written, no, you cannot skip baking the crust. If you *absolutely* need a true no-bake dessert, your best bet is to scrap the flaky pastry entirely and use a pre-made or homemade graham cracker crust instead. That crust only needs to chill to set up, not actually bake. But if you want that divine, flaky texture that complements our creamy filling, stick to the blind-baking method!
What is the actual difference between butterscotch and caramel filling?
This trips up so many people when they think about Classic Pie Recipes! They taste similar, but the difference is the sugar used. Caramel is made by heating *granulated white sugar* until it melts and browns. Butterscotch, on the other hand, gets its signature intense, almost smoky flavor from *brown sugar* (which is white sugar plus molasses) or by cooking sugar with butter and sometimes molasses.
In our pie, we rely heavily on light brown sugar, which creates that distinct, rich, molasses-backed sweetness that caramel just can’t hit. That’s what makes this butterscotch filling so unique!
Do I have to use the egg yolks in this Silky Smooth Pudding Pie?
Yes, please, for the love of dessert, do not leave out those yolks! They are essential structural components, not just for thickening, but they provide all the richness that makes this a true Indulgent Sweet Treats experience instead of just a cornstarch pudding. The yolks emulsify the fat coming from the cream and butter, which is what guarantees that stable, smooth texture and prevents graininess during chilling.
Can I make my butterscotch pie ahead of time for Thanksgiving?
Absolutely! As I mentioned earlier, making this pie ahead is the secret weapon for any big holiday meal. You can successfully prepare the entire filling, let it cool completely, and pour it into your cooled, baked crust. Cover carefully (remember the plastic wrap trick!) and chill it. It holds up beautifully in the fridge for up to four days. That makes it one of the best Holiday Pie Ideas because you cook one day and serve another!
Estimated Nutrition for this Indulgent Sweet Treats
Whenever I share my favorite Homemade Dessert Recipes, I always get questions about the numbers. I tried to keep this buttery, heavenly pie as reasonable as possible by using a cornstarch base instead of pure heavy cream, but let’s be real—this is an indulgent treat, not a health food! These numbers are based on 8 servings using the ingredients listed.
Please remember that these are just close estimates! The final nutritional stats will change based on the fat content of your butter, the exact measure of the brown sugar you pack, and whether you use store-bought or homemade toppings. For the full official nutrition disclosure, please see my Disclaimer page.
- Serving Size: 1 slice
- Calories: 450
- Sugar: 55g
- Sodium: 250mg
- Fat: 24g
- Saturated Fat: 14g
- Unsaturated Fat: 10g
- Trans Fat: 0.5g
- Carbohydrates: 58g
- Fiber: 1g
- Protein: 6g
- Cholesterol: 120mg
Estimated Nutrition for this Indulgent Sweet Treats
Whenever I share my favorite Homemade Dessert Recipes, I always get questions about the numbers. I tried to keep this buttery, heavenly pie as reasonable as possible by using a cornstarch base instead of pure heavy cream, but let’s be real—this is an indulgent treat, not a health food! These numbers are based on 8 servings using the ingredients listed.
Please remember that these are just close estimates! The final nutritional stats will change based on the fat content of your butter, the exact measure of the brown sugar you pack, and whether you use store-bought or homemade toppings. For the full official nutrition disclosure, please see my Disclaimer page.
- Serving Size: 1 slice
- Calories: 450
- Sugar: 55g
- Sodium: 250mg
- Fat: 24g
- Saturated Fat: 14g
- Unsaturated Fat: 10g
- Trans Fat: 0.5g
- Carbohydrates: 58g
- Fiber: 1g
- Protein: 6g
- Cholesterol: 120mg
Old-Fashioned Creamy Butterscotch Pie
Make a rich, silky-smooth butterscotch pie from scratch using a classic, all-butter crust and a velvety custard filling.
- Prep Time: 25 min
- Cook Time: 20 min
- Total Time: 4 hours 45 min
- Yield: 8 servings
- Category: Dessert
- Method: Stovetop Cooking
- Cuisine: American
- Diet: Vegetarian
Ingredients
- 1 recipe for a single 9-inch all-butter pie crust, blind-baked
- 1 1/2 cups packed light brown sugar
- 1/2 cup granulated sugar
- 1/4 cup cornstarch
- 1/4 teaspoon salt
- 1 1/2 cups whole milk
- 1/2 cup heavy cream
- 4 large egg yolks, lightly beaten
- 4 tablespoons unsalted butter, cut into pieces
- 1 teaspoon vanilla extract
- Whipped cream, for topping
- Toasted pecans, for garnish (optional)
Instructions
- Prepare your 9-inch pie crust and blind-bake it according to your preferred method until golden brown. Let it cool completely.
- In a medium saucepan, whisk together the brown sugar, granulated sugar, cornstarch, and salt.
- Gradually whisk in the whole milk and heavy cream until the mixture is smooth.
- Place the saucepan over medium heat. Cook, stirring constantly with a wooden spoon or heatproof spatula, until the mixture thickens significantly and begins to bubble. This takes about 8 to 10 minutes.
- Once bubbling, continue to cook for 1 minute while stirring constantly. Remove the pan from the heat.
- Temper the egg yolks: Slowly drizzle about 1 cup of the hot sugar mixture into the beaten egg yolks while whisking the yolks vigorously. This prevents the yolks from scrambling.
- Pour the tempered yolk mixture back into the saucepan with the remaining hot sugar mixture. Return the pan to medium-low heat.
- Cook, stirring constantly, for 1 to 2 minutes until the custard thickens enough to coat the back of a spoon. Do not let it boil after adding the yolks.
- Remove the pan from the heat. Stir in the butter pieces until fully melted and incorporated. Stir in the vanilla extract.
- Pour the hot butterscotch filling immediately into the cooled, pre-baked pie crust.
- Press plastic wrap directly onto the surface of the filling to prevent a skin from forming.
- Chill the pie in the refrigerator for at least 4 hours, or until the filling is completely set.
- Before serving, top generously with whipped cream and sprinkle with toasted pecans, if using.
Notes
- For a quicker version, you can use a store-bought, pre-baked pie shell.
- If you want a deeper butterscotch flavor, substitute 1/4 cup of the brown sugar with dark brown sugar.
- You can make this pie filling a day ahead and store it covered in the refrigerator before filling the crust.
Nutrition
- Serving Size: 1 slice
- Calories: 450
- Sugar: 55g
- Sodium: 250mg
- Fat: 24g
- Saturated Fat: 14g
- Unsaturated Fat: 10g
- Trans Fat: 0.5g
- Carbohydrates: 58g
- Fiber: 1g
- Protein: 6g
- Cholesterol: 120mg