

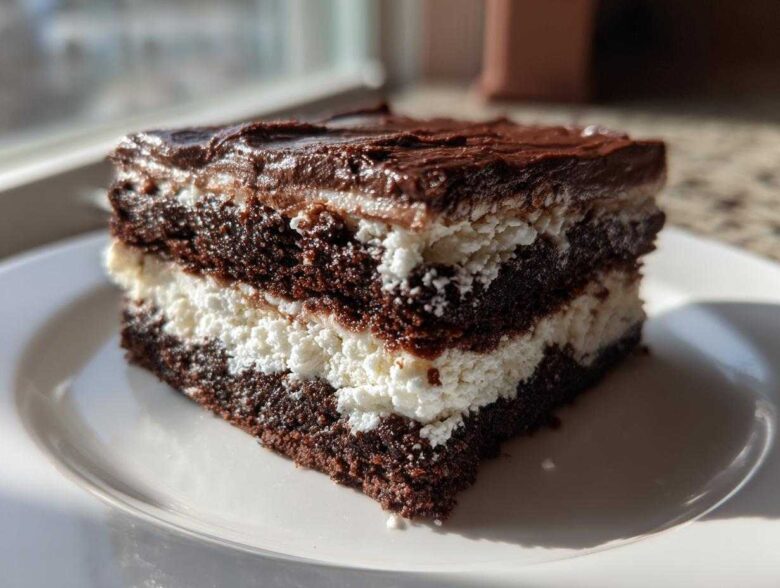
You know those days? When the thought of turning on the oven feels like climbing a mountain, but you desperately need something rich, chocolatey, and absolutely impressive? Oh, I know those days intimately! That’s precisely why I’m shouting this good news from the rooftops today: we are making a brownie refrigerator cake! This isn’t just any dessert; it’s a decadent, amazing, layered chocolate dream that skips the heat entirely. Forget complicated mixing—this is all about assembly and the magic of the chill. Owen and I test these no-bake wonders when we’re low on energy but high on craving, and I promise you, this arrangement of fudgy brownies and creamy layers is a tested, reliable showstopper ready for any table. It’s the easiest way to announce that something truly delicious has arrived on your counter, just like we talk about on our About Us page!
Why This Brownie Refrigerator Cake Is Your New Favorite No Bake Brownie Dessert
I’m telling you, this brownie refrigerator cake is going to change your life, especially when you’re slammed and need a winner. We rely on recipes that make us look like baking geniuses without the actual work, and this fits the bill perfectly.
- It’s ridiculously fudgy—we’re talking serious chocolate satisfaction without any mixing bowls gathering heat!
- It’s perfectly layered, looking so impressive when you slice into it.
- It must be made ahead, meaning zero stress the day of your gathering.
Honestly, it’s one of the best no bake brownie desserts out there.
Zero Oven Time for the Ultimate Brownie Refrigerator Cake
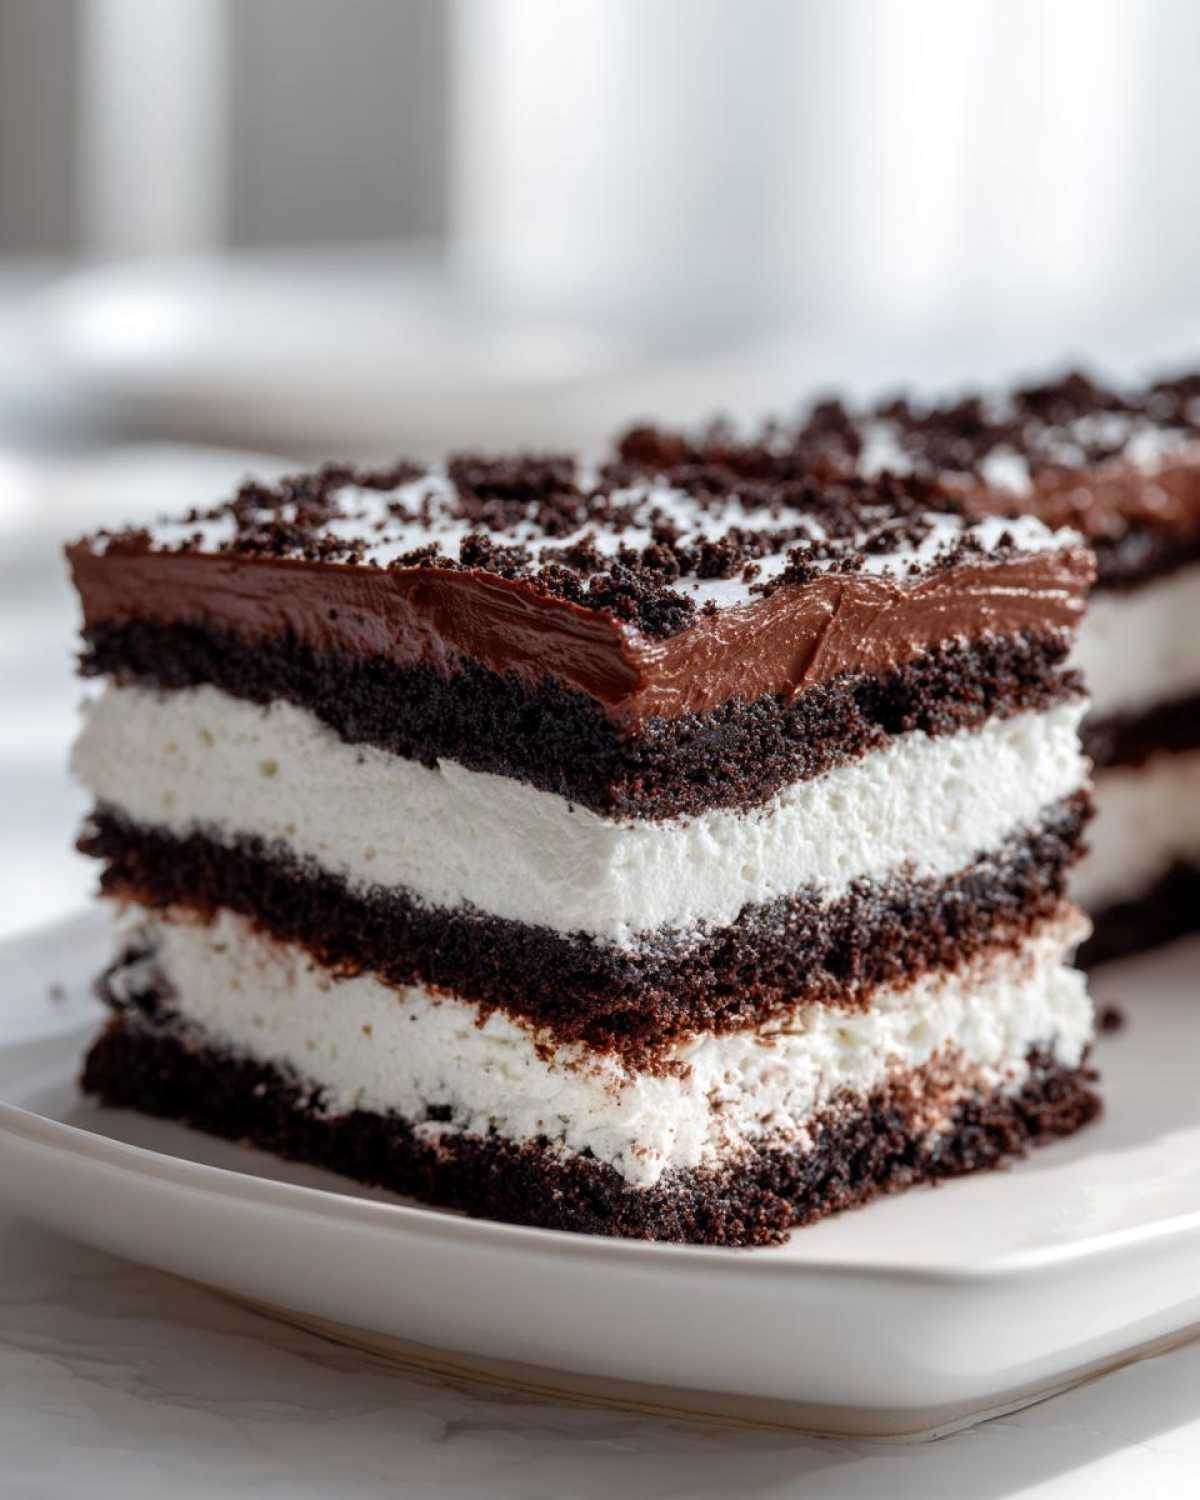
That’s right, folks! Absolutely no baking required for the final assembly. The oven work is handled either by the store or by you way ahead of time on a cooler day. All the magic happens while this baby chills out in the fridge. It becomes this firm, cool, sliceable treat—the definition of a great cool dessert recipe. Just think of the electricity you save!
Perfect Potluck Dessert Ideas: Make Ahead Icebox Cake Ready
If you are heading to a party or hosting brunch, this is your answer. Because it *needs* that long chill time to set the different layers properly, you can assemble this entire brownie refrigerator cake the day before! Set it, forget it, and pull it out when everyone’s ready for a showstopper. It truly is one of the best potluck dessert ideas because it travels well and stays perfectly chilled.
Gathering Ingredients for Your Brownie Refrigerator Cake Recipe
Okay, assembling this Brownie Refrigerator Cake Recipe is almost as fun as eating it, and honestly, getting the right ingredients ready is half the battle. Since this is a no-bake situation, texture is everything! We aren’t relying on leavening agents to save us; we are relying on creaminess and fudginess to hold the structure. So, let’s talk specifics. You’ll notice the ingredient list calls for a few very important things to be prepared *before* you even start layering. Don’t just toss things in. Pay attention to the temperatures, trust me!
When you look at the list, note that we are using pre-made brownies or a baked box mix that is completely, 100% cooled down. If they are even slightly warm, they’ll melt that lovely cream cheese layer, and we don’t want a chocolatey soup on our hands!
Ingredient Notes and Substitutions for This Chilled Brownie Dessert
This is where I lend you my decades of kitchen scribbles! For the brownie layer, if you have the choice between a box mix that results in super cakey brownies or a dense, fudgy batch, go fudgy every single time. We want that deep, almost soil-like texture right at the bottom. You can find my favorite fudgy, chewy brownie recipe here if you want to bake your own, but store-bought fudgy ones work great too!
When we get to the whipped topping, I strongly recommend using the frozen tub of whipped topping and letting it thaw, folding it in yourself. Sometimes those pre-whipped cans don’t hold up as well once they start chilling and warming up again. The structure of this chilled brownie dessert depends on that fluffy stabilizer!
And please, when it says ‘softened cream cheese,’ it means soft enough to spread readily with a spoon, not melted mush. Leave that block out on the counter for at least an hour before you start whipping that cream cheese layer dessert.
Step-by-Step Assembly of the Easy Layered Chocolate Cake
Okay, are you ready to build this architectural wonder? This is where we take our prepared, cooled brownies and our creamy components and turn them into the beautiful Brownie Refrigerator Cake everyone will be talking about. Don’t rush the spreading parts; that’s our secret to keeping those layers distinct and gorgeous once it sets!
Preparing the Cream Cheese Layer Dessert Base
First things first, let’s tackle the cream cheese layer. This layer needs to be absolutely lump-free because it acts as the sturdy center for our whole chilled dessert. Make sure that cream cheese is truly softened—I mean, it should practically fall apart when you look at it! If it’s too cold, you end up fighting it with the mixer, and that leads to scraping down the bowl every 30 seconds. Remember, we want this unbelievably rich, but it needs that beautiful texture you get from properly beaten ingredients.
Whip the softened cream cheese first until it’s fluffy, then slowly introduce the powdered sugar and vanilla. You want it pale yellow, smooth, and light, kind of like a very dense, delicious frosting. If you want to see how I get my frostings perfectly fluffy and stable, I sometimes use techniques similar to those in my vanilla buttercream frosting recipe post, using the scraping down method. Set this beautiful mixture aside while you gently work on the pudding layer. This smoothness is crucial for a beautiful slice later on!
Layering Your Brownie Refrigerator Cake for Structure
Before any layering happens, prep your pan—this is non-negotiable for easy serving! I like lining an 8×8 inch dish with plastic wrap, leaving a generous overhang on two sides. This gives us handles to lift the whole cake out later. Seriously, don’t skip the overhang! This preparation ensures we serve a perfect slice of this Brownie Refrigerator Cake.
Now, the fun part: layering! Take half of your cooled brownies and press them lightly into the bottom of the lined dish. Don’t smash them down like gravel; just make a nice, even foundation. Next, dollop that smooth cream cheese mixture on top and spread it carefully right to the edges. Slow and steady wins the race here!
Finally, gently spread the chocolate pudding and whipped topping mixture over the cream cheese. Again, be gentle! If you use too much force, you’ll dig right into that layer underneath. Cap it off with the remaining brownie pieces. If you prefer a smoother top, just use the remaining whipped topping instead of the final brownie layer. Cover it tight with that plastic wrap overhang and send it to the fridge. Now the hardest part begins: waiting for this easy layered chocolate cake to chill!
Tips for Success with Your Fudgy Brownie Dessert
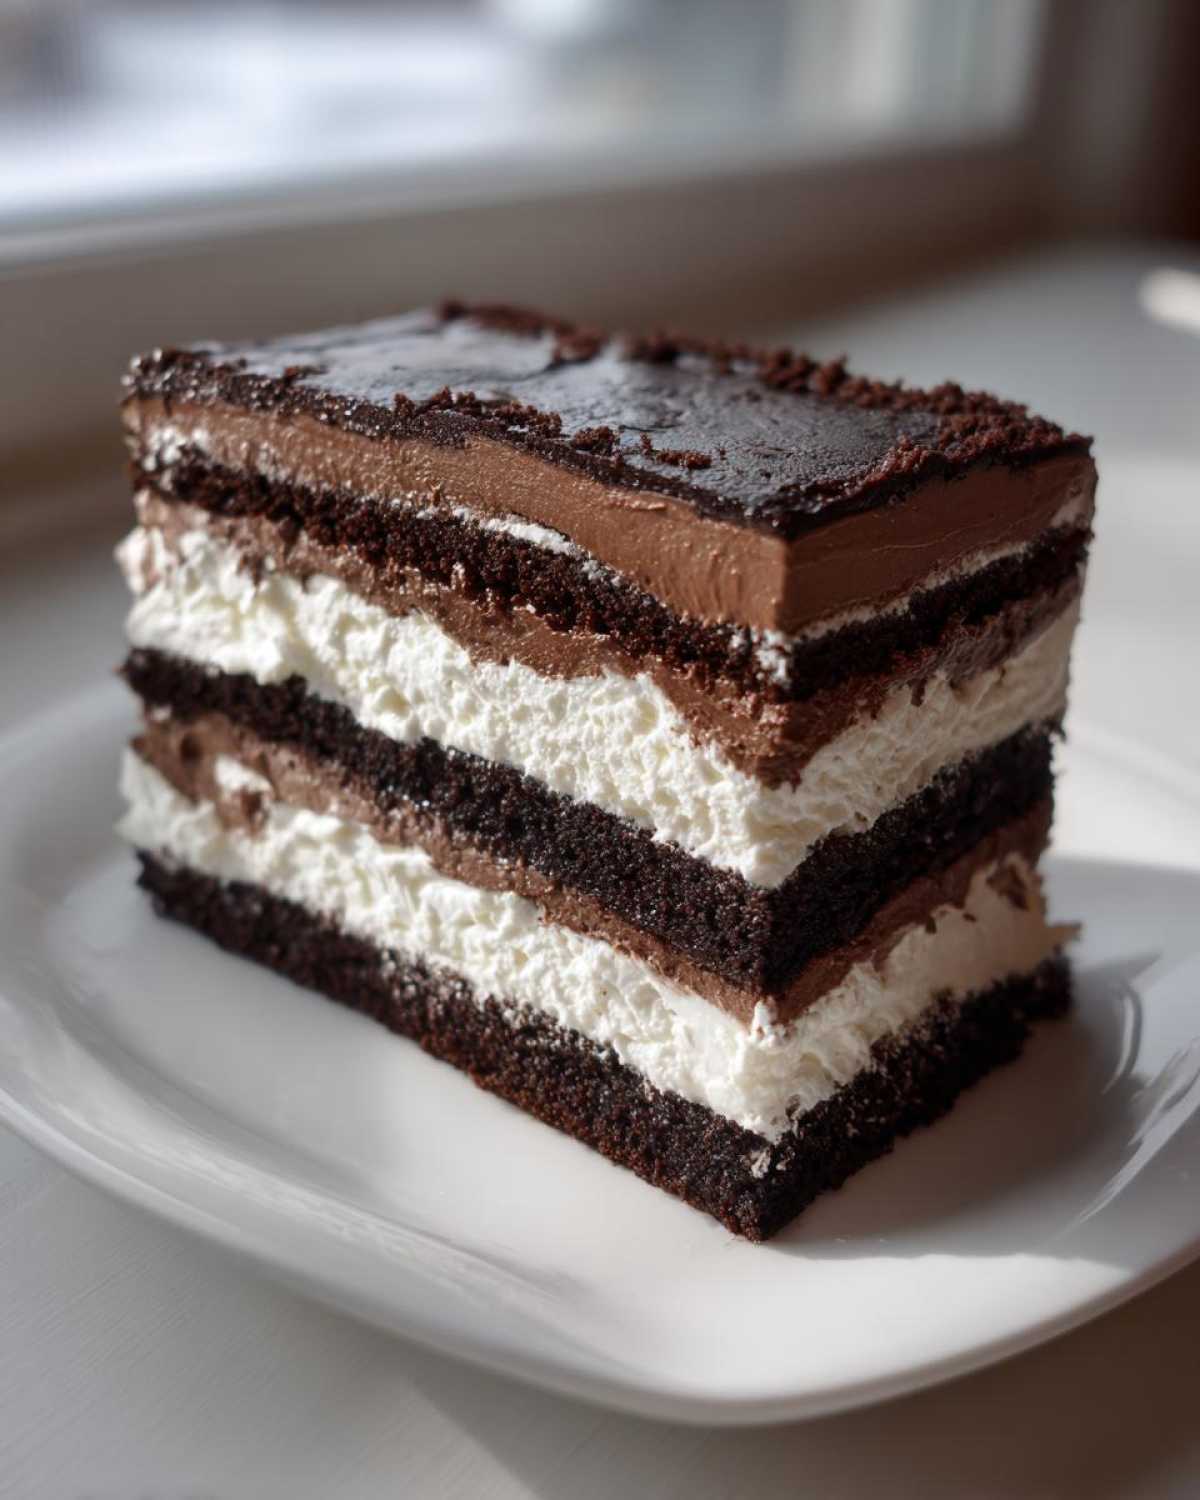
When you’re relying on the fridge to do all the heavy lifting, every little detail counts! I’ve learned this the hard way—showing up to an event with a beautiful idea that turns into a soupy mess is a nightmare. So, here are the few non-negotiable rules I follow to guarantee a perfectly set, fudgy brownie dessert every single time we make this brownie refrigerator cake.
First up: the chill time! I know you’re eager, but you absolutely cannot rush this part. The recipe says six hours, but if you can push it to overnight, do it. This dessert is designed to be firm enough to slice like a proper cake, not spooned out like a trifle. That structure comes from time, not temperature manipulation!
My second tip relates to the pudding layer. When you whisk the instant pudding mix with the cold milk, it thickens fast, almost too fast. Don’t overmix it initially. Just whisk until the blades of the whisk start to slow down, then let it rest for those five minutes. This lets the pudding do its thickening job before you fold in that glorious, airy whipped topping. Keep the folding gentle—think light, sweeping motions, not aggressive stirring—to keep all that trapped air inside the pudding base.
Finally, because this is an icebox cake, we are using moisture-rich ingredients that need time to marry. Before serving, let the completely chilled cake sit on the counter for about ten minutes while you set the table. This lets the chill take the edge off the cold, softening the cream cheese layer just slightly so it melts beautifully in your mouth instead of fighting your fork!
Storage and Reheating Instructions for This Decadent Brownie Treat
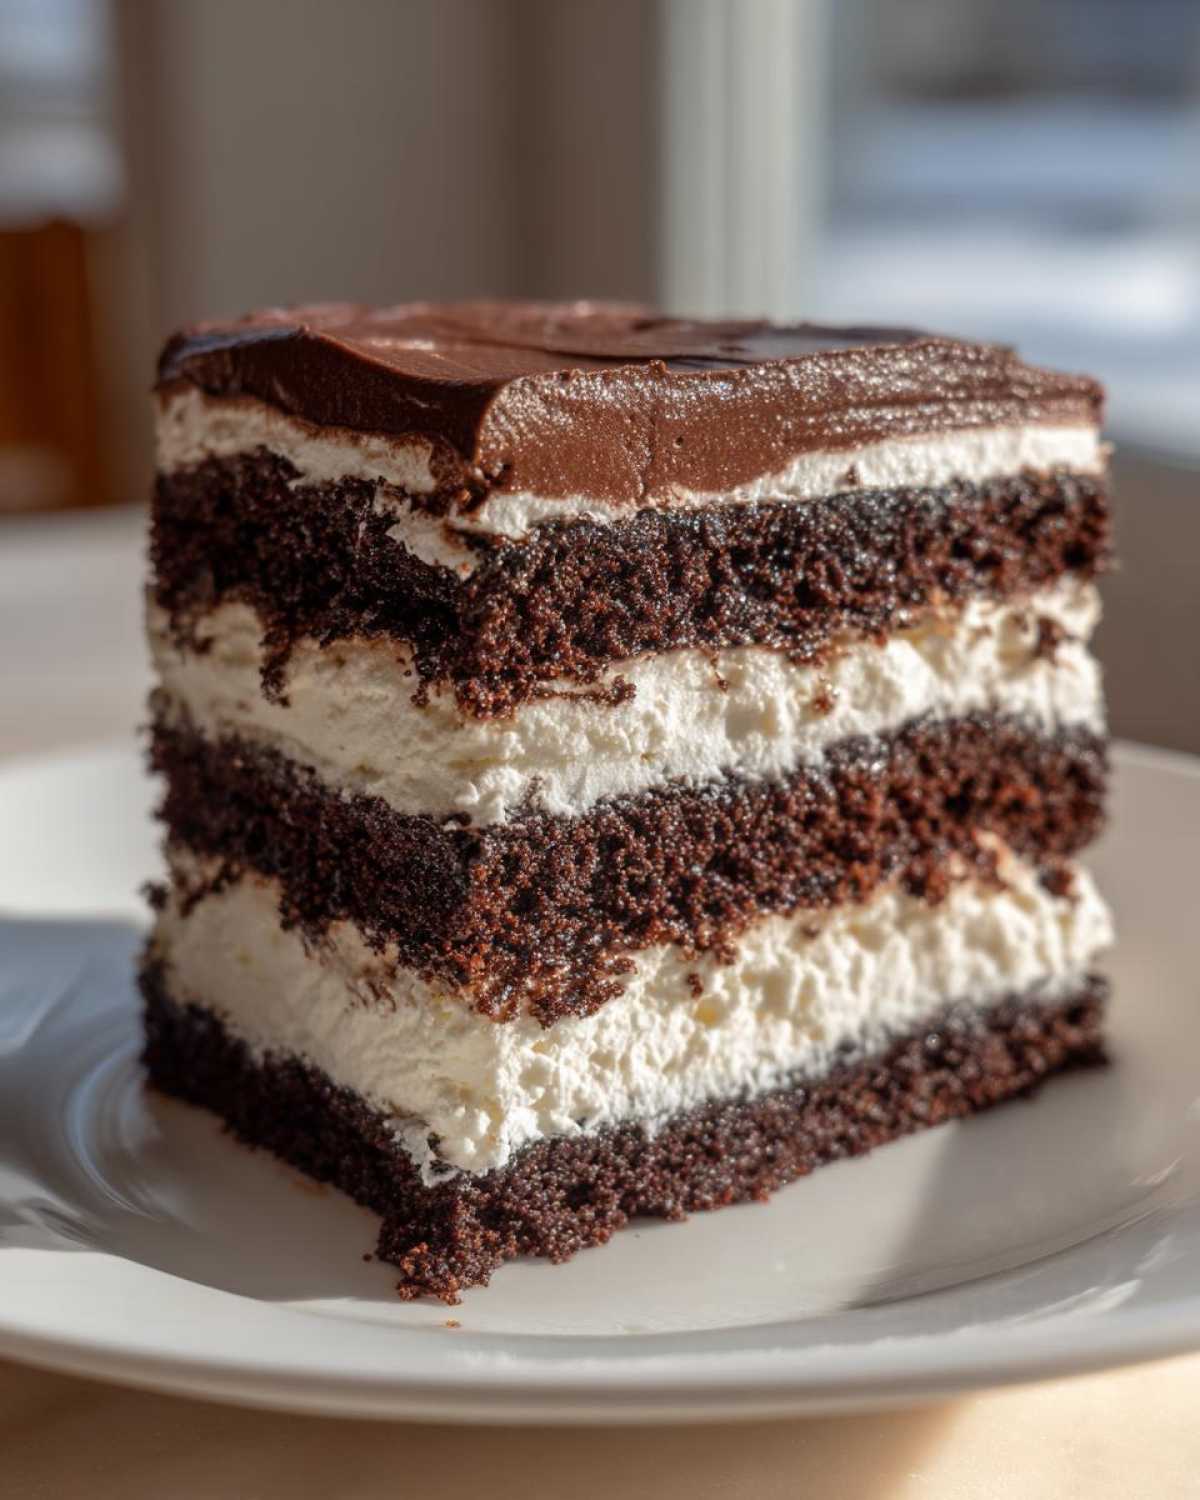
Now, this is the secret weapon for hosting: you can truly make this decadent brownie treat way ahead of time! Since it’s a brownie refrigerator cake, storage is all about keeping it cold and happy so those layers stay perfectly defined.
The best news is that this kind of dessert actually *improves* with time. When Owen and I test these, we always agree: Day Two is when the flavors really marry up. The moisture from the pudding and cream cheese layers seeps just a tiny bit into the brownie pieces, making them unbelievably fudgy. We usually let it sit in the fridge for a full 24 hours before cutting into it.
For refrigerator storage, you need to cover it really well. Remember that plastic wrap overhang we talked about? Pull that right over the top, or switch it to an airtight container. It stays fantastic in the fridge for up to three days. If you leave that plastic wrap off, the whipped topping starts to absorb every other smell in your fridge, and trust me, your chocolate layer will taste suspiciously like last night’s leftovers!
Speaking of longer storage, this chilled brownie dessert actually freezes like a dream! If you know you won’t get to it within three days, slice it up first—this is crucial, *slice it before you freeze it*—wrap each individual square tightly in plastic wrap, and then seal all those parcels inside a heavy-duty freezer bag. It lasts beautifully for about a month. When you want a treat, just pull out a slice, let it thaw on a plate on the counter for about an hour, and enjoy that cold, rich chocolate goodness all over again. We never try to reheat any part of this, because honestly, the joy of this dessert is that it’s meant to stay cool. If you’re looking for something warm, maybe check out my crockpot stew recipe instead!
Serving Suggestions for a Simple Layered Chocolate Dessert
When you’ve created something this rich and decadent—a true layered masterpiece—you don’t want to ruin the moment with a topping that steals the show! This brownie refrigerator cake is heavy on the chocolate, light on the fake sugar, and it stands beautifully on its own. But, if you must accessorize, keep it light and slightly contrasting. After all, this is the ultimate simple layered chocolate dessert.
For toppings, a dusting of high-quality cocoa powder or a light drizzle of good melting chocolate works wonders right before you slice it. We tried adding peanut butter swirls once, and let me tell you, it ended up feeling too heavy for how much we already packed into those layers! The contrast really works best when it’s bright or acidic to cut through all that creamy fudge.
My favorite way to serve this is with something citrusy on the side, or really, just a great drink! Owen and I recently perfected our Apple Cider Moscow Mule recipe, and it’s become the essential pairing for this dessert. The fizz, the slight tartness of the apple, and the warmth of the ginger just cut right through the richness of the cream cheese and brownie layers. It’s a perfect kitchen dance party finale!
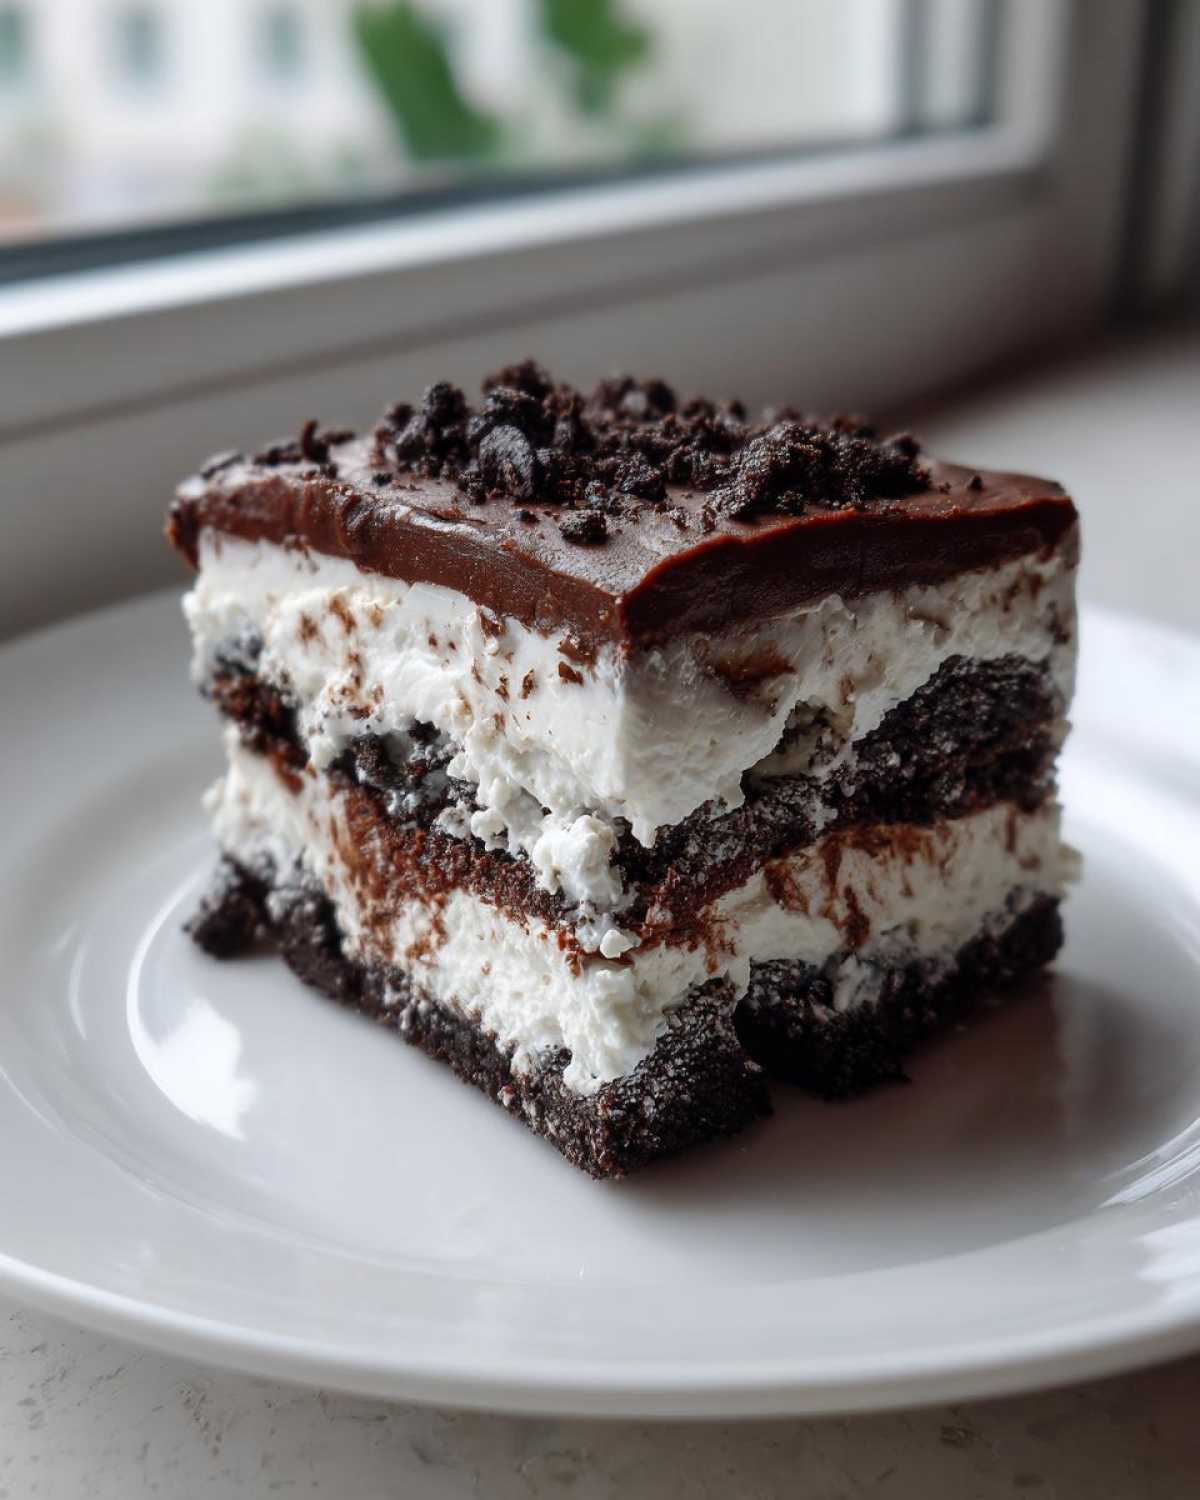
If you are serving this to a crowd and want a little extra visual pop, try placing a single, fresh raspberry or a small curl of orange zest right on top of each slice. It adds color without adding unnecessary weight to this already amazing treat. When you serve it cold, that little bit of freshness really sings! If you want to see what another baker pairs with their version of this amazing dessert, I saw some great ideas on this pin, too!
Frequently Asked Questions About the Brownie Refrigerator Cake Recipe
I totally get it—when you find a recipe like this amazing brownie refrigerator cake, you have questions! We designed this to be flexible, but there are a couple of spots where sticking to the instructions really pays off. Since this is one of my favorite no oven desserts, I want to make sure your layers set up exactly like mine did. Here are the things readers ask me most often about assembly and structure!
Can I use homemade brownies instead of a mix for the brownie refrigerator cake?
Oh, please do! If you have a trusted favorite brownie recipe, absolutely use it! Just keep a few things in mind. Since this is a cream cheese layer dessert, you want the brownie pieces to be sturdy and rich, not fluffy and cake-like. If your homemade brownies tend to be a little bit softer or underbaked, that’s actually perfect for this! They will soak up just a tiny bit of moisture from that creamy layer as they chill, making them unbelievably fudgy. The only real rule is that they must be cooled completely—I mean room temperature, maybe even cold from the fridge—before you break them up and layer them in the dish. Warm brownies equal melted filling, and that’s a mess no one wants!
How far in advance can I prepare this No Bake Brownie Dessert?
This is the highlight of the entire recipe! This No Bake Brownie Dessert shines when made ahead. Seriously, planning this a day early guarantees success! If you assemble it the night before (say, Monday night), it will be perfectly set and delicious Tuesday evening. This gives the flavors time to meld properly and ensures the pudding and cream cheese layers aren’t soupy at all; they become beautifully firm.
You can definitely push it to two days in advance, but I wouldn’t recommend going further than that. That wonderful whipped topping keeps everything fresh, but around the 48-hour mark, the texture starts to get a little too dense for my taste. For the absolute best flavor and structure for your brownie refrigerator cake, aim for 12 to 24 hours before you plan to slice and serve it!
Nutritional Estimates for Your Brownie Refrigerator Cake
Okay, I’m giving you the facts here, but please, please take these numbers with a giant grain of salt! Owen always laughs because when we make this glorious brownie refrigerator cake, we aren’t exactly tracking macros—we’re tracking happiness. But for those of you who need the details, I finally went through and got the estimates based on standard box mixes and components.
Remember, since this is a make-ahead, no-oven dessert, the final weight and measurement can vary wildly based on how thick you make your layers or if you use store-bought versus homemade brownies. These numbers are just a guide for one slice of this rich, decadent brownie treat.
Here’s what our calculations look like for one generous serving:
- Serving Size: 1 slice
- Calories: 380
- Sugar: 35g (Yes, it’s a treat! That’s why we don’t eat it every day!)
- Sodium: 250mg
- Fat: 20g
- Saturated Fat: 10g
- Carbohydrates: 48g
- Protein: 5g
We really focus on that amazing flavor, but I wanted to share the rundown so you have the full picture on this amazing chilled brownie dessert. If you swap the instant pudding for a lighter version or use low-fat cream cheese, those numbers will shift quite a bit! Enjoy every bite!
Share Your Brownie Refrigerator Cake Creations
Well, friends, we’ve done the work, we’ve kept the kitchen cool, and now we’ve got one of the best, easiest, and most foolproof brownie refrigerator cake recipes ready for chilling! Now that you’ve had a chance to assemble your layers—from the fudgy base to that dreamy cream cheese layer—I am so excited for you to serve this up. Honestly, seeing your creations is the best part of running the Hungry Herald!
If you made this incredible no bake brownie dessert, please don’t keep the joy to yourself! Head down to the comments section below and let me know how it turned out. Did you try the overnight chill? Did you drizzle extra chocolate syrup on top? I want to hear all the details about how this recipe announced some good news at your dinner table!
We are always looking for photos and stories to feature on our main blog feed, so snap a picture of that beautiful slice you manage to get out of the dish before it disappears. You can tag us on social media, or if you just want to share your personal thoughts right here on the site, that’s wonderful too! Every comment and rating helps us know which simple, joyous recipes to bring you next.
For those who loved this, I saw another lovely version on Recipes Smile that might inspire your next assembly project, too. Go ahead, leave your feedback, and tell us what you’re celebrating this week. Remember, every great meal is a headline worth reporting!
PrintThe Ultimate Fudgy Brownie Refrigerator Cake (No-Bake, Layered Cream Cheese & Pudding)
Announcing the good news: you can create a decadent, rich, layered chocolate dessert without ever turning on your oven! This Brownie Refrigerator Cake uses pre-made brownies, creamy layers, and the magic of chilling to deliver an impressive, make-ahead treat perfect for any gathering.
- Prep Time: 25 min
- Cook Time: 0 min
- Total Time: 6 hr 25 min
- Yield: 10 servings
- Category: Dessert
- Method: Chilling/No-Bake
- Cuisine: American
- Diet: Vegetarian
Ingredients
- 1 (18.3 ounce) box fudge brownie mix (prepared according to package directions for baking, then cooled completely, or use 1 box of store-bought fudgy brownies)
- 1 (8 ounce) package cream cheese, softened
- 1 cup powdered sugar
- 1 teaspoon vanilla extract
- 1 cup cold milk
- 1 (3.4 ounce) package instant chocolate pudding mix
- 1 (8 ounce) container frozen whipped topping, thawed
- 1/4 cup chocolate syrup (optional, for drizzling)
Instructions
- Prepare the brownies according to the package directions. Let them cool completely. If using store-bought brownies, cut them into uniform squares or break them into pieces suitable for layering.
- Prepare the cream cheese layer: In a medium bowl, beat the softened cream cheese, powdered sugar, and vanilla extract until smooth and creamy. Set aside.
- Prepare the pudding layer: In a separate bowl, whisk together the cold milk and instant chocolate pudding mix for about two minutes until it begins to thicken. Let it stand for five minutes.
- Gently fold half of the thawed whipped topping into the thickened pudding mixture until just combined.
- Assemble the cake: Line an 8×8 inch or 9×13 inch baking dish (depending on desired height) with plastic wrap, leaving an overhang for easy removal later.
- Create the first layer using half of your prepared brownie pieces, pressing them gently into the bottom of the dish.
- Spread the cream cheese mixture evenly over the brownie layer.
- Top the cream cheese layer with the chocolate pudding and whipped topping mixture. Spread gently.
- Add the remaining brownie pieces as the top layer. If you prefer a smooth top, skip this step and use the remaining whipped topping instead.
- If using the optional chocolate syrup, drizzle it over the top layer.
- Cover the dish tightly with the plastic wrap overhang. Chill the Brownie Refrigerator Cake in the refrigerator for at least 6 hours, or preferably overnight, to allow the layers to set firmly.
- When ready to serve, use the plastic wrap overhang to lift the cake out of the dish. Slice and serve cold.
Notes
- If you want an extra fudgy texture, use a dense, fudgy brownie recipe instead of a box mix.
- For a richer cream cheese layer, substitute 1/4 cup of the powdered sugar with granulated sugar.
- This is a fantastic make-ahead dessert; it tastes even better the second day!
Nutrition
- Serving Size: 1 slice
- Calories: 380
- Sugar: 35
- Sodium: 250
- Fat: 20
- Saturated Fat: 10
- Unsaturated Fat: 10
- Trans Fat: 0.5
- Carbohydrates: 48
- Fiber: 2
- Protein: 5
- Cholesterol: 45