

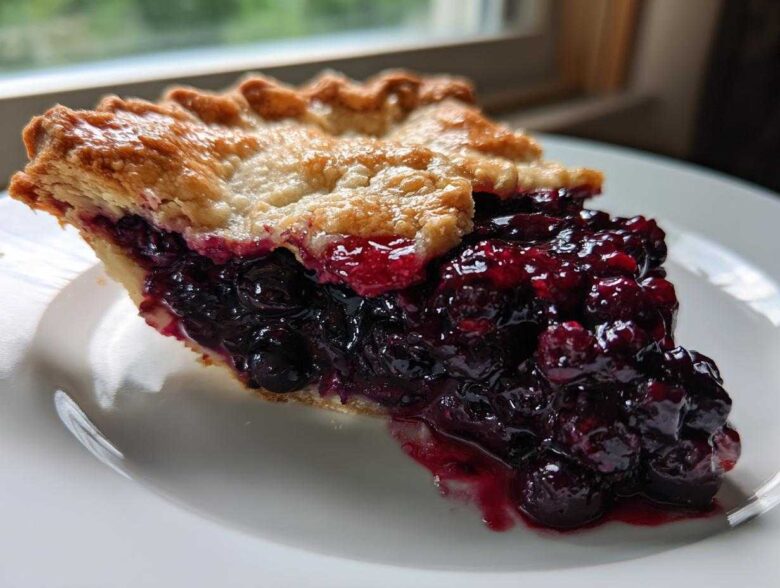
When I think about the quintessential American dessert, nothing screams summer gathering or cozy Sunday like a giant, glorious fruit pie. But let’s be honest—a fruit pie is only as good as its foundation, right? I spent years battling soggy bottoms and crusts that snapped instead of flaking. Trust me, I’ve tossed more dough in the trash than I care to admit! But I finally cracked the code, and what I landed on is the definitive, flaky-crusted blueberry pie recipe you need in your life. The best part? This technique is so solid that it handles your plump, fresh summer berries or those handy bags of frozen deep-blue gems without any fuss. Get ready for the most satisfying, thick, sweet-tart filling you’ve ever scooped!
Why This Classic Blueberry Pie Recipe Stands Out
Forget the disappointing, runny fillings you’ve dealt with before. This version is built for structure and flavor. We nail the texture every single time. Here’s why I swear by this method.
- It yields that shatteringly flaky crust you dream about.
- The filling sets up perfectly—thick, luscious, and never watery.
- You can swap between fresh and frozen blueberries easily!
Honestly, mastering these two components is what elevates this from just a pie to the blueberry pie recipe everyone asks for. You can see how I apply this crust logic in my apple cinnamon muffins too; cold fat is magic!
Flaky Crust Secrets for the Best Blueberry Pie Recipe
The key to flakiness is keeping things bone-chillingly cold. Seriously, I sometimes chill my flour for 15 minutes before I start mixing! Your butter pieces must stay that size—think frozen peas, not melted puddles. If your kitchen is warm, stick the whole bowl back in the fridge for ten minutes halfway through cutting in that butter. Minimal handling is essential; treat the dough gently, and it will reward you with layers!
Achieving the Best Blueberry Pie Filling
The secret weapon here is cornstarch. It’s the backbone that keeps the sweet and tart juices perfectly suspended. If your berries are super sweet, you can back off the sugar just a touch, but don’t skip the lemon zest—that brightness cuts through the intense berry flavor beautifully. I’ve even tested this recipe on my mom’s super tart wild blueberries, and the ratio holds up because we tested it with both fresh and frozen berries without issue.
Gathering Ingredients for Your Homemade Blueberry Pie Recipe
Okay, time to pull out your mixing bowls! When you’re making something this classic, ingredient quality really shines through, especially with the crust. You’ll notice I stress ‘very cold’ for the butter in the recipe—that’s non-negotiable for flakiness. I always try to grab butter that’s been sitting in the coldest part of the fridge, not just the door.
For the filling, it’s important to know that the sugar amount is a starting point. Berries change every year, right? So taste test your mix when you toss it together! And don’t fret about the cornstarch; it’s doing the heavy lifting to get that perfect “set.” If you want to see how I manage similar precision with fat in my baking, check out the notes on my brown butter cookies!
Ingredient Notes and Substitutions for This Blueberry Pie Recipe
Let’s talk details so you don’t end up stressed out mid-bake. The butter for the crust? It has to be cut into cubes and kept cold or it just melts into the flour, giving you a tough, shortbread-like texture instead of those beautiful flaky layers.
Now, for the berries: If you are using fresh, just toss ’em in. If you are using frozen, please, please, please—and this is important—do not thaw them! Thawed berries release too much moisture upfront, and you’ll end up with soup. Just add them straight from the freezer to the sugar mixture. You might need to add about five extra minutes to your total bake time, but the result is worth it.
Sugar adjustment is key. If you’re using those super sweet, cultivated blueberries you bought at the market, maybe knock the sugar down to 2/3 cup instead of 3/4. If you’re using tart, tiny wild berries, stick to the original measurement or even add a splash more sugar. Sweet and tart is the goal here!
Step-by-Step Instructions for the Flaky Crust Recipe
Alright, let’s tackle that dough! This is where most people get nervous, but I promise you, it’s so much fun once you get the rhythm down. We’re making this crust by hand, so you’ll want your butter and water to be as icy as possible. If you prefer a super fast method that avoids the usual fuss, my brownie recipe technique shows how quick mixing can work, but for pie, patience wins!
First, once your flour and salt are whisked together, dump in those cold, cubed butter chunks. Now, grab a pastry blender—or hey, your fingertips work great if you’re fast! You’re pressing that butter down into the flour mixture. We aren’t looking for fine flour here; we need those lovely, visible pea-sized chunks of butter scattered throughout. Those chunks are what melt in the oven and create all those beautiful, airy steam pockets that make the crust layer.
Next comes the scary part: the water. Add it spoonful by spoonful. I mean it—one tablespoon at a time! You are only looking to hydrate the flour around the butter pieces. As soon as the dough starts to look like it *might* hold together if you squeezed it hard, stop adding water. You don’t want to see a puddle at the bottom of the bowl; you just want shaggy clumps.
Turn that shaggy mess out onto a lightly floured surface. Gently, using the palms of your hands, push the dough together just enough for it to form a cohesive ball. Don’t knead it! Kneading develops gluten and makes the dough tough. Split that dough ball into two equal-ish pieces. Flatten each into a disk, wrap them up tight in plastic wrap, and tuck them into the fridge. You absolutely must let them chill for at least one hour. This resting time relaxes the gluten we just worked so hard to avoid straining, and it solidifies the butter again.
Assembling the Perfect Blueberry Pie Recipe Filling
Now that your crust dough disks are chilling happily in the fridge—which, remember, should be at least an hour—it’s time for the star of the show: that beautiful blueberry filling! Please make sure your crust has at least 30 minutes left minimum before you start this part, because once the berries are mixed with the sugar, we don’t want the juices sitting around for too long.
Grab the biggest bowl you have because we need room to toss these berries without crushing them! We talked about using 6 cups of blueberries, and that seems like a lot, but trust me, they cook down beautifully as the heat sets that starch.
First, gently add your blueberries to the bowl. Think of them as delicate little jewels; we want them intact for that great texture later. Next, you’re going to sprinkle over your dry components: the sugar, the cornstarch, the cinnamon. If you are using extra tart wild berries, maybe add just a tiny dash more sugar right now.
Now, the flavor boosters! Drizzle in the lemon juice and toss in that lovely lemon zest. That zest is what makes people stop and ask what your secret ingredient is—it brightens everything up without tasting overly lemony. Give this whole mixture a very gentle fold with a rubber spatula. You just want the cornstarch and sugar to coat every single berry; don’t mash them!
That’s it! That’s the entirety of the filling process. It’s so simple when you rely on the starch to do the work instead of jamming it full of flour or other thickeners. Once your crust is rolled out and nestled in the pie plate, you can just scoop this luscious blueberry mixture right on top. It smells heavenly already, doesn’t it?
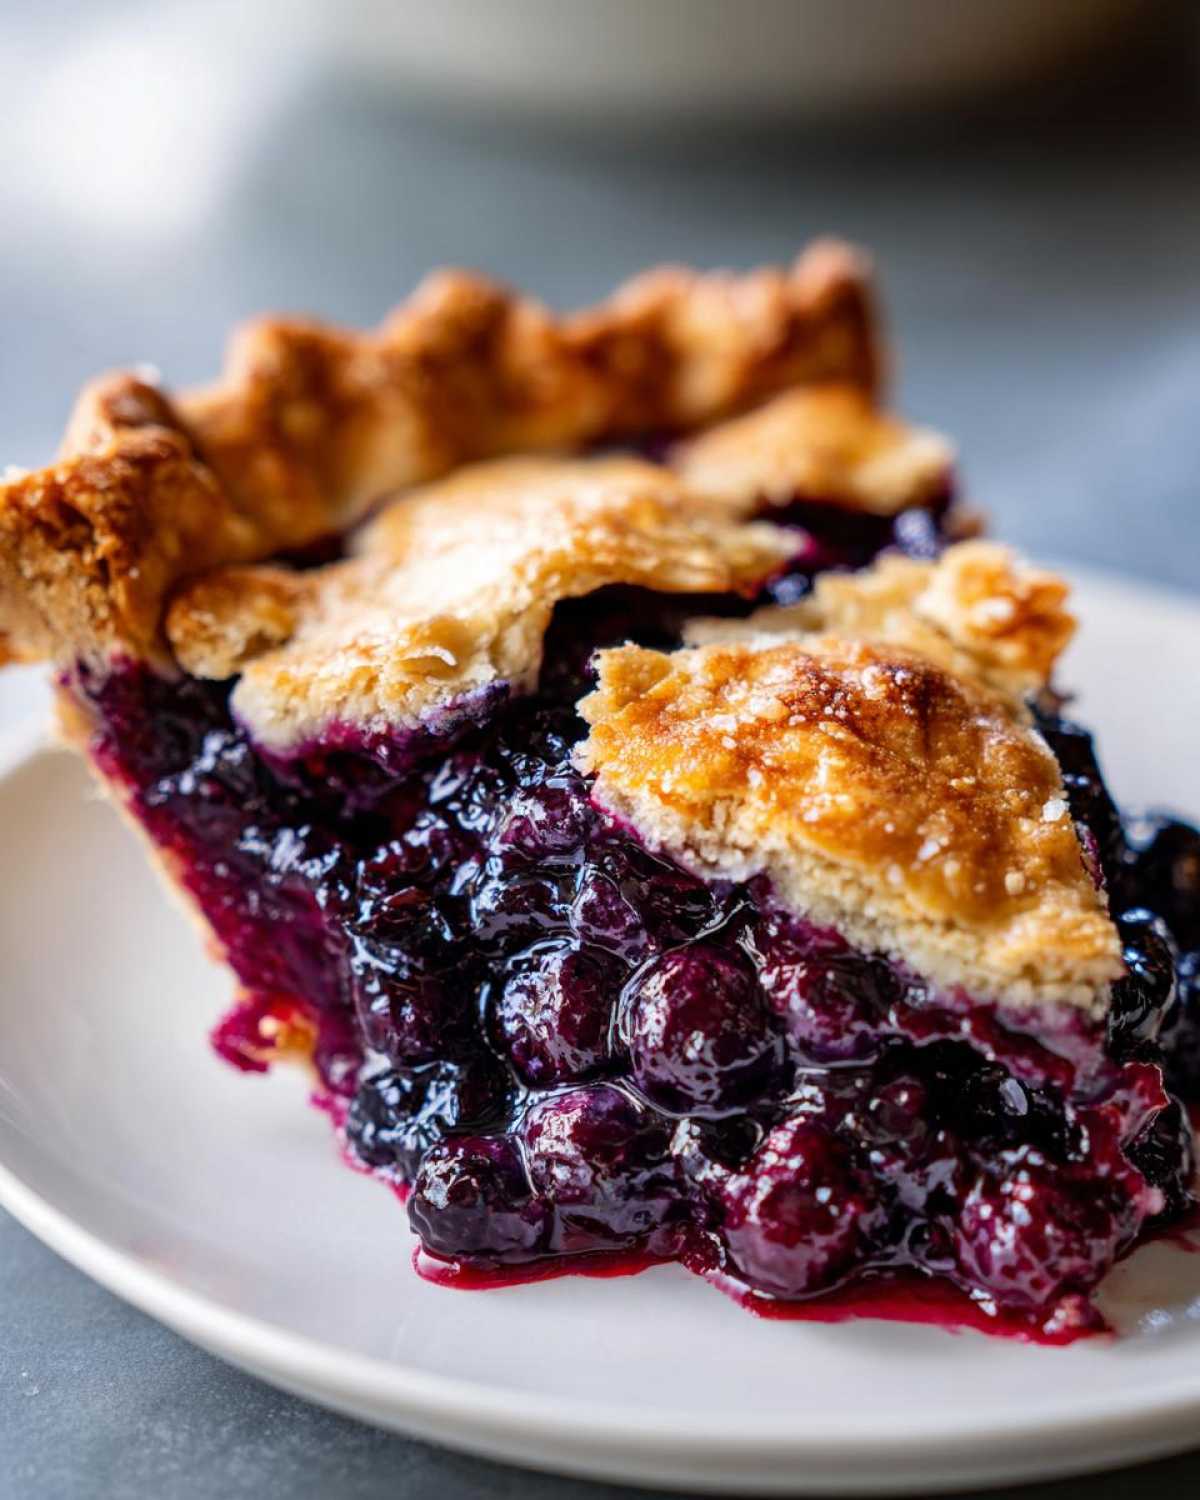
Baking Your Classic Blueberry Pie Recipe
Okay, here comes the moment of truth! Now that you’ve lovingly nestled that sweet-tart filling into that gorgeous, cold, flaky bottom crust—and topped it with your lattice or—if you went that route—your crumble—it’s time to introduce it to the heat. This temperature dance is super important for achieving that golden-brown top without burning the edges before the filling is set.
First things first: make sure your oven is screaming hot and fully preheated to 425°F (220°C). We hit it with that high heat for the first 15 minutes. Why? That blast of heat is what locks in the structure of that bottom crust and starts puffing up those butter layers for maximum flakiness. Don’t peek too much!
After those initial 15 minutes, you need to act fast. Carefully—and I mean carefully, that plate is hot!—reduce your oven temperature down to 375°F (190°C). Then, you’re going to let it bake for another 40 to 50 minutes. The main thing to watch for isn’t time; it’s bubbling! You want to see thick, slow, enthusiastic bubbles erupting through the vents or weaving through your lattice work. If the juices are just thin and runny, it needs more time. If the crust starts looking too dark before the filling is bubbly, trust me, grab a sheet of aluminum foil and loosely drape it over the edges that are browning too fast. This trick is a lifesaver! It’s kind of like how I manage to keep my maple-glazed salmon from scorching!
Lattice Top vs. Crumb Topping Variations for This Blueberry Pie Recipe
Most people adore the classic lattice look, seeing those berries peek through as the pie bakes, but if you’re short on time or just prefer a bit of crunch on top, the crumb topping is an amazing alternative. If you opted for the crumble—which is basically just flour, sugars, and cold butter blended roughly—you don’t need to worry about egg washing or sealing edges.
Just sprinkle that crumb mixture evenly over the berry filling before it goes into the oven. You might want to drop the temp slightly if you use crumb topping, maybe keeping it closer to 375°F the whole time, so the loose topping doesn’t fly everywhere or burn before the crust sets underneath. Either way, the goal is a golden crust and a hot, thickened filling underneath!
Setting and Serving This Homemade Blueberry Pie Recipe
Now, if you are like me, the second that glorious, golden-brown pie comes out of the oven, smelling like heaven, you want to carve into it immediately. Stop right there! I know it’s torture, but you absolutely must resist for a few hours. This is probably the single most important piece of advice I can give for this Homemade Blueberry Pie Recipe.
The filling is boiling hot when it leaves the oven, and that cornstarch needs time—and cooler temperature—to fully gel and thicken. If you slice into it too soon, all that beautiful juice you worked so hard to keep from running everywhere is just going to spill out, leaving you with a messy plate rather than a nice, clean wedge of pie. Three hours is the minimum, but honestly? Four hours is where it really sets up nicely! I usually bake it in the afternoon, let it cool on the counter while we have dinner, and then we serve it after dessert.
When it is showtime, this pie is fantastic on its own, but for a real crowd-pleaser at your summer gatherings, you have to serve it warm—not hot, just gently warm—with something cold on top. My go-to, year after year, is a big scoop of vanilla bean ice cream. The contrast between the warm, tart, spiced fruit and the rich, cold cream is just unbeatable.
If you want something a little fancier, a dollop of slightly sweetened, freshly whipped cream is incredible. You can even mix a little almond extract or a tiny bit of lemon zest into the cream to tie back into the pie’s filling flavors. It makes even a simple slice feel gourmet! If you want to see how a little cooling time totally transforms a texture, check out how important resting is for my creamy butternut squash soup; it’s the same principle!
Storage and Reheating Instructions for Blueberry Pie
So, you managed to save some of this glorious homemade pie? Good for you! Storing leftover pie correctly is less about hiding it and more about making sure that second slice tastes just as amazing as the first one did yesterday. I know you want to wrap it up tight and stick it in the fridge immediately, but hang on a second—let’s talk strategy here to protect that flaky crust!
First, you must confirm it’s fully cooled. I mean it—fully cool. Any residual heat trapped under plastic wrap or foil will create condensation, and condensation is the mortal enemy of a crisp pie crust. Once it’s completely cool (usually 4 hours on the counter is enough), cover it loosely with plastic wrap or place it under an overturned large bowl to keep dust and fridge smells away.
Now, the big question: Counter or fridge? Because this recipe doesn’t use a custard base, it’s pretty robust. If you plan on eating the rest of the pie within **two days**, leaving it on the counter at a cool room temperature is actually fine. In fact, I prefer it, because chilling can sometimes dull the flavor of the berries slightly.
However, if it’s summer, your kitchen is warm, or you need to keep it past 48 hours, you definitely need to refrigerate it. If you do chill it, just a quick tip: take the slice you want to eat out of the fridge about 30 minutes before serving so it warms up just a hair—it tastes much better less like a refrigerated brick!
When it comes to reheating, we aren’t nuking the whole thing! That’s a one-way ticket to a soggy bottom. If you are just enjoying a single slice, the best way to reheat is in a low oven or toaster oven. Preheat your oven to about 325°F (160°C). Place the slice directly on a small baking sheet or foil. Heat it up for about 10 to 15 minutes. This gentle heat warms the filling through while helping to crisp up the crust again. It’s almost like it just came out of the oven! It works wonders, much like how I reheat leftover asparagus to bring back that perfect snap later on, as you can read about with these pumpkin seed tips!
Frequently Asked Questions About This Blueberry Pie Recipe
I get so many lovely notes back after people try this, and usually, the same little questions pop up! It’s totally normal; pie baking can feel a little bit technical sometimes. Don’t stress if your first one isn’t perfect; that’s how you learn! We’re going to tackle the most common hurdles right here, so you can feel confident starting your own batch of this Classic Blueberry Pie.
Can I use a store-bought crust in this blueberry pie recipe?
Look, I’m the first person to preach about that homemade flaky crust recipe—and you truly deserve it! But listen, sometimes life is hectic, and you need a shortcut, right? Yes, absolutely, you can use store-bought crusts! This filling is so robust that it works perfectly well with pre-made dough.
My one suggestion if you go that route is to make sure you still use the high-heat blast at the beginning when baking. That really cheers up the pre-made dough! Also, if you are using a top crust, make sure you brush it with an egg wash and sprinkle on that coarse sugar; it makes a huge difference in browning when you skip making the dough from scratch. It’s still an amazing Easy Fruit Pie!
How do I prevent my blueberry pie from shrinking?
This is all about that cornstarch doing its job correctly! Shrinkage usually happens for two reasons: either you didn’t use enough thickener for the amount of liquid released by the berries, or—and this is super common—you cut into it way too soon! Remember everything I said back in the cooling section?
When the pie comes out of the oven, the filling is all expanded and bubbly. If you slice it while it’s hot, it collapses as it cools because the starch hasn’t set up its structure yet. You want that 3 to 4-hour rest period. If you’ve waited the full time and it *still* seems a bit runny, next time, just add an extra tablespoon of cornstarch. Simple fix for next time, but for this one, just let it chill a little longer!
If you’re looking for other quick tips on making desserts that set up right, I share some great secrets for my no-bake energy bites that rely on precise ratios, too!
Share Your Experience Making This Blueberry Pie Recipe
Okay, you’ve done the hard work! You’ve got that gorgeous, deeply purple, perfectly flaky double-crust pie cooling on the rack. Now comes my favorite part: hearing from you! I put my heart and soul into making sure this blueberry pie recipe delivers that classic, old-fashioned flavor we all crave, whether you served it up for the Fourth of July or just a Tuesday when you desperately needed dessert.
I would absolutely love to know how it turned out for you. Did that crust shatter just right? Were your berries sweet or tart? Did you go lattice or did you try that crumb topping I mentioned? Don’t be shy!
Head down to the comments section below and let me know how your pie turned out. Please, if you loved it, leave a star rating right there on the main recipe card—it really helps other home bakers feel confident about trying something from scratch! And if you managed to take a beautiful photo, send it my way; I’m always looking for new inspiration.
Baking from scratch connects us, doesn’t it? It reminds us of simple, wonderful traditions. Keep making memories around your table, and if you are already planning your next bake, maybe skip the fruit obsession for a minute and try my legendary pumpkin spice cake with cream cheese frosting—it’s the perfect follow-up to a summer pie!
PrintClassic Homemade Blueberry Pie with Flaky Crust

Make a traditional, from-scratch blueberry pie featuring a sweet and tart filling and a perfectly flaky crust. This recipe works well with fresh or frozen blueberries.
- Prep Time: 45 min
- Cook Time: 60 min
- Total Time: 105 min
- Yield: 8 servings
- Category: Dessert
- Method: Baking
- Cuisine: American
- Diet: Vegetarian
Ingredients
- 2 1/2 cups all-purpose flour
- 1 teaspoon salt
- 1 cup (2 sticks) unsalted butter, very cold and cubed
- 1/2 cup ice water, plus more if needed
- 6 cups fresh or frozen blueberries (do not thaw if frozen)
- 3/4 cup granulated sugar (adjust based on berry sweetness)
- 1/4 cup cornstarch
- 1 tablespoon lemon juice
- 1 teaspoon lemon zest
- 1/4 teaspoon ground cinnamon
- 1 large egg, beaten (for egg wash)
- 1 tablespoon coarse sugar (for sprinkling)
Instructions
- Prepare the crust: In a large bowl, whisk together the flour and salt. Cut in the cold butter using a pastry blender or your fingers until the mixture resembles coarse crumbs with some pea-sized pieces of butter remaining.
- Gradually add the ice water, one tablespoon at a time, mixing until the dough just comes together. Do not overmix. Divide the dough in half, form each half into a disk, wrap in plastic, and chill for at least 1 hour.
- Prepare the filling: In a separate bowl, gently combine the blueberries, granulated sugar, cornstarch, lemon juice, lemon zest, and cinnamon. Set aside.
- Preheat your oven to 425°F (220°C).
- Roll out one dough disk on a lightly floured surface to an 11-inch circle. Carefully transfer it to a 9-inch pie plate. Trim the edges, leaving a 1-inch overhang.
- Pour the blueberry filling into the crust. Dot the top of the filling with a few small pieces of leftover butter if desired.
- Roll out the second dough disk. You can cut strips for a lattice top or place the whole circle over the filling. If using a full top crust, cut several vents in the top to allow steam to escape.
- Crimp the edges of the top and bottom crusts together to seal. Brush the top crust lightly with the beaten egg and sprinkle with coarse sugar.
- Bake for 15 minutes at 425°F (220°C). Then, reduce the oven temperature to 375°F (190°C) and continue baking for 40 to 50 minutes, or until the crust is golden brown and the filling is bubbling thickly. If the edges brown too quickly, cover them loosely with foil.
- Cool the pie completely on a wire rack for at least 3 to 4 hours before slicing. This allows the filling to set properly.
Notes
- If you prefer a crumb topping instead of a top crust, combine 1 cup flour, 1/2 cup brown sugar, 1/2 cup granulated sugar, and 1/2 cup cold cubed butter until crumbly. Sprinkle this mixture over the filling before baking.
- If using frozen blueberries, do not thaw them first, but you may need to add 5 to 10 minutes to the total baking time.
- For an extra flaky crust, keep all ingredients cold throughout the mixing process.
Nutrition
- Serving Size: 1 slice
- Calories: 410
- Sugar: 35g
- Sodium: 250mg
- Fat: 22g
- Saturated Fat: 13g
- Unsaturated Fat: 9g
- Trans Fat: 0g
- Carbohydrates: 52g
- Fiber: 3g
- Protein: 5g
- Cholesterol: 55mg