

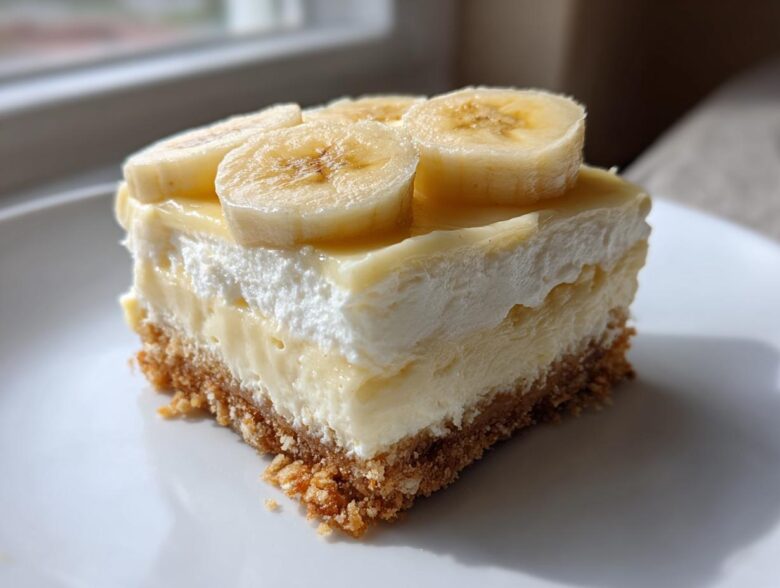
Oh my gosh, you have to drop everything and make these! I recently took a batch of these cheesecake cookies inspiration recipe, but these are better. I’m talking about taking two heavyweight champions of the dessert world—creamy, dreamy Banana Pudding and rich, tangy Cheesecake—and smashing them together into one perfect square. Seriously, the first time I served my decadent Banana Pudding Cheesecake Bars at a summer barbecue, they vanished faster than you can say, “Pass me another one!” This recipe isn’t just easy; it’s impressive. It’s got that crunchy vanilla wafer base, a smooth cheesecake layer, fresh bananas, and that light, fluffy pudding topping. Total game-changer.
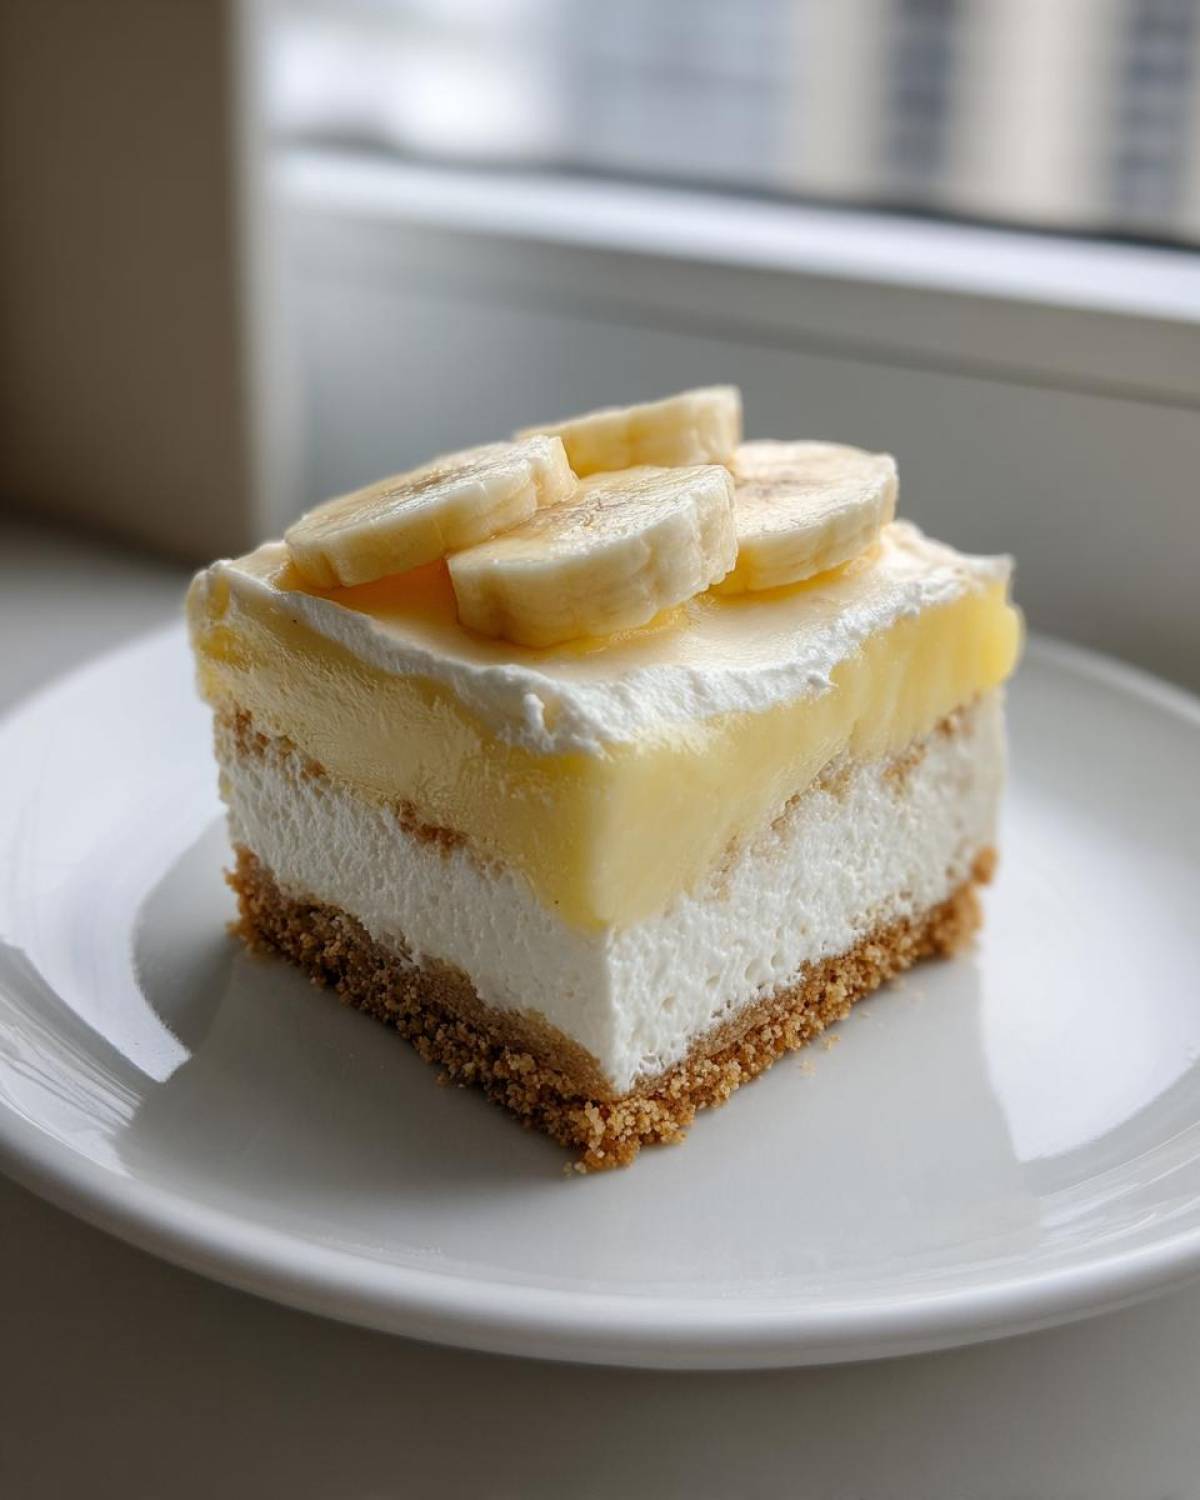
Why You Will Love These Banana Pudding Cheesecake Bars
Honestly, I keep this recipe in my back pocket for emergencies because it always wins the crowd over. Who doesn’t adore the combination of textures? You get crunch, creaminess, and soft fruit all in one bite. They’re perfect for potlucks because you can slice them neatly, unlike a messy pie.
- They are the ultimate Southern comfort dessert, taking everything great about classic banana pudding and giving it structure.
- The cheesecake layer bakes up incredibly smooth—seriously, it’s like velvet!
- It’s such an easy make-ahead dessert. The longer they chill, the firmer and better these Banana Pudding Cheesecake Bars get.
- We use a simple buttery vanilla wafer crust that stays crisp even after chilling.
Essential Ingredients for Perfect Banana Pudding Cheesecake Bars
Don’t even think about making substitutions here—especially not with the cream cheese! For that truly decadent texture we are aiming for, you absolutely have to use full-fat, brick-style cream cheese. It makes all the difference in getting a cheesecake layer that doesn’t weep or crumble. Laying out your ingredients like this makes the whole process feel totally manageable. Trust me, getting your ingredients measured and prepped (what they call *mise en place*) is half the battle!
For the Vanilla Wafer Crust
- 1 1/2 cups vanilla wafer crumbs (I crush mine in a Ziploc bag! So cathartic!)
- 1/4 cup granulated sugar
- 6 tablespoons unsalted butter, melted
For the Cream Cheese Layer
Make sure your cream cheese has been sitting out on the counter for at least an hour. Cold cheese equals lumpy batter, we don’t want any lumps!
- 16 ounces cream cheese, softened
- 1 cup granulated sugar
- 1 teaspoon vanilla extract
- 3 large eggs
For the Pudding Topping
This is where the classic banana pudding flavor really shines through, so pay attention to the milk temperature. You need the milk to be ice cold so the instant pudding sets up fast and firm.
- 1 (3.4 ounce) package instant vanilla pudding mix
- 1 1/2 cups cold milk
- 2 large bananas, sliced
- 1 cup whipped topping, thawed
If you want to check out some great recipes for making vanilla frosting from scratch, I have a great guide, but for this layer, instant pudding is non-negotiable for texture!
Step-by-Step Instructions for Layered Banana Pudding Cheesecake Bars
Okay, let’s dive into the construction zone! Making these Banana Pudding Cheesecake Bars is honestly more about layering than tricky cooking, but you have to follow the timings or you risk a soggy bottom layer or a cracked top. We’re working with three distinct sections here. Make sure you’ve lined that 9×13 pan with parchment paper first so you can lift the whole thing out later like a glorious dessert blanket! We start by setting the stage.
Preparing the Vanilla Wafer Crust and Initial Bake
First things first: get that oven preheated to 350°F (175°C). While it warms up, mix your vanilla wafer crumbs with the sugar, then drizzle in that melted butter. You want it to look like wet sand—dark and clumping easily when you squeeze it. Press that mixture *firmly* into the bottom of your lined pan. I use the flat bottom of a measuring cup to really pack it down tight! Then, pop it in for a quick 10 minutes just to set it up. Once it comes out, let it cool down a bit while you whip up the filling!
Making the Cheesecake Filling for Banana Pudding Cheesecake Bars
Remember I said room temperature cream cheese is essential? Beat that softened cream cheese with the 1 cup of sugar and vanilla until it’s perfectly pristine and fluffy—no lumps allowed! Now, this is the part where you slow down. Add your eggs in, one at a time. Beat just until you see the yellow disappear; seriously, stop mixing once it’s combined! If you overmix the eggs, that rich cheesecake layer is going to puff too high and crack when it cools. Pour this lovely mixture gently over that slightly cooled crust. Bake this for 25 to 30 minutes. You’ll know it’s done when the edges look set, but the very middle still has a tiny, tiny wobble—that little jiggle means you’ll have perfect, creamy Banana Pudding Cheesecake Bars when they chill!
Assembling the Creamy Pudding Topping
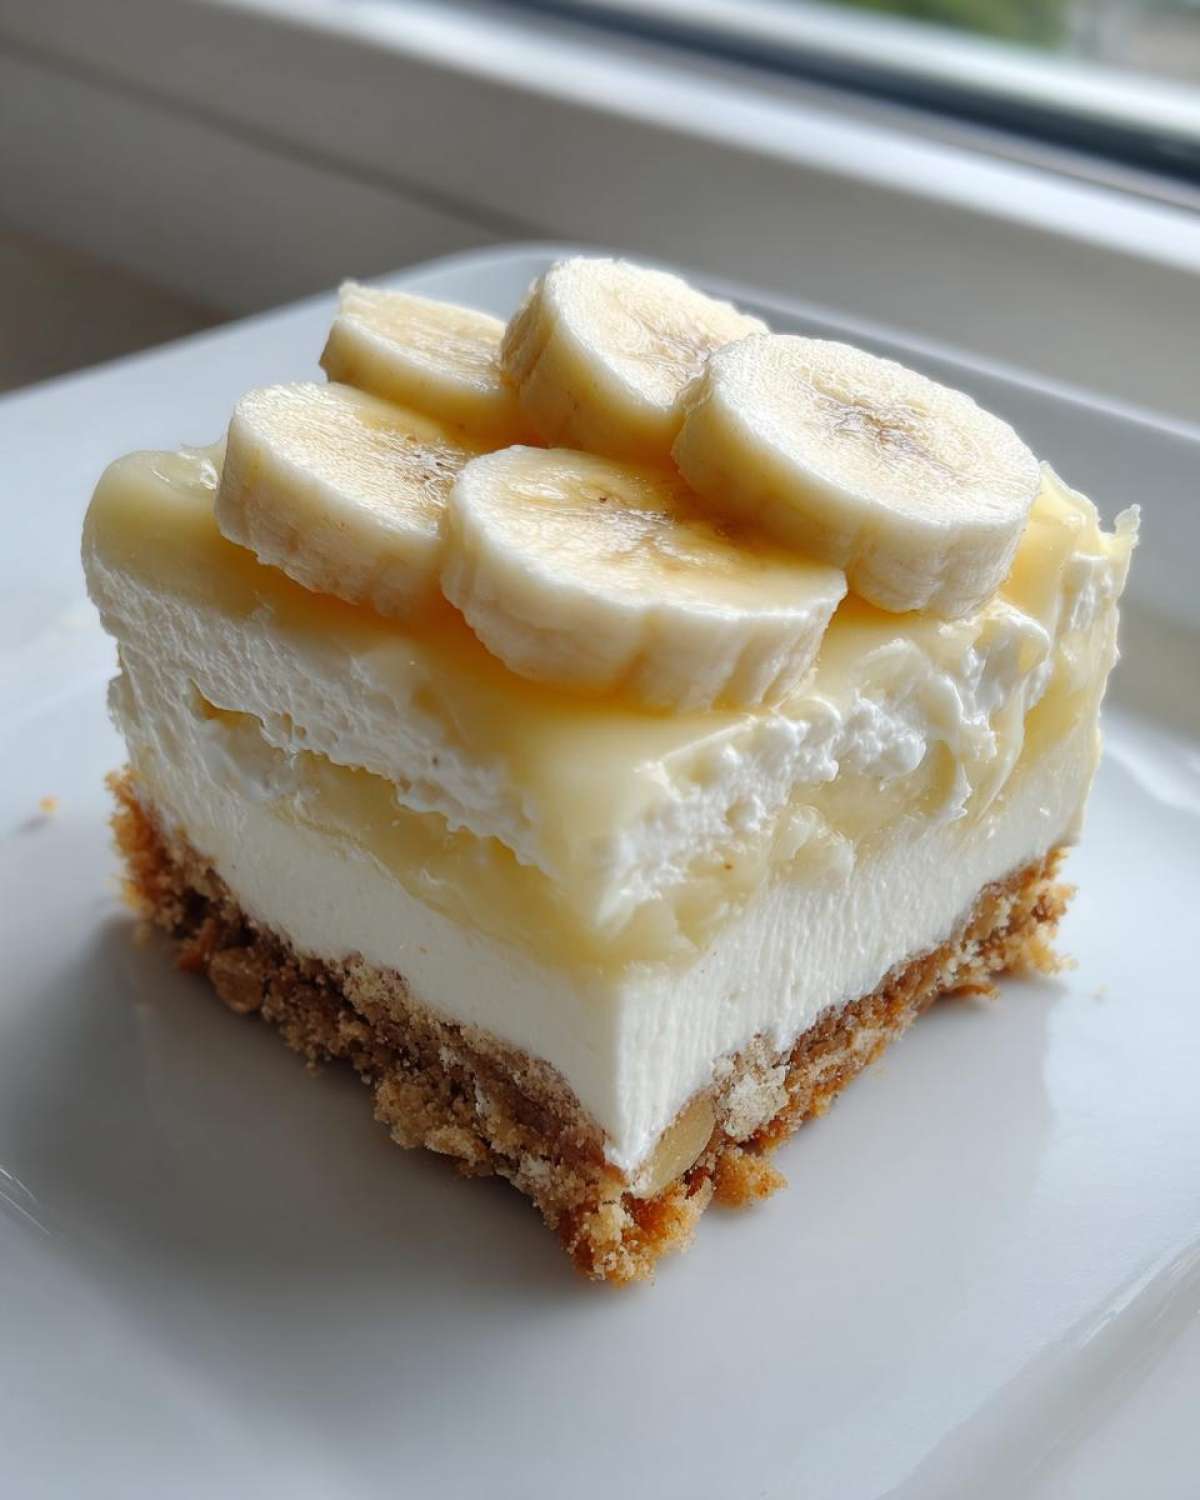
Once that cheesecake layer is out and cooling on the rack, it’s time for the instant gratification part! Whisk that vanilla pudding mix into the 1 1/2 cups of *cold* milk. Keep whisking until it thickens up completely—it happens fast, almost instantly. Then, gently fold in that thawed whipped topping. You don’t want to deflate all the air, so use a rubber spatula and be gentle. We’re making a light cloud here that sits right on top!
Layering and Chilling Your Banana Pudding Cheesecake Bars
This is the final assembly before we wait! Arrange your sliced bananas evenly over the cooled cheesecake. Don’t be shy, cover that surface! Then, spread that fluffy, light pudding mixture right over those bananas. Now comes the hardest part: patience. Cover the whole thing up and push it into the fridge for a minimum of 4 hours. Honestly, if you can wait overnight like I try to, the structure is phenomenal, and you get the absolute best texture for cutting these Banana Pudding Cheesecake Bars. Once they are totally firm, grab that parchment paper overhang and lift the whole dessert out onto a cutting board. Wipe off your sharp knife, and slice them into neat squares!
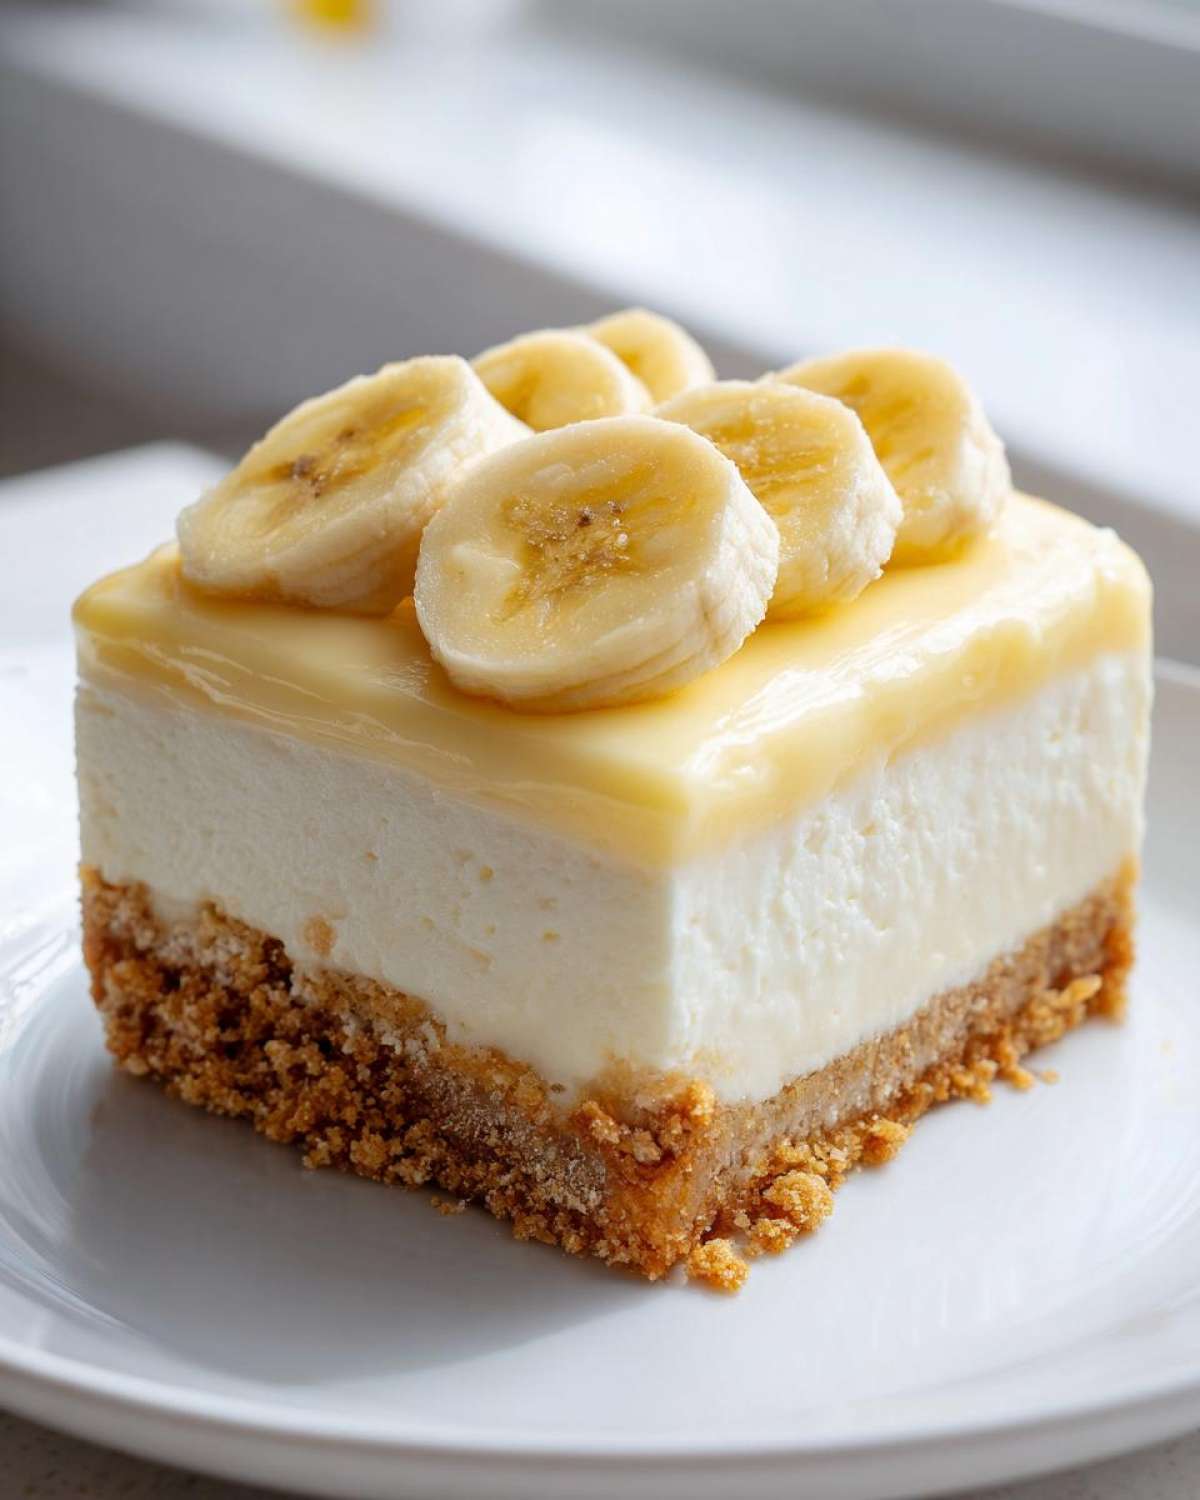
If you want an easy guide for making other banana pudding bars without the cheesecake, I’ve got you covered!
Expert Tips for Perfect Banana Pudding Cheesecake Bars
Listen, even the best recipe needs a few little kitchen hacks to go from good to absolutely legendary. I’ve learned a few things over the years baking these layered desserts, especially when dealing with the moisture from the bananas and pudding. These little tweaks will save you headaches later, I promise! If you’re looking for tips on icing sugary things, always check out my guide on best sugar cookie icing dries hard.
Ingredient Notes and Substitutions for Banana Pudding Cheesecake Bars
Let’s talk about adjustments. The recipe calls for a 9×13 pan, which gives you perfect, easy-to-handle bars. But if you use a smaller 9×9 pan, you’ll get these incredibly thick, rich squares. Just keep in mind that a smaller pan means the cheesecake center will need about 10 or 15 minutes longer in the oven to set up properly! Always check that center jiggle, no matter the size.
And about those bananas? I learned this the hard way—don’t use the super soft, brown-spotted ones that are perfect for bread. For these bars, you want bananas that are freshly sliced, maybe just starting to show a few tiny brown specks, but still firm. The overly mushy ones tend to turn into actual banana mush underneath that pudding layer. If you have to use graham cracker crumbs instead of vanilla wafers, go for it, but you might need to add an extra tablespoon of sugar to the crust mix to keep the flavor where it should be!
When you’re mixing that instant pudding, remember what I said earlier: the milk must be ice cold. If you use lukewarm milk, you’re going to end up with thin, runny goo that never sets up right. Cold milk interacts instantly with the starch in the mix, giving you that thick, structured layer ready for topping those Banana Pudding Cheesecake Bars.
Achieving the Best Texture in Rich Banana Cream Cheese Squares
The number one mistake people make with layered cheesecake desserts is cutting them too soon. Seriously, don’t even look at the fridge for at least four hours! If you try to slice them warm or even room temp, the cheesecake layer squishes, the pudding oozes, and you end up with a messy puddle rather than neat, clean Rich Banana Cream Cheese Squares. The chilling process allows the fats in the cream cheese to firm up properly, giving you those clean, beautiful knife marks.
Speaking of cutting, here’s my secret weapon trick: Once the bars are totally chilled and firm, I lift the whole thing out of the pan using the parchment paper overhang—it should act like handles. I place that whole square onto a nice, sturdy cutting board. Before I start slicing, I dip my sharpest knife in very hot water, wipe it totally clean, and *then* make the cut. Hot knife, clean slice! Dip, wipe, slice. Repeat after every cut. This gives you such gorgeous, clean edges that really show off every layer!
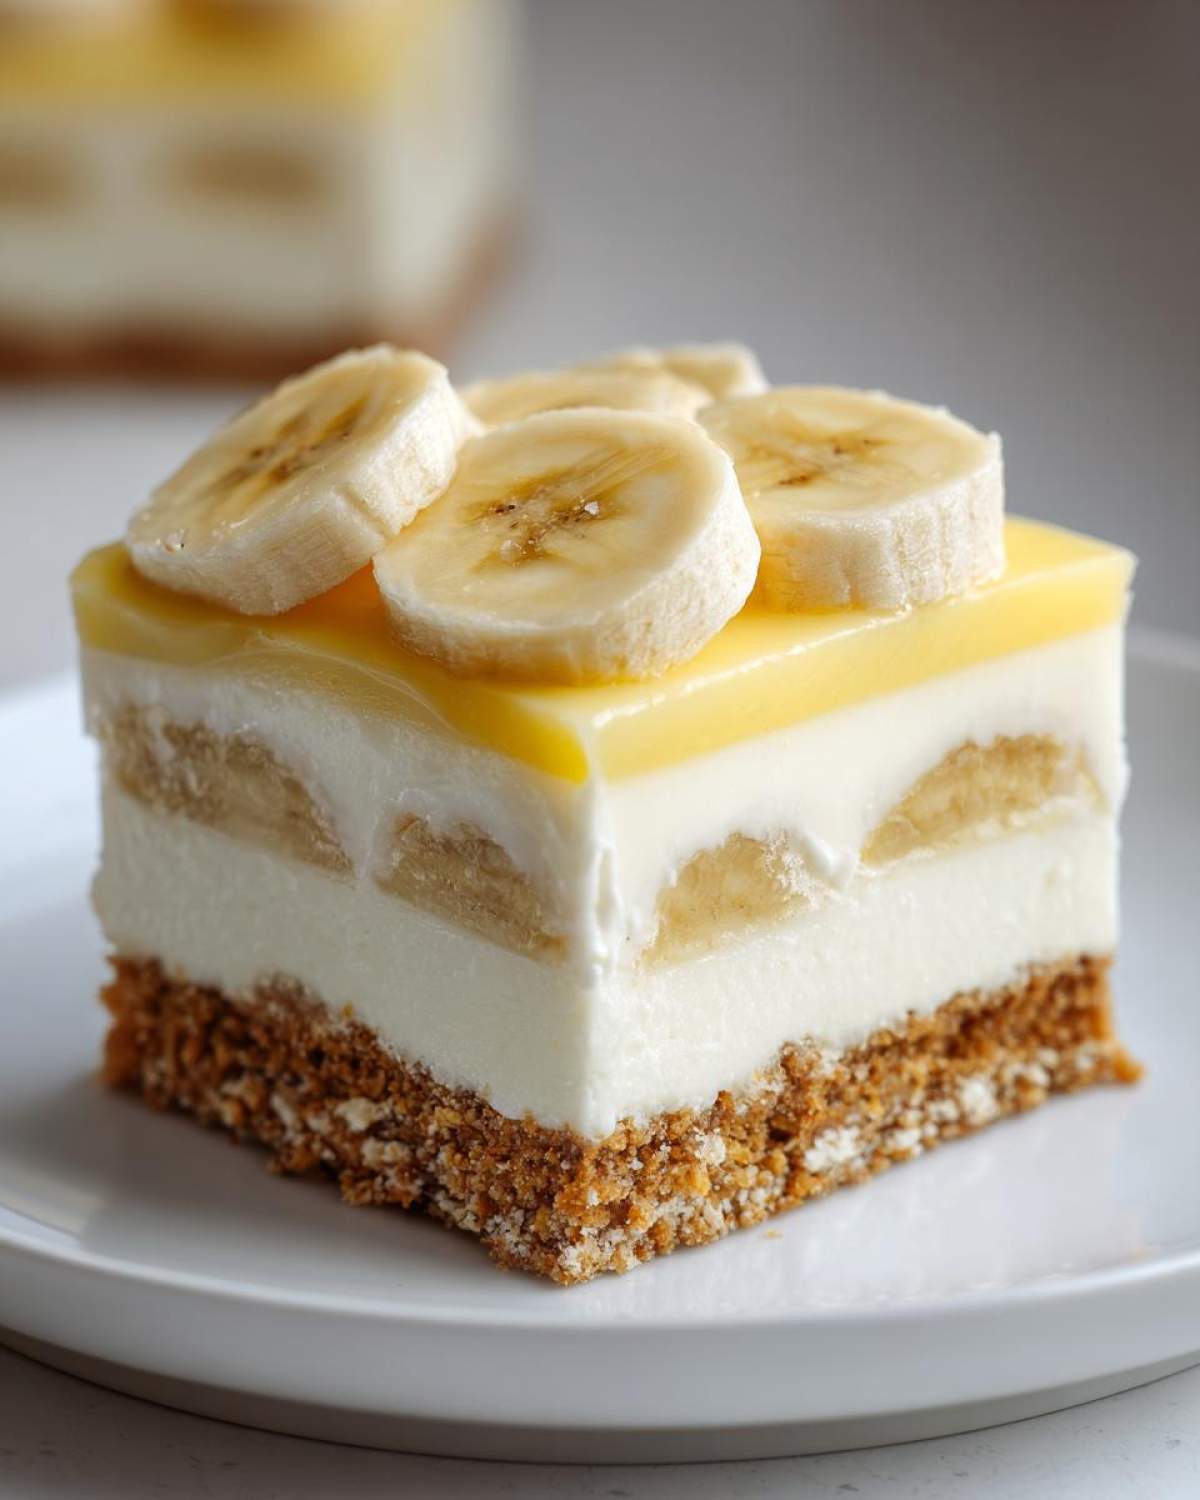
Storage and Make Ahead Tips for Banana Pudding Cheesecake Bars
One of the absolute best things about these Banana Pudding Cheesecake Bars? They need to be made ahead of time! That’s perfect for stress-free entertaining, right? Since we have three different layers here—a baked cheesecake base, fresh bananas, and a delicate pudding topping—storage requires a little bit of thought, mostly to keep those bananas from turning sad and brown.
You absolutely must keep these bars refrigerated. They are not shelf-stable at all because of the dairy in the cheesecake and the fresh pudding topping. I always store mine in that same 9×13 pan, covered tightly with plastic wrap or aluminum foil. Make sure the plastic wrap isn’t touching the pudding layer; if you can—and this is a pro move—stick a few toothpicks strategically into the cheesecake layer before wrapping so the plastic floats above the topping!
How far ahead can you make them? My rule of thumb is to assemble the entire thing—crust, cheesecake, bananas, and pudding topping—and then chill it for a full 24 hours before cutting. That extra time in the cold lets the pudding layer really set up against the cheesecake, giving you those perfect, non-messy squares when you slice them. If you’re prepping for a big party tomorrow, pull everything out this afternoon and let it chill overnight. You totally shouldn’t try to reheat these whatsoever; they are meant to be served cold, just like a lovely make ahead banana dessert should be!
If you happen to have leftovers (unlikely, but I can dream!), they’ll stay good in the fridge for about three to four days. Just keep them covered tightly. The only potential issue is that the bananas might start to look a little softer or darker on day four, but the flavor will still be divine because of that creamy cheesecake underneath insulating them!
Serving Suggestions for This Layered Banana Dessert Bars
Once you’ve wrestled these beautiful squares out of the pan and cut them perfectly (remember that hot knife trick!), you might wonder what’s the best way to serve them up. Honestly, these layered banana dessert bars are practically a full meal in themselves—they are so rich! But a little something extra on the side never hurt anyone, right?
For a fancy presentation, especially if you’re serving them after dinner, I like to plate them individually. A tiny drizzle of caramel sauce right on the plate—not over the whole bar, just a little swirl on the plate for color—takes it up ten notches. It complements the vanilla and banana flavors so beautifully.
If you’re looking for a great drink pairing, skip the heavy coffee. Something light and bubbly cuts through the richness of the cheesecake perfectly. I absolutely adore serving these with a slightly tart, refreshing beverage. Have you ever tried making an Apple Cider Moscow Mule? The ginger beer and apple cider echo the warm spice notes that banana pudding sometimes has, and the bubbles cleanse the palate between bites of heavy cheesecake. It’s a fantastic combination for a summer evening!
If you want a garnish that’s even simpler than caramel, try this: before serving, just crush a few extra vanilla wafers and sprinkle them lightly over the top of the bars. It brings back that beautiful little crunch on the very first bite before you hit the creamy layers underneath. Simple, effective, and looks like you tried way harder than you actually did!
Frequently Asked Questions About Cheesecake Bars
Whenever I share pictures of these desserts, I get a flood of questions about technique or substitutions, so I figured I’d save us all some time and answer the heavy hitters right here! Hopefully, this helps you get your perfect batch of cheesecake bars with vanilla wafer crust ready to go. It’s all about anticipating what might go wrong so we can make sure we end up with those gorgeous, firm squares!
Can I make these Banana Pudding Cheesecake Bars without baking the crust?
That is such a great question, especially if you are looking for an no bake banana pudding cheesecake bars recipe! For this specific cheesecake layer, I really do recommend that quick 10-minute bake for the crust. Why? Because cheesecake filling is very wet, and baking the crust first creates a slight barrier. It sets the butter and helps prevent that crust from getting soggy once the wet cheesecake batter sits on top of it for 30 minutes in the oven. If you skip the bake, you risk having a crumbly, loose base. If you absolutely must skip the oven, press that crust down harder than you’ve ever pressed anything in your life, and then chill the crust in the freezer for 20 minutes before adding the filling!
What is the best way to prevent the bananas from browning?
Oh, the dreaded banana oxidation! It happens to the best of us, and nobody wants brown bananas peaking through their pretty pudding layer. Since we are layering these banana pudding layered desserts for a party, you definitely want to take precautions. The best way to handle this is a quick acid bath right after slicing them.
I mix about one cup of cold water with two tablespoons of either lemon juice or pineapple juice. As soon as I slice my bananas, I drop them right into that citric acid bath for just about five minutes. You want to remove them quickly—don’t let them soak! Pat them completely dry with a paper towel before arranging them over the cheesecake layer. That thin coating of acid protects the fruit and keeps those banana slices looking bright yellow for days in the fridge. It’s my little trick for keeping homemade banana pudding dessert looking fresh!
Nutritional Estimate for One Serving
Now, let’s talk fuel! When you’re making something this rich and delicious, you know the nutrition info isn’t going to look like celery sticks, but knowledge is power, right?
Please keep in mind that all these numbers are just estimates. I calculated them based on standard database values for the ingredients listed in this recipe—like the full-fat cream cheese and the butter. If you use low-fat substitutes or add extra mix-ins, your numbers are going to change significantly. This estimate is based on getting 16 good-sized servings from the 9×13 pan.
- Serving Size: 1 bar
- Calories: 320
- Sugar: 28g
- Sodium: 210mg
- Fat: 19g
- Saturated Fat: 11g
- Trans Fat: 0.5g
- Carbohydrates: 34g
- Fiber: 1g
- Protein: 5g
- Cholesterol: 65mg
See? Worth every single calorie! Treat yourself—you made an incredible dessert!
Share Your Homemade Banana Pudding Dessert Bars
Okay, now it’s *your* turn! I’ve given you all my secrets for making the most decadent, perfectly structured Banana Pudding Cheesecake Bars, and now I absolutely need to know how they turned out for you.
Baking is always better when you share, even if it’s just with me through the comments section! Did the crust come out perfectly crisp? Did your cheesecake layer stay wonderfully creamy? I want all the details!
If you followed these steps and ended up with something beautiful—and I know you did because these instructions are gold—please do me a huge favor and snap a picture! Tag me on social media because nothing makes me happier than seeing my recipes come to life in your kitchen.
And if you’re looking for even more incredible, down-home, scratch-made deliciousness, you can always explore the rest of what I’m cooking up over on my main blog page. Don’t forget to leave a star rating for this recipe below, too. It really helps other bakers find the best desserts!
PrintLayered Banana Pudding Cheesecake Bars with Vanilla Wafer Crust
Make rich, creamy cheesecake bars layered with vanilla wafer crust, banana pudding, and fresh bananas.
- Prep Time: 25 min
- Cook Time: 35 min
- Total Time: 4 hours 60 min
- Yield: 16 servings
- Category: Dessert
- Method: Baking
- Cuisine: American
- Diet: Vegetarian
Ingredients
- 1 1/2 cups vanilla wafer crumbs
- 1/4 cup granulated sugar
- 6 tablespoons unsalted butter, melted
- 16 ounces cream cheese, softened
- 1 cup granulated sugar
- 1 teaspoon vanilla extract
- 3 large eggs
- 1 (3.4 ounce) package instant vanilla pudding mix
- 1 1/2 cups cold milk
- 2 large bananas, sliced
- 1 cup whipped topping, thawed
Instructions
- Preheat your oven to 350°F (175°C). Line a 9×13 inch baking pan with parchment paper, leaving an overhang for easy removal.
- Combine the vanilla wafer crumbs and 1/4 cup sugar in a bowl. Pour in the melted butter and mix until the crumbs are evenly moistened.
- Press the crumb mixture firmly into the bottom of the prepared pan to form the crust. Bake for 10 minutes. Remove from the oven and let cool slightly.
- In a large bowl, beat the softened cream cheese, 1 cup sugar, and vanilla extract until smooth. Beat in the eggs one at a time, mixing just until combined after each addition. Do not overmix.
- Pour the cream cheese mixture over the slightly cooled crust. Bake for 25 to 30 minutes, or until the edges are set and the center has only a slight jiggle. Let cool completely on a wire rack.
- While the cheesecake cools, prepare the instant vanilla pudding according to package directions using the cold milk. Whisk until thickened, about 2 minutes.
- Gently stir the prepared pudding into the whipped topping.
- Arrange the sliced bananas evenly over the cooled cheesecake layer.
- Spread the pudding and whipped topping mixture over the bananas.
- Cover the pan and refrigerate for at least 4 hours, or preferably overnight, until the bars are firm.
- Use the parchment paper overhang to lift the dessert from the pan. Cut into squares before serving.
Notes
- For a sturdier crust, you can press the crumbs into the bottom of a 9×9 inch pan instead, adjusting baking time as needed.
- Use slightly under-ripe bananas; very soft bananas can become mushy in the layers.
- You can substitute graham cracker crumbs for vanilla wafers if desired.
Nutrition
- Serving Size: 1 bar
- Calories: 320
- Sugar: 28
- Sodium: 210
- Fat: 19
- Saturated Fat: 11
- Unsaturated Fat: 8
- Trans Fat: 0.5
- Carbohydrates: 34
- Fiber: 1
- Protein: 5
- Cholesterol: 65