

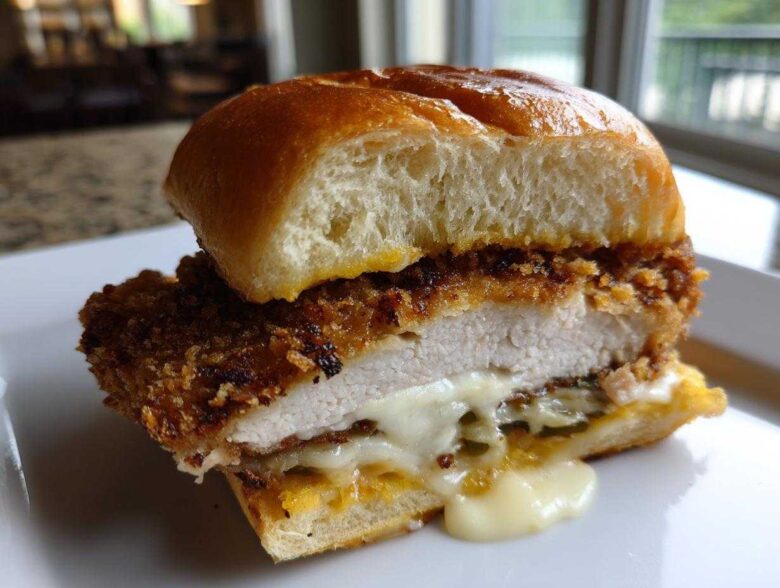
I’m going to let you in on a little secret: that restaurant-quality crunch you chase every time you try making a fried chicken sandwich at home? It’s not luck; it’s technique! For years, my chicken burgers came out soggy or greasy, but I finally cracked the code. This recipe for the **Crispy Chicken Burger with Melty Cheese** is my gold standard. We’re talking about a thunderously crunchy exterior that holds up to everything, paired with chicken so juicy it nearly melts in your mouth before the cheese even gets there. If you want to see how others have mastered the art of the crust, check out my tips for the best crispy chicken parmesan recipe! Trust me, once you master our buttermilk brine and double-dipped coating, you’ll never look back. Get that oil hot—we’re making the best fried chicken sandwich you’ve ever had!
Why This **Crispy Chicken Burger with Melty Cheese** Recipe Works
Okay, so why does this burger beat every other one you’ve tried? It’s all about building contrast, my friend. You need that loud, audible crunch on the outside to balance the incredibly tender inside. If you mess up either part, the whole thing falls apart. This recipe is engineered to nail both the crunch and the melt every single time. We’re doing things the right way, no shortcuts!
When you see my tips for getting crispy chicken skin, you’ll see the principle is similar—it’s about layers and temperature control.
- We guarantee a juicy interior thanks to the long soak.
- Our crust laughs in the face of sogginess—it’s that thick!
- The cheese melts perfectly right when the chicken finishes frying—talk about timing!
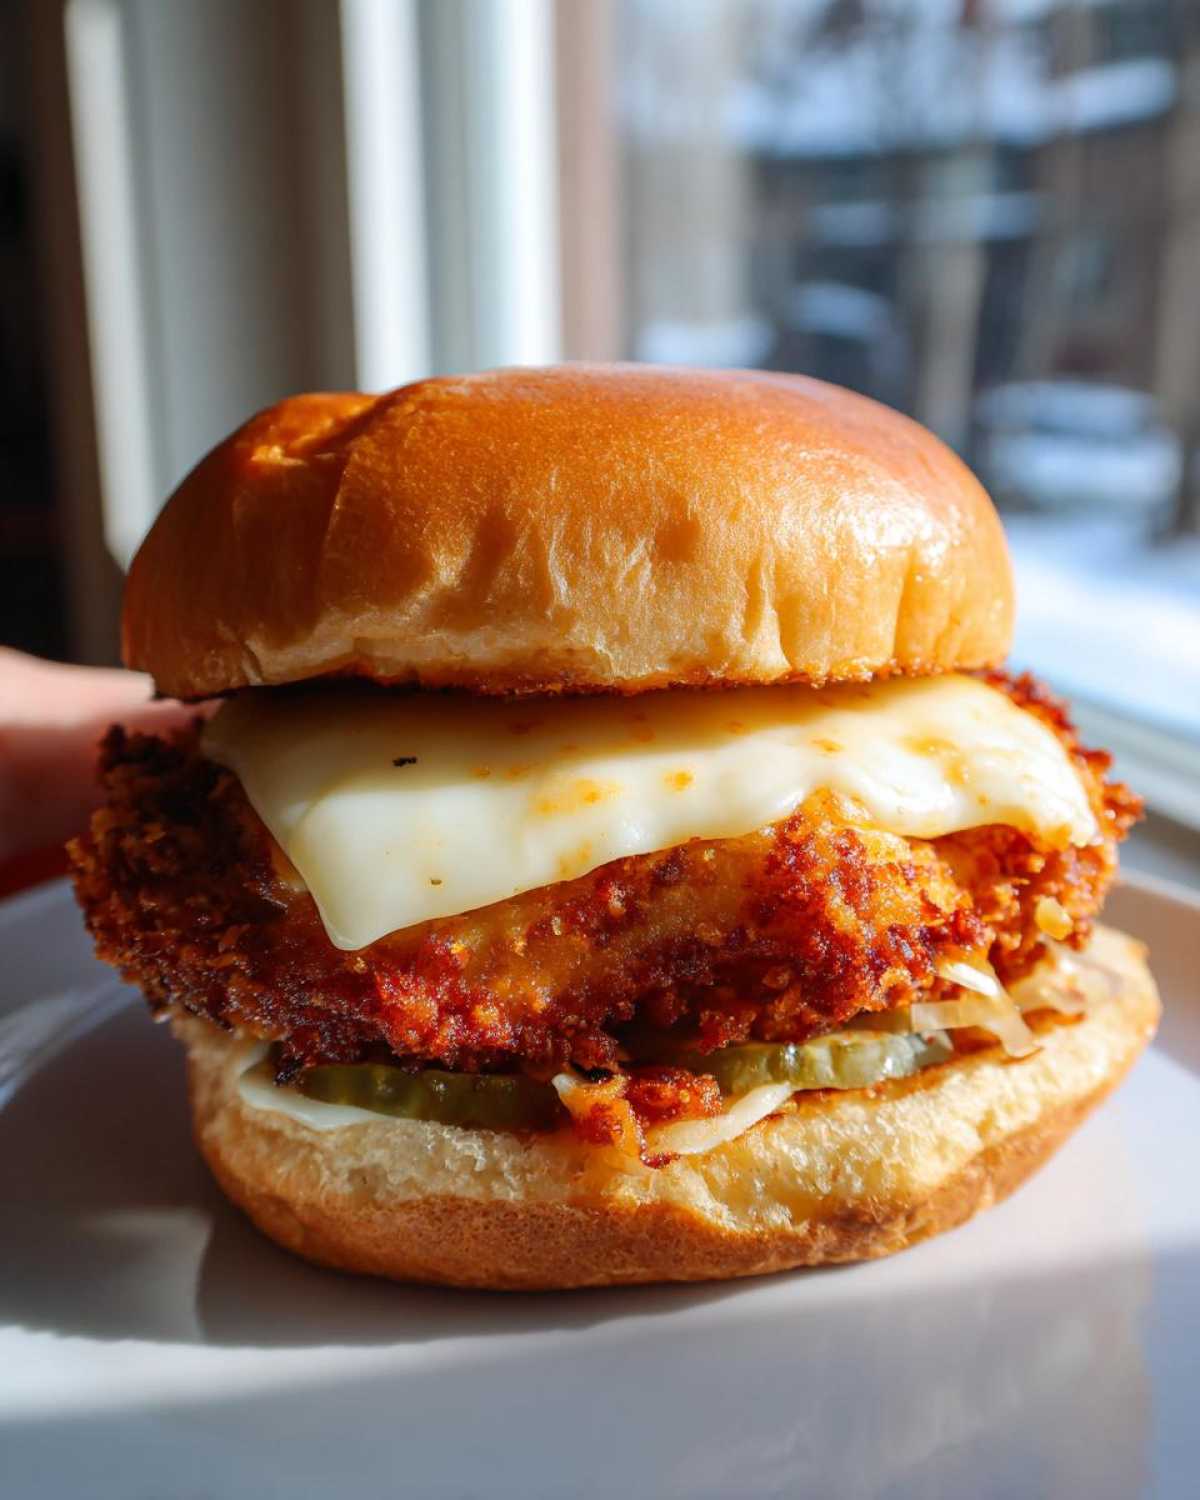
Buttermilk Brine for Juicy Chicken Patty Recipe
Listen, this is non-negotiable for a great **Crispy Chicken Burger with Melty Cheese**. The buttermilk is slightly acidic, right? That acid starts to gently denature the proteins in the chicken breast. It’s like a gentle tenderizer that coaxes moisture deep into the meat fiber while also tenderizing it. When you fry it up, that moisture is locked in, giving you a chicken patty that isn’t dry or chewy. It perfectly sets up the interior for the crunch we are about to build!
The Secret to Crunchy Chicken Coating
This is where we earn the “crispy” title. I call it the power combo: Panko! You don’t just use flour; you use a flour/panko mix for the main coat. Even better? The double dip! You go flour, egg, panko, then back into the egg for just a second, and then a final, firm press into that panko mix. That second coating grabs hold of the wet egg wash and creates those super jagged, crusty edges that give you the ultimate crunch. This is seriously The Secret to Crunchy Chicken Coating.
Ingredients for the Ultimate **Crispy Chicken Burger with Melty Cheese**
Okay, gathering your supplies is half the battle won! I’ve listed everything you need below, broken down into easy-to-shop groups. If you want a perfect result, don’t eyeball those measurements, especially when it comes to the breading station. It’s all about precision when you’re aiming for that restaurant-quality crunch. Don’t forget to check out my guide on vanilla buttercream frosting if you ever need something sweet later—but right now, we focus on savory perfection!
For the Chicken and Brine
This starts with making sure your chicken is perfectly sized and ready for tenderizing. You need thin cutlets so they cook through before the crust burns!
- 2 (6 oz) boneless, skinless chicken breasts, halved horizontally (this gives you four thin cutlets!)
- 1 cup buttermilk (the real stuff, please!)
- 1 tablespoon hot sauce (for a little background spice)
- 1 teaspoon salt
- 1 teaspoon black pepper
For the Double Dipped Breading Station
This is the magic line-up that creates the ultimate texture contrast. Lay these dishes out in order before you start dipping!
- 1 cup all-purpose flour
- 1 cup panko breadcrumbs (this is the secret weapon for crunch!)
- 1/2 cup all-purpose flour (this is separate for the initial dusting)
- 2 large eggs, beaten
For Assembly and **Melty Cheese Burger Topping** Ideas
This is where we finish the job with that incredible smoked Gouda and the zesty sauce that ties everything together. This combination really makes the Crispy Chicken Burger with Melty Cheese shine.
- 4 slices smoked Gouda cheese (it melts beautifully!)
- 4 brioche burger buns (brioche toasts the best, trust me)
- Vegetable oil, for frying (you need a good two inches deep)
- For the Sauce:
- 1/2 cup mayonnaise
- 2 tablespoons Dijon mustard
- 1 teaspoon smoked paprika
- For Topping:
- Shredded lettuce, for serving
- 2 large dill pickle chips, per burger
How to Prepare Your Crispy Chicken Burger with Melty Cheese
Now that we have all our players ready, it’s time to get those chicken cutlets into the game. We are moving fast here, but precision is key, especially when handling hot oil. Remember, the goal is that awesome contrast: super crisp crust and a deeply juicy interior. If you happen to need a fantastic savory dish for later, check out this amazing homemade Reuben bake casserole recipe! But for now, focus on not splashing that hot oil!
Pounding and Buttermilk Fried Chicken Technique
First things first: we need consistency! Pound those halved chicken breasts until they are all about a half-inch thick. This ensures they cook evenly and quickly. Next, dunk them into that buttermilk mixture—the one with the hot sauce and seasoning. They need at least two hours submerged, but honestly, overnight is where the real magic happens for tenderness. When you pull them out, let that excess buttermilk drip off; we only want the meat coated, not swimming.
Achieving the Double Dipped Chicken Breading
Set up your dredging station in exactly this order: the first shallow dish has 1/2 cup flour, the second has the beaten eggs, and the third has the fancy final mix of 1 cup flour plus the panko breadcrumbs. Dredge the damp chicken first in that initial 1/2 cup of flour—this is super important as it helps the egg stick! Shake off the excess. Then, dip it completely in the egg. Now, press it firmly into the final flour/panko mix. For that next-level crunch? Dip it *back* into the egg wash quickly, let it drip for half a second, and then press it *again* into that panko mix. Really use your hands to embed those crumbs!
Frying and Getting Perfectly Melted Cheese Burger Topping
This is the most critical part for texture. Heat up about two inches of vegetable oil in a heavy pot until it hits 325°F (160°C). You must watch that thermometer! Carefully lower your breaded beauties in, but don’t overcrowd them, or the oil temperature will plummet and you get sad, soggy chicken. Fry them for about five to seven minutes per side. As they cook, try to keep that oil buzzing between 300°F and 330°F (149°C and 165°C). Once they hit 165°F internal temp, pull them onto a wire rack immediately. Do not wait! As soon as they land on the rack, slap that slice of smoked Gouda on top. The residual cooking heat is exactly what you need for that stunning, Perfectly Melted Cheese Burger Topping without steaming the crust!
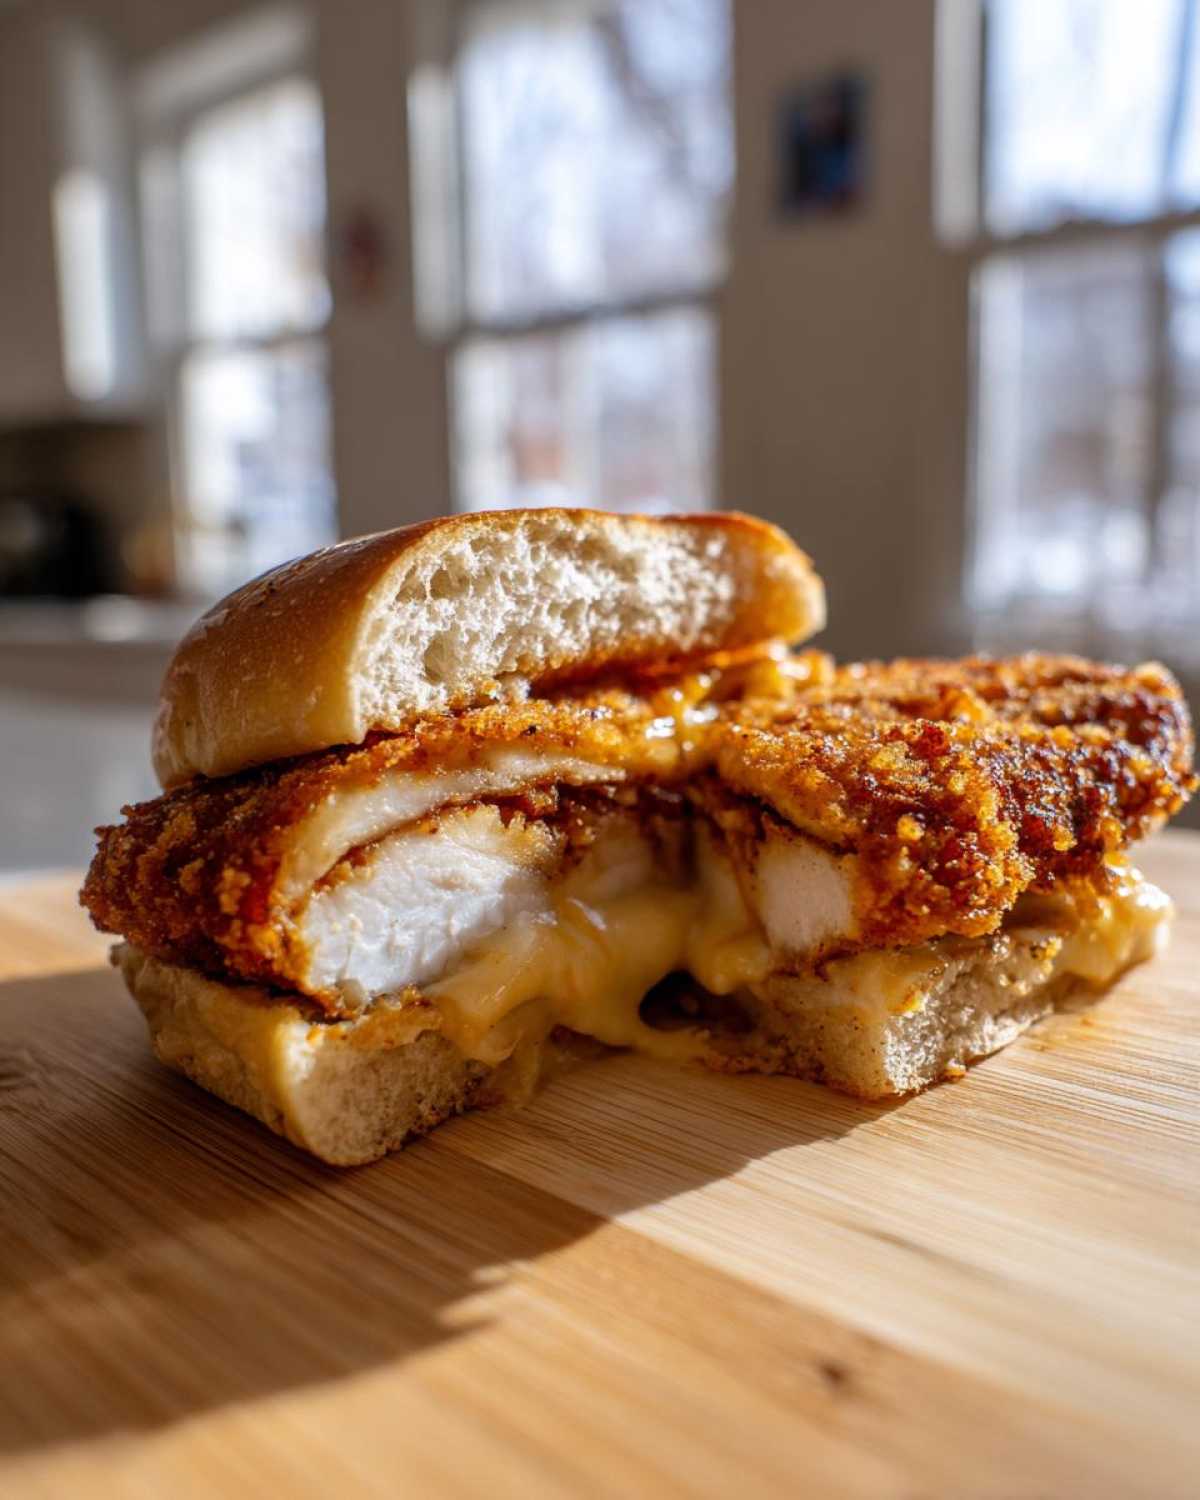
Tips for Success with Your Crispy Chicken Patty Textures
I know we talked a lot about the chicken itself, but we can’t forget the supporting cast! If your oil temperature drops too low, all that gorgeous panko breading we so carefully applied is going to soak it up like a sponge, turning your crunchy dream into a greasy nightmare. We want crisp, not heavy! Also, the way you handle the final product matters immensely if you want that satisfying textural pop when you bite in.
If you’re looking for some other fantastic ways to get things perfectly crunchy, you should definitely look at how I manage the crisp on these Amish onion fritters—it’s all about surface area protection!
Toasting Burger Buns Secrets for Structure
Seriously, don’t skip this step under any circumstances when building your Crispy Chicken Burger with Melty Cheese. Soggy buns are the enemy of crispy chicken. You can’t just slap that masterpiece onto untoasted bread! Before you even think about putting down sauce, you need to toast those brioche buns. I use my skillet—the same one I might use for eggs—and let it get moderately warm with zero butter or oil. Just dry heat!
Take your sliced buns and place them cut-side down and let them sit for about 60 to 90 seconds. You’re looking for a light, barely golden toast. This process seals the interior crumb of the brioche just enough so that when you spread that zesty sauce on it, the bread drinks up the moisture instead of collapsing under the weight of the chicken and cheese. It gives the bottom bun the strength it needs to hold up against all that incredible crunch!
Gourmet Crispy Chicken Build and Serving Suggestions
We’ve done the hard work—the brine, the double dip, the perfect fry—so now it’s time for the victory lap: assembling this monster! To truly create a Gourmet Crispy Chicken Build, the layering matters just as much as the cooking. This isn’t just cheese slapped on lettuce; this is architecture!
First, make sure that sauce we whipped up is spread generously on *both* toasted bun halves. I like to put a little sauce base on the bottom bun, then the chicken, then the melted Gouda, followed by the crisp lettuce, and then a bit more sauce on the top bun. The double application of sauce keeps every layer flavorful and slightly adhesive!
When it comes to sides, you need something that cuts through that richness. A heavy side will weigh this burger down, so I always opt for something tangy or spicy. A light, vinegar-based coleslaw—one with crisp cabbage and a sharp zest—is my absolute favorite pairing. It complements the fat from the deep fry perfectly.
If you’re looking for the perfect beverage companion, you need something bright and refreshing. Skip the heavy dark sodas. I highly recommend splashing out and making my signature apple cider Moscow Mule recipe! The tartness of the cider and ginger is just stunning alongside the smoky Gouda and crunchy chicken. You’re serving restaurant quality here, so treat yourself to a fantastic drink!
Make-Ahead & Freezer Tips for Crispy Chicken Burger with Melty Cheese
I totally get it; sometimes you can’t fry everything fresh right before serving, especially when hosting! If you’re planning a big backyard bash, you can definitely prep major components ahead of time for this Crispy Chicken Burger with Melty Cheese. But, I’m going to be real with you: the fresh fry is what makes this burger legendary, so we save that for last!
The good news is that the buttermilk brine works even better overnight, so don’t feel rushed on that front. Plus, you can whip up that creamy Dijon sauce and keep it sealed tight in the fridge for up to four days. It actually seems to get better as the paprika blends in!
If you want to prep the coating, you can set up your breading station and dredge the chicken completely, getting it ready for the fryer. If you’re going straight to the freezer with the coated cutlets, wrap them tightly in plastic wrap and then foil. You can freeze them like that for about a month. I’ve done this before big gatherings. For a great how-to on freezing foods effectively, I always point people to look at guides like my freezer breakfast burritos guide—the wrapping technique is similar!
When you’re ready to cook the frozen cutlets, you must fry them straight from frozen. Don’t let them thaw on the counter! You’ll need to drop the oil temperature slightly, maybe to 300°F, and expect the cooking time to increase by about three to four minutes per side. Keep watching that thermometer, and remember: the success of the melt still depends on slapping that cheese on immediately after they come out of the oil!
Variations: Spicy Crispy Chicken Burger Variations
Look, I love the smoky Gouda version, but sometimes you just need a kick, right? If you’re feeling adventurous and want to take this amazing foundation—the crunchy crust, the juicy chicken—and pump up the heat, I’ve got a few incredibly easy ways to create Spicy Crispy Chicken Burger Variations without messing up the core technique. These swaps are simple enough that you can try one this weekend and the next one next week!
The great thing about this recipe is how well it accepts extra spice! If you want to explore other flavor profiles, I suggest checking out how I manage the heat in my easy buffalo chicken bowl recipe; the principle of balance is the same.
Turning Up the Heat in the Brine
The easiest way to build heat from the inside out is right in the marinade. Instead of just the one tablespoon of hot sauce I called for, crank it up! If you’re brave, use three tablespoons of your favorite high-quality cayenne-based sauce. Another fantastic trick—and one I often use when I’m craving true burn—is to add about a quarter teaspoon of straight cayenne pepper directly into the buttermilk along with the salt and pepper. It coats the meat beautifully, and when it fries, that spice bloom is unmatched. Don’t worry about the crust burning; the buttermilk protects the meat, and the spice integrates itself perfectly into the coating.
Cheese Swap: Going Hotter
Smoked Gouda is great because it’s mellow yet complex, but if you want heat in your melt, make the swap! Pepper Jack is the ultimate classic choice here—it melts smooth, just like the Gouda, but brings a noticeable jalapeño pepper warmth. Or, if you’re feeling really bold, skip the cheese entirely and go for a spicy Boursin or a smear of cream cheese mixed heavily with Gochugaru chili flakes right on the top bun. The cream cheese melt softens beautifully when the hot chicken hits it!
Sauce Upgrades for Extra Kick
This is probably the simplest way to change your Crispy Chicken Burger with Melty Cheese experience from mild to wild. Take the mayonnaise/Dijon/paprika base we created and run wild! My favorite upgrade is switching the paprika for a teaspoon of chipotle powder and adding two teaspoons of adobo sauce from a can of chipotles peppers. That Smoky Chipotle Mayo is incredible! Alternatively, you can just stir in a tablespoon of Sriracha or Sambal Oelek if you like a cleaner heat. Whatever you choose, make sure you spread that spicy sauce generously on both toasted buns to ensure every bite has that extra zip!
Storage & Reheating Instructions for Leftover Crispy Chicken Burger
Let’s be honest: this Crispy Chicken Burger with Melty Cheese is a pure, glorious experience when served piping hot, straight from the fryer. That crispy coating tends to deflate and soften the second it hits humidity or gets stuffed into the fridge. That signature crunch fades fast! So, while I truly recommend eating this whole thing immediately, life happens, and sometimes you have leftovers.
The golden rule here is: NEVER try to reheat an assembled burger in the microwave. I repeat, NO MICROWAVE. That heat wave will turn your beautiful panko crust into sad, damp upholstery foam. We need high, dry heat to try and wake that crust back up. If you want to see how I revive my favorite leftovers using dry heat, take a peek at my guide for air fryer crispy chicken tenders recipe; the principle is the same!
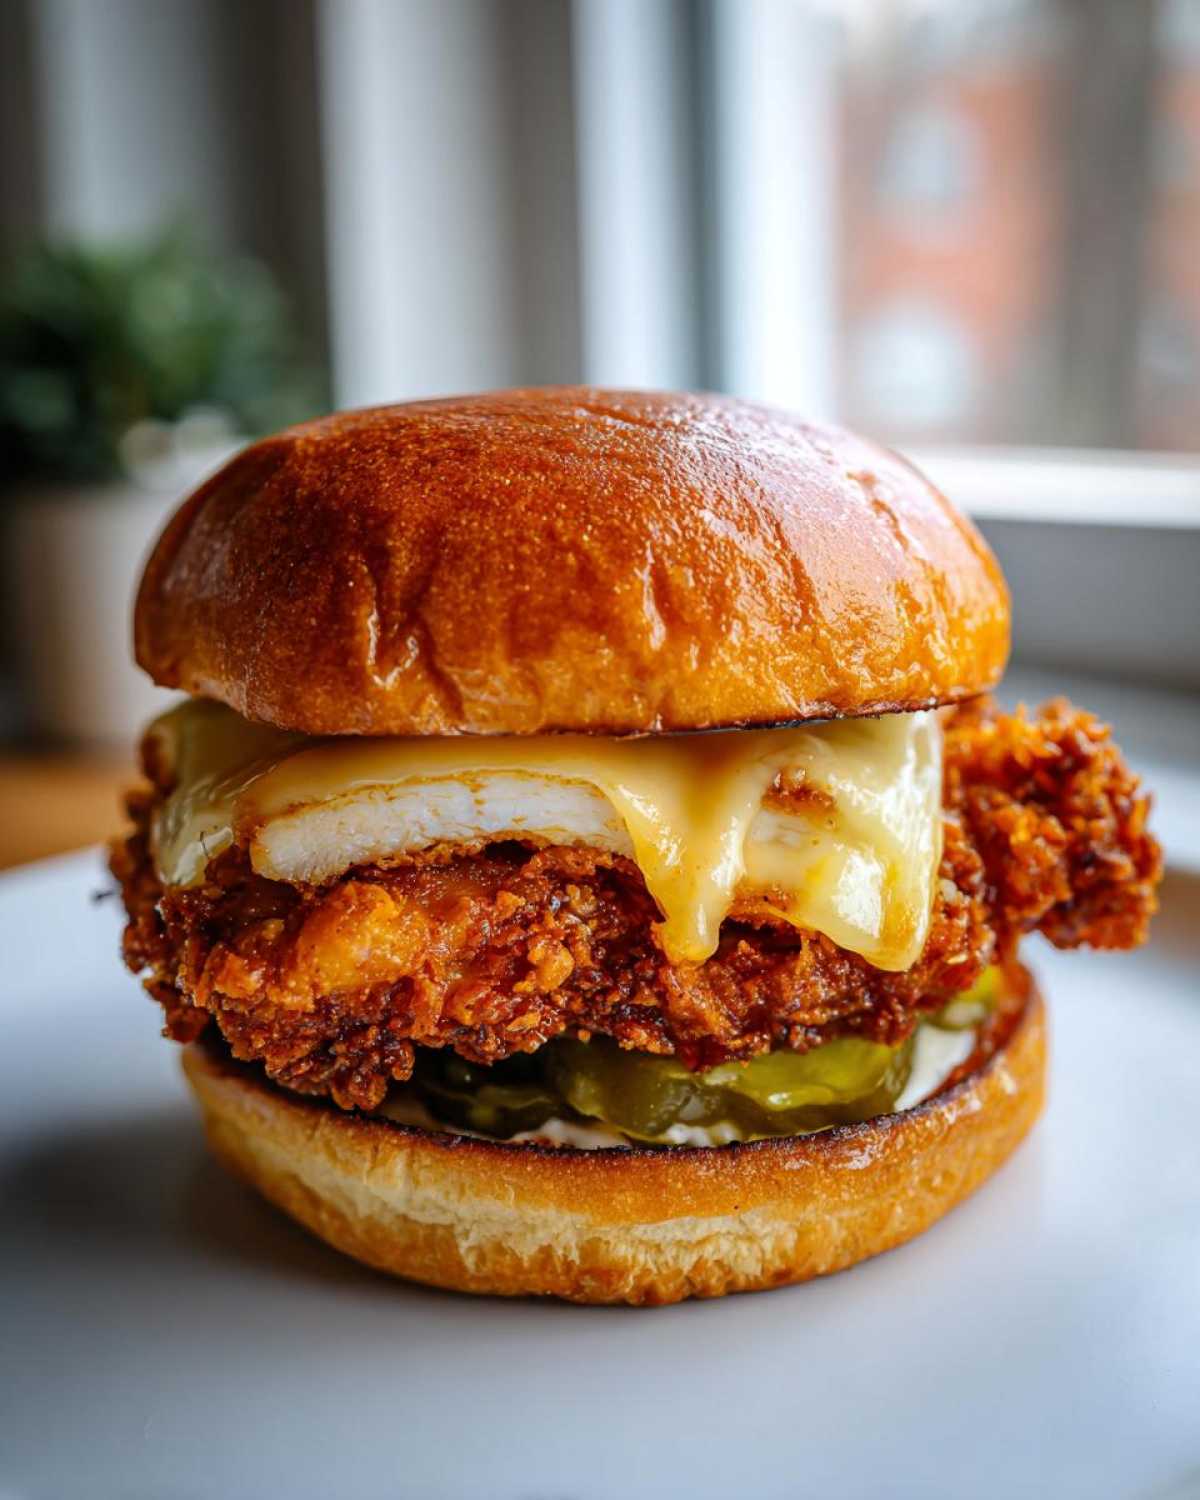
Here is my non-negotiable process for salvaging what’s left of that amazing crunch:
- Separate Everything: If you’re storing leftovers, pull the chicken patty out from the bun, remove the lettuce and pickles (they won’t save well), and scrape off most of the sauce. You are only reheating the chicken and, if you must, the cheese might try to cling on.
- Oven Method (Best for Large Batches): Preheat your oven to about 375°F (190°C). Place the chicken cutlets on a wire rack set over a baking sheet. This allows air to circulate underneath, preventing the bottom from steaming. Bake for about 8 to 10 minutes until the internal temperature hits 165°F again. This usually brings back about 80% of that initial crispiness.
- Air Fryer Method (Best for One or Two Patties): If you have an air fryer, this is your best bet for single servings. Set it to 350°F (175°C) and cook the patty for only 4 to 6 minutes. Give it a quick shake halfway through if you can.
Once the chicken is hot and noticeably crisp again, *then* you toast a fresh bun, make your sauce, and reassemble your burger. That fresh toast on the bun makes a huge difference when pairing it with the reheated chicken!
Frequently Asked Questions About Making the Best Crispy Chicken Sandwich Recipe
I know when you tackle a recipe like this—all about that perfect crunch and that gooey melt—you sometimes have last-minute panics! That’s totally normal. I’ve gathered the questions I get asked most often from folks trying to nail the Ultimate Crispy Chicken Burger with Melty Cheese at home. Don’t worry if frying seems intimidating; we’ll tackle those frying safety and texture fears right now. If you’re feeling ambitious after mastering this sandwich, you can always look over my chicken divan ultimate creamy casserole recipe for a different kind of comfort food!
Can I use the Air Fryer **Crispy Chicken Burger Alternative**?
I get this question all the time! Yes, you absolutely *can* adapt this! The air fryer is fantastic for reducing oil, but you won’t get the exact same heavy, irregular crust that comes from a total submersion, deep-fried situation. If you must air fry, here’s the deal: make sure you spray the breaded chicken generously with oil until it looks damp, then air fry at about 380°F (195°C). You’ll likely need to cook them for 12–15 minutes, flipping halfway through. Just be mindful that this will tend toward a drier texture rather than the juicy, shatteringly crisp texture we are aiming for with this specific Homemade Fried Chicken Burger Guide.
What is the best cheese besides Gouda for a **Crispy Chicken Burger with Melty Cheese**?
Smoked Gouda is my absolute favorite because it brings that subtle smoky background note that plays so well with the spices in the meat, but you need cheeses that have great meltability! If you want something reliable, grab Monterey Jack. It melts slick and smooth every time and has a really mild flavor that lets the chicken shine. Another fantastic choice is Provolone, especially the deli slices. It gets that satisfying, glossy ooze that just screams “melty cheese!”
How do I prevent my **Crispy Chicken Coating** from falling off?
This is a major pitfall, but we addressed it directly with the double-dipped method! The key is ensuring the chicken is properly coated at every stage. After the initial flour dredge, excess flour *must* be shaken off gently. That light coating creates the adhesive layer for the egg wash. Then, when you press it into that final panko mix—press hard! Really use your palms to embed those crumbs. If you treat the breading like you’re tucking the chicken into a cozy breadcrumb blanket, it won’t go anywhere during the fry!
Nutritional Estimate for This Recipe
I always say that when you’re eating something this unbelievably delicious, you shouldn’t stress too much about the numbers, but for those who like to keep track—and I totally respect that!—I’ve pulled together the general estimated nutritional breakdown for this incredible Crispy Chicken Burger with Melty Cheese using the ingredients listed.
Remember, these figures are just an estimate, okay? If you use a lighter hand with the oil or swap out the brioche for a standard bun, those numbers will shift a bit. Think of this as a solid starting guideline. If you’ve been tracking your macros and want to see how something similarly satisfying stacks up, you can always check out the estimates for my easy egg bites high protein copycat recipe!
Here’s the breakdown for one complete burger:
- Serving Size: 1 burger
- Calories: 750
- Fat: 38g (This includes the necessary frying fat, that’s where most of it comes from!)
- Saturated Fat: 11g
- Unsaturated Fat: 27g
- Trans Fat: 0g (We are definitely keeping those out!)
- Protein: 48g (That chicken is working hard for you!)
- Carbohydrates: 55g
- Fiber: 3g
- Sugar: 8g (Mostly natural sugars from the Gouda and the small amount in the bun/sauce)
- Sodium: 950mg (The brine adds a bit here, so be mindful of extra salt elsewhere!)
- Cholesterol: 150mg
We’ve packed this sandwich with serious protein from that thick chicken breast, which helps balance the richness from the deep fry. It’s a treat, for sure, but one that’s worth every single crunchy bite of that beautiful **Crispy Chicken Burger with Melty Cheese**!
Share Your Ultimate **Crispy Chicken Burger with Melty Cheese** Experience
Oh my goodness, you made it! You tackled the brine, you mastered the double dip, and I bet that Gouda is perfectly gooey right now. When you finally sit down with this incredible hamburger, I absolutely need to hear about it! Don’t keep these culinary victories to yourself!
This recipe is a passion project, and seeing it succeed in your kitchen is the best reward for me. Whether you achieved a crust so loud you woke the neighbors or you discovered a new favorite cheese that melted like a dream, please come back and tell me! Your success is my success, especially when it comes to perfecting that crunchy/juicy contrast.
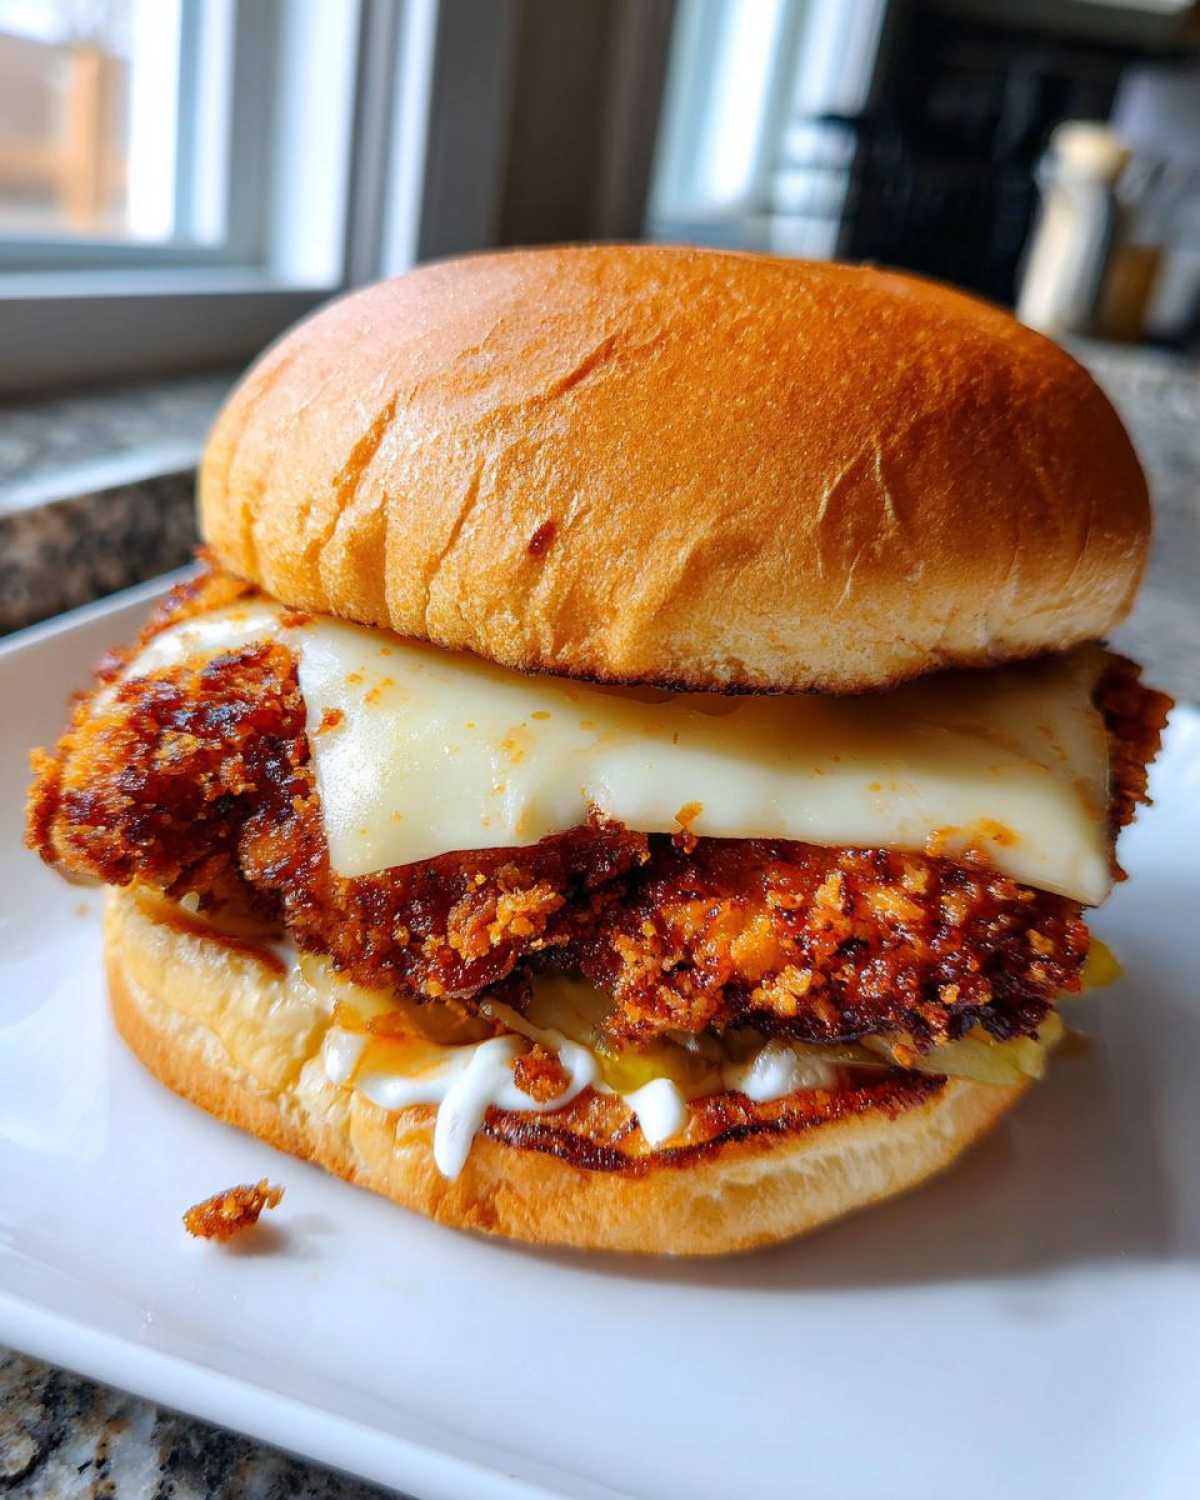
Have feedback, a triumphant photo, or just want to tell me how much better this is than takeout? Drop everything in the comments below! I read every single one, and honestly, those success stories are what keep me experimenting in the kitchen!
If you captured your masterpiece, make sure to tag me when you post it on social media! You can always find more kitchen adventures and behind-the-scenes fails over on my main blog page. I can’t wait to see your versions of the ultimate **Crispy Chicken Burger with Melty Cheese**!
PrintUltimate Crispy Fried Chicken Burger with Smoked Gouda Melt
Follow this guide to make a restaurant-quality crispy chicken burger featuring a buttermilk brine, double-dipped panko breading for maximum crunch, and perfectly melted smoked Gouda cheese.
- Prep Time: 20 min
- Cook Time: 15 min
- Total Time: 2 hours 35 min
- Yield: 4 servings
- Category: Main Course
- Method: Deep Frying
- Cuisine: American
- Diet: Low Fat
Ingredients
- 2 (6 oz) boneless, skinless chicken breasts, halved horizontally
- 1 cup buttermilk
- 1 tablespoon hot sauce
- 1 teaspoon salt
- 1 teaspoon black pepper
- 1 cup all-purpose flour
- 1 cup panko breadcrumbs
- 1/2 cup all-purpose flour (for dredging)
- 2 large eggs, beaten
- 4 slices smoked Gouda cheese
- 4 brioche burger buns
- Vegetable oil, for frying
- 1/2 cup mayonnaise
- 2 tablespoons Dijon mustard
- 1 teaspoon smoked paprika
- Shredded lettuce, for serving
- 2 large dill pickle chips, per burger
Instructions
- Pound the chicken halves to an even 1/2-inch thickness.
- In a shallow dish, combine the buttermilk, hot sauce, 1 teaspoon salt, and 1 teaspoon pepper. Marinate the chicken for at least 2 hours, or preferably overnight.
- Prepare the breading station: Place the 1 cup flour and panko in one dish. Place the 2 beaten eggs in a second dish. Place the remaining 1/2 cup flour in a third dish.
- Heat 2 inches of vegetable oil in a deep, heavy-bottomed pot or Dutch oven to 325°F (160°C). Use a thermometer to monitor the temperature closely.
- Remove chicken from the buttermilk, letting excess drip off. Dredge the chicken first in the dry 1/2 cup flour, shaking off excess.
- Dip the floured chicken completely into the egg wash. Let excess drip off.
- Press the chicken firmly into the panko/flour mixture, ensuring the entire surface is coated. For extra crispiness, dip the coated chicken back into the egg wash quickly, then press again into the panko mixture (double dip).
- Carefully place 1 or 2 chicken cutlets into the hot oil, ensuring you do not overcrowd the pot. Fry for 5 to 7 minutes per side, until golden brown and the internal temperature reaches 165°F (74°C). Maintain oil temperature between 300°F and 330°F (149°C and 165°C).
- Remove chicken and place on a wire rack set over a baking sheet to drain excess oil. Immediately top each hot chicken piece with a slice of smoked Gouda cheese. The residual heat will melt the cheese.
- While the chicken rests, lightly toast the cut sides of the brioche buns in a dry skillet or under the broiler until golden brown.
- Mix the mayonnaise, Dijon mustard, and smoked paprika to create the sauce. Spread generously on both halves of the toasted buns.
- Assemble the burger: Bottom bun, sauce, crispy chicken with melted cheese, pickles, lettuce, and top bun. Serve immediately.
Notes
- Maintaining the correct oil temperature is key; too low results in greasy chicken, too high burns the crust before the center cooks.
- For the crispiest coating, press the breading firmly onto the chicken pieces before frying.
- If you prefer a spicy burger, add cayenne pepper to the buttermilk marinade.
Nutrition
- Serving Size: 1 burger
- Calories: 750
- Sugar: 8
- Sodium: 950
- Fat: 38
- Saturated Fat: 11
- Unsaturated Fat: 27
- Trans Fat: 0
- Carbohydrates: 55
- Fiber: 3
- Protein: 48
- Cholesterol: 150