

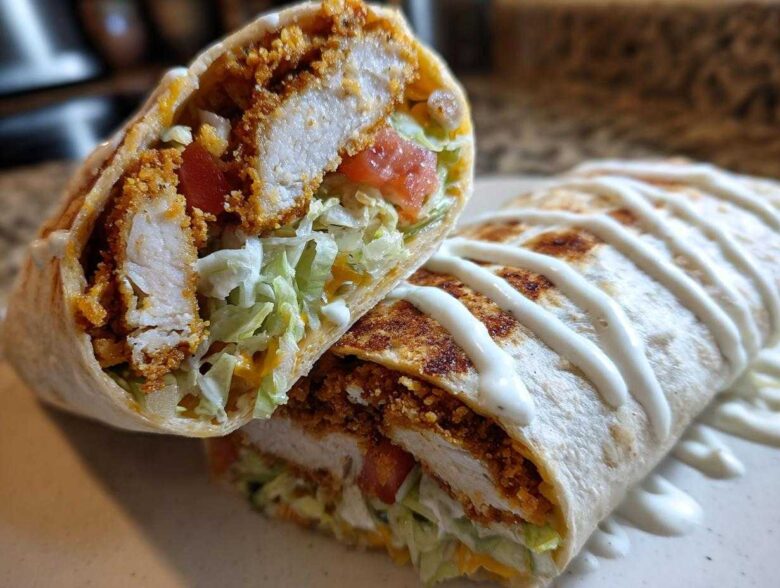
Oh my gosh, are you craving something that squeaks when you bite into it? You know, that amazing contrast between bone-dry crunch and super-creamy coolness? If you’re hunting for the ultimate lunchtime fix that delivers on texture every single time, you’ve landed in the right spot!
I’m going to walk you through, step-by-step, how to master the Crispy Chicken Wrap with Ranch Sauce. Forget soggy fillings; my method focuses entirely on making sure that chicken stays shatteringly crisp, even after it’s swimming in our incredible homemade ranch. This isn’t just any wrap; this is the definitive guide I developed after years of making flimsy wraps sad! Trust me, once you try this technique, you won’t look back.
If you’re curious about who I am and why I’m so obsessive about crispy food, you can always check out our little corner of the internet!
Why This Crispy Chicken Wrap with Ranch Sauce is Your New Favorite Meal
I’ve tried every quick lunch out there, but nothing hits the spot quite like this combo. It’s all about honoring that amazing texture contrast we all crave. This Crispy Chicken Wrap with Ranch Sauce is addictive because it’s perfectly balanced—it’s hearty without feeling heavy.
- Achieving Ultimate Crunch Factor: We aren’t messing around with soggy coatings here! We rely on the tried-and-true method of a double dredge ending in Panko crumbs, which guarantees that golden, crisp exterior when lightly fried. That’s my secret to building trust in the chicken!
- Quick Assembly for Weeknights: Even though we take time for the perfect chicken, putting the whole thing together is lightning fast. It makes for the best Quick Lunch Wraps with Chicken when you don’t have much time to spare before heading out the door.
Gathering Ingredients for Crispy Chicken Wrap with Ranch Sauce
Okay, before we even think about heating the oil, we have to make sure our ingredients are ready to go! You need everything prepped because once that chicken starts frying, things move fast. Having everything laid out—mise en place, as the fancy chefs say—is the secret number one for making a perfect Crispy Chicken Wrap with Ranch Sauce without panicking.
I’ve broken down the list below by what you’re using it for, so you don’t mix up your coating spices with your sauce seasonings!
For the Crispy Chicken Coating and Frying
This is where the magic happens. Make sure your chicken is cut evenly—I like mine about 1-inch strips so they cook quickly and stay tender inside.
- 1 lb boneless, skinless chicken breasts, cut into 1-inch strips
- 1 cup all-purpose flour
- 1 teaspoon salt (don’t skip this!)
- 1/2 teaspoon black pepper
- 1/2 teaspoon paprika (sweet, not smoked, for this one)
- 2 large eggs, beaten until they look frothy
- 1 cup Panko breadcrumbs (Panko is non-negotiable for real crunch!)
- Vegetable oil for frying (you’ll need about an inch deep in your skillet)
For the Homemade Ranch Sauce Recipe
This homemade ranch is so much better than anything bottled. If you can find fresh dill, grab it! That fresh herbaceous flavor really elevates the whole wrap experience. It shows you care!
- 1/2 cup mayonnaise
- 1/4 cup buttermilk (this is key for tang!)
- 1 tablespoon fresh dill, chopped
- 1 teaspoon dried parsley
- 1/2 teaspoon garlic powder
- 1/4 teaspoon onion powder
Wrap Fillings and Tortillas
These are the supporting actors that bring the wrap together. I specify romaine because it holds up well under the sauce, but you can definitely use shredded iceberg if you want maximum crunch. You’ll need four large tortillas total.
- 4 large flour tortillas (make sure they are soft enough to roll without cracking!)
- 1 cup shredded lettuce (Romaine is my go-to)
- 1/2 cup diced tomato
- 1/4 cup shredded cheddar cheese
The Best Crispy Chicken Wrap Tutorial: Frying Method
This is the part I get most excited about, and honestly, it’s where most people slip up! If you want that top-tier, glorious crunch in your Crispy Chicken Wrap with Ranch Sauce, the coating process needs to be methodical. Don’t rush this part; it’s the foundation of our success!
We are going to use the classic three-step breading station. It sounds like a lot of dishes, but trust me, it’s totally worth the cleanup time for the texture payoff.
Setting Up the Breading Stations
Get three shallow dishes—pie plates work great—and set them in a line right next to where you’ll scoop the finished chicken. Remember, we seasoned the flour mix with salt, pepper, and paprika for flavor right into the crust itself. That’s step one for real flavor!
- In the first dish, add your seasoned flour mixture. Make sure that flour is evenly blended so every piece gets the same seasoning kick.
- In the second dish, just pour in those beaten eggs. Nothing else needed here; the eggs are the glue!
- The third dish is reserved for the Panko breadcrumbs. These Japanese flakes are lighter and flakier than regular breadcrumbs, which gives us that superior crunch we’re after.
Frying for Maximum Crunch
Next up, the oil! You want about an inch of vegetable oil in your biggest skillet, and we need it hot—hit that sweet spot right at 350 degrees Fahrenheit. If it’s too cool, the chicken gets greasy; too hot, and the coating burns before the inside cooks. Use a thermometer if you have one, but if you don’t, drop a tiny bit of breadcrumb in; if it sizzles excitedly right away, you’re good to go!
Now, dip those chicken strips. Flour first (shake off the excess!), then straight into the egg bath, and finally, press it *firmly* into the Panko. When you press it into that Panko, really pat it on so it adheres well—that’s what stops it from falling off in the oil.
Fry just a few strips at a time. Overcrowding the pan drops the oil temperature instantly, and we absolutely cannot have soggy chicken! They only need about 4 to 6 minutes total, turning them halfway through, until they are deeply golden brown. Once they look perfect, pull them out and place them on a wire rack lined with paper towels. The wire rack is important because it lets air circulate underneath so the oil drips away completely. That keeps your chicken crispy!
For an alternative that also locks in the crisp, check out my guide on getting crispy skin—similar principles apply to coating these strips!
Making the Creamy Ranch Sauce for Wraps Recipe
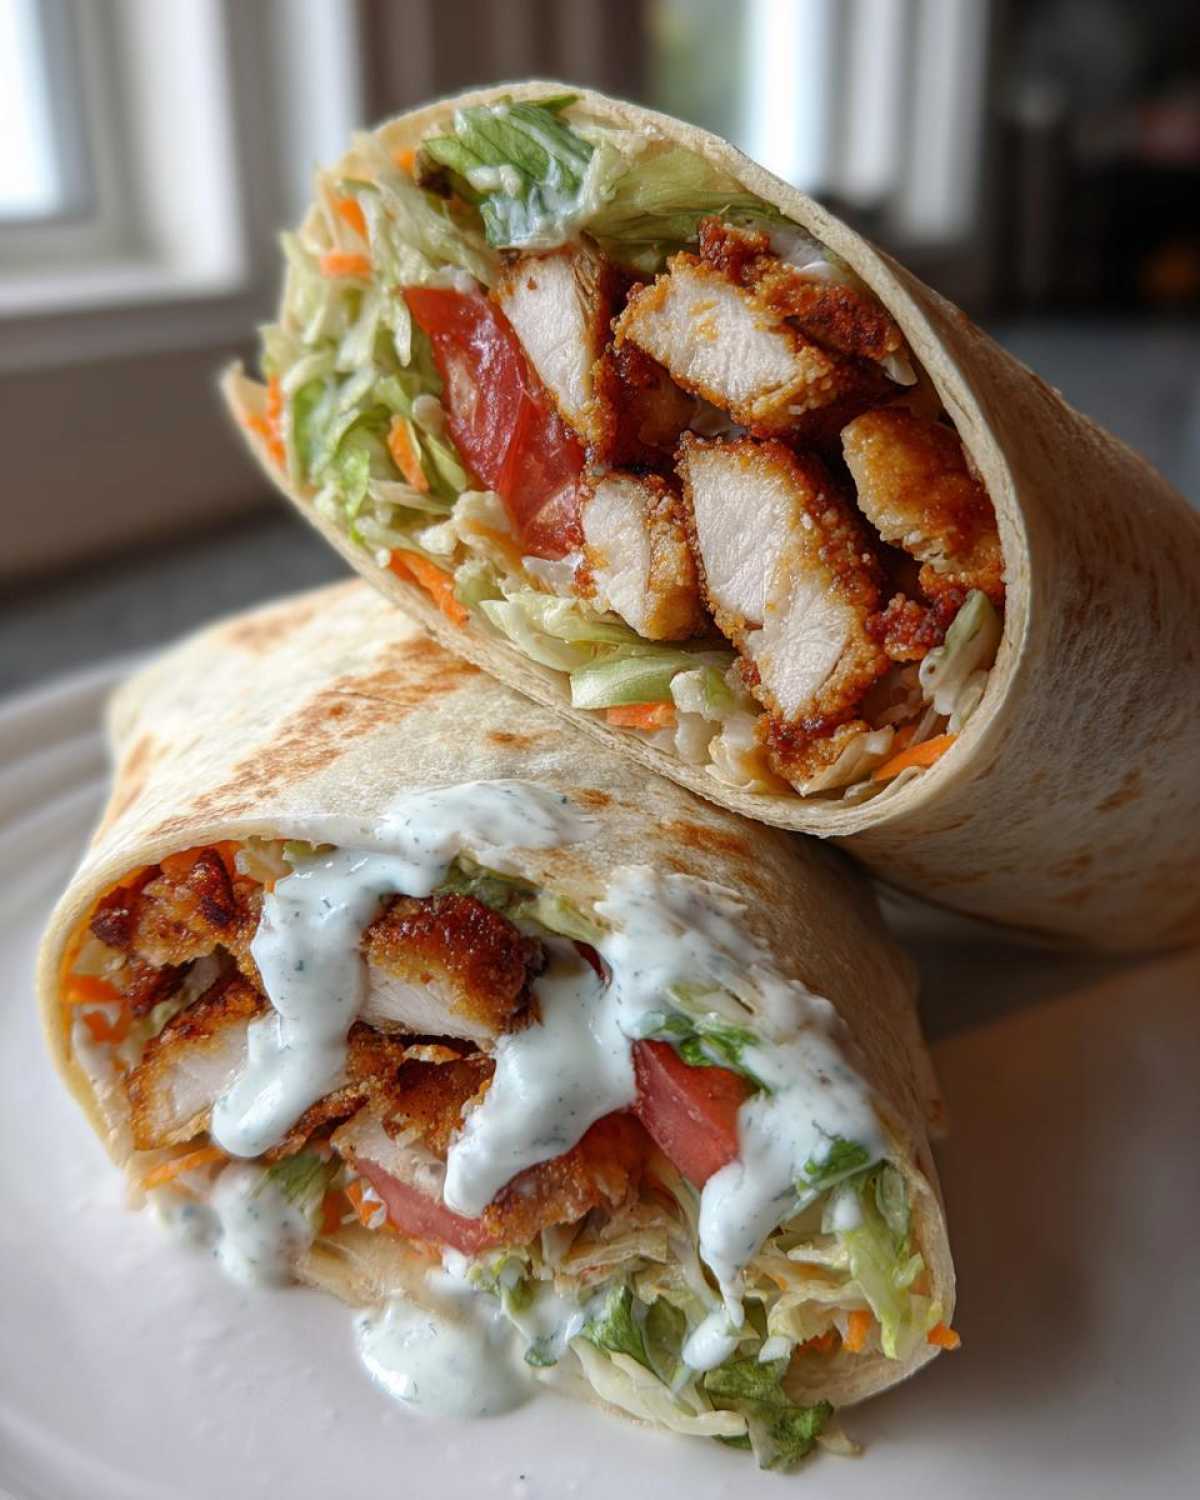
Now that the chicken is draining and looking gloriously crunchy, we absolutely have to take care of the sauce! Honestly, I often make this part first because it gives the flavors time to mingle, and it makes the final assembly of the Crispy Chicken Wrap with Ranch Sauce so much smoother.
This isn’t one of those gloopy, overly thick bottled sauces, nope! We’re whisking up a seriously fresh batch of our Ranch Sauce for Wraps Recipe using simple ingredients right from the fridge. It just takes a minute, but the fresh herbs make all the difference in flavor.
Grab a small bowl—no need to dirty my big mixer bowl for this! Whisk the mayonnaise and buttermilk together first until they are just starting to combine. Then toss in the fresh dill, parsley, garlic powder, and onion powder. Give it a good whisk until everything is completely incorporated and smooth. You want it creamy but still pourable, so if it looks too thick, just splash in a tiny bit more buttermilk until you hit that perfect consistency that spreads nicely but doesn’t run everywhere.
Something I love about this sauce, and it’s written in my notes too, is that you can make it totally ahead of time! I usually whip up a batch on Sunday, pop it in a little jar, and it stays tasting fantastic in the fridge for a couple of days. It makes grabbing lunch during the week ridiculously easy. If you want ideas for other creamy textures, you know I have a recipe for a quick creamy dill dip that uses this exact base!
Assembly Steps for Your Delicious Chicken Wrap Dinner
Okay, the chicken is crisp, the ranch is dreamy, and everything is ready to go! Now we build. The order you layer ingredients in your Crispy Chicken Wrap with Ranch Sauce makes a huge difference between a neat meal and one that explodes all over your lap five minutes later. I learned this the hard way!
The secret to structural integrity is keeping the wet sauce away from the very edges of the tortilla. If the sauce touches the edge, the tortilla gets weak right where you need the most strength for rolling. Keep everything centered!
Warming Tortillas and Layering
First things first: pliable tortillas! Cold tortillas crack every time you try to fold them, and we cannot risk our beautiful crispy chicken trying to escape. You can either wrap them in a slightly damp paper towel and microwave them for about 20 seconds total, or, my preferred method, heat them one at a time in a dry, hot skillet for about 30 seconds per side until they puff up slightly.
Lay that warm tortilla flat on your cutting board. Now, start layering in this order for the best results:
- Spread a decent layer of your homemade ranch sauce right down the center strip. Don’t overdo it; we want flavor, not soup!
- Next, lay down your fresh lettuce. This acts as a buffer between the heat/moisture of the other veggies and the tortilla itself.
- Scatter the diced tomatoes and then sprinkle over that shredded cheddar cheese.
- Finally, pile your hot, crispy chicken strips right over the cheese. Keep the pile centralized, leaving about an inch of clean tortilla border on the top and bottom edges.
If you’re looking for more dough inspiration—though flour tortillas are best here—you can see my tips on making fantastic dough from scratch over here!
The Perfect Roll Technique
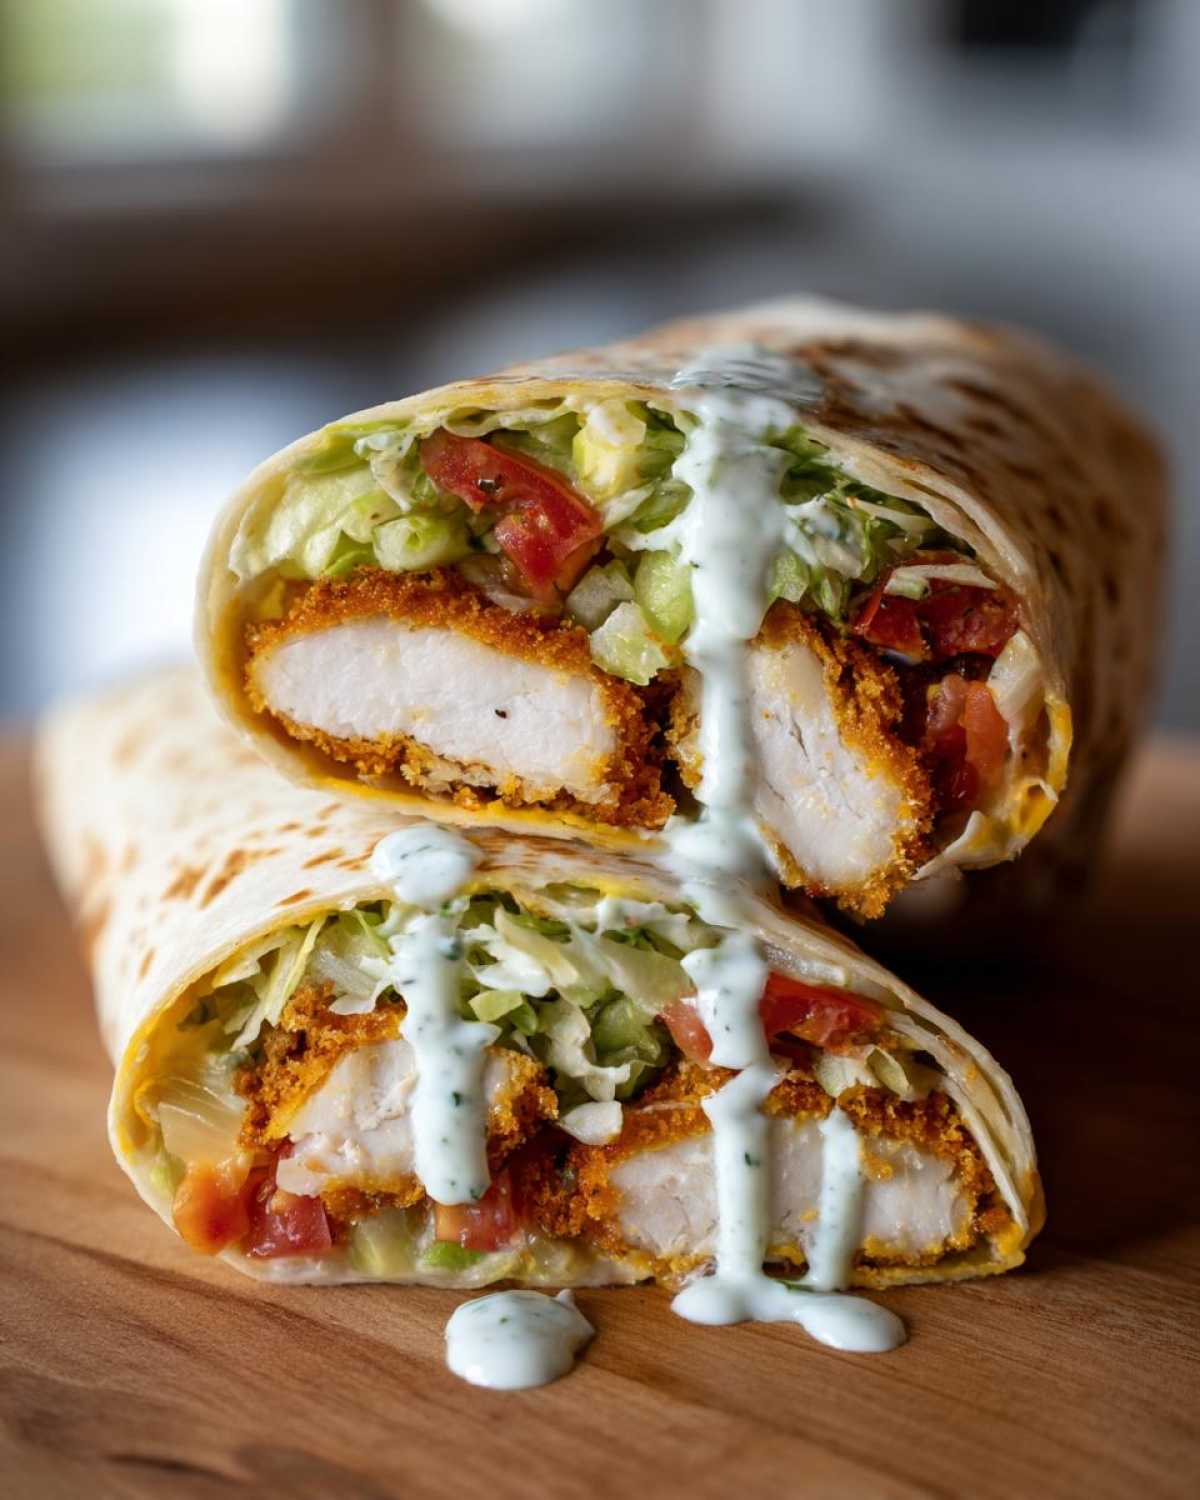
This is how you contain the glorious explosion inside. Think of it like wrapping a present, but with food!
- Take the sides (the left and right edges) of the tortilla and fold them inward, just enough so they cover about one-third of the filling. This creates side walls.
- Now, take the edge of the tortilla closest to you (the bottom edge) and tightly fold it up and over the filling, tucking the edge securely underneath the filling stack.
- Keep pulling that bottom edge snug around the contents and roll the whole thing forward until the wrap is sealed up tight. You want a dense roll, not a puffy sausage casing!
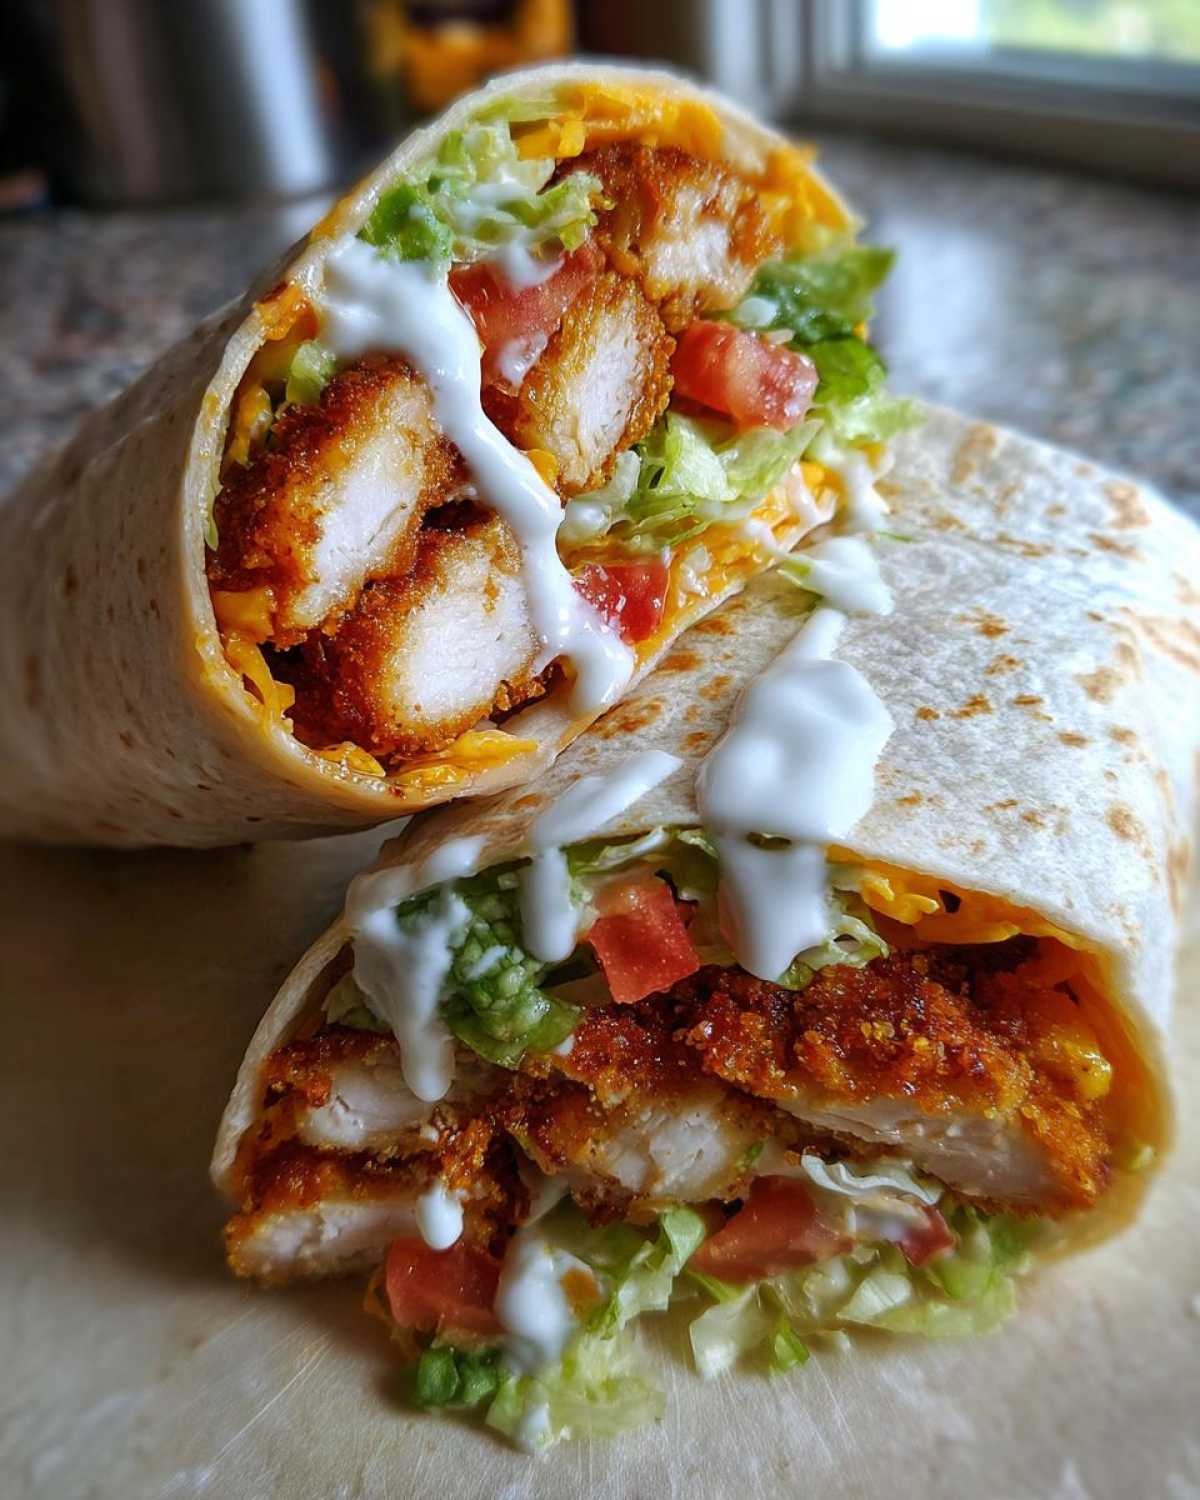
Once you have that perfect seal, slice it cleanly in half diagonally with a sharp knife, and get ready to enjoy the crunchiest, ranchiest Delicious Chicken Wrap Dinner you’ve ever made!
Alternative Cooking Methods: Air Fryer Crispy Chicken Wrap
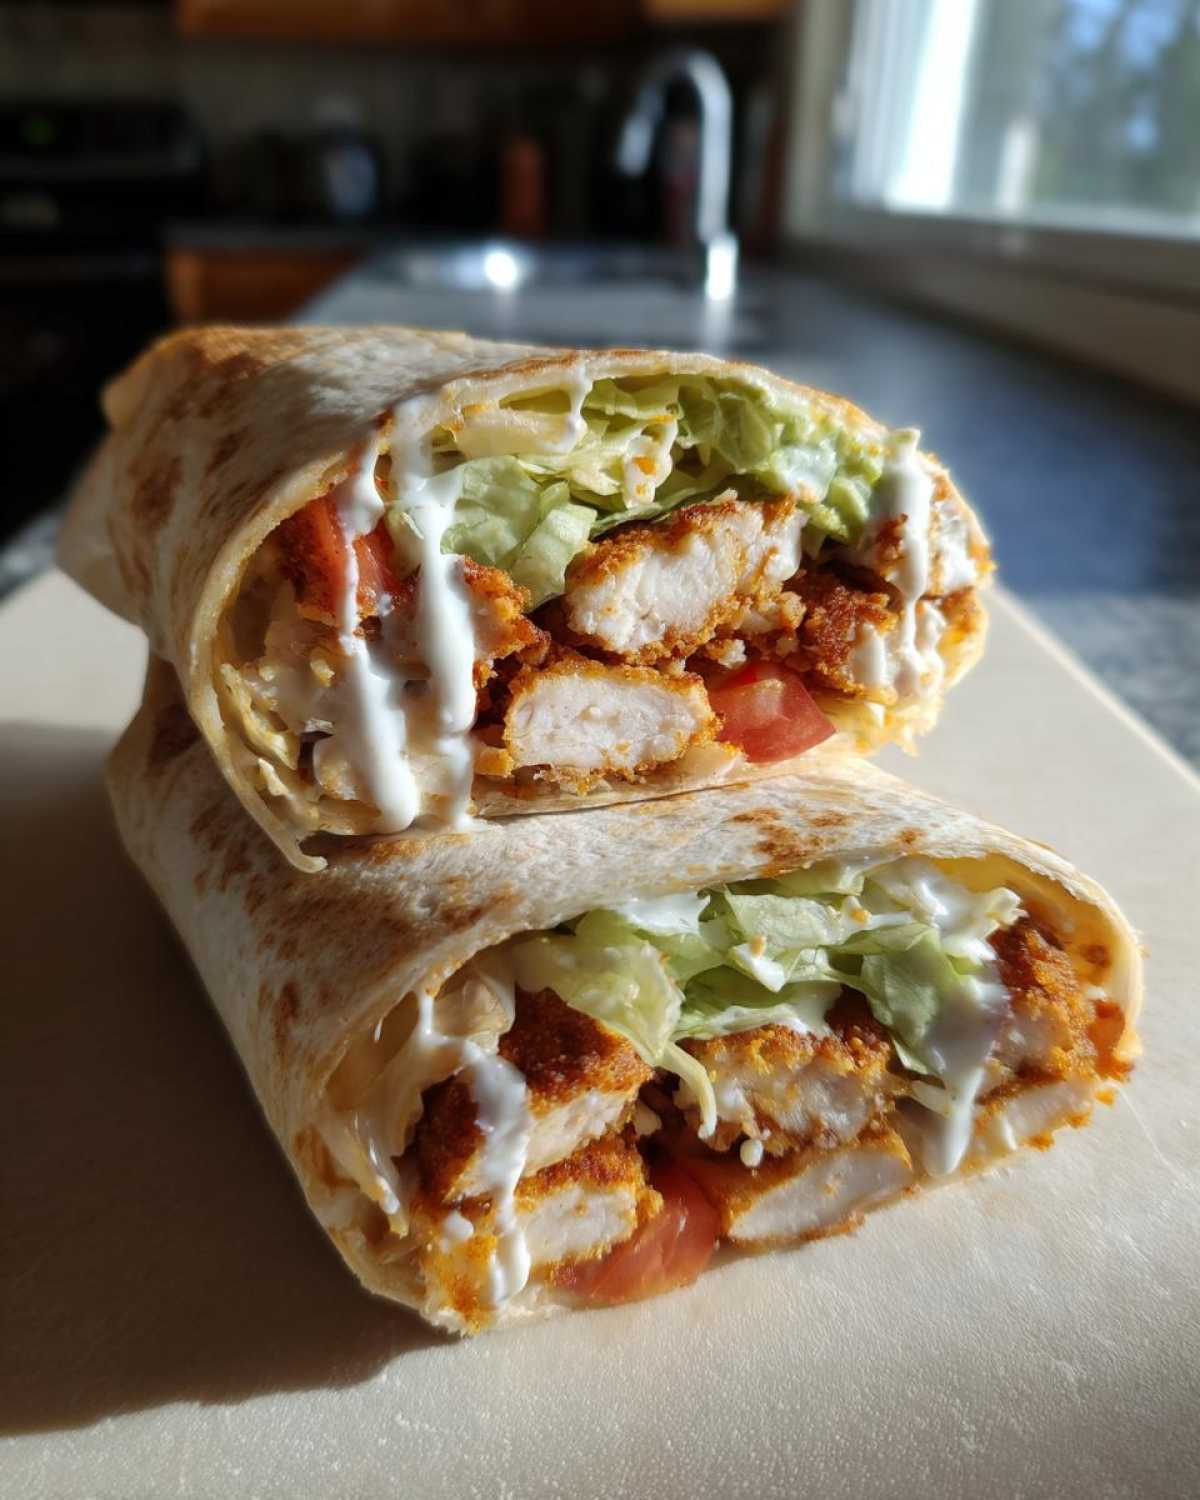
I know, I know. Sometimes standing over a skillet of hot oil just isn’t in the cards, especially if you’re trying to keep things a little lighter or if you just prefer the sheer convenience of the air fryer. Don’t you worry one bit! I tested this coating method in the air fryer too, because you deserve a great Air Fryer Crispy Chicken Wrap option.
The wonderful thing about the panko coating we used is that it’s fantastic in the air fryer. Because the panko flakes are already so airy, they crisp up beautifully with just circulating hot air. It gives you that satisfying crunch without using any extra oil for the actual cooking process.
If you’re skipping the frying pan for this recipe, here’s exactly what you need to do immediately after you finish coating the chicken strips:
- Preheat your air fryer. You want it hot and ready to go, set that temp to 400 degrees Fahrenheit.
- Lightly spray the bottom of the air fryer basket with cooking spray—just a tiny bit to make sure nothing sticks!
- Arrange your coated chicken strips in a single layer in the basket. Don’t let them overlap much, or they’ll steam instead of crisping up properly. You will absolutely need to work in batches here, just like with the frying method!
- Cook them for 12 to 15 minutes total. Around the halfway point (so, maybe at the 7 or 8-minute mark), you need to open the basket and flip every single piece over. This ensures both sides get beautifully golden brown and crunchy.
When they come out, they’ll look perfect and be cooked all the way through! Pop them onto that wire rack just like we did with the fried ones to let them breathe. Then you just move straight into assembling your wrap with the sauce and fillings. It’s an amazing, nearly handheld version of the classic!
Tips for Success with Your Homemade Ranch Chicken Wrap
Now that you have the blueprint down for the chicken and the amazing sauce, let’s talk about leveling up this Homemade Ranch Chicken Wrap so it becomes legendary! These little adjustments aren’t in the main instructions, but they are the tweaks I use when I want to impress someone or when I’m packing them for lunch the next day. It’s all about quality control and knowing how to personalize a great recipe.
The key to a truly unforgettable experience is paying attention to the details! Once you nail that chicken crunch, the rest is customizing it to your exact cravings.
Ingredient Swaps and Customization
This recipe is super flexible with the veggies and cheese, which is great because you can use what you have on hand. I almost always toss in something extra crunchy, like super-thinly shredded carrots. They blend right in with the chicken texture but give you a hidden vitamin boost!
When it comes to cheese, cheddar is classic, but have you ever tried a pepper jack? That little bit of heat goes unbelievably well with the cool, herby ranch dressing. Or maybe Monterey Jack if you want to keep the flavor milder but still get that perfect melt factor. Remember when I talked about using fresh dill? If you don’t have that, you can use about half a teaspoon of dried chives alongside your parsley. It’s not quite the same as the fresh flavor, but it’s a decent swap in a pinch.
If you’re into richer flavors in general, you might also want to check out my guide on how to make killer garlic butter—you can drizzle just a tiny bit of that over the chicken *before* the ranch for an extra savory background note!
Preventing Soggy Wraps
This is my biggest pet peeve: the wrap wrapper getting wet before you can even finish the first half. We want our crunch factor to last! I call this the ‘moisture defense line’ when assembling our Crispy Chicken Wrap with Ranch Sauce.
The absolute number one rule here is: Keep the sauce and wet ingredients away from the edges of the tortilla. When you lay down that ranch, make sure you leave at least a full inch of clean, dry tortilla space along the left and right sides. The same goes for the tomatoes; try to place them right over the chicken and lettuce pile, not smeared near the perimeter.
By keeping the wet stuff centered, when you fold those edges in and roll it up tight, you create a seal with dry tortilla holding everything together. This shields the outside layer from absorbing too much moisture too fast. If you’re making these ahead of time, this small step is the difference between a perfect wrap and a sad, damp one!
Storage and Make Ahead Crispy Chicken Wraps
Listen, sometimes life moves too fast, right? Being able to whip up a Crispy Chicken Wrap with Ranch Sauce on a Tuesday night when you’re exhausted is the dream, and we can absolutely make that happen with smart storage!
The critical thing to remember when you’re planning Make Ahead Crispy Chicken Wraps is that crispy things do not like to be stored next to wet things. If you assemble the whole thing—chicken, lettuce, sauce, everything—and then put it in the fridge, I promise you that tortilla will turn into wet tissue paper by morning. We are not going to do that!
So, successful meal prepping means breaking it down into its core components. The amazing homemade ranch sauce is the easiest part; as I mentioned before, it keeps beautifully in any little sealed jar in the fridge for up to two days. It usually tastes even better on day two anyway!
The chicken is the next piece. You can cook the chicken strips completely, let them cool fully, and store them in an airtight container in the fridge for up to three days. Honestly, handling them cold is fine, but you *must* re-crisp them before wrapping.
For the vegetables, keep the lettuce and tomatoes in separate containers so they stay crisp and dry. Never pre-slice tomatoes too far ahead of time; they get watery so fast!
When you’re ready to eat, just reheat the chicken—and this is important, listen closely—use the oven or the air fryer! I know the microwave is tempting, but it steams the crust and ruins all our hard work. Pop those pieces in the oven at 375 degrees for about five minutes until they are piping hot and crunchy again. Then, warm your tortillas separately, and assemble everything fresh right before you eat. If you’re into freezing make-ahead meals, you should check out the techniques I use for my freezer breakfast burritos—similar principles on keeping moisture locked out apply!
Frequently Asked Questions About This Recipe
I always get tons of questions on this one, mostly revolving around keeping that amazing crunch alive—and I totally get it! It’s the whole point of the Crispy Chicken Wrap Recipe, right? Here are some of the things I hear most often from folks making their first or fifth batch!
Can I use pre-cooked chicken for this Crispy Chicken Wrap Recipe?
Oh, that’s a tricky one! If you want that truly perfect, golden, shattering crust, I really, really advise against it. The raw coating process is designed to adhere to raw chicken, and when you fry it up, it cooks everything evenly. If you use already cooked chicken, you’re mostly just frying the coating, and it can sometimes taste greasy or start to get heavy before the coating browns nicely.
BUT, if you are in a massive pinch and need a Quick Lunch Wrap with Chicken, here’s my workaround: Take your pre-cooked strips (maybe even rotisserie chicken!), coat them completely following the flour/egg/panko rules we used, and then just flash fry them really quickly—like 2 minutes max—just until that panko crust is golden. Don’t worry about cooking the inside, just crisping the outside! That helps a lot!
How long does the homemade ranch sauce last?
This sauce is a total winner for meal prep! Because we used mayonnaise and buttermilk, which have great stability, the sauce lasts wonderfully. I usually whip up the whole batch and keep it stored in a tightly sealed container (a mason jar is my favorite for the fridge) for up to two full days. It’s perfect for prepping lunches ahead of time. You’ll notice the herbs smell even more flavorful the next day, which is always a nice bonus for your Homemade Ranch Chicken Wrap!
What is the best way to reheat leftover crispy chicken for a wrap?
Please, for the love of maximum crunch, put away the microwave! Microwaves are the absolute enemy of crispy textures; they turn everything hot and steamy, and we worked too hard for soggy chicken!
If you have leftover strips and want to make another wrap later, I swear by two methods. If you have an air fryer, use that! Pop the chicken in at 380 degrees for about 4 to 6 minutes, shaking halfway through. It brings the crunch right back to life. If you don’t have an air fryer, use a conventional oven. Lay the pieces on a baking sheet and bake them at 400 degrees for about 8 minutes. They’ll warm up through and the crust will crisp up beautifully. Then you can assemble your fresh wrap, maybe even grab some inspiration from our lunch category for pairing ideas!
PrintCrispy Chicken Wrap with Ranch Sauce

Follow this recipe to make satisfying wraps featuring crunchy fried chicken pieces tossed in a creamy homemade ranch dressing.
- Prep Time: 20 min
- Cook Time: 15 min
- Total Time: 35 min
- Yield: 4 servings
- Category: Lunch
- Method: Frying
- Cuisine: American
- Diet: Low Fat
Ingredients
- 1 lb boneless, skinless chicken breasts, cut into 1-inch strips
- 1 cup all-purpose flour
- 1 teaspoon salt
- 1/2 teaspoon black pepper
- 1/2 teaspoon paprika
- 2 large eggs, beaten
- 1 cup panko breadcrumbs
- Vegetable oil, for frying
- 4 large flour tortillas
- 1 cup shredded lettuce
- 1/2 cup diced tomato
- 1/4 cup shredded cheddar cheese
- For the Ranch Sauce:
- 1/2 cup mayonnaise
- 1/4 cup buttermilk
- 1 tablespoon fresh dill, chopped
- 1 teaspoon dried parsley
- 1/2 teaspoon garlic powder
- 1/4 teaspoon onion powder
Instructions
- Prepare the chicken coating: Mix flour, salt, pepper, and paprika in a shallow dish. Place beaten eggs in a second dish, and panko breadcrumbs in a third dish.
- Dredge each chicken strip first in the flour mixture, shaking off excess. Dip into the egg, then press firmly into the panko breadcrumbs to coat completely.
- Heat about 1 inch of vegetable oil in a large skillet over medium-high heat to 350 degrees Fahrenheit.
- Fry the chicken in batches for 4 to 6 minutes, turning occasionally, until golden brown and cooked through. Remove chicken and place on a wire rack lined with paper towels to drain excess oil.
- Prepare the ranch sauce: In a small bowl, whisk together mayonnaise, buttermilk, dill, parsley, garlic powder, and onion powder until smooth.
- Warm the tortillas briefly in a dry skillet or microwave until pliable.
- Assemble the wraps: Lay a tortilla flat. Spread a layer of ranch sauce down the center. Top with lettuce, diced tomato, shredded cheese, and a portion of the crispy chicken strips.
- Fold in the sides of the tortilla, then tightly roll from the bottom up to seal the wrap. Slice in half and serve immediately.
Notes
- For air frying, cook the coated chicken at 400 degrees Fahrenheit for 12 to 15 minutes, flipping halfway through.
- You can make the ranch sauce up to two days ahead and store it in the refrigerator.
- Use romaine lettuce for extra crunch in your wrap.
Nutrition
- Serving Size: 1 wrap
- Calories: 580
- Sugar: 5
- Sodium: 850
- Fat: 32
- Saturated Fat: 7
- Unsaturated Fat: 25
- Trans Fat: 0
- Carbohydrates: 40
- Fiber: 3
- Protein: 35
- Cholesterol: 110