

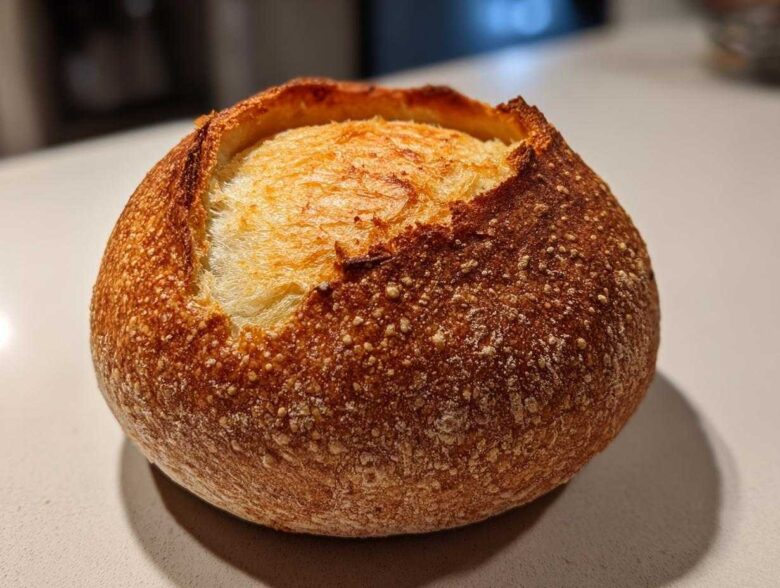
You know those nights? The ones where the air outside is miserable, and all you want is something warm, cheesy, and deeply comforting? That’s where our easy and soft homemade bread bowls swoop in to save the day! Honestly, when I (Stella) first tried making these from scratch, I thought it would be a Herculean task, but I was wrong. Owen and I realized making these edible soup receptacles gave us an excuse to put on some upbeat music and actually enjoy the process. I promise you, these aren’t just sturdy enough to hold your chili; they have the most incredible soft interior with just the right crackle on the crust. Get ready, because this recipe is the good news headline your next cozy dinner needs!
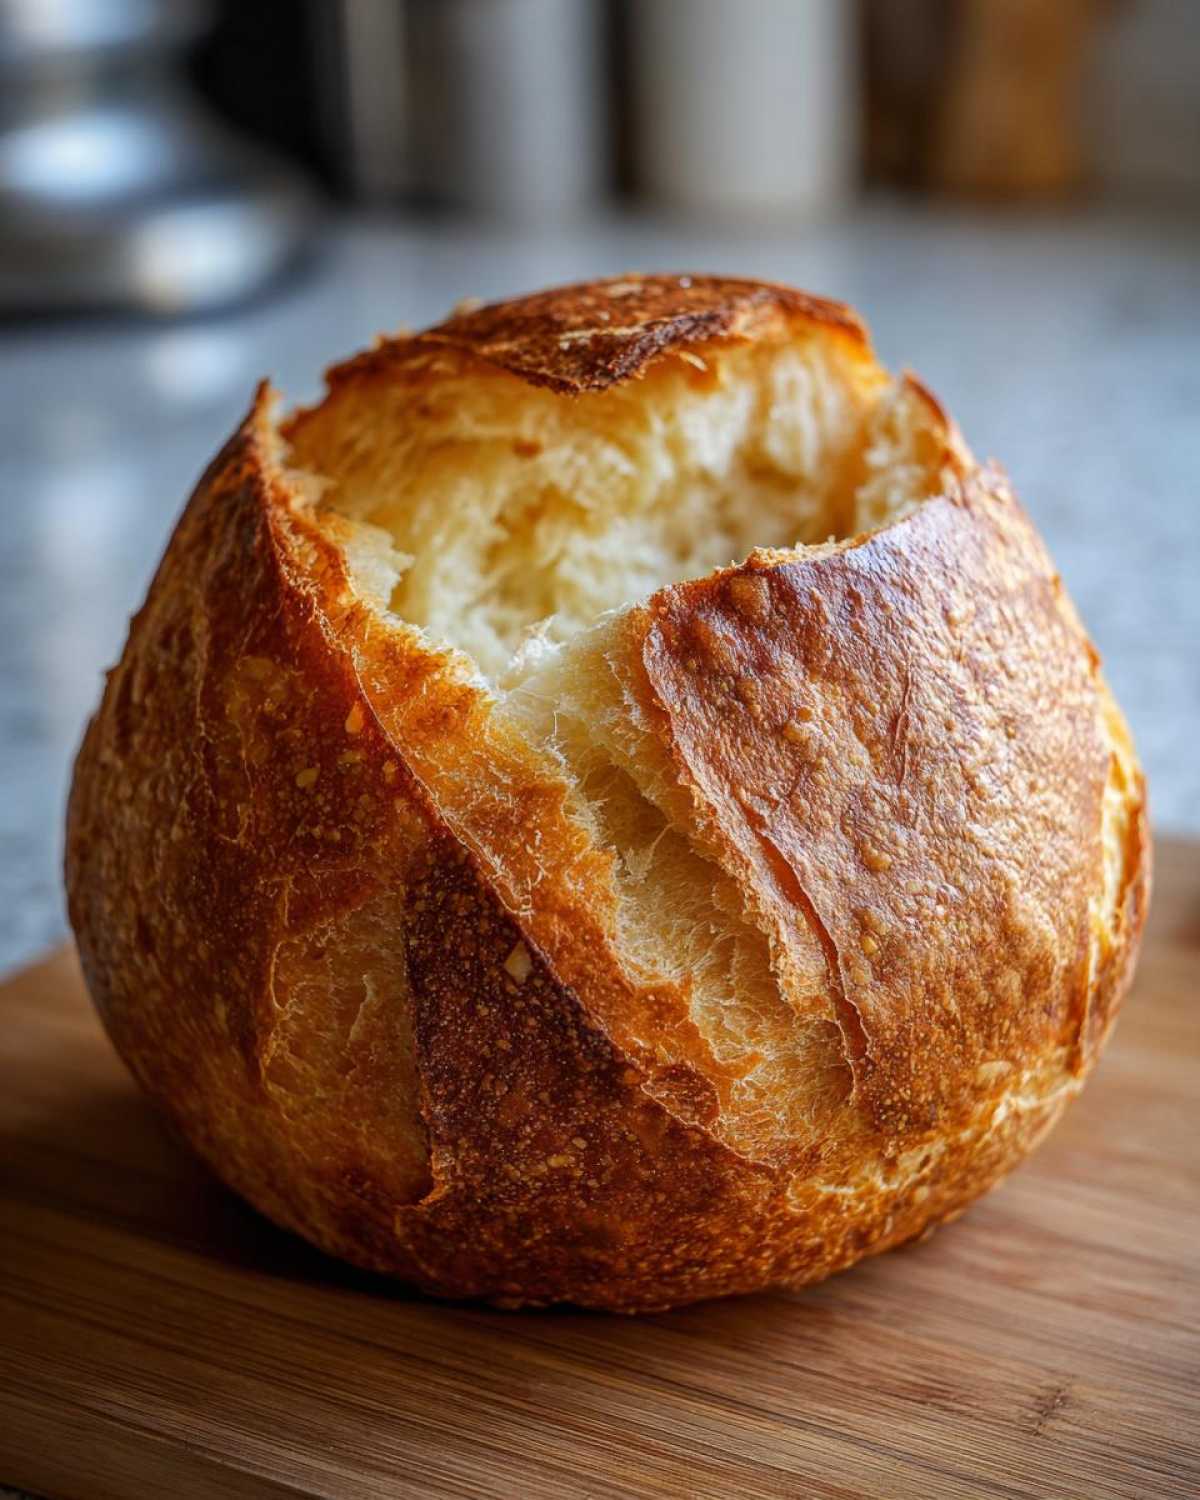
Why You Will Love This Easy & Soft Homemade Bread Bowl Recipe
I can’t shout this from the rooftops enough: these aren’t those dry, crumbly things you sometimes get at the store! We worked hard to nail the texture, and I think you’ll be thrilled with the results. Making these bread bowls is super simple, even if you’re new to yeast baking.
- Soft Interior Guaranteed: You get that perfect, cloud-like inside that soaks up soup beautifully.
- Sturdy Crust That Holds Up: They absolutely stand tall, making them the best sturdy soup bowls bread you’ll ever eat.
- Simple Process: We kept the steps quick so you can have fresh bread bowls on the table fast.
- Perfect for Everything: Ideal for creamy potato soup, hearty chili, or even a big dip!
Essential Ingredients for Perfect Bread Bowls From Scratch
Okay, let’s talk about what goes into these amazing bread bowls. When you’re making something this foundational, the quality really shows. You only need stuff you likely already have, which is part of what makes this recipe so fantastic and easy.
You absolutely need active dry yeast, and make sure it’s fresh! If your yeast doesn’t froth up when we mix it with water? Well, the yeast is dead, and we have to start that step over. That little foamy layer is our barometer for success!
We use all-purpose flour and plain salt. The recipe calls for one large egg, but this is strictly for brushing on top—that’s our egg wash that gives these beauties that gorgeous bakery sheen. Keep the sugar minimal because we want the bread to taste like delicious bread, not dessert!
- 1 cup warm water (Make sure it’s between 105-115°F, not too hot!)
- 2 1/4 teaspoons active dry yeast
- 1 tablespoon granulated sugar
- 2 3/4 cups all-purpose flour, plus extra for dusting
- 1 1/2 teaspoons salt
- 1 large egg, beaten (for that lovely shiny wash)
- 1 teaspoon water (mixed into the egg wash)
Simple Tutorial: How to Make Bread Bowls
Forget getting takeout containers; making these bread bowls at home is really just a matter of time—not skill! We’re going to walk through this step-by-step. Just be sure not to rush the rising times; that’s where the magic happens. Once you get the hang of shaping them, you’ll start seeing these amazing bakery style loaves popping out of your oven!
Activating Yeast and Mixing the Dough for Your Bread Bowls
First things first: we need to wake up that yeast! In your bowl, mix your warm water, sugar, and yeast. Don’t dump them in all willy-nilly! We wait 5 to 10 minutes, and if it gets foamy on top, you’re good to go! That’s the sign that your yeast is happy and ready to work its magic on these bread bowls. Now, add in your flour and salt and mix until it looks like a shaggy mess. Easy peasy!
Kneading and First Rise for Soft Bread Bowls
Time to get those hands in there! Turn the dough out and knead it for about 7 or 8 minutes until it feels smooth and elastic—no more sticky bits sticking everywhere. If you’re using a mixer, keep that dough hook going on medium-low for five minutes straight. Once kneaded, it goes into an oiled bowl, covered, for its first nap. We’re waiting for it to double in size, which takes about an hour to an hour and a half. This long rest is what ensures you get those wonderfully **soft bread bowls for soup**.
Shaping and Second Proofing the Bread Bowls
Once that dough has puffed up nicely, gently punch it down; don’t attack it! Divide that big mound into four equal chunks. This is crucial: take each chunk and roll it between your hands, pulling the outside edges underneath until you have a really tight, smooth ball sitting on your counter. That tension is what helps keep its shape as it bakes. Place them on a lined sheet, loosely cover them again, and let them chill out for 30 calm minutes. Shape matters when making perfect bread bowls!
Baking Instructions for Sturdy Soup Bowls Bread
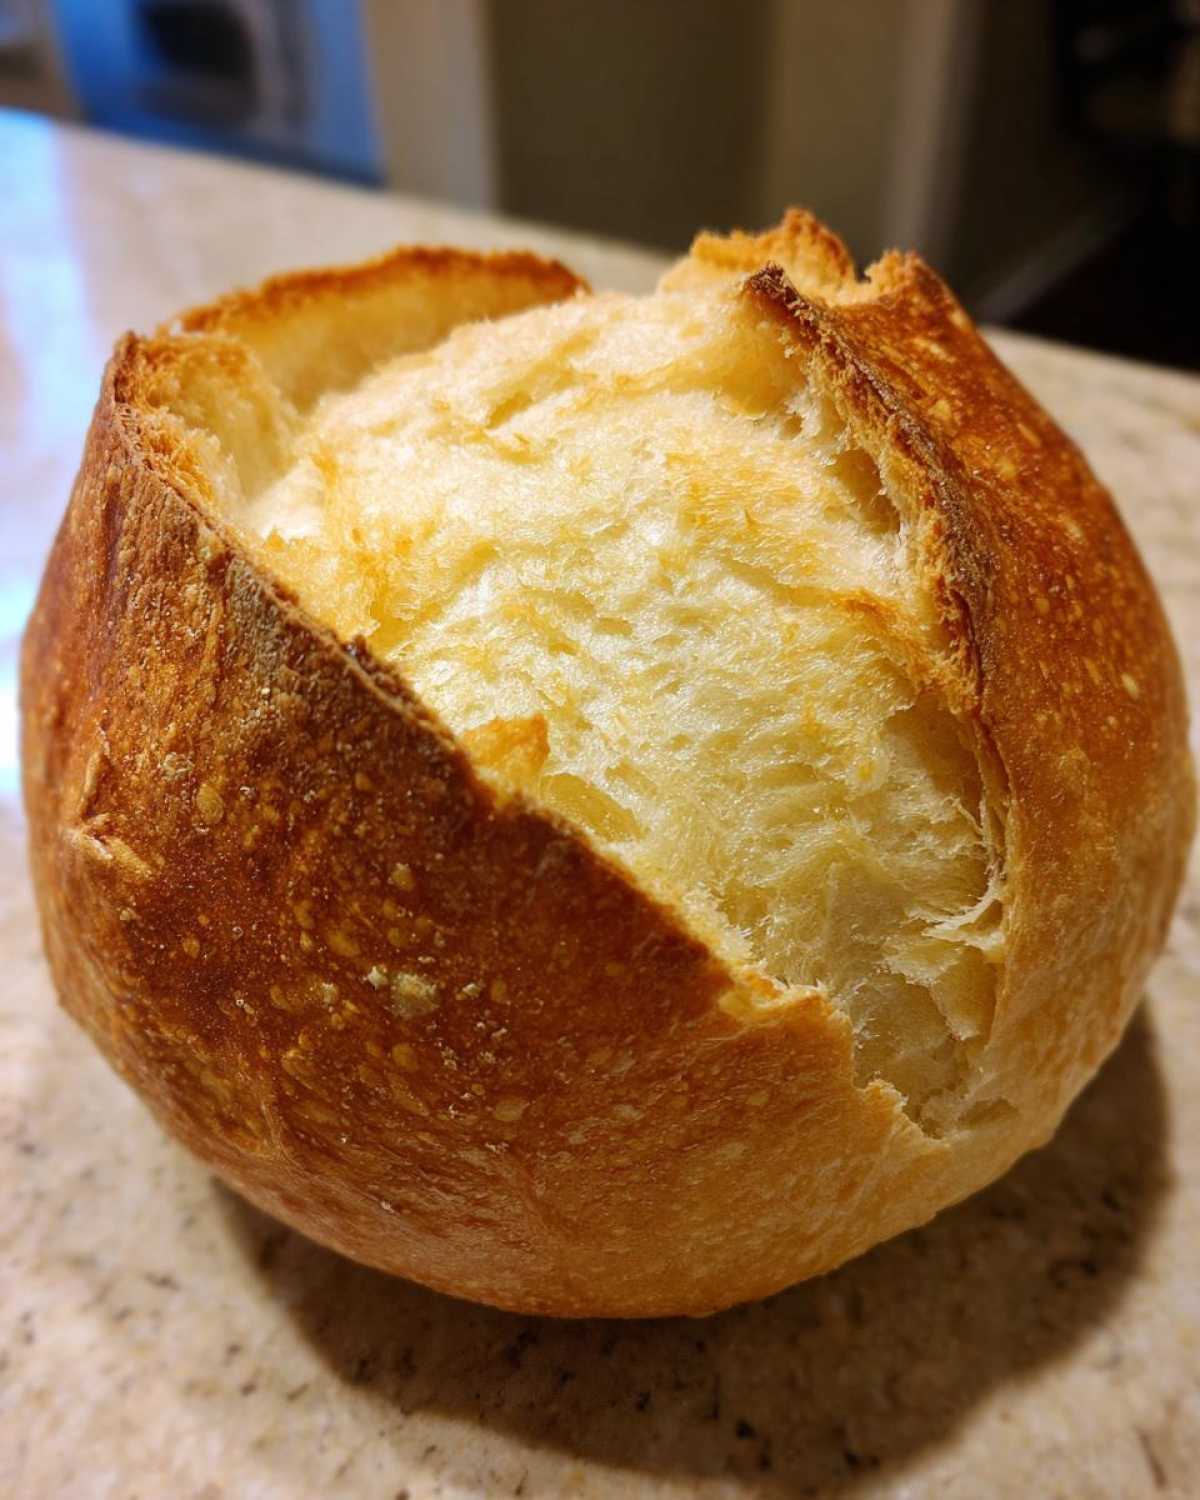
Get your oven screaming hot—400°F (200°C) is the target! While that’s heating, whisk your egg and water together. This egg wash is the ticket to that beautiful golden-brown color you see at the bakery. Brush it gently all over the tops of your rested dough balls. Bake them for about 20 to 25 minutes. You’ll know they are done when they look deep golden and, if you tap the bottom, they sound wonderfully hollow—that’s your cue for **sturdy soup bowls bread**!
Hollowing Out Your Edible Soup Bowl Guide
Hold up! Do not slice into them right out of the oven! You have to let them cool on a wire rack for at least 15 minutes. If you cut them hot, you risk squishing that airy interior, and we don’t want mushy soup carriers. Once cooled, use a sharp knife to cut a circle around the top, leaving a solid inch border around the edge. Slowly pull the top off, and then carefully scoop out the soft center bread. Keep that delicious bread aside! You’re learning the secrets of the **edible soup bowl guide** now, so you have to save those scraps for dipping later!
Expert Tips for Bakery Style Bread Bowls at Home
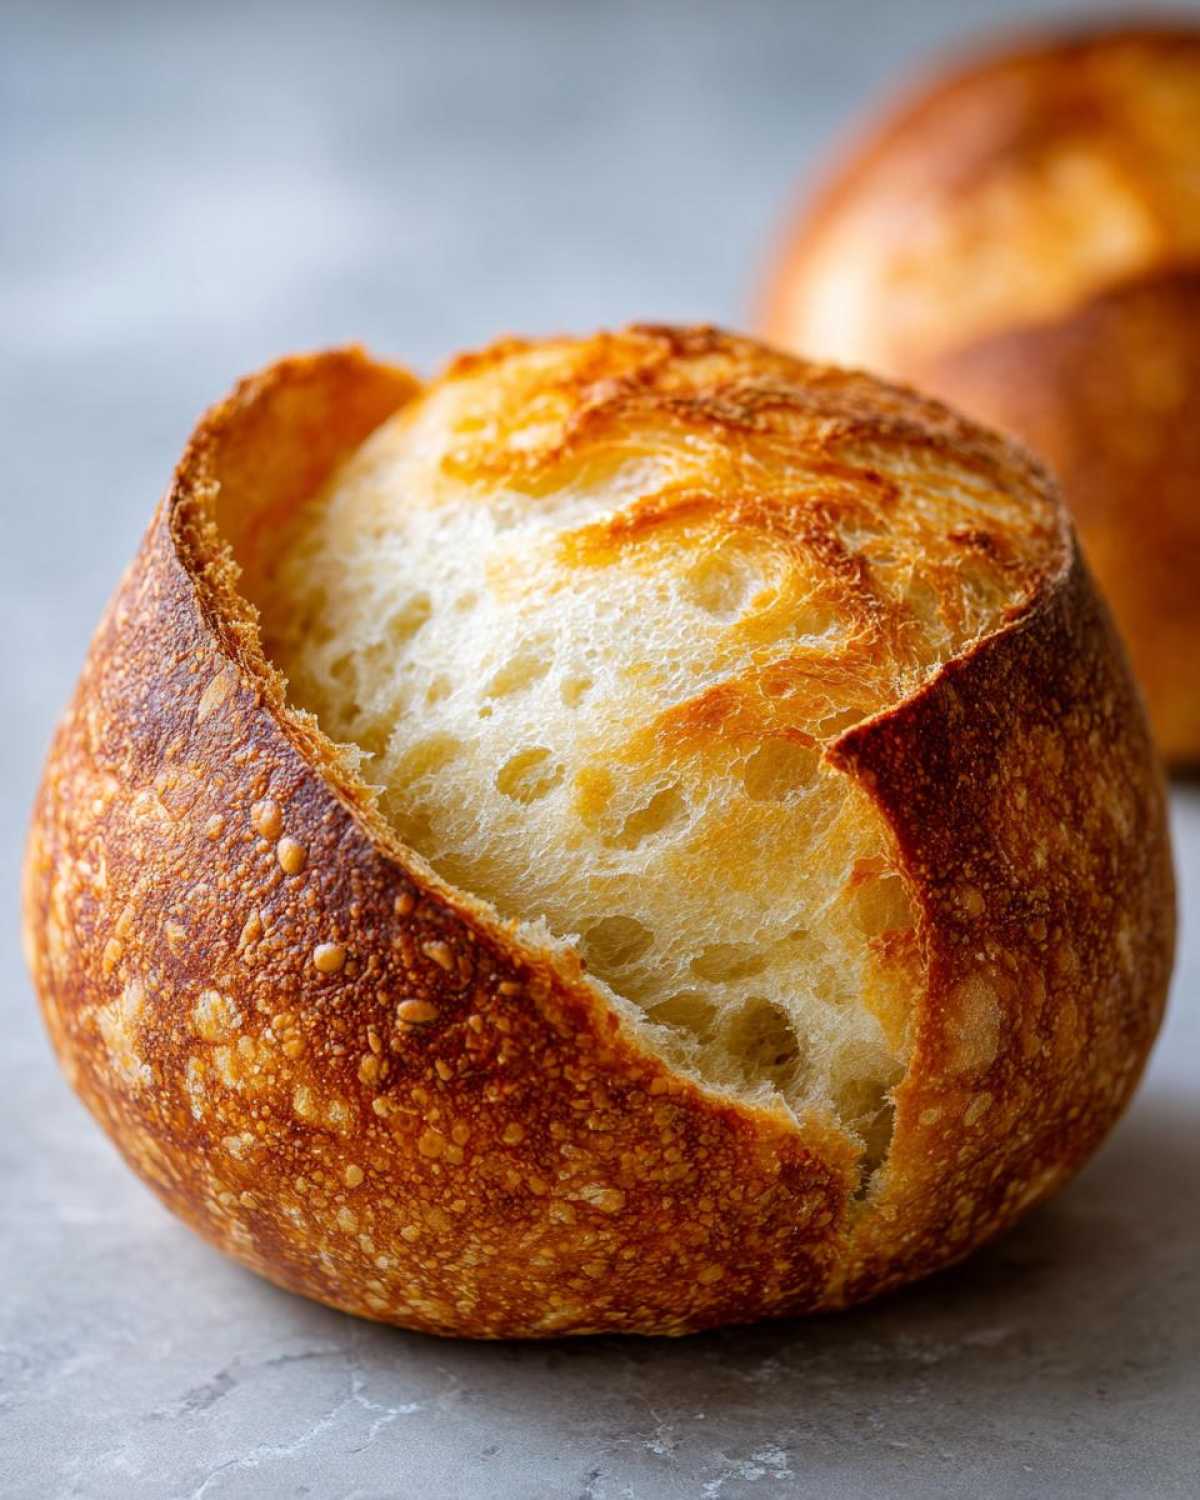
We’ve mastered the dough, but now let’s talk about making these truly rival anything you find at a fancy bakery. These tips are little secrets Owen discovered while testing batches for the perfect dinner party setup. Do you want a hard, crusty bowl to hold thick chili? Or do you prefer a softer edge that melts slightly into creamy soup? It all comes down to the end of the bake!
For that super firm, almost waterproof shell—perfect for serving up that delicious beef stew you might be planning—bake those **bread bowls** for an extra five minutes until they sound like a drum when tapped. But if you want something softer, skip the egg wash and just give the tops a quick, light mist of water halfway through baking. See? Total customization!
And seriously, don’t toss the insides! That scooped-out bread is liquid gold. You can try making croutons using my recipe for crispy roasted chicken seasonings on them, or just save them next to the bubbling soup for extra dipping power. As they say over at All Quick Easy Recipes, the best homemade bread bowls recipe always features zero waste!
What to Fill Your Homemade Bread Bowl Recipe With
Okay, we made the incredible edible shells—now for the best part: what are you filling these glorious bread bowls with?! Honestly, once you master this homemade bread bowl recipe, you start seeing them everywhere! They are the ultimate carrier for comfort food, right?
If it’s cold outside, you absolutely cannot go wrong with a thick, hearty chili. Think smoky spices and beans; you need that sturdy wall we worked so hard to build to soak up all that flavor. Or maybe you’re leaning into something creamy? Owen insists that nothing beats a hearty beef stew served right here. A perfectly cooked loaded baked potato soup in one of these vessels is pure indulgence.
But don’t save them just for soup night! We use them for appetizers all the time. Have you ever tried filling one with a hot spinach and artichoke dip? You can use my recipe for the ultimate layered cheesy pizza dip, which gets super bubbly in the oven! If you check out the post from Molly’s Home Guide, they show off a great potato soup version, too! Check out their creamy soup idea! Whatever you choose, know that serving food inside fresh bread automatically makes it 100 times better!
Troubleshooting Common Issues When Making Bread Bowls
Even the best bakers have days where the dough just doesn’t cooperate! If your first batch of bread bowls isn’t perfect, don’t pitch the whole batch yet! The most common hiccup I see readers run into is the dough not rising during that first rest. Usually, this is because the water was either too hot and killed the yeast, or the water was too cold to wake it up. Remember, 105-115°F is your sweet spot, like a warm bath!
If your bowls look great coming out of the oven but then sink or collapse when they cool, it usually means they were pulled out too soon. They need to bake long enough for the internal structure to set. If they sound dull instead of hollow when you tap them, pop them back in for 5 more minutes until that nice, happy hollow sound pops out. Don’t let a fussy first bake stop you from making these amazing bread bowls!
Storage and Reheating Instructions for Bread Bowls
Once your gorgeous, edible bread bowls have cooled completely—and trust me, resist the urge to eat them hot!—you need to store them right. Since these are real bread, they don’t last forever on the counter like those funky, preservative-laden store-bought ones, but keeping them fresh is easy.
For short-term storage, like for the next day, just pop them into an airtight container or a sturdy zip-top bag once they are totally cool. Keep them at room temperature. They should stay wonderfully soft and ready for dinner for about two days. If you try to refrigerate them, they’ll harden up on you, and nobody wants a stale soup holder!
Now, what if you need to crisp that crust back up before filling it? That’s my favorite trick for making them taste like they just came out of the oven. Preheat your oven to about 350°F—nothing too crazy. Place the cooled bread bowls directly on the rack, maybe skip the egg wash refresh since they are already baked, and let them warm up for about 5 to 8 minutes. You want them warm all the way through and the crust slightly crisp again, but not so hot that they collapse when you cut them open.
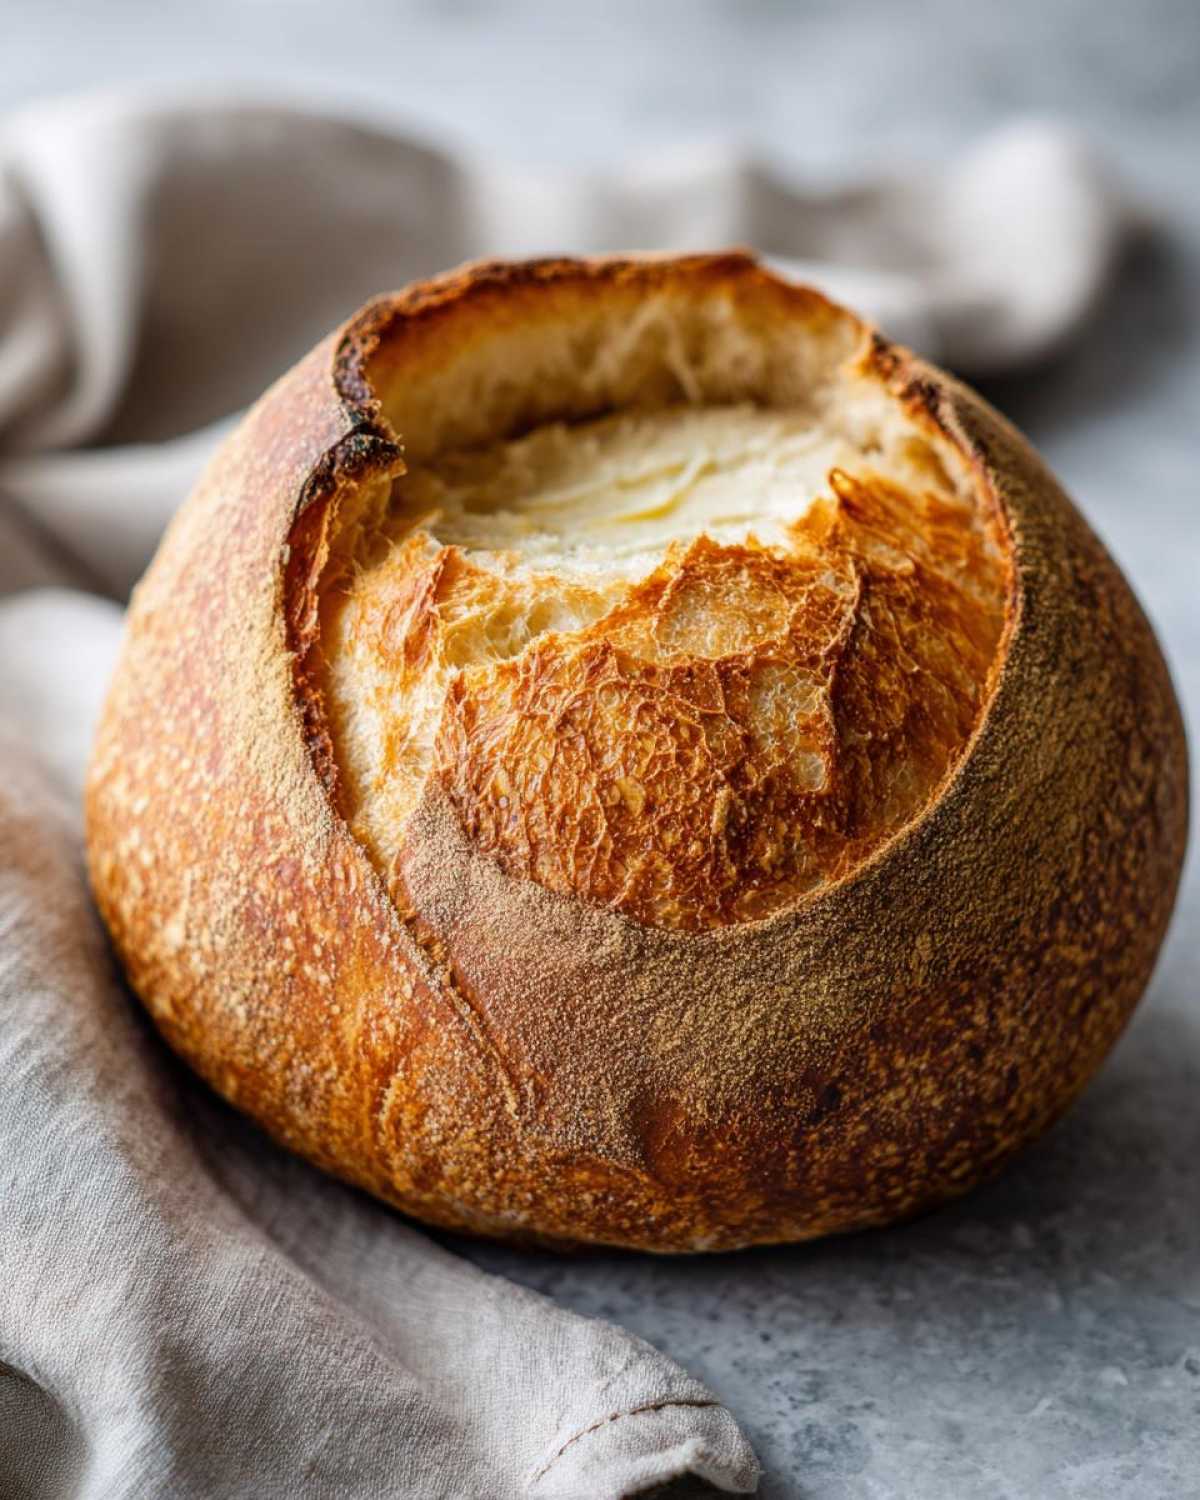
If you happen to have any leftover scraped-out bread, don’t let it go to waste! Those soft middles are perfect for ripping up to dip in your leftover soup or making homemade croutons later. I hope you enjoy having these fresh bread bowls on hand for a few days!
Frequently Asked Questions About Homemade Bread Bowls
I know you probably have a few lingering thoughts swirling around before you dive into the dough! That’s totally normal with a homemade bread bowl recipe. We get asked about using different flours all the time, and yes, you can absolutely make these ahead of time. That’s one of the best parts about them—baking is done, and dinner is half-made! I’ve tried making these ahead for a busy night using the methods found on Adventures of a DIY Mom, and they turn out just as spectacular!
Can I use bread flour instead of all-purpose flour?
Yes, you absolutely can! If you want a slightly chewier texture, bread flour is a great swap for the all-purpose flour in this recipe. Bread flour has a higher protein content, which means more gluten development, leading to a better structure. If you choose bread flour, be prepared to knead for just a minute or two longer until it’s smooth. This is my go-to when I want those thicker crusts perfect for bread bowls for chili!
How do I make these Panera style bread bowls?
Everyone loves those famous restaurant bread bowls, right? The secret to getting that look and feel is twofold. First, the interior needs to be slightly less developed so it scoops out easily. Second, you need that slightly tougher crust. I find that using the egg wash (as we did in the recipe) gives you that glossy, cafe finish. Also, if you look at what Adventures of a DIY Mom suggests, sometimes using a little steam in the oven right at the start helps the crust set differently. Try placing an empty pan on the bottom rack while preheating and tossing a handful of ice cubes in it right when you put the dough in!
Can I make the dough ahead of time for an easy bread bowl recipe?
I love prepping dough ahead of time! If you let the first rise happen in the fridge overnight—maybe after step 4—it develops so much more flavor. Just punch it down gently in the morning, reshape your four balls, let them proof at room temperature for about an hour, and then bake! It makes getting a great simple bread bowl tutorial experience when your evening is busy. These look amazing paired with my slow cooker beef stew!
Can these bread bowls be frozen?
They freeze beautifully! Once they are completely baked and cooled, wrap them tightly in plastic wrap, then foil. They’ll last for about three months this way. When you’re ready to use one, just thaw it on the counter for a few hours, then give it that quick 5-minute warm-up in the oven at 350°F, just like we talked about for reheating. It’s the ultimate shortcut!
Estimated Nutritional Data for Your Bread Bowls
Now, I know we aren’t tracking every single macro here at Hungry Herald—we’re too busy dancing and announcing good food news! But for those of you who like to peek at the numbers, here is the estimated nutritional data for one of these plain, unfilled bread bowls.
Remember, these are just ballpark figures, okay? If you use more sugar, or maybe you are a little heavy-handed with that oil during the kneading process, the numbers will shift slightly. But this gives you a solid starting idea for one delicious, sturdy edible vessel!
- Serving Size: 1 bread bowl (unfilled)
- Calories: 280
- Fat: 1.5 grams (Only 0.3g is saturated, so we’re doing okay!)
- Carbohydrates: 58 grams
- Sugar: 2 grams (Mostly from the teaspoon of sugar needed to feed the yeast)
- Protein: 9 grams
- Sodium: 350 mg
- Fiber: 2 grams
- Cholesterol: 0
Look at that! Pretty standard for homemade white bread, but miles better in flavor than anything store-bought. When you go load it up with your chili or that creamy beef stew, that’s when the real tally starts, but for the bread itself, it’s a wonderful canvas.
Share Your Kitchen Dance Party
Okay, Heralds! Now that you have the secrets to creating these incredible, sturdy, and soft bread bowls, I absolutely need to hear about them! Did you make those glorious, golden spheres? Did you get to have a little kitchen dance party while waiting for the yeast to bloom? We need all the details!
Head down to the comments section below and tell me what amazing soup or chili you decided to serve up! Did you try the loaded potato soup, or did you go old school with chili? I’m so curious to know how everyone is using these edible bowls. Don’t keep all that good news to yourself!
If you snap a picture of your creation—maybe topped with cheddar or dripping with creamy sauce—please tag us on social media! Seeing your success stories is the best part of being the Editor-in-Chief here at Hungry Herald. We love seeing our recipes come to life in your homes. Come back soon for more announcements!
If you want to keep exploring more announcements from our kitchen, check out the rest of the blog here. Happy Baking!
PrintEasy & Soft Homemade Bread Bowls From Scratch (Perfectly Sturdy for Soup)
Learn how to make soft yet sturdy homemade bread bowls that rival bakery style. This simple tutorial guides you to creating edible soup bowls perfect for filling with your favorite chili, stew, or dip.
- Prep Time: 20 min
- Cook Time: 25 min
- Total Time: 1 hour 55 min
- Yield: 4 servings
- Category: Baking
- Method: Baking
- Cuisine: American
- Diet: Vegetarian
Ingredients
- 1 cup warm water (105-115°F)
- 2 1/4 teaspoons active dry yeast
- 1 tablespoon granulated sugar
- 2 3/4 cups all-purpose flour, plus more for dusting
- 1 1/2 teaspoons salt
- 1 large egg, beaten (for egg wash)
- 1 teaspoon water (for egg wash)
Instructions
- Combine the warm water, yeast, and sugar in a large bowl. Let this mixture sit for 5 to 10 minutes until it becomes foamy. This shows the yeast is active.
- Add the flour and salt to the yeast mixture. Mix with a wooden spoon or a stand mixer with a dough hook until a shaggy dough forms.
- Turn the dough out onto a lightly floured surface. Knead for 6 to 8 minutes until the dough is smooth and elastic. If using a stand mixer, knead on medium-low speed for about 5 minutes.
- Place the dough in a lightly oiled bowl, turning it once to coat. Cover the bowl with plastic wrap or a clean kitchen towel. Let the dough rise in a warm place for 1 to 1.5 hours, or until it has doubled in size.
- Gently punch down the risen dough. Divide it into 4 equal pieces. Shape each piece into a tight, smooth ball. These will be your individual bread bowls.
- Place the dough balls on a baking sheet lined with parchment paper, leaving several inches between them. Cover them loosely and let them rest for a second rise for about 30 minutes.
- Preheat your oven to 400°F (200°C). Line a baking sheet with parchment paper.
- In a small bowl, whisk together the beaten egg and 1 teaspoon of water to create an egg wash. Gently brush the tops of the dough balls with the egg wash. This helps achieve a golden crust.
- Bake for 20 to 25 minutes, or until the bread bowls are deep golden brown and sound hollow when tapped on the bottom.
- Remove the bread bowls from the oven and let them cool on a wire rack for at least 15 minutes before hollowing them out.
- To serve, use a sharp knife to cut a circle around the top of each loaf, leaving about a 1-inch border. Carefully scoop out the soft interior bread, leaving a sturdy wall for your filling. Save the scooped bread for dipping.
Notes
- For a sturdier bowl that holds creamy soups well, bake the bowls slightly longer until the crust is very firm.
- If you want a softer crust, skip the egg wash and lightly mist the loaves with water halfway through baking.
- Use the scooped-out bread to make croutons or breadcrumbs for another meal.
Nutrition
- Serving Size: 1 bread bowl (unfilled)
- Calories: 280
- Sugar: 2
- Sodium: 350
- Fat: 1.5
- Saturated Fat: 0.3
- Unsaturated Fat: 1.2
- Trans Fat: 0
- Carbohydrates: 58
- Fiber: 2
- Protein: 9
- Cholesterol: 0