

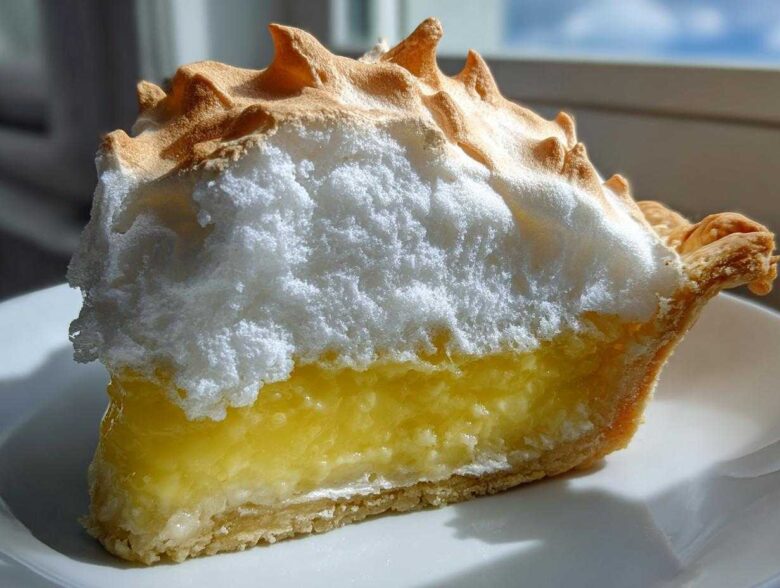
Oh man, let’s talk about achieving dessert perfection, shall we? I’m talking about that moment when you slice into a pie and the filling is brilliantly tangy lemon dessert sharp, yet the topping is impossibly sweet and light. That, my friends, is the magic of a truly great lemon meringue pie, and it can be tricky sometimes! I’ve spent years wrestling with sugary toppings that slump or start crying little beads of sugar syrup—we call that weeping, and it’s the worst. But don’t you worry, because I finally nailed this recipe. This isn’t just some quick hack; this is the real deal for a from scratch pie recipe that delivers a towering, beautiful, and wonderfully tart classic lemon meringue every single time. You’re going to love this! If you want to know more about the philosophy behind my kitchen experiments, check out our About Us page.
Why This Classic Lemon Meringue Recipe Stands Out
So, what makes this version of my lemon meringue pie the absolute best? Well, it’s all about beating those common kitchen disasters! We want a pie that shines, tastes intensely tart and sweet desserts wonderful, and doesn’t leak sadly onto your counter once it’s cooled. This recipe nails the structure from top to bottom.
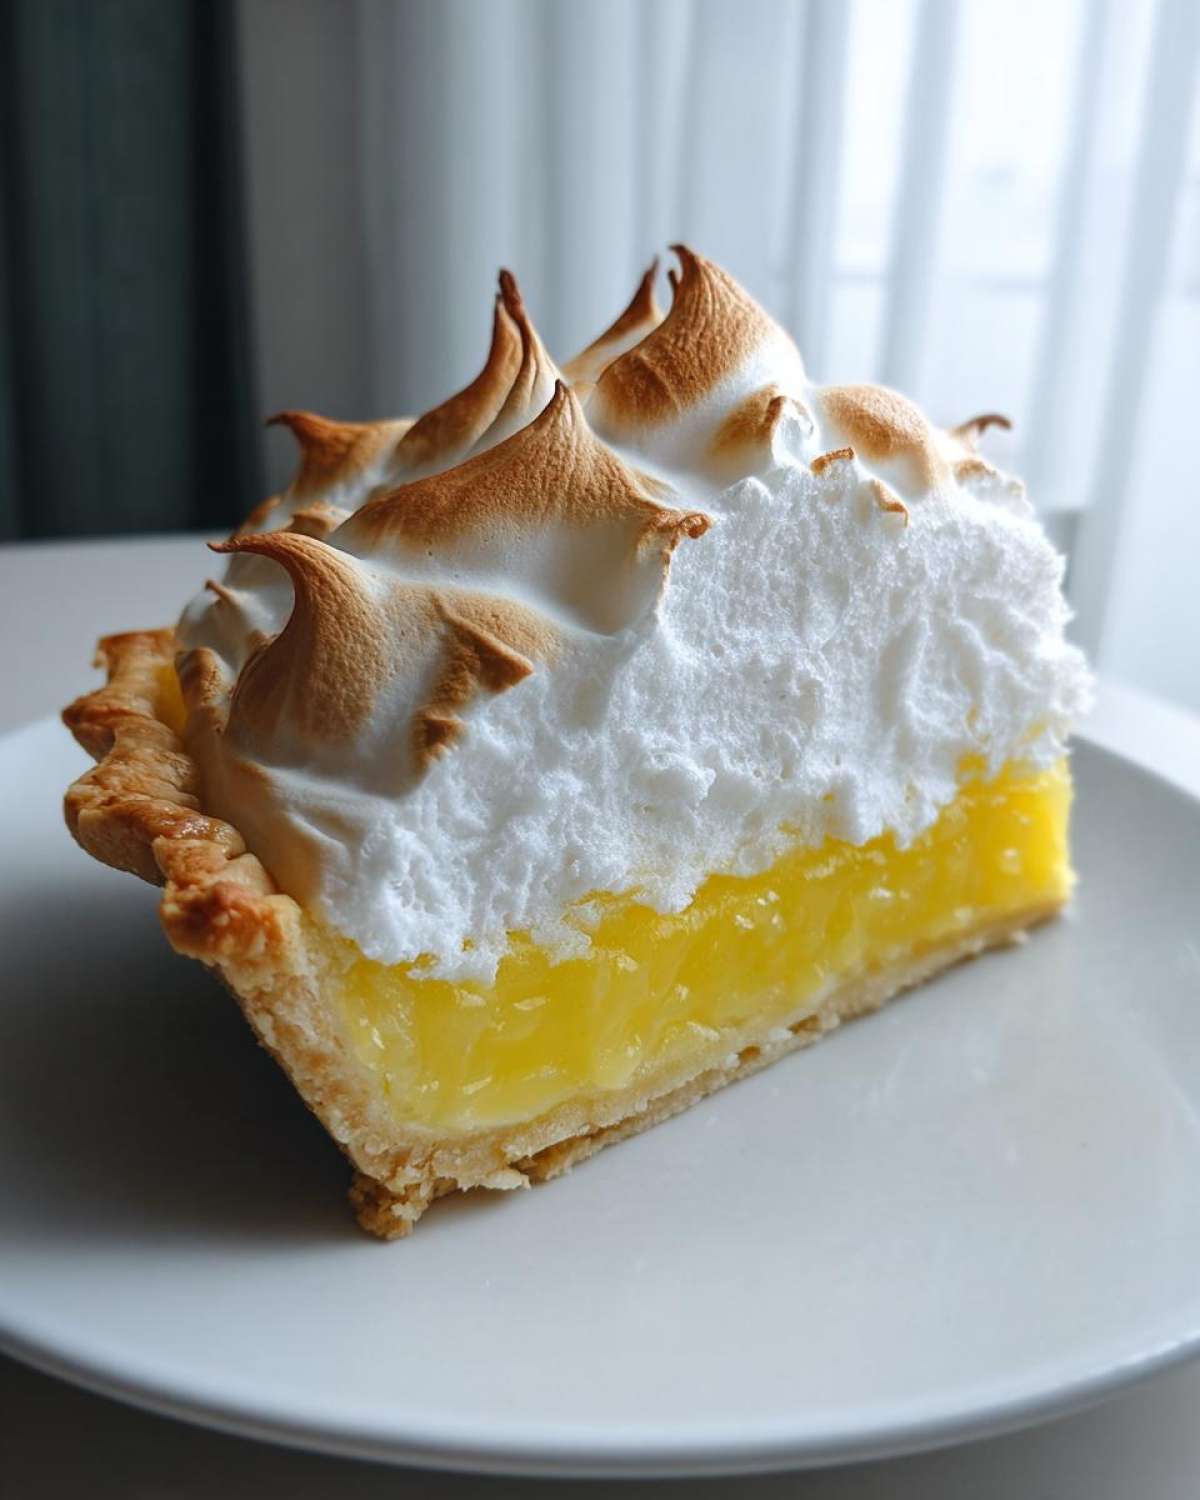
- The filling is incredibly set and deeply flavorful—no runny messes here!
- We focus on getting that impressive, cloud-like height on the meringue.
- The texture contrast between the smooth filling and the crisp crust is perfect.
Achieving the Perfect Creamy Lemon Filling
You simply cannot skimp on flavor when it comes to the lemon part. That bright, zesty punch is essential for cutting through the sugar. That’s why I insist on using heaps of fresh lemon juice and that fragrant zest. Store-bought juice just tastes flat, honestly. When you cook that filling until it’s thick—really thick—you lock in that vibrant, creamy lemon filling flavor that makes people beg for the recipe. It’s the backbone of this whole beautiful dessert!
Tips for a Fluffy Meringue Topping
This is where most people panic, but trust me, it’s actually easy if you follow two simple rules for that fluffy meringue topping. First, those egg whites? They must be at room temperature; cold whites just won’t whip properly. Second, you add the sugar slowly, like confetti falling from the ceiling, not dumping it all at once! This gradual addition whips tons of air into those proteins, giving you that stable, marshmallow-like structure that stands tall and proud, ready for toasting.
Gathering Ingredients for Your Homemade Lemon Meringue
Okay, now that we’ve got our game plan, let’s talk about what you need to gather. Because we are making this completely from scratch, the freshness of a few items really makes a difference. I’ve laid out everything below, but honestly, reading the ingredient list is almost as fun as the assembly, right? Make sure you have your 9-inch pie crust baked and cooled before you even think about starting the filling. That’s rule number one for minimizing stress!
Here is the list of everything you’ll need for this beautiful pie:
- 1 recipe for 9-inch pie crust (baked!)
- 1 1/2 cups granulated sugar
- 1/3 cup cornstarch
- 1/4 teaspoon salt
- 1 1/2 cups cold water
- 4 large egg yolks, lightly beaten
- 1/2 cup fresh lemon juice
- 1 tablespoon lemon zest
- 2 tablespoons butter
- 6 large egg whites, room temperature
- 1/4 teaspoon cream of tartar
- 1/2 cup granulated sugar (for meringue)
Ingredient Notes and Substitutions for Lemon Meringue
If you try to cheat on the lemon juice by grabbing the stuff in the little plastic bottle, I will know! Seriously though, only use fresh-squeezed lemon juice. The flavor difference in that tangy lemon dessert filling is night and day. Also, I mentioned this before, but it bears repeating: for that massive, stable meringue, your 6 egg whites must be at true room temperature. Pop them out on the counter about an hour before you start whipping them. They just incorporate air so much better that way, which is the secret to a truly fluffy meringue topping.
Step-by-Step Instructions for the Best Lemon Meringue Pie
Alright, grab your whisk and maybe an apron, because we are putting this incredible filling together! This is where the magic happens, but we have to be disciplined, especially when dealing with those eggs. Remember, a rolling boil for exactly one minute is crucial to thicken things up properly before we temper those lovely yolks. We’re aiming for a filling so smooth and rich it practically hums with citrus goodness.
- First things first—your 9-inch pie crust needs to be baked and sitting ready to go.
- In your saucepan, you’re going to take that 1 1/2 cups of sugar, the cornstarch, and the salt, and whisk them together until they look totally uniform.
- Slowly whisk in the cold water until you have a thin, smooth slurry.
- Set the heat to medium and stir constantly! Don’t walk away; stir until it thickens up and starts to boil hard. You must let it boil for a full minute while stirring—this cooks out the raw starch flavor.
- Take the pan off the heat. Now, in a separate bowl, gently beat your 4 egg yolks. We have to temper them! Slowly drizzle about a cup of that hot sugar mixture into the yolks while whisking like crazy. This keeps them from turning into scrambled eggs!
- Once tempered, pour that wonderful yolk mixture right back into the saucepan with the rest of the hot stuff.
- Put it back on medium heat and stir until it comes back up to a boil one last time and boils for that required minute. Now, remove it for good!
- Stir in your butter until it vanishes, then mix in the lemon juice and zest. Pour this hot filling right into your waiting crust immediately!
If you want to peek at some other helpful baking techniques, I’ve got a great piece up on the blog!
Mastering the Creamy Lemon Filling
The real trick to getting that pudding-like set is ensuring you allow that cornstarch mixture to actually boil steadily for that sixty seconds after you add the liquid back in. That boiling action activates the starch. Tempering the yolks, which means slowly raising their temperature with hot liquid, is non-negotiable. If you dump the hot filling directly onto cold yolks, you shock them, and you end up with streaks of cooked egg, not a creamy lemon filling. We want silky smooth, so take your time with that slow drizzle and constant whisking!
Creating the Perfect Fluffy Meringue Topping
Because we need that meringue to set up high and hold its shape, we need room-temperature egg whites and patience. Whip those 6 egg whites until they start looking foamy, then add that cream of tartar—it’s the secret stabilizer! Keep mixing and gradually rain in that last 1/2 cup of sugar, one tablespoon at a time, letting it fully incorporate before adding more. You’ll know it’s ready when you lift the beaters and the peaks stand straight up and look glossy. Crucially, spread this hot meringue right over that piping hot lemon filling, sealing it firmly right to the crust edge. That heat transfer is what stops the shrinkage and prevents those awful little beads of moisture.
Troubleshooting Common Lemon Meringue Issues
Let’s be honest, the moment you pull that pie out, you hold your breath waiting for the dreaded weep. Weeping—those tiny, sticky beads of moisture that form on the meringue surface—is the number one complaint I hear about classic lemon meringue pie! The main culprit is usually moisture difference between the filling and the topping.
The secret to fighting that weep starts while the pie is still hot. You absolutely must spread that fluffy meringue right onto the hot lemon filling, making sure every single edge of the meringue touches the crust. When the meringue seals completely to the crust, it traps the steam inside the filling, which prevents the sugar from syneresing (that’s the technical word for forming those sad little water drops).
The second issue is shrinkage. If your meringue pulls away from the crust, it means it wasn’t properly sealed to the hot filling, or maybe you didn’t use enough cream of tartar! Keep your egg whites at room temp, add the sugar slowly, and press firmly against the crust edge. If you follow these steps, you’ll have a pie that stands proud until the last bite.
Tips for a Showstopper Lemon Meringue Dessert
So you’ve conquered the weep, you’ve got the height, now we make it look absolutely magazine-ready! Frankly, a lemon meringue pie isn’t truly finished until that meringue has a little color on top. It just screams “I baked with love!” to everyone who sees it. You have a couple of fantastic options here for that gorgeous, toasted finish, and you can choose based on what you have handy after that long bake!
Most recipes call for popping the pie back into the oven now, usually around 350°F (175°C) for about 12 to 15 minutes. This works great, especially if you like a slightly firmer meringue where the peaks brown more evenly. Just watch it like a hawk in the oven because the sugar can go from golden to burnt in about fifteen seconds flat. You’re looking for soft, pale golden ribbons catching the light on those peaks.
But—and this is my personal favorite for maximum drama—you absolutely have to try the kitchen torch! Oh my goodness, using a culinary torch gives you such incredible control over the browning. You can toast just the very tips of those beautiful peaks, leaving the valleys between them pure white. It looks incredibly professional and lets you really define that towering shape we talked about. It’s faster, and honestly, it’s just more fun! My method is to let it bake for 10 minutes to set the structure, and then I pull it out and hit it with the torch for the final, perfect browning. If you love high-impact desserts like this, you might want to check out my recipe for Brown Butter Chocolate Chip Cookies—they make a beautiful statement too!
Remember, whatever you choose—oven or torch—we are aiming for visual perfection here. This pie deserves to be the centerpiece on your table, stealing the show away from everything else!
Storage and Make Ahead Tips for Your Lemon Meringue
This is where we talk about logistics, because sometimes you want to make a stunner like this lemon meringue pie a day before the party. The filling is actually fantastic made ahead of time, which is a huge bonus for a busy host!
Here’s my honest advice: you can make the lemon filling a day ahead of time. Just cook it, pour it into your pre-baked crust, and cover it loosely with plastic wrap. Keep it in the fridge overnight. BUT—and this is important—you should only top it with the meringue right before you plan to serve it. Why? Because meringue, even when made perfectly, starts to weep and deflate after about 12 hours, especially in the fridge!
If you absolutely MUST make the whole thing ahead, stick it in the fridge, but know you might see some moisture starting to form. For the very best texture, I recommend assembling the meringue the morning of your event. If you need more tips for planning ahead for parties, feel free to check out my post on Make Ahead Lemon Desserts!
Variations on the Classic Lemon Meringue
While the classic pie gets all the glory, sometimes you need that amazing tangy lemon dessert flavor in a different format, especially when you’re dealing with a crowd or just feeling adventurous! This filling is so robust; it works beautifully beyond the traditional pastry shell, which is fantastic for easy serving.
One of my favorite pivots is turning this into lemon meringue bars. Instead of pouring the filling into a pie shell, you pour it over a shortbread base—I have a great shortbread recipe you can find right here for cherry pie bars that works perfectly for the base layer! You bake the whole thing, and when it sets, you treat the top just like a pie, spreading on that fluffy meringue before torching it.
Another divine swap is making individual lemon meringue tarts. You simply bake up lots of small shortcrust shells first, then fill them with the cooled lemon mixture and dollop meringue circles on top. They look like tiny edible clouds on your dessert platter, perfect for summer parties. Honestly, once you master the filling, the possibilities for all kinds of citrus meringue treats are endless!
Frequently Asked Questions About Lemon Meringue Pie
I always get so many questions after someone tries this recipe for the first time! It’s the detail work that makes the difference between a good pie and a showstopper dessert. Here are some of the most common things people ask me when diving into the world of the best lemon meringue pie.
Can I use pre-made pie crust for this lemon meringue recipe?
Oh, absolutely you can! If you are looking for an easy lemon meringue recipe, using a store-bought shell that’s pre-baked is a fantastic shortcut. It cuts down your total time significantly. However, I have to be honest—for the full, rich flavor experience, nothing beats a simple, flaky, homemade shortcrust pastry. But if you’re in a pinch, go ahead and use the store-bought one, just make sure it’s fully pre-baked!
How long does the filling need to cool before adding the meringue?
This is the moment of truth! You actually don’t want the filling to cool at all. As I mentioned in the instructions, the lemon filling needs to be piping hot—like, right off the stove hot—when you spread that meringue on top. This heat starts setting the bottom layer of the meringue right away and creates a seal against the filling. If the filling cools down too much before you top it, you are practically guaranteeing that watery weep we talked about. Hot filling plus meringue equals beautifully stable, tart and sweet desserts!
What’s the key step when learning how to make meringue?
For me, the absolute key when learning how to make meringue is patience during the sugar addition. You can’t rush it! Start beating your egg whites until they look like bath foam, then start adding the sugar one spoonful at a time, waiting a good 15 to 20 seconds between each addition. This forces the sugar molecules to dissolve slowly into the egg proteins. If you dump it all in, you weigh the structure down, and it collapses into a weak, sugary puddle instead of becoming that glorious, fluffy meringue topping you deserve!
Is there a way to make this lemon dessert that isn’t quite so sour?
While I adore a fiercely tangy lemon dessert, I know not everyone loves that level of tartness! If you want it sweeter, you can add an extra tablespoon or two of sugar to the lemon filling mixture when you are cooking it down. Just taste-test it near the end (carefully, it’s hot!). If you increase the sugar in the filling, you might want to slightly increase the cream of tartar in the meringue, just to keep that topping structure strong enough to support the sweeter base.
Estimated Nutritional Overview for Classic Lemon Meringue
Alright, let’s have a little chat about the numbers, because while this showstopper dessert tastes like pure sunshine and happiness, it does pack a little something in! I always say you should bake with love, not worry constantly about counting every grain of sugar, but it’s good to have a general idea, right?
The figures below are just estimates based on the classic proportions of this wonderful homemade lemon meringue pie recipe—we’re talking about one generous slice. If you find yourself having seconds (and trust me, it’s tempting!), the numbers will obviously go up!
For the full detailed information, always refer to the site disclaimer, as ingredient brands and sizes can change things up!
- Serving Size: 1 slice
- Calories: 380
- Sugar: 45g (Yes—it’s a dessert, but oh so worth it!)
- Sodium: 180mg
- Fat: 15g
- Saturated Fat: 6g
- Unsaturated Fat: 9g
- Trans Fat: 0g (Phew!)
- Carbohydrates: 60g
- Fiber: 1g
- Protein: 6g
- Cholesterol: 110mg
Remember, these are just guidelines for the classic lemon meringue. If you use a low-sugar crust or a sugar substitute in the filling, those figures will shift dramatically! Enjoy every bite of this incredible tart and sweet dessert!
PrintClassic Lemon Meringue Pie

A recipe for a traditional lemon meringue pie featuring a tart, creamy lemon filling and a tall, fluffy, toasted meringue topping.
- Prep Time: 30 min
- Cook Time: 45 min
- Total Time: 5 hours 15 min
- Yield: 8 servings
- Category: Dessert
- Method: Baking
- Cuisine: American
- Diet: Vegetarian
Ingredients
- 1 recipe for 9-inch pie crust (baked)
- 1 1/2 cups granulated sugar
- 1/3 cup cornstarch
- 1/4 teaspoon salt
- 1 1/2 cups cold water
- 4 large egg yolks, lightly beaten
- 1/2 cup fresh lemon juice
- 1 tablespoon lemon zest
- 2 tablespoons butter
- 6 large egg whites, room temperature
- 1/4 teaspoon cream of tartar
- 1/2 cup granulated sugar (for meringue)
Instructions
- Prepare the baked pie crust and set it aside.
- In a medium saucepan, whisk together 1 1/2 cups sugar, cornstarch, and salt.
- Gradually whisk in the cold water until smooth.
- Cook over medium heat, stirring constantly, until the mixture thickens and boils. Boil for 1 minute, stirring constantly. Remove from heat.
- In a separate bowl, whisk the egg yolks lightly. Slowly temper the yolks by whisking about 1 cup of the hot sugar mixture into the yolks.
- Pour the tempered yolk mixture back into the saucepan with the remaining hot mixture. Cook over medium heat, stirring constantly, until it returns to a boil. Boil for 1 minute. Remove from heat.
- Stir in the lemon juice, lemon zest, and butter until the butter melts.
- Pour the hot lemon filling immediately into the baked pie crust.
- In a clean, grease-free bowl, beat the egg whites with an electric mixer until soft peaks form. Add the cream of tartar and continue beating.
- Gradually add the remaining 1/2 cup sugar, beating until stiff, glossy peaks form.
- Spread the meringue over the hot lemon filling, making sure the meringue touches the edge of the crust all around to prevent shrinking.
- Bake at 350°F (175°C) for 12 to 15 minutes, or until the meringue is lightly browned. Alternatively, toast the meringue with a kitchen torch.
- Cool the pie completely on a wire rack at room temperature for at least 4 hours before slicing.
Notes
- To prevent the meringue from weeping (beads of moisture forming), make sure the meringue is spread over hot filling and seal the meringue completely to the crust edge.
- Use room temperature egg whites for the best volume when making the meringue.
- Chill the pie for at least 4 hours before serving for the filling to set properly.
Nutrition
- Serving Size: 1 slice
- Calories: 380
- Sugar: 45g
- Sodium: 180mg
- Fat: 15g
- Saturated Fat: 6g
- Unsaturated Fat: 9g
- Trans Fat: 0g
- Carbohydrates: 60g
- Fiber: 1g
- Protein: 6g
- Cholesterol: 110mg