

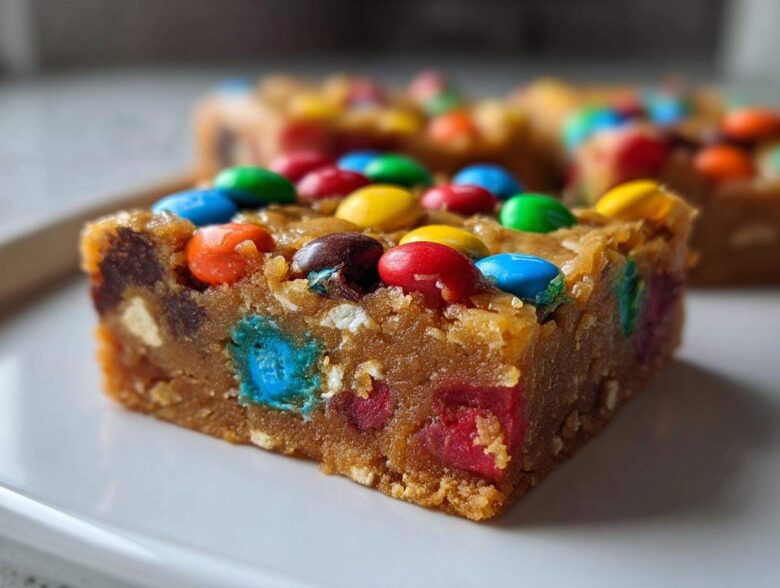
Oh my gosh, the holidays! Aren’t we all just drowning in cookie fatigue by mid-December? I swear, trying to get twelve different kinds of perfectly shaped, decorated cookies ready for every party nearly sends me over the edge every year. That’s why, when things get absolutely frantic, I reach straight for my lifeline: these amazing Chewy M&M christmas cookie bars. Forget fiddly rolling pins and cutting out tiny gingerbread men; these are pure, chewy perfection baked right in a pan!
They are so festive looking, barely take any time to whip up, and they always disappear first at any cookie exchange. I remember last year I completely forgot about a neighborhood potluck until two hours before—these bars saved my life! They are the definition of low-effort, high-impact festive baking. Trust me, you’re going to want to check out all my best cookie exchange tips right after you bookmark this recipe!
Why These M&M Christmas Cookie Bars Are Your New Holiday Favorite
Honestly, these bars just make life easier when we’re all running around like crazy between the mall and decorating the tree. They are designed for maximum holiday impact with minimum stress. You get that classic cookie flavor without all the mess!
- Quick Prep Time for Busy Holiday Schedules: We’re talking only about 15 minutes of actual hands-on work before they go into the oven. That’s fantastic for Easy Christmas Baking when your counter space is covered in ribbon and glitter.
- Perfect Texture: Soft, Chewy Christmas Cookie Bars: Forget dry, crumbly squares. These are wonderfully gooey and soft right out of the pan. They absolutely qualify as one of the best Chewy Christmas Treats you can make; they truly shine as reliable christmas cookie bars.
Gathering Ingredients for the Best Christmas Cookie Bars
Alright, let’s talk about what you need! The beauty of these christmas cookie bars is that they use pretty standard pantry staples, with just a little burst of holiday magic mixed in. If you already have the basics for regular cookies, you’re halfway there. Seriously, these are such reliable Holiday Bar Recipes because the ingredients are simple and accessible. Don’t substitute the full-fat items here; we need that richness for the chewiness! Before you start, grab everything, because once the mixing starts, we move fast.
If you’re curious about changing up your butter game after this recipe, check out my thoughts on making those amazing brown butter chocolate chip cookies later!
Dry Ingredients for Fluffy Christmas Cookie Bars
These need to be whisked together first so everything gets distributed evenly and you don’t end up with a salty bite!
- 3 cups all-purpose flour
- 1 teaspoon baking soda
- 1/2 teaspoon salt (makes a huge difference, don’t skip the salt!)
Wet Ingredients and Mix-ins for Festive Christmas Cookie Bars
This is where the structure and the fun come from. Make sure your butter is actually softened—not melted! That’s a common issue when rushing!
- 1 cup unsalted butter, softened
- 1 cup granulated sugar
- 1 cup packed light brown sugar (that packing is important!)
- 2 large eggs
- 1 tablespoon vanilla extract
- 1 1/2 cups M&Ms (Go heavy on the holiday red and green ones!)
- 1 cup semi-sweet chocolate chips
Step-by-Step Guide to Making Perfect Christmas Cookie Bars
Making these christmas cookie bars is so satisfying because you feel like you’re creating something really special for a Christmas Cookie Exchange, but it takes virtually no effort compared to traditional cookies. We’re moving fast here, so have your ingredients ready to go! The whole process, from start to finish once the oven is hot, is honestly super quick, which is why these are my go-to for Simple Christmas Baking. I walk through all the best Simple Christmas Baking techniques below!
Preparation and Creaming for Chewy Christmas Cookie Bars
First things first: get that oven heating up to 350°F (175°C). You need that consistent heat! Now, take your 9×13 inch pan and line it with parchment paper, making sure you leave a nice overhang on the long sides. That overhang is your handle later—you’ll thank me when you have to lift these giant, gooey things out! Next, get your big mixing bowl. Beat that softened butter with both types of sugar until the mixture looks light and totally fluffy. That’s the secret to keeping these Gooey Holiday Squares from turning into dense bricks instead of being beautifully chewy.
Mixing the Dough and Adding Festive Mix-ins
Once the butter is fluffy, beat in your eggs one at a time, making sure each one is incorporated before adding the next, followed by the vanilla. We already whisked the dry stuff (flour, soda, salt) separate, remember? Now, add those dry bits to the wet mixture slowly. And here’s the rule: only mix on low speed until you *just* see the last streaks of flour disappear. Seriously, stop immediately! If you overmix here, you encourage gluten development, and suddenly your Festive Dessert Bars are tough!
Now you bring in the fun stuff—the M&Ms and the chocolate chips. Fold those in gently by hand. You want them spread everywhere, not smashed into crumbs.
Baking and Cooling Your Christmas Cookie Bars
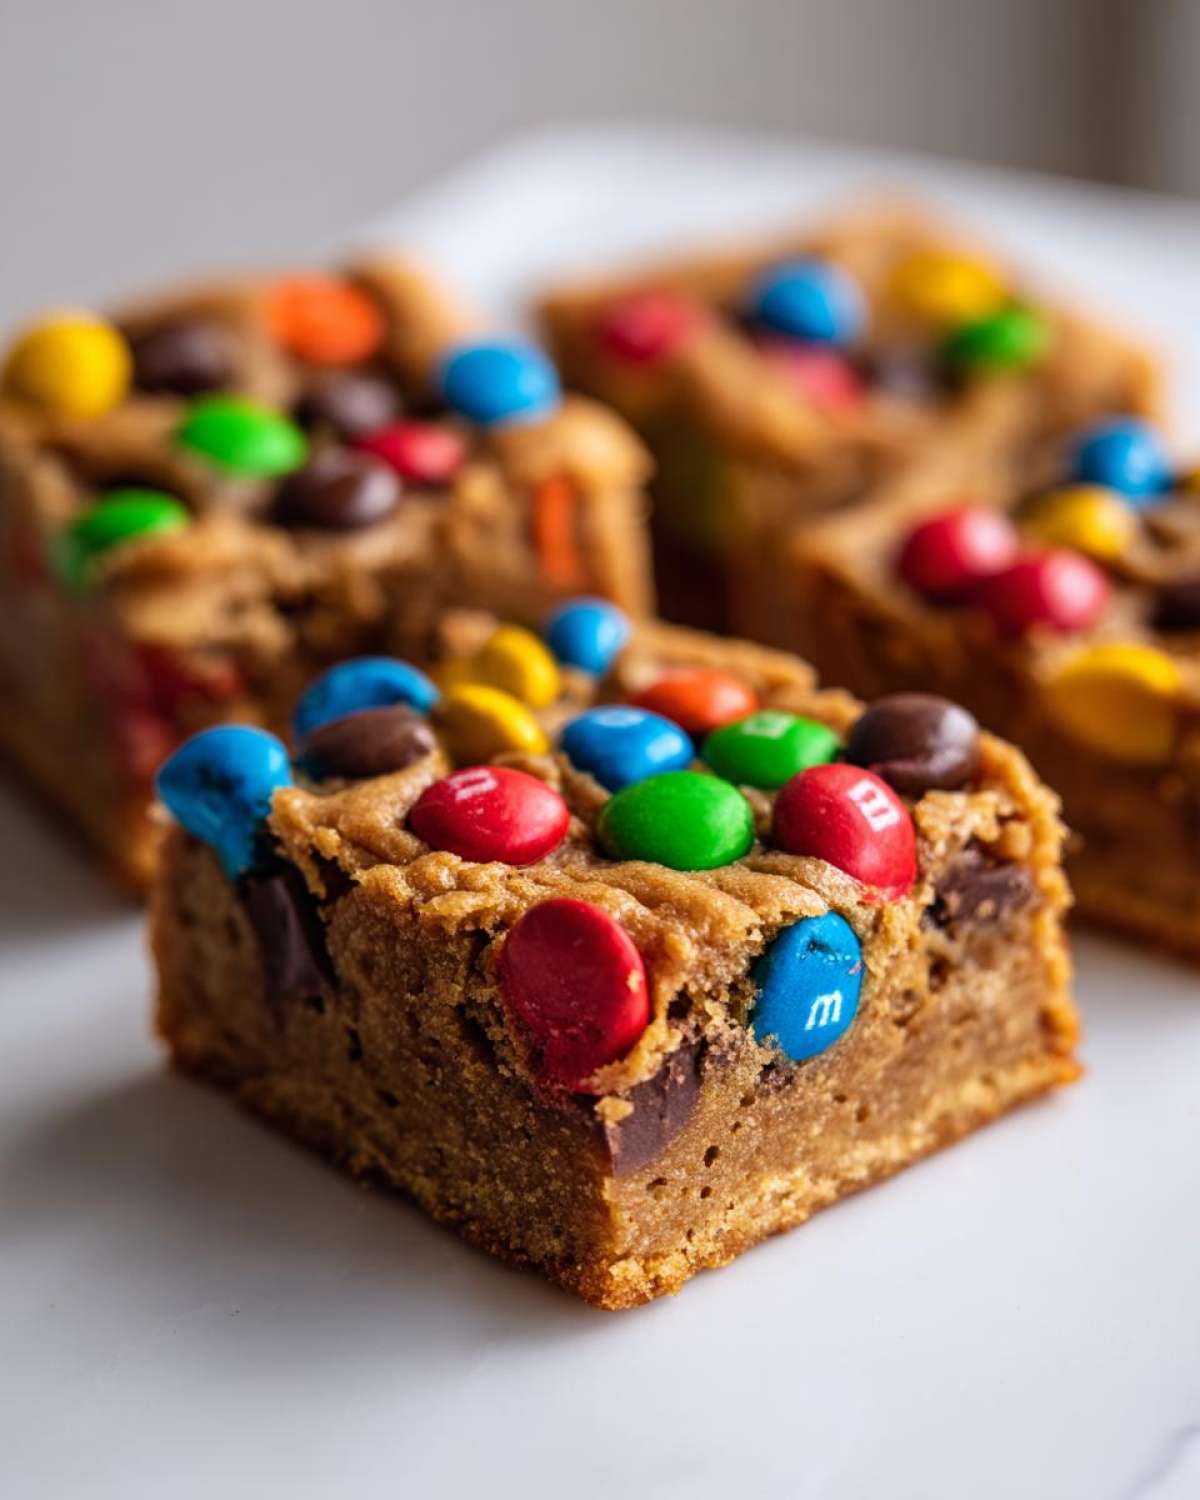
Press that whole beautiful, colorful dough evenly into your prepared pan. It’s thick, so use the back of a spatula. Bake them for 20 to 25 minutes. You’re looking for the edges to turn just lightly golden brown, but the very center should still look slightly set, not liquid. If you want them extra gooey, pull them out right at the 20-minute mark, honestly!
This next part is non-negotiable for clean slices: you HAVE to let these cool completely on a wire rack. I know it’s hard, but if you try to cut them warm, you’ll end up with a chocolate-candy pile instead of perfect christmas cookie bars. Once they are totally cool—seriously, chill them for an hour if you have to—use those parchment sling handles to lift the whole slab out and slice them up cleanly.
Expert Tips for Success with Your Christmas Cookie Bars
Look, baking during the holidays can feel like a high-stakes game, but these bars are genuinely forgiving! I’ve picked up a few little tricks over the years that ensure my Holiday Bar Recipes come out chewy and beautiful every single time, without any fuss. These aren’t huge, complicated steps; they’re just small adjustments that make a big difference when you need your Festive Sweet Treats to be spot on!
Achieving the Perfect Chewy Texture
If you take away only one thing from this whole post, please let it be this: pull these out of the oven approximately one minute before you think they are done. I know! It feels wrong! But since the recipe calls for 20 to 25 minutes, I go for 21 or 22 minutes maximum. The center doesn’t need to look dry—it needs to look *set*. As they cool on that wire rack, they continue cooking slightly, and that gentle carry-over heat locks in the maximum chewiness. Also, remember to use room temperature butter and eggs. Cold ingredients don’t cream properly, and when they don’t cream right, you lose those microscopic air bubbles that keep the final product tender. It’s all about proper foundation building!
Presentation for Holiday Bar Recipes
These bars are already fun because of the colorful candies, but if you want them to really pop on the platter, especially if the kids are helping, try this little trick. After you press the dough firmly into the pan—that’s before it ever sees the oven—grab about a quarter cup of extra M&Ms, maybe a few extra chocolate chips, and just lightly sprinkle or gently press them into the top surface of the raw dough. Sometimes I even throw a few festive sprinkles on top! This guarantees that the colors are visible on the top layer after baking, rather than getting slightly buried in the middle. It’s a simple visual upgrade for your Christmas Baking Ideas for Parties.
If you want to see some other fun ways to present sweet treats that aren’t bars, you might get a kick out of how I manage to stay sane while making those bacon-wrapped jalapeno poppers—yes, sometimes I need savory breaks between all the sugar!
Storing and Gifting Your Christmas Cookie Bars
Okay, so you’ve made a massive 9×13 pan of these glorious treats. What now? Since these are such fantastic christmas cookie bars, you’re probably going to want to keep some for yourself (which is totally allowed!). Good news: they store like a dream. You just need to make sure they are completely cooled down, and I mean *completely*, before you try to stack them anywhere. Any residual warmth will make them stick together or cause condensation.
I keep my stash in an airtight container right on the counter at room temperature, and they stay wonderfully soft and chewy for up to four full days. If you need them to last longer, you can actually freeze them! Cut them into squares first, layer them between sheets of wax paper, and pop them straight into a freezer bag. They thaw out perfectly in about an hour on the counter.
These are also amazing for homemade Christmas Food Gifts because they travel so well! Forget fragile ornaments; everyone loves a tray of these. I usually line a nice little tin or a decorative box with some parchment paper, stack the bars carefully, and maybe tie a bright red ribbon around it. They look incredibly festive, and since they don’t require refrigeration, they are perfect to drop off at neighbors’ houses or take to work events. If you’re looking for more ideas for edible gifts that travel well, check out my recent post on easy ideas for homemade Christmas Food Gifts!
These christmas cookie bars are honestly the gift that keeps on giving all through the season!
Variations on Classic Christmas Cookie Bars
So, while these M&M christmas cookie bars are my absolute go-to champion recipe, I know sometimes you want to mix it up, right? Maybe you need something without chocolate this time, or perhaps you just want to use up that extra bag of festive sprinkles you bought in July! I totally get it. The base dough for these Festive Dessert Bars is strong, which means it takes substitutions like a champ. You can easily swap out the mix-ins to create entirely new Holiday Bar Recipes. I’ve played around with this recipe dozens of times. Here are a couple of my favorite quick twists that keep that wonderful chewy texture intact!
I always suggest that beginners start by sticking to the same amount of mix-ins, just swapping the type. Don’t try to add new wet ingredients, or you risk messing up the wonderful balance we worked so hard to achieve in the creaming stage!
If you love apples, even though this isn’t an apple recipe, you might enjoy checking out my gooey caramel apple crisp recipe for another festive treat!
White Chocolate Peppermint Bars
This one is pure winter wonderland. For the holidays, I often replace the semi-sweet chocolate chips with an equal amount—one cup—of white chocolate chips. Then, instead of the M&Ms, I use crushed candy canes or peppermint candies. Make sure you crush them up pretty small, or they can sometimes get extremely hard when baked!
When you fold those in, it creates this lovely, creamy white base with bursts of cool mint. It’s festive, it’s different, and it smells incredible while baking. It’s a fancy-feeling change, but it takes the same 15 minutes of prep time as the original christmas cookie bars!
Sprinkle Overload Christmas Sugar Cookie Bars
If you’re looking for something that screams ‘party’ but still has that classic, simple cookie flavor, go heavy on the sprinkles! Instead of the M&Ms, use 1 1/2 cups of the festive holiday-colored sprinkles you love—jimmies or nonpareils work great. I also suggest adding about 1/4 cup of extra flour to the dry mix if you do this, just to give the dough a little extra backbone to hold all those sprinkles!
This variation is almost like taking a giant sugar cookie and baking it in a pan. It’s a softer, sweeter version of our Chewy Christmas Treats that kids absolutely adore. You can even top these with a simple powdered sugar glaze after they cool if you want a real showstopper!
Frequently Asked Questions About Christmas Cookie Bars
I know sometimes my writing gets a little wordy, so let’s clear up a few things that always pop up when I put out a great recipe like these christmas cookie bars. It’s totally normal to have questions, especially when you’re trying to fit baking into a packed holiday schedule. These quick answers should help you feel totally confident tackling these Christmas Baking Ideas for Parties!
Can I use different candy instead of M&Ms in these Holiday Bar Recipes?
Oh, absolutely! That’s one of the best parts—they are so customizable. If you don’t have M&Ms, or maybe you just want a different flavor profile, swap them out! I highly recommend trying chopped peppermint bark if you love a minty crunch, or just use a mixture of different holiday sprinkles. If you use sprinkles like jimmies, they melt in a bit differently than M&Ms, but the texture remains fantastic. Just make sure you’re swapping bulk for bulk, so keep the total volume of mix-ins pretty similar to keep those Festive Dessert Bars perfectly balanced!
How do I prevent my Christmas Cookie Bars from getting hard?
This is the biggest hurdle for anyone wanting truly Chewy Christmas Treats, right? There are two main things to watch out for. First, never, ever overmix the flour once it gets combined with the wet ingredients. We want the flour incorporated, but we don’t want to develop that gluten network that makes things tough. Stop mixing the second the streaks disappear! Second, and this is huge, don’t overbake them! If the center looks just slightly set when you pull them out at the suggested time, you are golden. They firm up beautifully as they cool, guaranteeing that soft, gooey center you’re hoping for in your Simple Christmas Baking.
Are these considered Easy Christmas Baking for beginners?
One hundred percent yes! I designed this recipe specifically to be one of the absolute easiest things you can whip up all season. There’s no complicated layering, no chilling time for the dough, and you don’t have to deal with frosting if you don’t want to—though I love dropping a simple glaze on top sometimes! Since they bake up in one large pan and you just slice them afterward, they are fantastic for anyone new to making holiday treats. They definitely qualify as Easy Christmas Baking; they look incredibly festive without requiring any fancy piping skills for decoration!
If you’re looking for more beginner-friendly holiday inspiration, have a peek at my best Christmas baking ideas for parties!
Nutritional Estimates for These Festive Dessert Bars
Alright, let’s talk about the fuel we get from these amazing christmas cookie bars! Now, I am definitely not a nutritionist—I’m a home baker who loves butter and sugar, you know how it is! So please take these numbers as a good general estimate, okay? They are based on a yield of 24 squares, and every bar is going to look a little different depending on how large you cut them or if you used extra M&Ms on top, so treat this like a fun guideline rather than the law.
We’re focusing on the core ingredients here for our Festive Dessert Bars, but remember that using different types of chocolate chips or different amounts of brown sugar can change these totals significantly. Still, if you need a rough idea of how many calories you’re sneaking in while prepping for that holiday party, here’s the ballpark for one generous square:
- Calories: Around 220
- Fat: About 11g (Yeah, we got that real butter in there!)
- Carbohydrates: Roughly 30g
- Protein: A small boost at about 3g
It’s holiday baking, darling, it’s meant to be enjoyed! Don’t stress about the numbers too much; just enjoy a couple of these incredible Gooey Holiday Squares, and remember to save the exact recipe measurements if you ever need to calculate something specific later on!
Share Your Holiday Bar Recipes Experience
Okay, now that you have baked up a storm of these gorgeous christmas cookie bars, I absolutely need to hear all about it! Seriously, this is where the fun part begins for me—seeing your results and hearing your stories! I put all my best tips and tricks into making sure these Holiday Bar Recipes come out perfectly chewy and festive for your family or your next big event.
Did you try adding the extra M&Ms on top before baking for that extra pop of color? Did they disappear instantly at your cookie exchange? Tell me everything in the comments below! I love knowing that this recipe is making your holiday baking life just a tiny bit easier.
And please, if you took a picture of your beautiful, colorful squares, tag me on social media! Seeing your creations truly helps build up this community and lets me know what other Christmas Baking Ideas for Parties you guys might need next season. Head over to my main blog page and find the posts you loved the most! I check those comments every single day, so don’t be shy!
PrintChewy M&M Christmas Cookie Bars
Make simple, chewy cookie bars packed with M&Ms, perfect for holiday parties and cookie exchanges.
- Prep Time: 15 min
- Cook Time: 25 min
- Total Time: 40 min
- Yield: 24 squares
- Category: Dessert
- Method: Baking
- Cuisine: American
- Diet: Vegetarian
Ingredients
- 1 cup unsalted butter, softened
- 1 cup granulated sugar
- 1 cup packed light brown sugar
- 2 large eggs
- 1 tablespoon vanilla extract
- 3 cups all-purpose flour
- 1 teaspoon baking soda
- 1/2 teaspoon salt
- 1 1/2 cups M&Ms (holiday colors preferred)
- 1 cup semi-sweet chocolate chips
Instructions
- Preheat your oven to 350°F (175°C). Line a 9×13 inch baking pan with parchment paper, leaving an overhang on the sides for easy removal.
- In a large bowl, cream together the softened butter, granulated sugar, and brown sugar until light and fluffy.
- Beat in the eggs one at a time, then mix in the vanilla extract.
- In a separate bowl, whisk together the flour, baking soda, and salt.
- Gradually add the dry ingredients to the wet ingredients, mixing on low speed until just combined. Do not overmix.
- Fold in the M&Ms and chocolate chips by hand.
- Press the dough evenly into the prepared baking pan.
- Bake for 20 to 25 minutes, or until the edges are lightly golden and the center is set.
- Let the bars cool completely in the pan on a wire rack before lifting them out using the parchment paper overhang.
- Cut into squares.
Notes
- For extra festive decoration, press a few extra M&Ms onto the top of the dough immediately after pressing it into the pan.
- If you prefer a softer bar, slightly underbake them by 1-2 minutes.
- Store cooled bars in an airtight container at room temperature for up to 4 days.
Nutrition
- Serving Size: 1 square
- Calories: 220
- Sugar: 18g
- Sodium: 105mg
- Fat: 11g
- Saturated Fat: 6g
- Unsaturated Fat: 5g
- Trans Fat: 0g
- Carbohydrates: 30g
- Fiber: 1g
- Protein: 3g
- Cholesterol: 30mg