

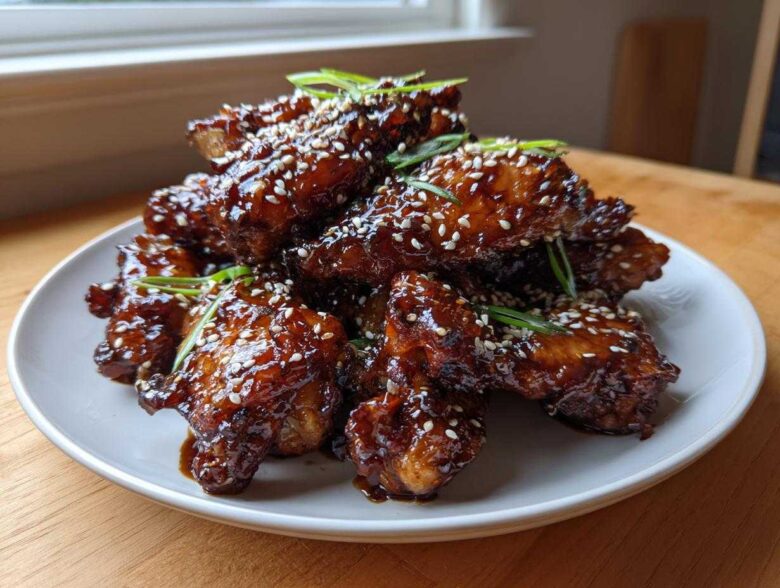
If there’s one thing I’ve learned obsessing over appetizers, it’s that we all want crispy skin AND a sauce that actually sticks. Forget deep frying when you want wings for a weeknight meal—it’s messy! I finally perfected my recipe for these Sticky Teriyaki Chicken Wings Oven Baked, and honestly, they are game-changers. The secret is convincing the oven it’s actually a fryer for the first half of baking. Trust me, I’ve tested every temperature and trick under the sun, and this combination of baking powder and two-step glazing is the absolute key to getting that thick, sweet, utterly crave-able coat without losing the crunch underneath. For more tips on getting that perfect crunch, check out my guide on crispy skin roasted chicken—the technique is similar! You won’t ever go back, I promise!
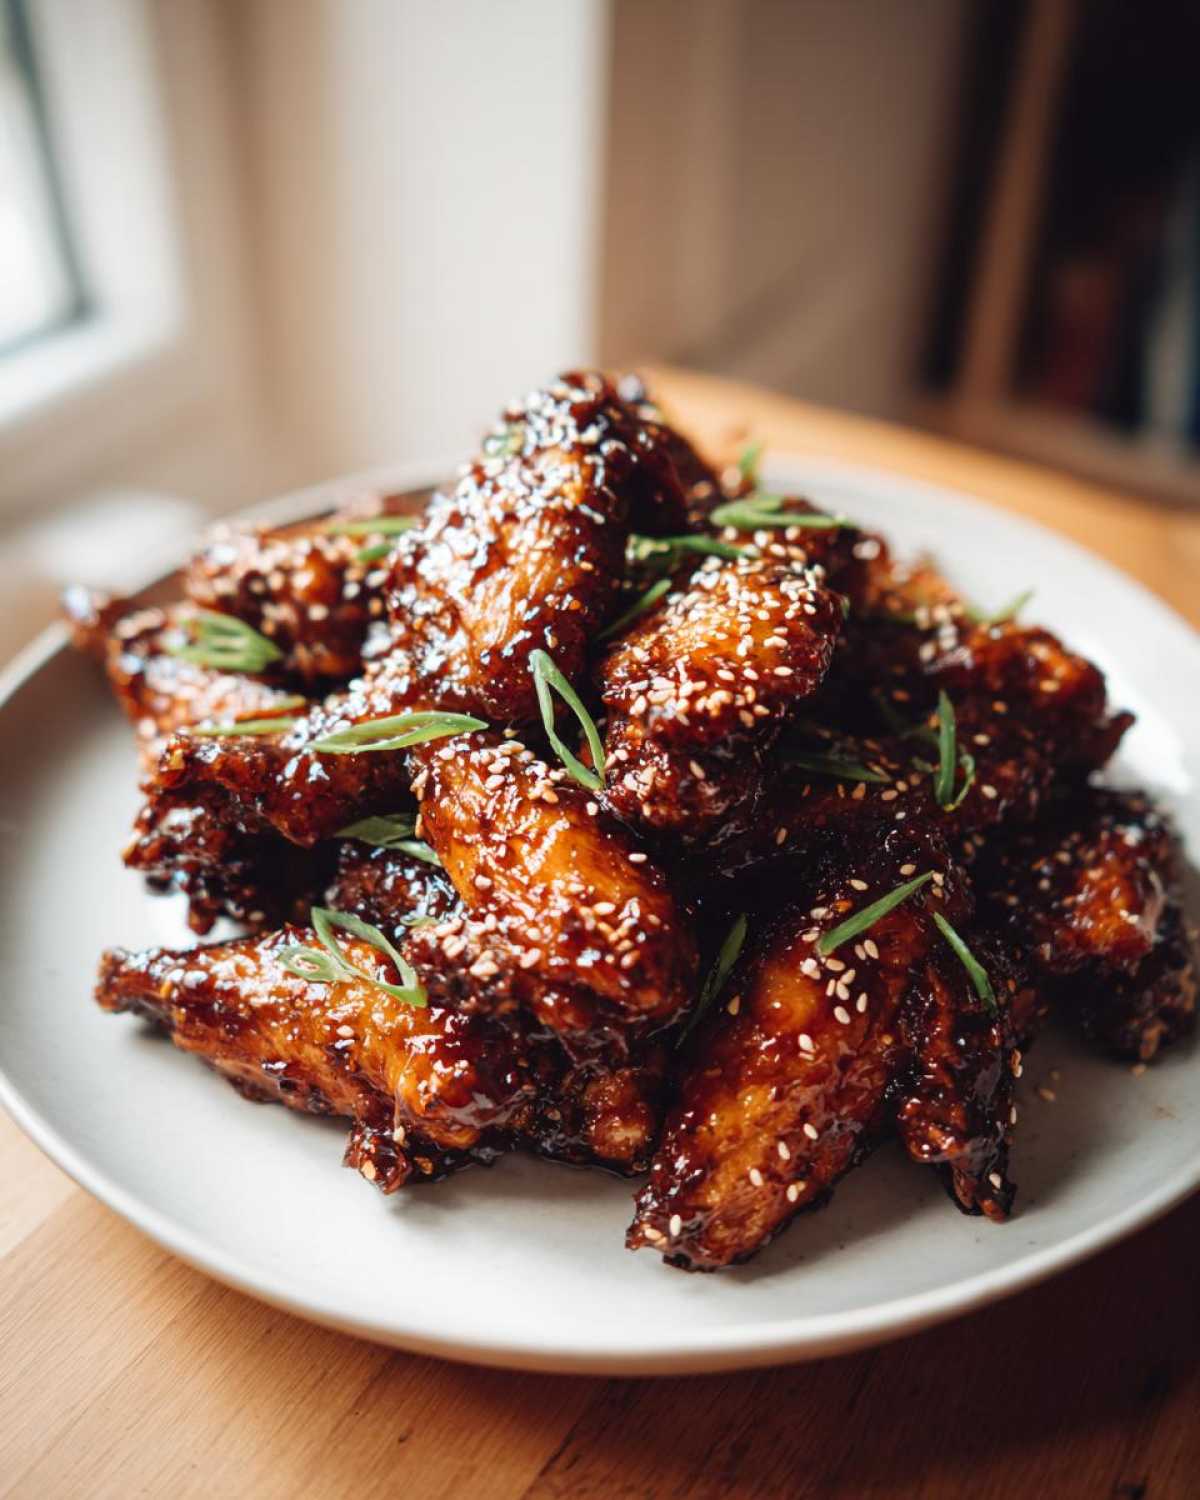
Why This Sticky Teriyaki Chicken Wings Oven Baked Recipe Works (E-E-A-T)
Okay, let’s talk science for a minute, because these aren’t just great wings—they are structurally superior wings! When you bake wings, the biggest fear is sogginess, right? Well, we blast that fear away with two specific tricks. First, the high heat and the baking powder work together to create tiny pores that wick moisture away from the skin during that initial bake. This is what gives you those fantastic Crispy Skin Baked Wings. Then, we use our glaze carefully, ensuring every piece gets coated perfectly.
It’s all about timing the sauce to seal in the crispiness without bathing the wings in liquid. This method builds layer upon layer of amazing texture and flavor. Honestly, it beats ordering wings out any day!
Achieving Crispy Skin for Sticky Teriyaki Chicken Wings Oven Baked
Listen up, this is non-negotiable if you want wings that taste oven-fried! You simply have to pat your wings bone-dry. Use paper towels until you think they are dry, and then pat them one more time. Seriously! After that, toss them with the baking powder—don’t skip it. Baking powder raises the pH level of the chicken skin, which helps it crisp up beautifully in the oven, regardless of the temperature we use. Keep them spaced out on that rack, too. Airflow is your friend here!
Building the Perfect Homemade Sticky Glaze
If your sauce runs off the minute you pull the wings out, you’ve got a thin sauce, not a proper glaze. That’s where the cornstarch slurry comes in. We simmer the teriyaki ingredients down first to concentrate the flavor, but it’s the slurry that transforms it into a thick, glossy coating. Whisking that cornstarch mixture in at the end gives you that glorious, thick, Homemade Sticky Glaze that clings perfectly to every nook and cranny. It caramelizes beautifully in that final little bake!
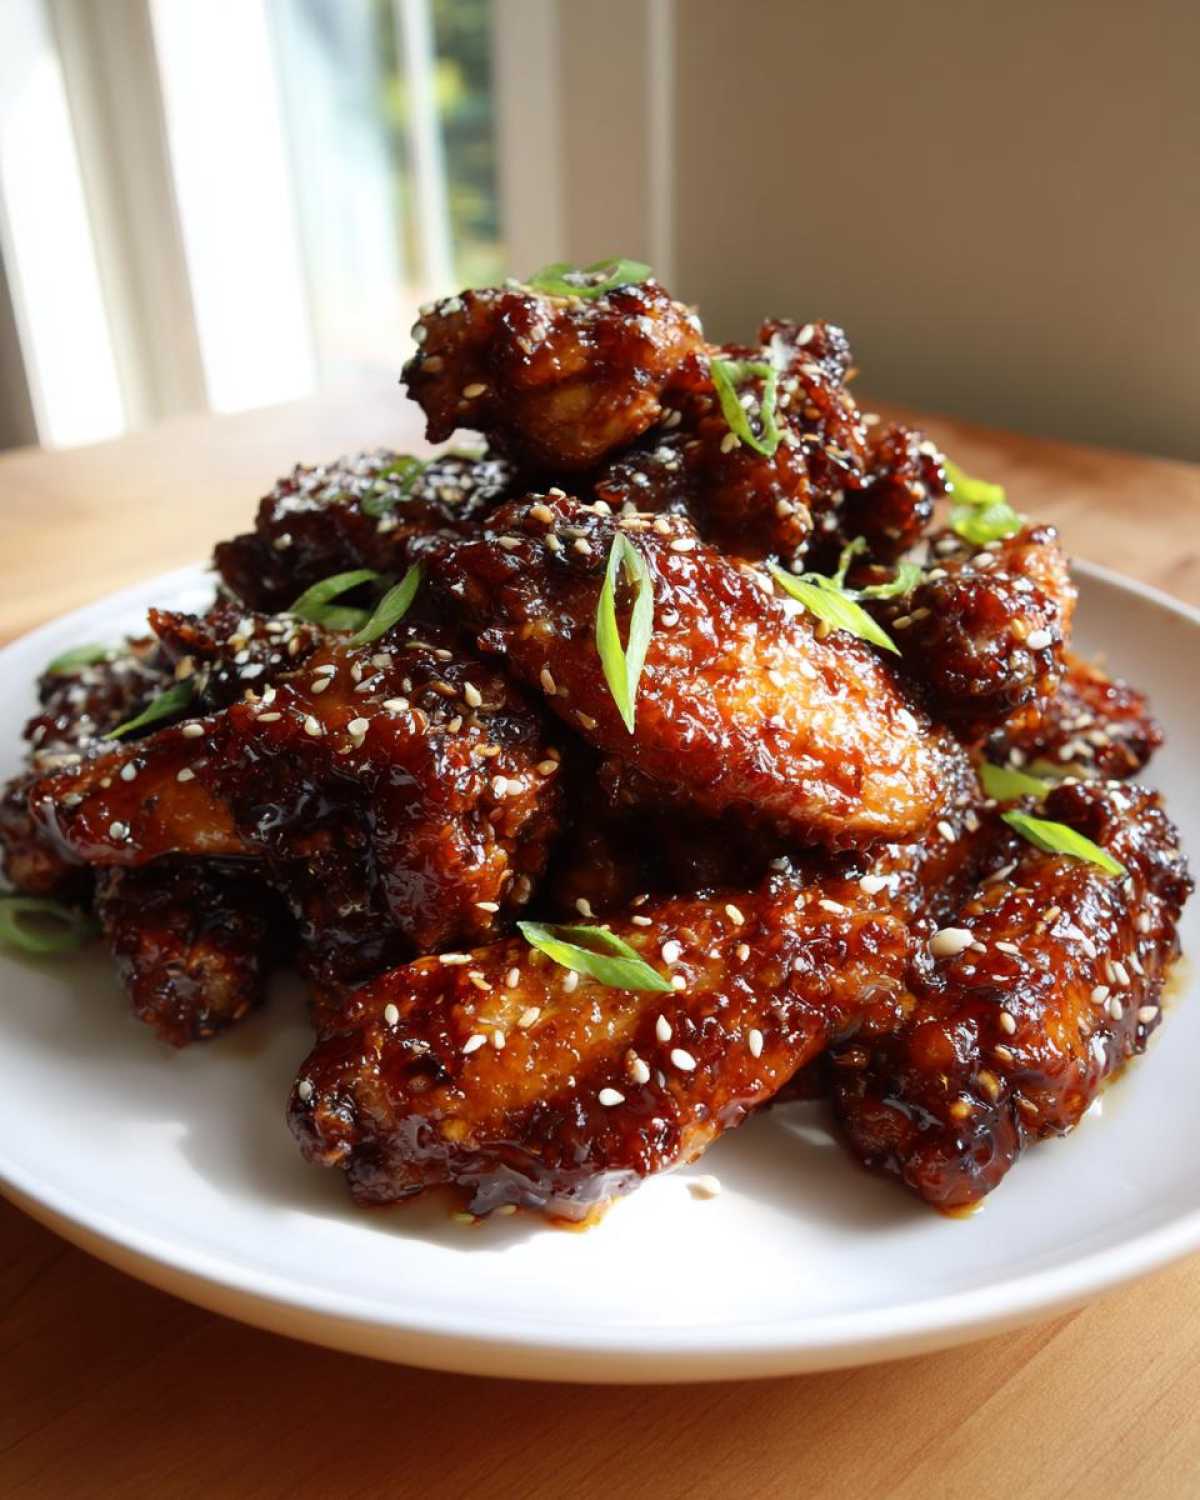
Ingredients for Sticky Teriyaki Chicken Wings Oven Baked
Gathering your supplies is half the battle, and I want you to have everything ready to go, because once those wings hit the rack, things move fast! For this Easy Teriyaki Wings recipe, precision really matters, especially with the glaze components. I always lay everything out right next to the stove so I can easily jump between making the sauce and managing the baking. Remember what I said? We need aluminum-free baking powder—it’s essential for getting that good crackle on the skin. Also, please make sure your brown sugar is nicely scooped and packed down into the measuring cup; it holds so much moisture and flavor!
You’ll need about two pounds of wings, split into flats and drumettes—no whole wings here, they cook unevenly. For the sauce, we’re grabbing soy sauce, sweet mirin (if you don’t have it, you can try my little trick mentioned later!), rice vinegar, fresh ginger, and garlic. Don’t forget the cornstarch and water for your slurry—that’s the glue for our sticky coating. And save those sesame seeds and green onions for the very end; they just add the final pop of color and freshness we love. If you’re looking for another simple flavor booster for your kitchen, you might enjoy my easy homemade garlic butter recipe while you’re grabbing spices!
I highly recommend double-checking you have every single measurement right before you start mixing. This Simple Teriyaki Sauce Recipe depends on that balance between salty soy sauce and sweet mirin and brown sugar. Get your list ready, grab those items, and then we can move on to the actual assembly!
Step-by-Step Instructions for Sticky Teriyaki Chicken Wings Oven Baked
Alright, let’s get cooking! This is where the magic happens, and believe me, following the timing here is crucial for getting that perfect finish on your Glazed Chicken Wings in Oven. We follow a precise path: bake to crisp, make the sauce while they bake, glaze, and then bake again to set that stickiness. Don’t try to rush the initial bake; that time is reserved for drying out the skin! If you need a quick refresher on the optimal heat, I always run my high-heat oven wings at baking chicken wings temperature guidelines, which is exactly where we are headed here.
Preparing the Wings for Baking Chicken Wings Recipe
First thing first: preheat that oven to 425 degrees Fahrenheit! You absolutely need that high heat right from the start. Grab a baking sheet, line it with foil—trust me, clean-up is easier—and put a wire rack on top of that foil. Line your wings up on the rack; they need space to breathe, literally! Now, grab your salt, pepper, and that crucial baking powder. Tumble the wings in and toss them until they look pale and dusty. We bake them for 25 minutes first, then flip them, and let them go for another 15 to 20 minutes until they look beautifully golden and feel truly crisp when you poke them.
Making the Simple Teriyaki Sauce Recipe
While those wings are getting their crunch on, you tackle the sauce. In a little saucepan, combine your soy sauce, mirin, brown sugar, vinegar, ginger, and garlic. Get that over medium heat and just let it bubble gently—stirring occasionally until the sugar melts away completely. Once it’s simmering nicely for about five minutes, it’s time for thickness! Whisk in that cornstarch slurry (cornstarch mixed with cold water) really well. Keep stirring constantly, and watch it transform! After just a minute or two, the sauce will coat the back of your spoon beautifully, making that Simple Teriyaki Sauce Recipe ready to go.
Glazing and Finishing Your Sticky Teriyaki Chicken Wings Oven Baked
When the wings come out of the oven, they should be crispy! Transfer them immediately to a big, clean bowl. Now, pour about half of that thick teriyaki glaze over them and toss gently to coat everything. This is the first layer of stickiness! Put those coated wings right back onto the wire rack. Bake them for just 5 more minutes. This step sets the first layer of glaze so it doesn’t just wipe off. Finally, take them out, pour the remaining sauce over them, give them one last loving toss, and they are done! Garnish them right away with sesame seeds and green onions while they’re hot.
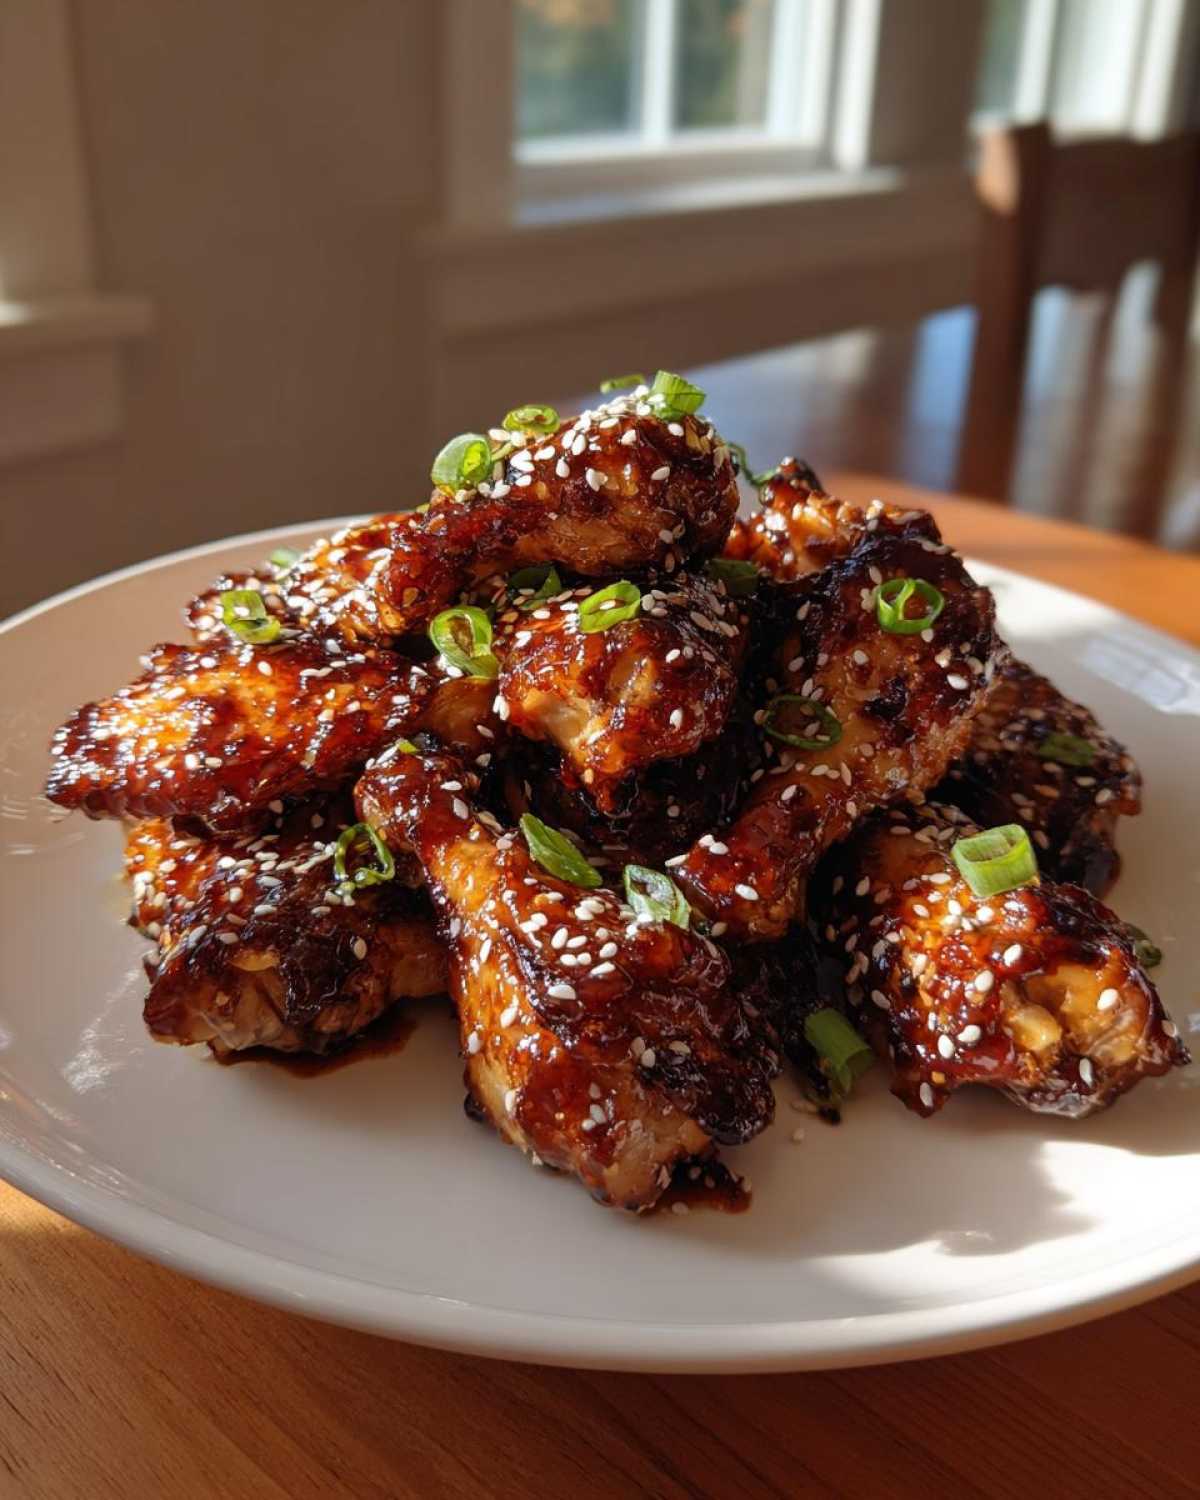
Tips for Perfect Sticky Teriyaki Chicken Wings Oven Baked Every Time
I know we covered a lot of ground already, but just like any great recipe, these Sticky Teriyaki Chicken Wings Oven Baked benefit from a few insider secrets I’ve picked up over the years. If you follow these little tweaks, you’re practically guaranteed to have the best batch of Game Day Appetizers on the block!
First thing, let’s talk about dryness one last time. I know I sound like a broken record, but I cannot stress this enough: wing dryness dictates crispiness. If you have time and you aren’t using the baking powder trick, my favorite way to prep them, try letting them sit uncovered in the fridge for a few hours after patting them dry. Seriously! That cold air acts like a natural dehydrator on the skin surface. It takes patience, but wow, does it pay off when you pull those beautifully crisp wings out.
Now, what if you’re staring at your pantry and realize you are totally out of mirin? Don’t panic! Mirin is sweet rice wine, and while it adds a layer of authentic depth, we can cheat a little. My go-to substitute for this Oven Roasted Wings Dinner is dry white wine—any cheap bottle works—but you must add about a teaspoon of plain granulated sugar to mimic that sweetness. Mix that substitute into your sauce ingredients instead of the mirin, and you’ll be just fine. For quick sauce adjustments later on, having my guide on a quick wing sauce recipe handy is always smart!
Another small thing about the glaze: If you find after the final bake that your wings still aren’t sticky enough for your taste—maybe your heat was a little low or your simmer time was short—you can always use that trick mentioned in the notes! Reserve a tiny bit of that thickened glaze right before you coat the wings the first time. Once the wings are bronzed and ready for the final 5 minutes, drizzle that extra bit on top. That second layer of sauce right before serving locks in maximum shine and stickiness. It’s a little extra step, but when you want that glorious sheen, it’s worth every second!
Storage & Reheating Instructions for Glazed Chicken Wings in Oven
Nobody likes leftover wings that have gone sad and chewy, right? Especially when you’ve worked so hard to get that sweet, sticky glaze just right! The good news is that these Glazed Chicken Wings in Oven reheat surprisingly well, provided you follow my golden rules for storage. Never, ever put hot wings directly into a sealed container in the fridge. They steam themselves! You want that residual moisture to evaporate.
When you have leftovers from your batch of Sticky Teriyaki Chicken Wings Oven Baked, let the wings cool completely on a plate or a simple cooling rack at room temperature for about 30 minutes. This lets the remaining condensation escape. Then, transfer them to an airtight container. They should keep perfectly nicely in the refrigerator for up to three days. I try not to let them hang around longer than that, since the texture starts to change.
Reheating is where we bring the crunch back! Forget the microwave—it turns everything rubbery, and trust me, it’s the enemy of crispy skin. My absolute favorite method is the oven or even a toaster oven if you only have a few wings.
The Best Way to Reheat Crispy Wings
Set your oven to about 375 degrees Fahrenheit. You want it hot enough to crisp up that exterior before the inside dries out. Lay the cooled wings out in a single layer on a wire rack placed over a baking sheet—just like we did when we first cooked them! Pop them in for about 8 to 10 minutes. If they were already heavily coated in sauce, you might want to skip the final glaze step for reheating, or just give them a quick light brush of regular teriyaki sauce, not the thick, reduced glaze.
If you’re in a huge hurry (like during a tense football game), the air fryer works wonders too, though I know not everyone has one! Just 4 minutes at 350 degrees usually does the trick to bring back some life to the skin. The goal is just to heat them through and re-crisp the surface. They should taste almost as good as they did fresh out of the oven once you follow this reheat routine!
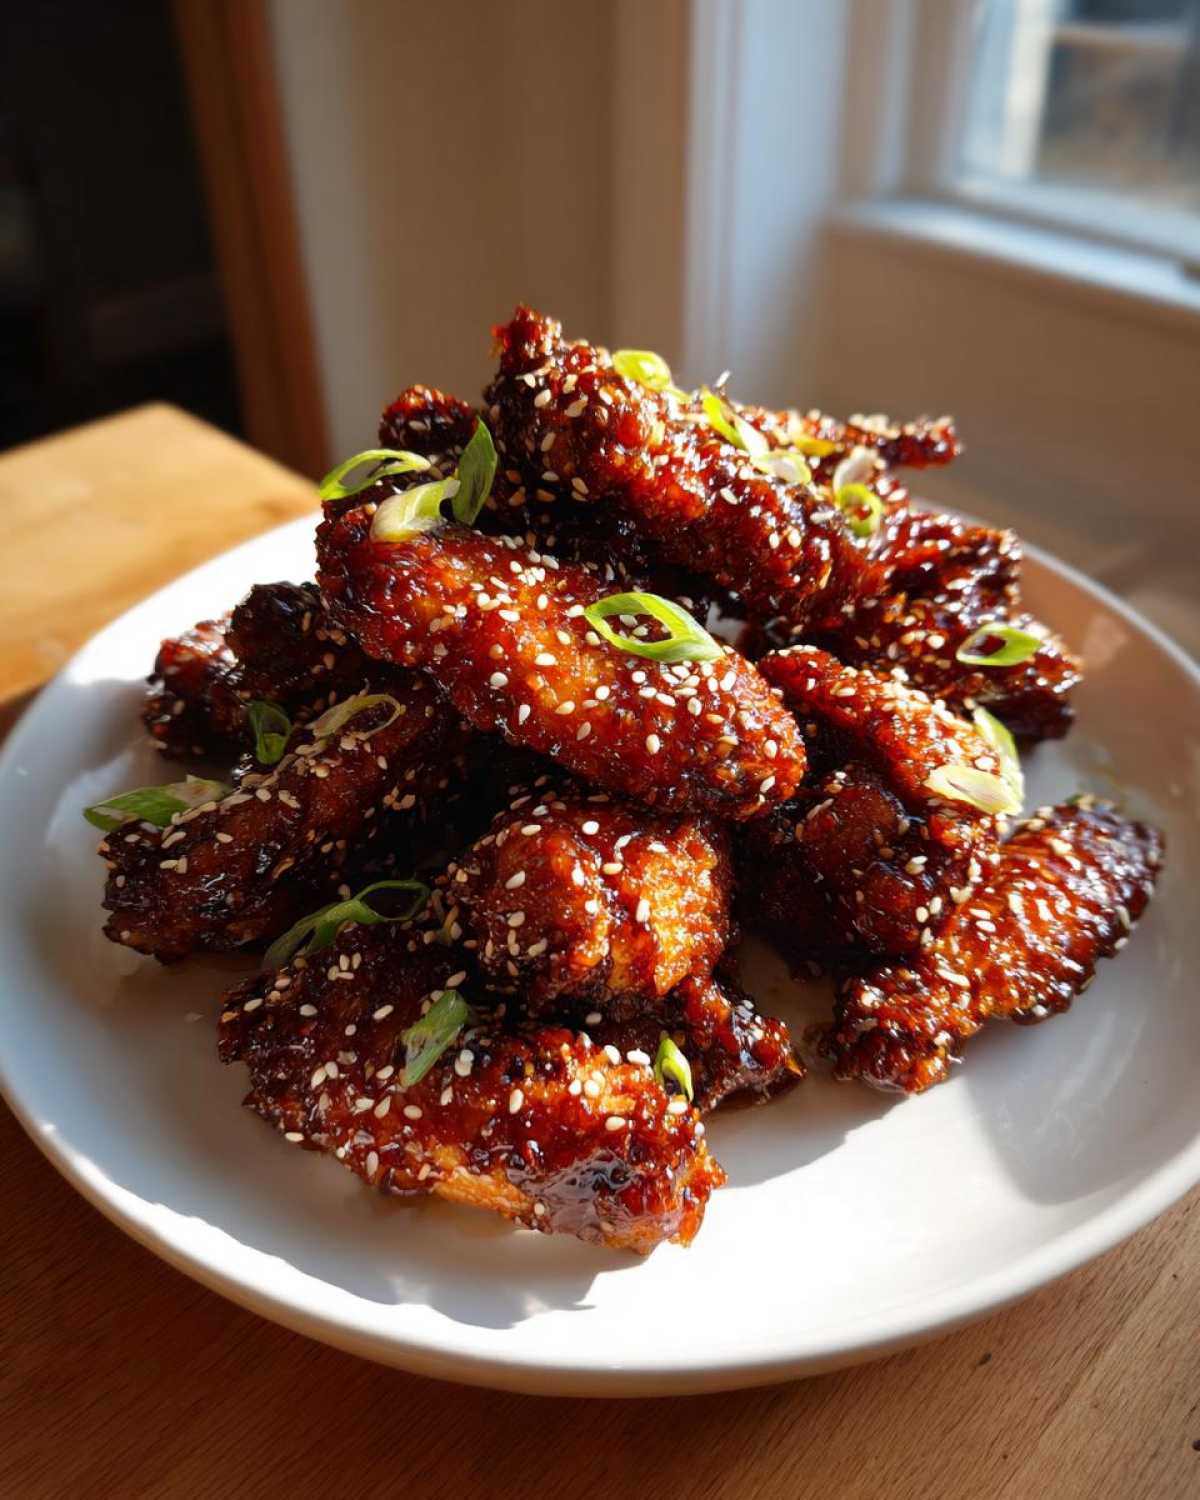
Serving Suggestions for Your Weeknight Chicken Wings
I always serve these Sticky Teriyaki Chicken Wings Oven Baked as a main course on a busy Tuesday night, not just for game day appetizers. They are so satisfying, but you definitely need a couple of fresh sides to balance out that intense sweet and savory profile, you know? You don’t want everything to be heavy!
My absolute go-to side for these Weeknight Chicken Wings is something green and quick. Steamed broccoli is a winner because it soaks up any leftover glaze drips on your plate, which is always a delight. If you’re feeling like stirring up something slightly more involved, I have a fantastic teriyaki chicken stir-fry recipe that uses a lot of similar fresh veggies, so you might already have the ingredients! Just substitute the chicken breast for a crisp slaw instead.
When it comes to carbohydrates, skip the heavy fries! Simple, fluffy white rice is perfect for absorbing all that sticky goodness. If you want to be slightly healthier, brown rice works, but honestly, the simple white rice texture just feels right with this kind of sauce.
Quick Side Dishes to Pair with Teriyaki Wings
Here are my favorite super-quick pairings that pull the meal together without adding stress to your weeknight:
- Fluffy White Rice: Plain and simple, the perfect vehicle for the extra sauce.
- Simple Steamed Broccoli: Drizzle it with a tiny touch of the reserved glaze or just some sesame oil.
- Quick Vinegar Slaw: I mix shredded cabbage and carrots with rice vinegar, a pinch of sugar, and salt. Total crispness contrast!
- Cucumber Salad: Thinly sliced cucumbers tossed with a little sesame oil and vinegar—so refreshing against the sticky glaze.
If you need to make the sides ahead of time, the slaw is perfect for that, as it just gets better sitting in the fridge for a few hours. These wings are so flavorful, you really don’t need much else on the table!
Frequently Asked Questions About Sticky Teriyaki Chicken Wings Oven Baked
I always get questions when people try this recipe for the first time, usually about swapping ingredients or bending the cooking rules. That’s totally fine! Cooking is all about testing boundaries, but for these Sticky Teriyaki Chicken Wings Oven Baked, the baking powder and the rack setup are the structural foundation, so try not to skip those if you can help it.
Can I make the Sticky Teriyaki Chicken Wings Oven Baked ahead of time?
Yes, you absolutely can prep these ahead! If you want to do Part A ahead of time (which is great for parties), I suggest baking the wings completely through until crispy, letting them cool completely, and then storing them. When you are ready to serve, you can reheat them briefly uncovered in the oven, and then proceed with the glazing steps, making sure to do that final 5-minute bake to set the glaze nicely. If you glaze them fully ahead of time, they might lose some crispness in the fridge, so try to save that final sticky coat for as close to serving time as possible. For more simple prep ideas, check out my guide on easy teriyaki wings for quick baking tips.
How do I make these Asian Chicken Wings healthier?
That’s a great question, especially if you’re trying to lighten up those Game Day Appetizers! Since we are already skipping the deep fryer for this Healthy Baked Wings Alternative, we are already ahead of the curve. To make them even lighter, try trimming off any thick, visible fat deposits on the wings before you season them. Also, when you make the glaze, cut about one tablespoon of that brown sugar out. The mirin and the natural sweetness from the reduction will still provide plenty of flavor, but you save a little on the sugar content. They’ll still be wonderfully sticky, I promise!
Can I skip the baking powder?
Oh, boy, I wish you didn’t have to ask that! If you have to skip it, know that you are sacrificing the incredible crispiness we built this recipe around. Baking powder is the secret ingredient that dries the skin out so it actually crisps up in the oven environment. If you skip it, you’ll end up with soft, baked skin that just gets soggy when you toss it in the sauce. It’s not the end of the world, but they won’t be the same! You’ll basically be making standard Baked Chicken Wings Recipe instead of the sticky, oven-fried version.
What if I don’t have mirin for the sauce?
I covered this a little in the tips section, but it’s a great FAQ topic! Mirin is key for that authentic sweet, slightly acidic depth you get in proper Japanese-style sauces. If you are truly out, use a dry white wine—even something cheap like Pinot Grigio works—and add about one teaspoon of granulated sugar to mimic the sweetness of the mirin. It’s a close enough substitute for a Weeknight Chicken Wings meal!
Can I use a regular baking dish instead of a wire rack?
You can, but you’ll really compromise the crisp factor! If you use a solid baking dish, the bottom of the wings will sit right in their rendered fat and any pooling sauce, leading to soggy bottoms. The entire point of the wire rack is to allow air to circulate completely around the wing so both the top and bottom can crisp up simultaneously. If you absolutely must use a dish, line it with foil, but try to prop up the wings slightly on something heat-safe—even balled up aluminum foil underneath helps, but it’s tricky!
Estimated Nutritional Information for Sticky Teriyaki Chicken Wings Oven Baked
Let’s get real for a second—these wings are covered in a rich, sweet glaze because that’s what makes them amazing! So, they aren’t exactly a light salad, but they are far healthier than deep-fried versions, which is why we love this Oven Roasted Wings Dinner method so much. I’ve put together the estimates we calculated based on a serving size of four wings. Please remember, this is just a guide!
Your exact numbers will change based on the brand of soy sauce you use (hello, sodium!), how fatty your wings were to start, and how much sugar you managed to scrape off the bottom of the pot during cleanup—which I fully support, by the way!
Here is the breakdown for what we estimate one serving (four wings) provides:
- Calories: 350
- Fat: 18g (About 5g Saturated Fat)
- Protein: 25g
- Carbohydrates: 20g (with about 1g of Fiber)
- Sugar: 18g
- Sodium: 750mg
- Cholesterol: 90mg
See? High in protein, and honestly, the fat content is mostly from the skin, which we worked so hard to make crispy! If you are focused on keeping the sodium down for your Family Friendly Chicken night, make sure you use low-sodium soy sauce next time you make this Sticky Teriyaki Chicken Wings Oven Baked recipe. It makes a huge difference!
Share Your Experience Making These Wings
Okay, now that you’ve got the secrets to these incredibly sticky and crunchy wings, I absolutely need to know how they turned out for you! I put my heart and soul into making sure this Sticky Teriyaki Chicken Wings Oven Baked method is foolproof, but I live for hearing about your kitchen wins.
Did the baking powder truly surprise you? Did your glaze look thick and glossy? Don’t be shy! Drop a rating right here on the recipe card—did it earn five stars in your house? Five stars means you’re immediately adding this to your rotation of favorite Game Day Appetizers, and that makes me so happy!
And if you’re a big sharer (like me!), take a quick picture of your finished wings—show off that sticky shimmer! Tag me on social media. Seeing your perfectly glazed wings makes my whole week. You can find all my latest kitchen adventures over on my blog, so come join the fun there too!
Whether you served them up for a big party or just needed a fantastic Weeknight Chicken Wings fix, I’m eager to hear all about the delicious results. Happy cooking, everyone!
PrintSticky Teriyaki Chicken Wings Oven Baked
A simple recipe for making flavorful, sticky teriyaki chicken wings using your oven. This method helps achieve crispy skin before coating the wings in a thick, sweet, and savory glaze.
- Prep Time: 15 min
- Cook Time: 50 min
- Total Time: 65 min
- Yield: 4 servings
- Category: Appetizer
- Method: Baking
- Cuisine: Asian
- Diet: Low Lactose
Ingredients
- 2 lbs chicken wings, separated into flats and drumettes
- 1 tablespoon baking powder (aluminum-free)
- 1 teaspoon salt
- 1/2 teaspoon black pepper
- 1/2 cup soy sauce
- 1/2 cup mirin (sweet rice wine)
- 1/4 cup packed brown sugar
- 2 tablespoons rice vinegar
- 1 tablespoon grated fresh ginger
- 2 cloves garlic, minced
- 1 teaspoon sesame oil
- 1 tablespoon cornstarch mixed with 2 tablespoons cold water (slurry)
- Sesame seeds, for garnish
- Sliced green onions, for garnish
Instructions
- Preheat your oven to 425 degrees Fahrenheit (220 degrees Celsius). Line a large baking sheet with foil and place a wire rack on top of the foil.
- Pat the chicken wings very dry using paper towels. In a large bowl, toss the wings with baking powder, salt, and pepper until evenly coated. The baking powder helps dry the skin for crisping.
- Arrange the wings in a single layer on the wire rack. Do not overlap them.
- Bake for 25 minutes. Flip the wings over and bake for another 15 to 20 minutes, or until the skin is golden brown and crisp.
- While the wings bake, prepare the teriyaki glaze. In a small saucepan, combine soy sauce, mirin, brown sugar, rice vinegar, ginger, garlic, and sesame oil.
- Bring the mixture to a simmer over medium heat, stirring until the sugar dissolves. Let it simmer gently for 5 minutes.
- Whisk the cornstarch slurry into the simmering sauce. Continue to cook, stirring constantly, until the sauce thickens enough to coat the back of a spoon, about 1 to 2 minutes. Remove from heat.
- Once the wings are cooked, transfer them to a large, clean bowl. Pour about half of the prepared teriyaki glaze over the hot wings. Toss gently until all wings are well coated.
- Return the glazed wings to the wire rack on the baking sheet. Bake for an additional 5 minutes to set the glaze.
- Remove from the oven. Toss the wings with the remaining glaze just before serving. Garnish with sesame seeds and sliced green onions.
Notes
- For extra sticky wings, reserve a small amount of the thickened glaze to brush on during the final 5 minutes of baking.
- If you do not have mirin, you can substitute it with dry white wine mixed with 1 teaspoon of sugar.
- Ensure the wings are completely dry before seasoning; this is key for crispy skin in the oven.
Nutrition
- Serving Size: 4 wings
- Calories: 350
- Sugar: 18
- Sodium: 750
- Fat: 18
- Saturated Fat: 5
- Unsaturated Fat: 13
- Trans Fat: 0
- Carbohydrates: 20
- Fiber: 1
- Protein: 25
- Cholesterol: 90