

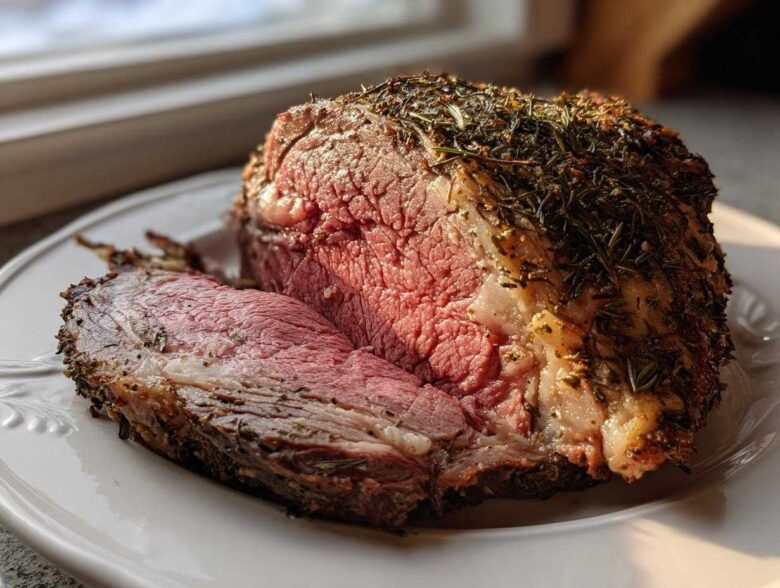
Look, when a big holiday dinner rolls around, the main event—that magnificent piece of beef—shouldn’t feel like a high-stakes gamble. We’ve all been there, right? Staring at a massive cut of meat, terrified we’re going to serve grey, dry disappointment instead of that gorgeous, pink centerpiece. Well, I’m here to tell you, Owen and I perfected this method through a few very nerve-wracking attempts so you don’t have to stress!
This recipe for a herb-crusted **rib roast** is the absolute headline news for your next celebration. We moved past viewing dinner as just fuel a long time ago; this is about announcing good news! This isn’t the world’s most complicated way to make a stunning **Standing Rib Roast**. No, this is our tested, trusted, two-temperature oven guide that consistently delivers a spectacular **Prime Rib Recipe** that practically guarantees that perfect medium-rare center. If you want to know more about our philosophy of making joy the main course, check out our little story right here. Get ready to report some delicious news!
Why This Herb Crusted Rib Roast is Your New Holiday Hero
Honestly, when you spend money on a gorgeous cut like this, you need a recipe that works. This method is just so satisfying because it eliminates the guesswork. Forget dry edges and chalky insides; this is how we make sure we get that unbelievably **Juicy Roast Beef** every single time we put it in the oven.
It’s foolproof, packed with flavor, and always screams “special occasion.” Plus, Owen always says this results in the most impressive **Tender Beef Roast** he’s ever tasted. I think you’ll agree once you try it!
- It guarantees edge-to-edge pinkness—no more measuring disasters!
- The herb crust locks in all those amazing juices.
- It’s surprisingly fast for such a show-stopping cut.
If you’re looking for other unbelievably juicy mains that make you feel like a culinary rockstar, you have to check out our classic meatloaf recipe; it’s just as reliably delicious!
Achieving the Perfect Medium Rare Rib Roast
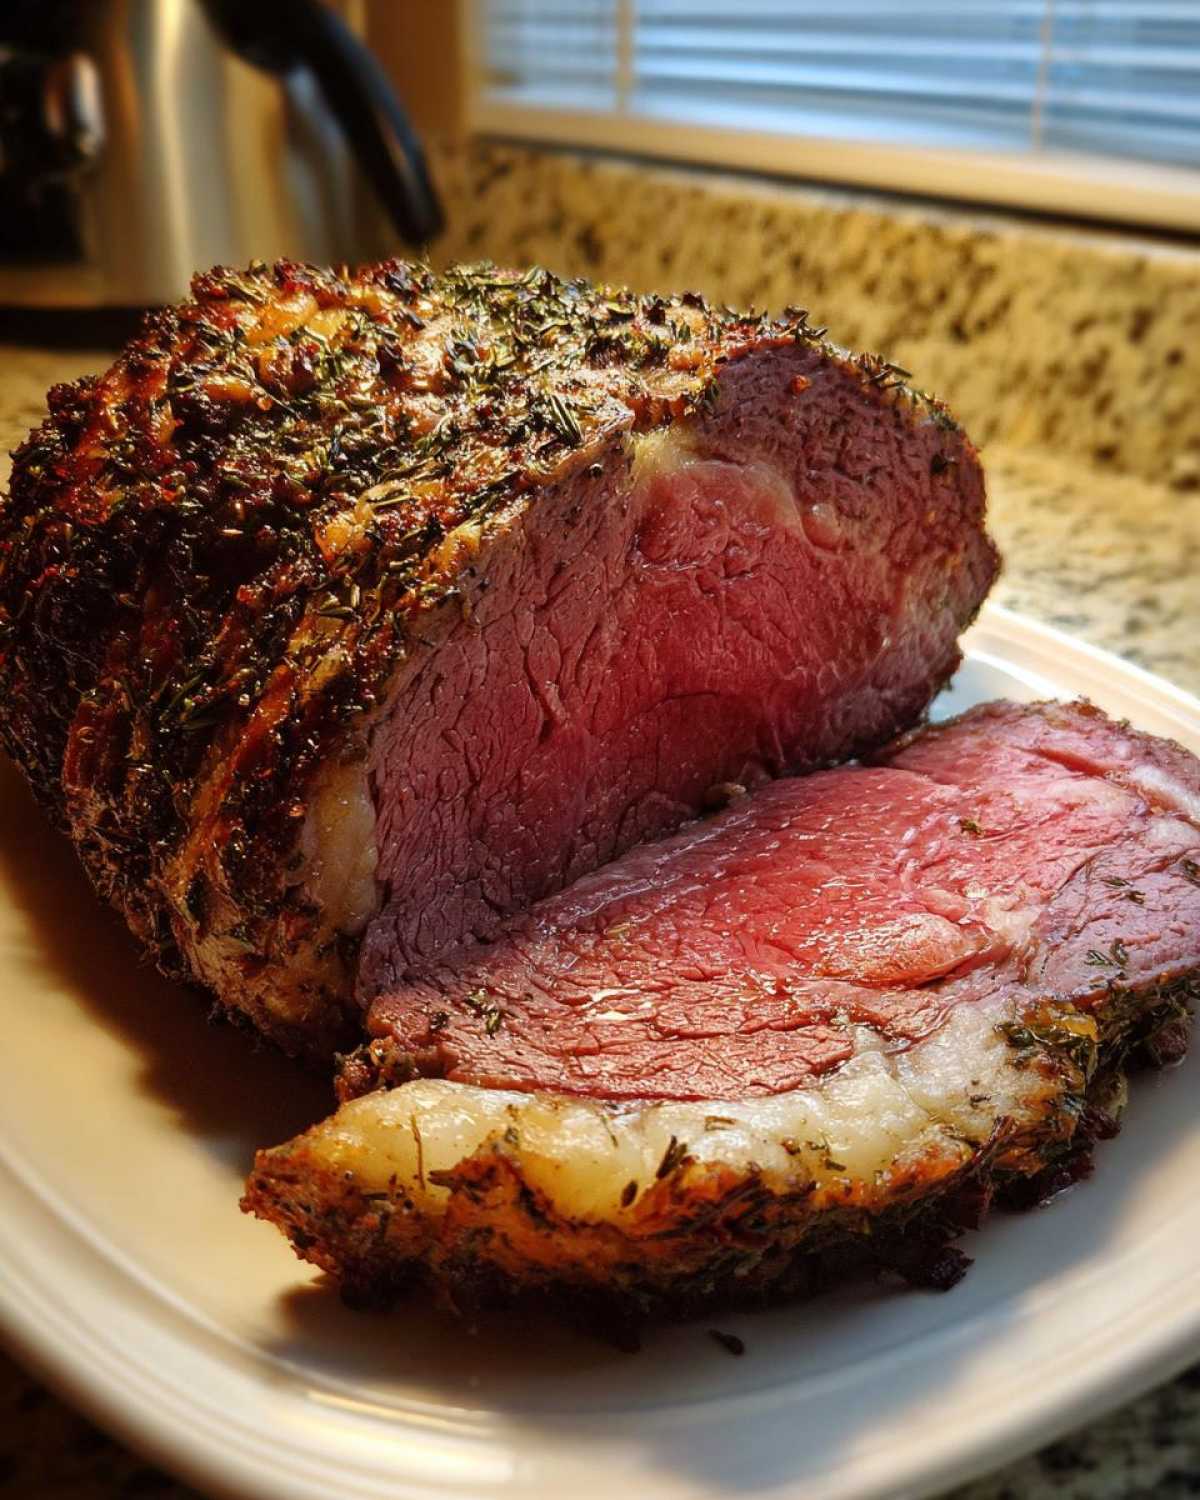
The secret sauce, or should I say, the secret temperature switch, is what seals the deal for that **Perfect Medium Rare Roast**. We start hot, really hot, at 450°F for just 15 minutes. That initial blast creates a beautiful, savory seal on the outside of the meat. Then, we knock the heat way down to 325°F for the long, slow cook.
Don’t try to guess this part, friends! Pull out that meat thermometer—it’s your best friend for a big roast like this. We aim to pull it out right when it hits 125°F to 130°F. Trust the thermometer, not the clock, and you’ll nail that medium-rare center every time!
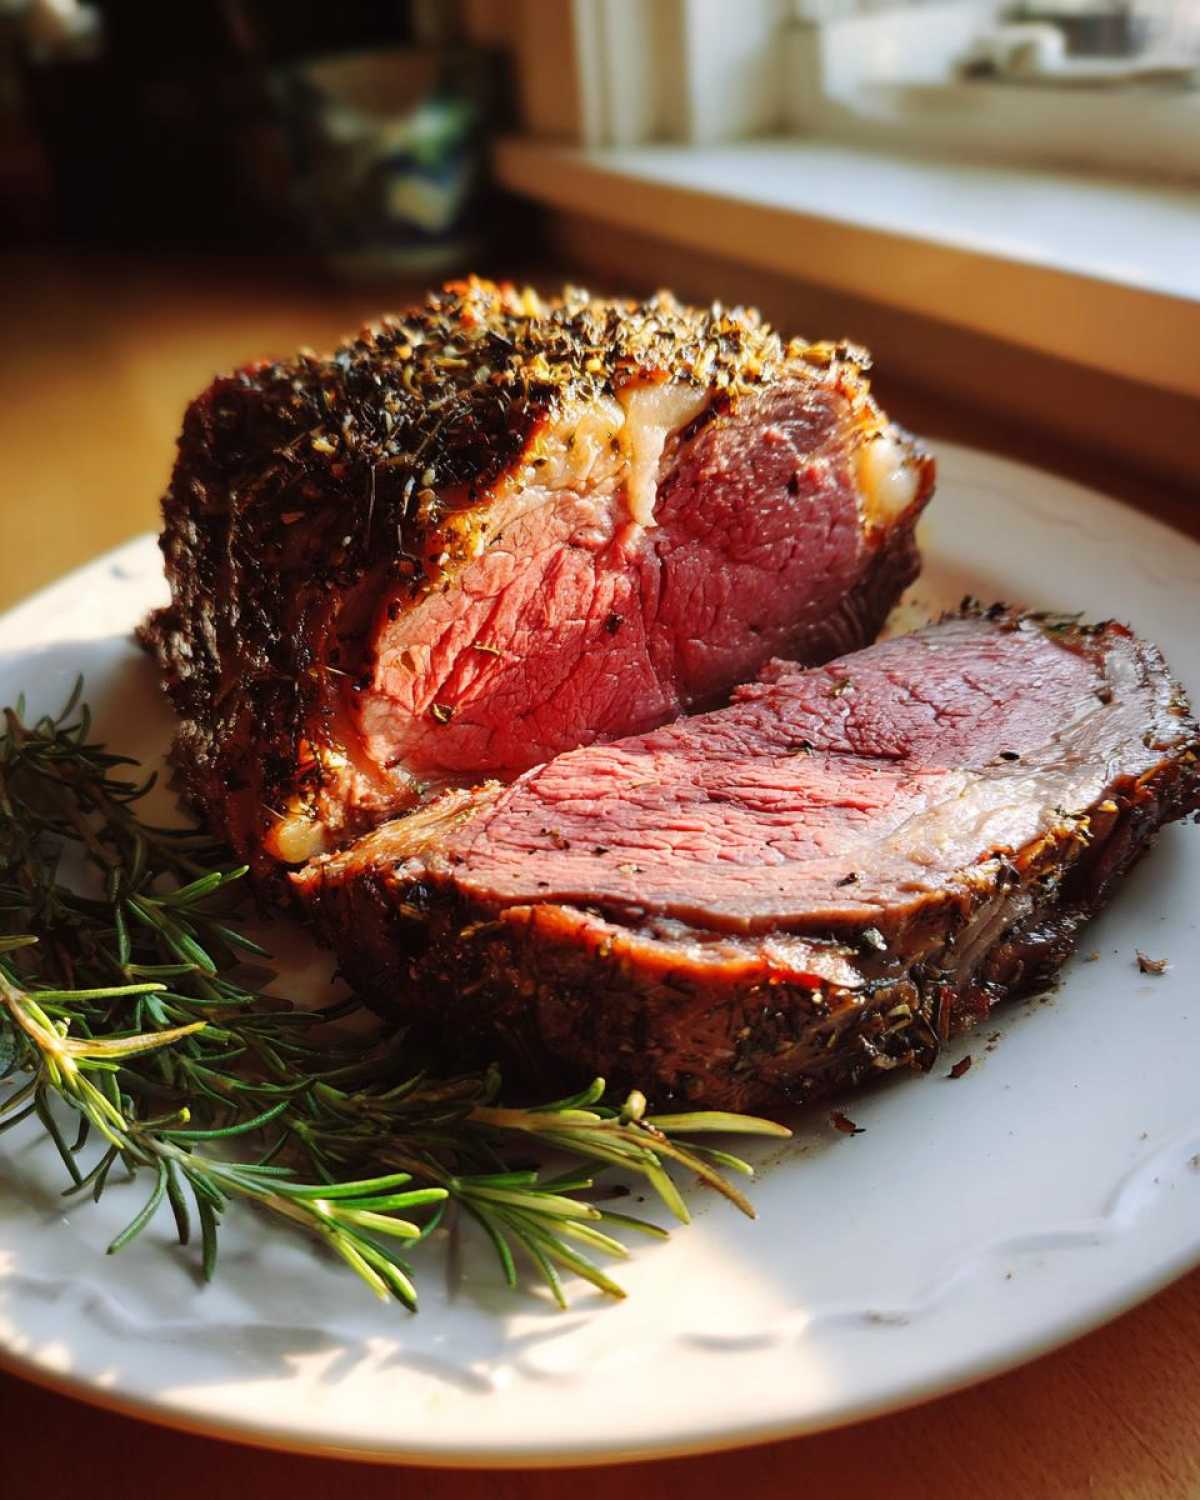
Flavor Profile: The Garlic and Herb Crust
Our **Herb Crusted Roast** isn’t just about looks; it’s the flavor backbone of this whole dish. We use a sticky paste of Dijon mustard, tons of garlic, rosemary, and thyme. When that mixture hits the high initial oven heat, the herbs toast up wonderfully, creating this intensely aromatic, crunchy shell.
It’s savory, earthy, and it complements the richness of the beef perfectly, rather than fighting it. Seriously, the smell that fills the house when this is cooking? That’s the smell of good news arriving!
Gathering Ingredients for Your Rib Roast
Okay, this is the fun part where we gather our ammunition for making this **rib roast** unforgettable! Remember, the quality of the meat makes a huge difference, especially with such a simple cooking method. If you can swing it, always splurge for USDA Prime; the marbling gives you the best chance at that melt-in-your-mouth texture. If Prime isn’t in the cards this year, a good Choice grade will still knock your socks off using this technique.
Here is what you’ll need to create that amazing crust:
- 1 (4 to 6 pound) Standing Rib Roast (Prime Rib), 2 to 3 ribs
- 3 tablespoons kosher salt
- 1 tablespoon freshly ground black pepper
- 2 tablespoons olive oil
- 6 cloves garlic, minced
- 2 tablespoons fresh rosemary, chopped
- 1 tablespoon fresh thyme leaves
- 1 tablespoon dried oregano
- 1 tablespoon Dijon mustard
This list seems simple, but every ingredient pulls its weight! You want to be generous with the salt and pepper; this is a big piece of beef and it needs bold seasoning. I always keep my favorite garlic butter recipe handy for serving later, but for the crust itself, we stick to these fundamentals for the best savory coating.
Ingredient Notes and Substitutions for Your Rib Roast
Let’s talk quickly about the roast size. We planned this recipe around 4 to 6 pounds—that’s usually 2 or 3 ribs—which keeps our roasting time manageable. If you go much bigger, you’ll definitely need to adjust the time based strictly on the thermometer, otherwise, the middle might be cold when the outside is done!
You absolutely should use fresh herbs if you can get them; the flavor is unmatched for this **Herb Crusted Roast**. If you must use dried herbs, cut the measurement in half across the board, because dried herbs are much more potent. And don’t skip the Dijon mustard! It’s not really there for a strong mustard flavor; it acts like the glue holding that gorgeous herb paste right onto the beef while it roasts. It’s a crucial binder!
How to Cook Rib Roast: The Foolproof Oven Method
Alright, this is where we get down to brass tacks! Remember how I told you the secret to a great **rib roast** is showing up prepared? The very first thing you need to do, long before you even think about turning the oven on, is pull that beef out of the fridge. I mean it! You need that roast to sit out on the counter for at least two to three hours. Letting it come up closer to room temperature helps it cook evenly. If you try to roast it cold, you’re asking for that grey band around the edges, and we are trying to avoid that, right?
When Owen watches me do this, he always reminds me to check the preheat setting. You need that oven screaming hot before the roast even goes in. So grab your roasting pan; maybe you want to check out how I get my chicken skin ultra-crispy because the principles of a good hot start are similar! Let’s build that beautiful crust.
Preparation: Seasoning and Creating the Herb Paste
First things first: pat, pat, pat that roast dry with paper towels. We’re making an **Oven Roasted Beef** that needs a crust, and moisture is the enemy of crust! Once it’s bone-dry, drizzle it lightly with the olive oil, then season it aggressively with salt and pepper all over. Don’t be shy here.
Next, take that lovely herb and garlic paste we mixed up—the rosemary, thyme, oregano, garlic, and that snappy Dijon. Use your hands and press that mixture firmly onto every bare surface of the beef. Think of it like giving your roast a wonderful, aromatic mud mask! Make sure it sticks well; that’s the flavor shield protecting the meat.
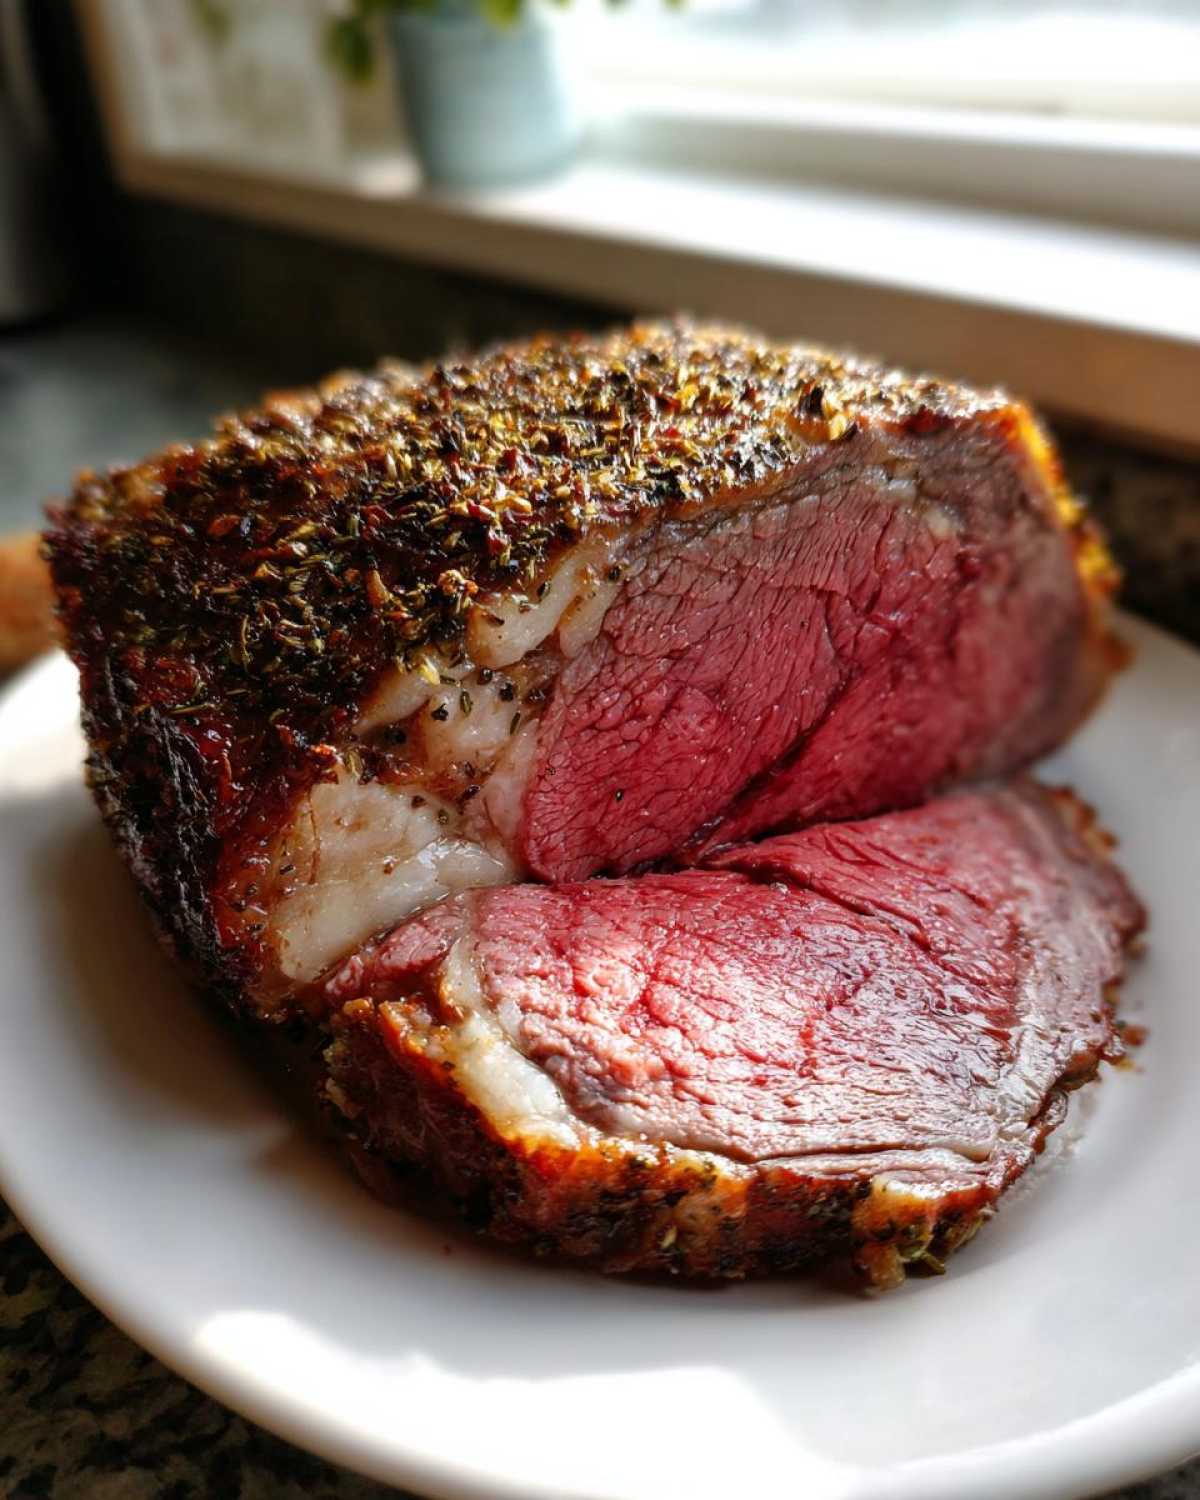
Roasting Schedule for a **Perfect Medium Rare Roast**
Here is the temperature dance that guarantees perfection. Get that oven up to 450 degrees Fahrenheit. Put the roast fat-side-up in the pan (a rack underneath is nice if you have one, but not strictly necessary for two ribs!). Roast it hard right there at 450°F for exactly 15 minutes. This is just the sear—it’s setting up the crust.
After those 15 minutes are up, *immediately* drop the temperature down to 325°F. Now, the thermometer comes out! Poke it into the thickest part, avoiding the bone. We are hunting for 125°F to 130°F for that ideal **Perfect Medium Rare Roast**. Keep checking it, but don’t open the door too often! This lower temperature cook time depends entirely on your actual roast size.
Crucial Resting Period for Your **Rib Roast**
When that thermometer hits 130°F, pull the pan out of the oven immediately! This is almost as important as the cooking itself, so please don’t skip this step if you want a **Juicy Roast Beef**.
Take the roast out of the pan and tent it *loosely* with foil. I mean loose—you don’t want the foil touching the crust and making it steam! You need to let it rest for a minimum of 15 to 20 minutes. I know, waiting is the hardest part, but during this rest, the juices redistribute throughout the meat and the temperature climbs another few degrees. That’s carryover cooking working its magic for you!
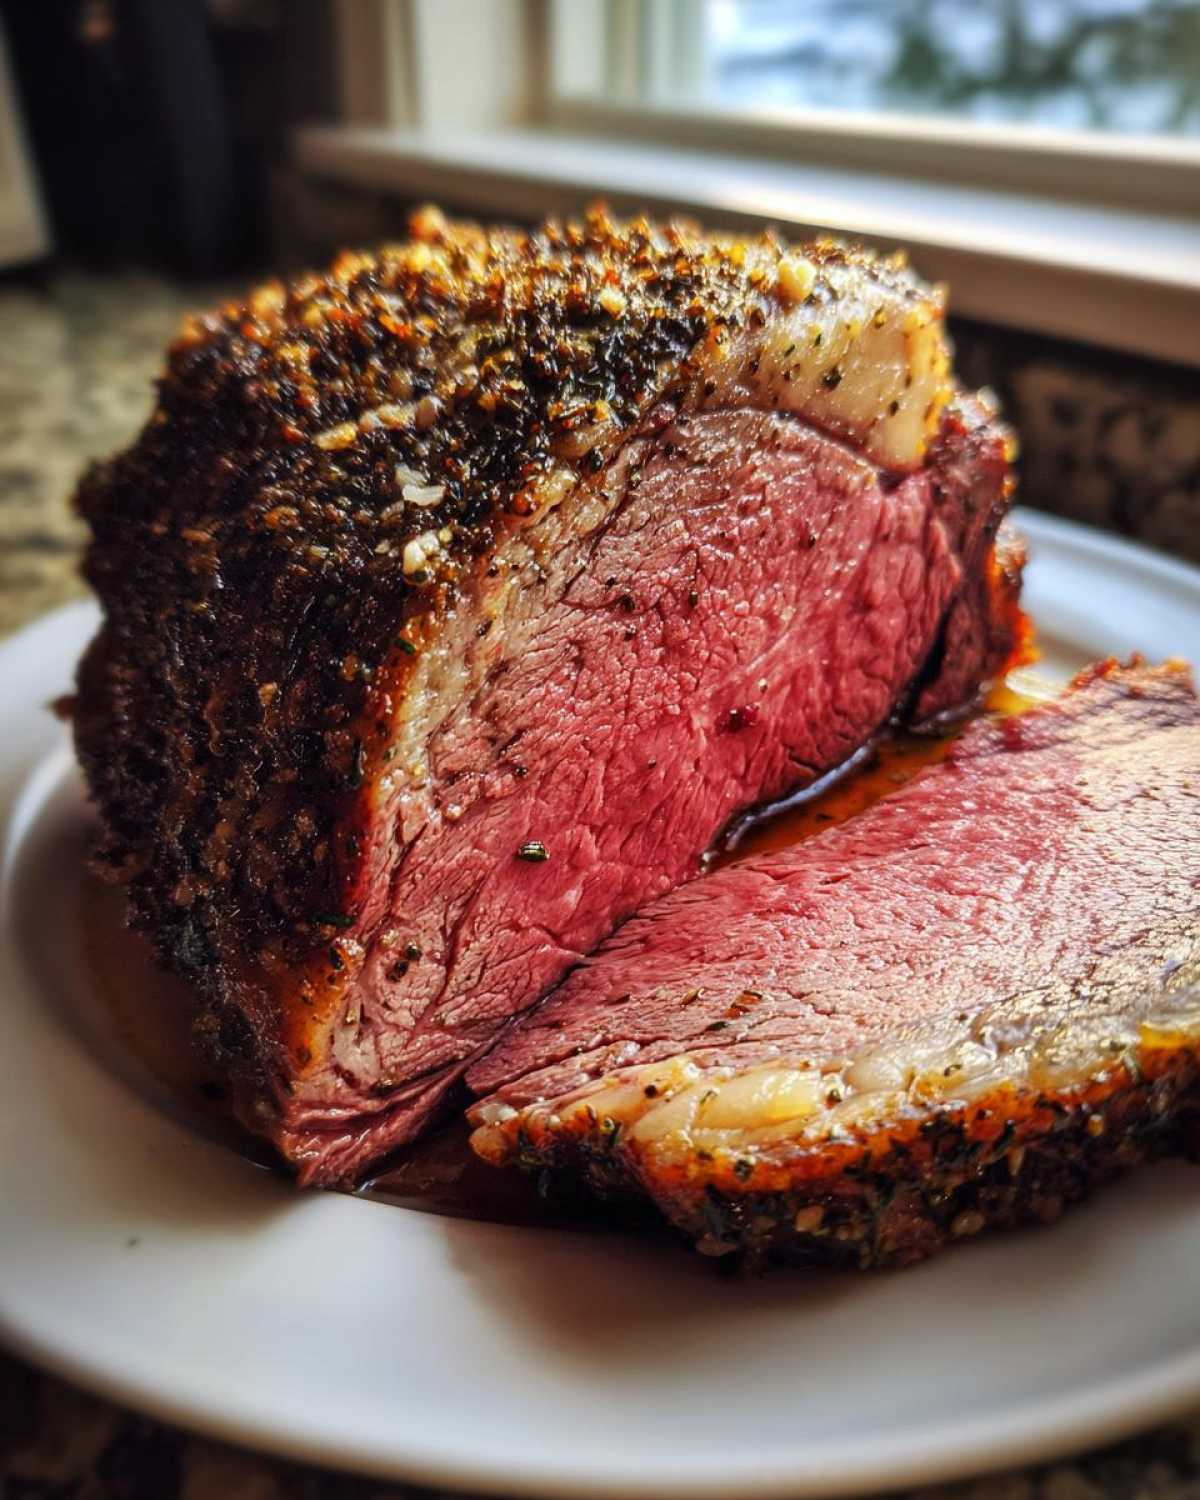
Tips for Success with Your Standing Rib Roast
When you’re dealing with a showstopper like a **Standing Rib Roast**, every little detail counts toward that celebratory bite. Owen and I have made too many mistakes learning this, so let me just hand you the highlights! These tips are what take this from ‘good’ to ‘the best roast we’ve ever had.’
If you want to dive deeper into all things beef beyond just this roast, I put together a full guide over at the blog you might find handy! Check out the comprehensive beef roast guide.
Here are the must-know secrets we adhere to every time we prep this fantastic **rib roast**:
The 24-Hour Dry Brine: Go Ahead!
This is one of the best secrets we learned. If you can plan ahead—and I know this is tough when you’re aiming for that **Christmas Dinner Centerpiece**—do a dry brine. This means taking your roast, patting it dry, and generously seasoning it with just the salt and pepper (no oil or herbs yet!). Put it on a rack in a pan and let it sit, uncovered, in the fridge for 24 hours. Seriously, do it. That heavy salting draws moisture out, but then the meat reabsorbs the seasoned moisture later, leading to incredible flavor penetration and an even better sear on that crust. It’s worth the planning!
Rack or No Rack? Understand Your Pan Setup
We often skip the rack, especially if we only have two ribs, because we want all that glorious, fatty drippings to collect for the gravy later. However, if you have a larger roast, or if your roast is uneven, using a rack is smart. Why? Because it lifts the meat up, allowing that super hot air from the sear to circulate around the entire bottom surface. If the bottom sits directly in rendered fat too fast, it can start to stew instead of roast. If you skip the rack, just make sure you rotate the pan halfway through the 325°F roasting time.
Don’t Forget the Foil Tent!
I mentioned this during the cooking part, but it bears repeating: resting is non-negotiable. When you pull that roast out at 130°F, the residual heat—that carryover cooking—will bump it up another 5 to 7 degrees. That jump is the difference between perfect medium-rare and slightly overdone! Make sure that foil tent is loose so condensation doesn’t melt your gorgeous herb crust. We aim for at least 20 minutes of rest; that’s the perfect time for Owen to get the wine poured and maybe put on some good dinner music!
If you need inspiration for an herb crust that rivals what the pros are doing, check out this amazing herb-crusted ribeye recipe for ideas on boosting your herb blend!
Making a Simple Gravy from Roast Pan Drippings
Okay, you’ve pulled that majestic **rib roast** out, and now you might be looking at that roasting pan filled with all that glorious, browned, flavorful stuff. Do NOT wash that pan! That sediment is pure gold, my friends. We need to turn that into a fantastic gravy, which is, frankly, mandatory for any good roast dinner.
First, place that roasting pan right on your stovetop over medium heat. Add a splash of liquid—beef broth is classic, but a good quality red wine also breaks down those lovely bits wonderfully. Use a wooden spoon or a scraper to scrape up all those browned, stuck-on flavors; that’s called deglazing, and it’s the secret to deep flavor!
Let that simmer down a bit, and if you want it thicker, just whisk in a slurry made of cornstarch mixed with a little cold water. A quick simmer and your homemade gravy is ready to go! This is so much better than jarred stuff, and it’s ready while the roast is resting. For a smoother gravy base, you might want to consult the tips in my guide on making ultra-smooth gravy.
Serving Suggestions for Your Rib Roast Centerpiece
So, you’ve conquered the **rib roast**, and now it’s time to build out the rest of that incredible **Christmas Dinner Centerpiece** plate! A magnificent roast like this demands sides that can stand up to its richness but don’t try to steal the spotlight. This is about balance, my friends, making sure every bite is harmonious.
When we plan our big holiday meals, I always think about creating that perfect, comforting **Sunday Dinner Roast** vibe. We need something starchy, something green, and maybe something sweet to cut through all that savory meat!
For the starch, you can never go wrong with incredibly creamy mashed potatoes. Owen insists on loading his with tons of butter and garlic—a simple side that always gets rave reviews. If you want to go slightly sweeter, which I highly recommend, you absolutely need to try my candied yams recipe. They cut through the richness of the beef so beautifully, and they are ridiculously easy to make. You can find my simple candied yam recipe here.
On the green side, keep it simple but vibrant. Roasted asparagus tossed with good olive oil, salt, and a squeeze of lemon juice right at the end works wonders. The slight bitterness and acid cleanse the palate perfectly between thick slices of roast beef. And if you really want to impress everyone without adding much work, go for roasted Brussels sprouts tossed with balsamic glaze—they get crispy and delicious!
If you are looking for more ways to pair your roast, I saw a fantastic guide on how to build an entire menu around a big prime rib over at Olivia’s Kitchen. It might give you some extra inspiration for a complete look at that roast centerpiece spread!
Storage and Reheating Instructions for Leftover Rib Roast
Having leftovers from a giant **rib roast** is, let’s be honest, one of the best parts of the whole ordeal! It means we get to enjoy that incredible flavor again without any of the work. But if you handled that initial cook perfectly, you need to handle the storage even better to keep that beautiful meat juicy.
Here’s my rule: handle the leftovers differently depending on whether you sliced it all already or if you still have a large chunk of roast left over. We want to keep that beef from turning dry and sad in the fridge!
If you have a big chunk of the roast left—say, more than half—wrap that piece tightly in plastic wrap first, and then slip it into a heavy-duty zip-top bag or an airtight container. This double-layer protection minimizes surface exposure to the air, which keeps it from drying out in the fridge. This will keep things great for about three to four days.
Now, for those precious, already-sliced pieces? Slicing meat before refrigerating exposes way more surface area to dry air, so they need a little extra love. I always recommend slicing thinly against the grain, just like you did before serving, but the reheating method is where you save the day.
Don’t you dare try to microwave those thin slices dry or put them back in a dry oven! That is a recipe for tough, chewy beef, and we worked too hard for that! Instead, we are going to gently reintroduce moisture.
The real trick is using liquid. If you made gravy, use that! If not, grab some plain beef broth or even just water. Place your leftover slices in a wide skillet over low heat. Pour just enough broth or water into the bottom of the pan to barely cover the bottom layer of meat. You aren’t boiling it; you are just gently simmering it until the meat is warmed through. This steaming process keeps the slices beautifully tender.
If you want to turn those leftovers into something totally new, like a quick, cozy beef stew, I have an amazing recipe for an easy crockpot beef stew recipe that uses leftover roast chunks perfectly. Either way, remember: low heat plus moisture is your mantra for glorious leftovers!
Frequently Asked Questions About Cooking a Rib Roast
I know when you’re standing in front of that huge **rib roast**, your brain gets flooded with questions! Seriously, I still double-check everything before I put it in the oven, even though we’ve made this recipe a dozen times. Don’t let intimidation stop you from making this ultimate centerpiece. Here are a few things people always ask Owen and me about nailing this **Standing Rib Roast**!
If you’re planning the whole menu, we’ve got a fantastic recipe for a homemade horseradish sauce that cuts right through the richness of the beef—you can check that out here!
Also, for those who want to see another take on oven-roasting perfection, this guide from WOCook offers some great visual tips for a simple oven prime rib recipe!
Bone-In vs. Boneless: Which Rib Roast is Better?
This is a classic question! We almost always go bone-in for our main holiday roast. Why? Because the bones act like little built-in insulation panels, helping the meat around them cook more evenly and just keeping the whole thing moister for longer. Plus, the bones add a ton of flavor!
For a boneless roast (*which is often just a ribeye roast rolled and tied*), the cooking time is naturally shorter, and it’s easier to carve if you aren’t confident with the knife. You just have to watch your temperature even more closely with a boneless cut so it doesn’t overcook along the edges.
How do I calculate my Roast Cooking Times accurately?
You just can’t trust the old “15 minutes per pound” rule for a **Prime Rib Recipe**—it’s not reliable enough for such an expensive cut! The only way to get that perfect result is by knowing your oven and trusting your thermometer. The initial sear at 450°F is timed (15 minutes), but the rest of the cooking time at 325°F depends on the roast’s shape and starting temperature.
I always calculate based on weight, but use the thermometer as the final judge. For medium-rare, plan on roughly 13 to 15 minutes per pound *after* that initial sear, but check the temperature—that’s your true guide! It’s much better to rely on the internal reading than to guess!
What happens if my oven doesn’t go down to 325°F?
Oh, some older ovens are stubborn! If your oven only goes down to, say, 350°F, you can still make this work, but you need to adjust your expectations. Roasting entirely at 350°F (after the initial blast) will yield a slightly higher final internal temperature and a slightly less-tender result than the low-and-slow method we use. You’ll need to pull it off the heat a bit earlier than you think.
If 350°F is your lowest setting, monitor the temperature, and be ready to pull it off when it’s maybe 8 to 10 degrees *lower* than your target, knowing that carryover cooking is going to take it the rest of the way while it rests. Just monitor closely!
What internal temperature results in a Tender Beef Roast?
This is the make-or-break temperature for any **Tender Beef Roast**! Remember, you must check the temperature *before* you rest the roast, as it will rise during that resting period.
Here is the target temperature *to remove it from the oven* for perfect results after resting:
- Rare: Pull at 120°F (Rests to 125°F)
- Medium-Rare (Our Goal!): Pull at 125°F to 130°F (Rests to 130°F to 135°F)
- Medium: Pull at 135°F (Rests to 140°F to 145°F)
If you see 140°F on the thermometer while it’s still in the oven, you’ve sadly gone past medium-rare, and it’s going to be a medium roast. Always prioritize that 125°F pull!
Nutritional Estimates for This Oven Roasted Beef
I always feel a little sheepish providing nutritional facts for something this decadent, but look, if you’re planning a big feast, knowing the basics is helpful! Keep in mind these numbers are just estimates based on the ingredients list, assuming you’re carving about a 6-ounce cooked portion (which is generous, but hey, it’s a holiday!).
This rich, savory **Oven Roasted Beef** is nutrient-dense, packed with protein, but yes, it carries a bit of fat, which is exactly what makes it taste so wonderfully rich and satisfying.
Here’s the breakdown per serving size:
- Serving Size: 6 oz cooked
- Calories: 450
- Protein: 42g
- Fat: 30g
- Saturated Fat: 12g
- Sodium: 450mg (This will vary wildly based on how heavily you salt during the dry brine!)
- Carbohydrates: 1g
- Sugar: 0g
See? Mostly protein! That’s what we want in a great centerpiece. If you want to make sure your side dishes are keeping things balanced, I put together a guide for some high-protein, lower-carb sides you might enjoy over in our egg bites recipe!
Nutritional Estimates for This Oven Roasted Beef
I always feel a little sheepish providing nutritional facts for something this decadent, but look, if you’re planning a big feast, knowing the basics is helpful! Keep in mind these numbers are just estimates based on the ingredients list, assuming you’re carving about a 6-ounce cooked portion (which is generous, but hey, it’s a holiday!).
This rich, savory **Oven Roasted Beef** is nutrient-dense, packed with protein, but yes, it carries a bit of fat, which is exactly what makes it taste so wonderfully rich and satisfying.
Here’s the breakdown per serving size:
- Serving Size: 6 oz cooked
- Calories: 450
- Protein: 42g
- Fat: 30g
- Saturated Fat: 12g
- Sodium: 450mg (This will vary wildly based on how heavily you salt during the dry brine!)
- Carbohydrates: 1g
- Sugar: 0g
See? Mostly protein! That’s what we want in a great centerpiece. If you want to make sure your side dishes are keeping things balanced, I put together a guide for some high-protein, lower-carb sides you might enjoy over in our egg bites recipe!
PrintFoolproof Herb Crusted Prime Rib Roast for a Juicy Centerpiece
Learn how to make a tender, juicy Standing Rib Roast with a flavorful herb and garlic crust using a simple oven method. This recipe guarantees a perfect medium-rare result every time, making it the ideal Christmas Dinner Centerpiece.
- Prep Time: 20 min
- Cook Time: 1 hr 45 min
- Total Time: 2 hr 5 min
- Yield: 6 servings
- Category: Main Course
- Method: Oven Roasting
- Cuisine: American
- Diet: Low Fat
Ingredients
- 1 (4 to 6 pound) Standing Rib Roast (Prime Rib), 2 to 3 ribs
- 3 tablespoons kosher salt
- 1 tablespoon freshly ground black pepper
- 2 tablespoons olive oil
- 6 cloves garlic, minced
- 2 tablespoons fresh rosemary, chopped
- 1 tablespoon fresh thyme leaves
- 1 tablespoon dried oregano
- 1 tablespoon Dijon mustard
Instructions
- Remove the rib roast from the refrigerator 2 to 3 hours before cooking. Let it sit at room temperature.
- Preheat your oven to 450 degrees Fahrenheit.
- In a small bowl, combine the minced garlic, chopped rosemary, thyme, oregano, and Dijon mustard. Mix well to form a paste.
- Pat the entire surface of the roast dry with paper towels. This helps create a good crust.
- Rub the roast all over with olive oil. Sprinkle generously with kosher salt and black pepper.
- Press the herb and garlic mixture evenly onto all sides of the roast.
- Place the roast, fat-side up, in a roasting pan. If the roast is uneven, you can place it on a rack set inside the pan.
- Roast at 450 degrees Fahrenheit for 15 minutes. This initial high heat helps sear the outside.
- Reduce the oven temperature to 325 degrees Fahrenheit. Continue roasting until the internal temperature reaches your desired doneness (see notes for timing guide).
- Use a meat thermometer inserted into the thickest part of the meat, avoiding bone. For medium-rare, aim for 125 to 130 degrees Fahrenheit.
- Once the target temperature is reached, immediately remove the roast from the oven.
- Tent the roast loosely with aluminum foil and let it rest for at least 15 to 20 minutes before carving. The internal temperature will rise during this rest period.
- Carve into thick slices and serve immediately. Use the pan drippings to make a simple gravy if desired.
Notes
- For a 4-pound roast aiming for medium-rare (125-130°F internal temp before resting), expect about 13-15 minutes per pound at 325°F after the initial sear. Always rely on your thermometer for the most accurate result.
- If you want to make a gravy, place the roasting pan on the stovetop over medium heat after removing the roast. Scrape up the browned bits, add a splash of beef broth or red wine, and simmer until reduced. Thicken with a slurry of cornstarch and water if needed.
- This herb crust works well with a simple dry brine: season the roast heavily with salt and pepper 24 hours ahead and leave it uncovered in the refrigerator.
Nutrition
- Serving Size: 6 oz cooked
- Calories: 450
- Sugar: 0
- Sodium: 450
- Fat: 30
- Saturated Fat: 12
- Unsaturated Fat: 18
- Trans Fat: 0
- Carbohydrates: 1
- Fiber: 0
- Protein: 42
- Cholesterol: 140