

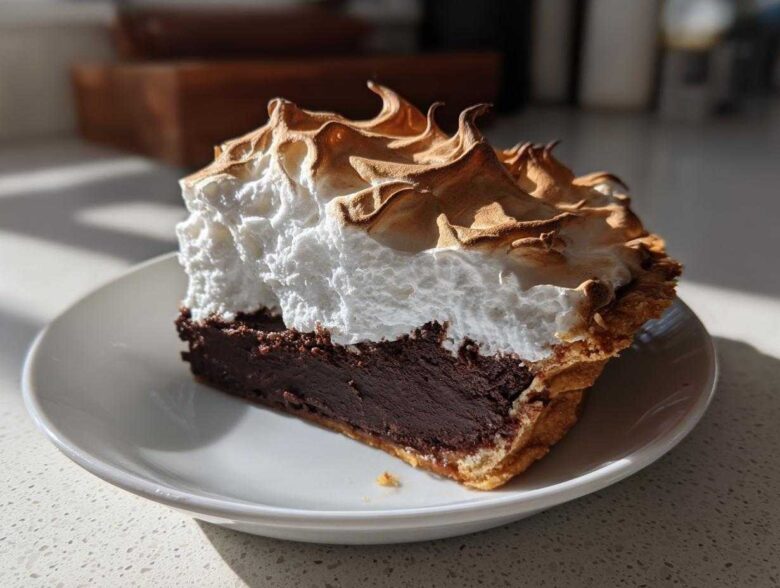
Oh, you know those desserts that just transport you instantly? The ones that feel like a warm hug and a celebration all rolled into one slice? For me, that is the chocolate meringue pie. We’ve all been there, right? You get brave, you make this gorgeous, towering pie, and then—disaster! The filling is soupy, or worse, that beautiful cloud of topping is weeping like crazy. Awful! If you want to know the story behind why we obsess over these headlines from our kitchen, check out our About Us page.
Well, I am here to tell you that we are ending the weeping pie crisis right now. Owen and I worked so hard to nail down the ultimate, foolproof chocolate meringue pie recipe. I’m talking about a filling so rich it’s almost sinful, paired with a meringue that stays unbelievably fluffy and stable. If you’re hungry for a show-stopping dessert that actually delivers, stick with us. We’ve got the good news you’ve been waiting for!
Why This Is The Ultimate Chocolate Meringue Pie Recipe
Trust me when I say this is the best chocolate meringue pie you’ll ever meet. We developed this recipe because every store-bought pie or online recipe seemed to fail the minute it left the oven. Runny filling? Check. Meringue that shrinks away from the crust? Double check. I finally threw out three batches of meringue that kept weeping onto the counter before I had my ‘aha!’ moment. Check out our thoughts on dense, fudgy chocolate cakes for another guaranteed win!
The key to this truly rich chocolate filling pie is precision in the filling cook time and tempering those yolks just right. You won’t find a more satisfying, decadent dessert that’s actually foolproof when you follow these steps. I found some inspiration that helped me lock down the perfect classic pie structure over at CookArtisan, too. It just works, every time, and that’s the headline worth sharing!
Achieving a Stable, Fluffy Meringue Topping Recipe
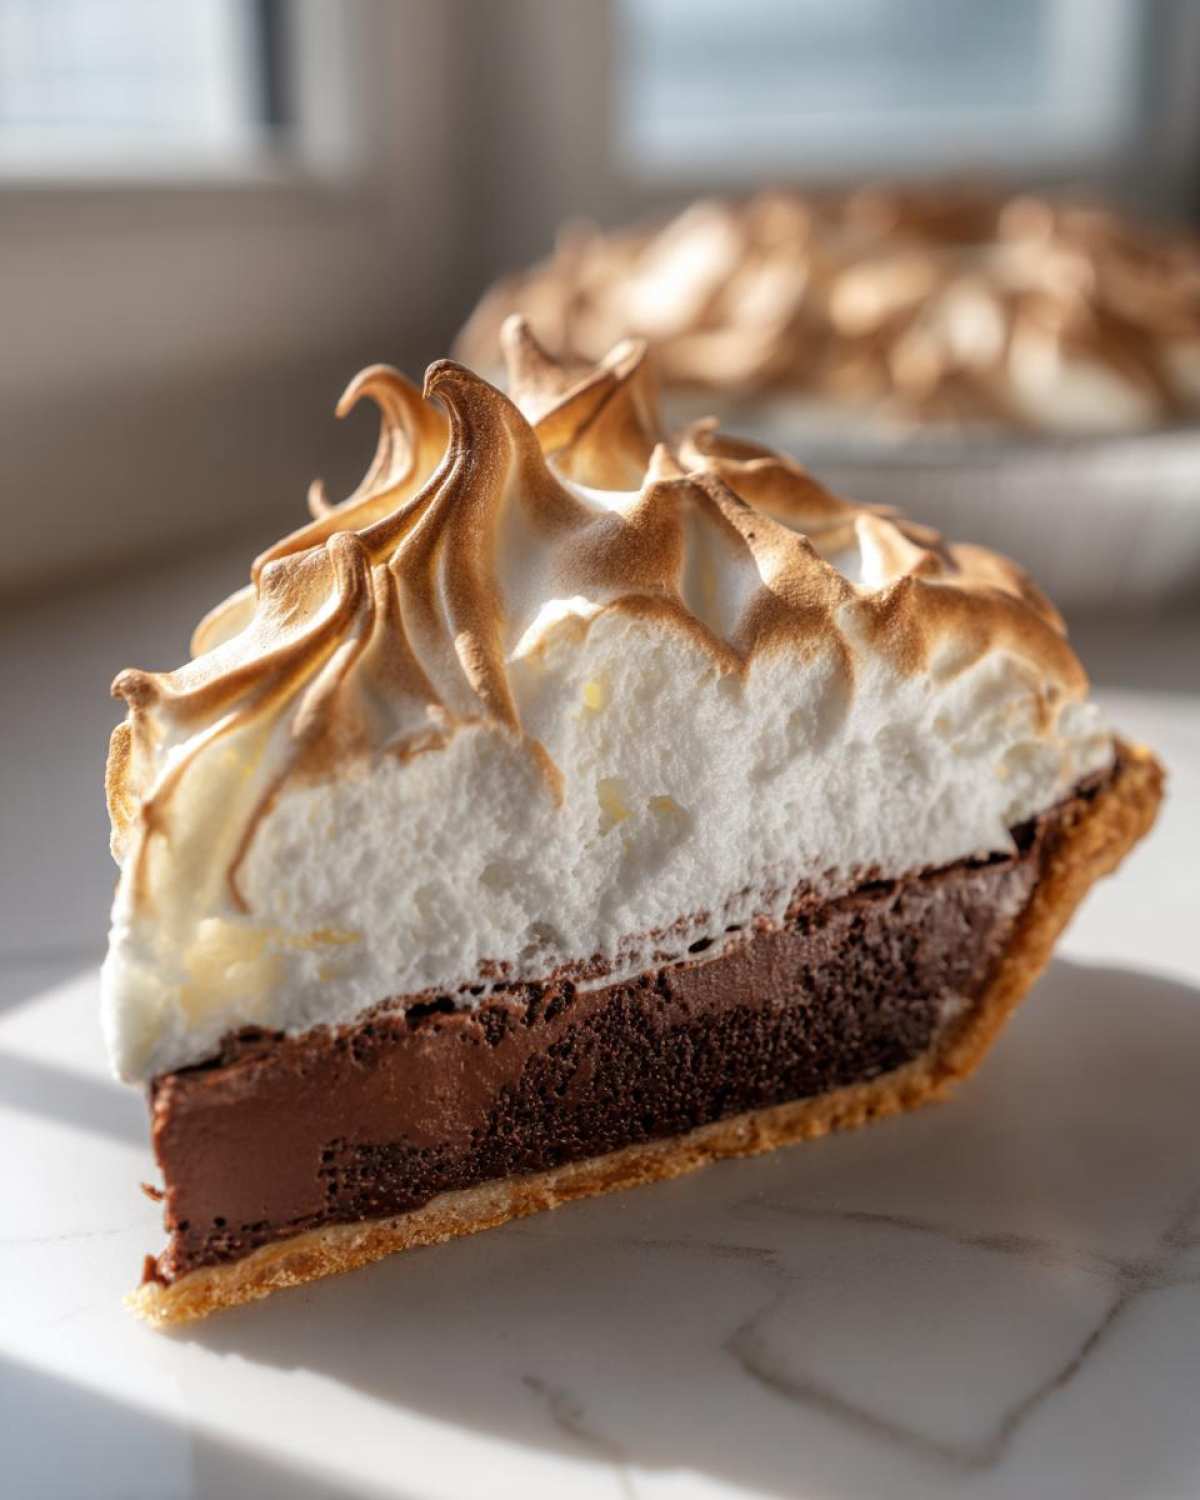
That beautifully tall, golden cloud on top? That’s zero luck and 100% technique. We are obsessed with getting a clean, fluffy meringue topping recipe here. The secret is using egg whites that are perfectly at room temperature—no cold ones allowed! Then, you absolutely must add the sugar slowly while beating with your mixer.
This gradual addition lets the sugar dissolve properly into the protein structure, which stops it from releasing water later—that’s the weeping we hate! This method builds structure so strong, you get glorious stiff peaks that bake up beautifully golden without cracking.
Gathering Ingredients for Your Classic Chocolate Pie with Meringue
Okay, now for the fun part: gathering our supplies! When you’re aiming for that truly rich chocolate filling pie, the quality of what goes in really matters. We don’t need a huge list, but we need precision. Make sure that pie crust is ready—we’re using a single, unbaked 9-inch crust to hold all that goodness.
For the thick, decadent base, you’ll need about 1 1/2 cups of sugar (but we split that!), cornstarch for body, salt for balance, milk, and those three essential egg yolks. And listen up: for the chocolate flavor, use 4 ounces of good quality, chopped unsweetened chocolate. Don’t skimp here; this is where the deep flavor comes from!
Then we need the meringue superstars: 4 large egg whites, making sure they are totally clean and at room temperature. Oh, and don’t forget the butter and vanilla to finish off that creamy filling. It’s all simple stuff, but treating each item with respect gets us that flawless pie.
Step-by-Step Instructions for Your Chocolate Meringue Pie
If you’ve been following along, you know we are making this incredibly easy chocolate meringue pie recipe, and now we just assemble the news! We start with that crust, which should be baked and totally cooled—that’s important infrastructure for a structurally sound dessert, folks. Everything else comes together surprisingly fast once the crust is ready. No need for complicated, scary steps here; just clear directions so you can get to the celebration part!
We are covering two big baking milestones here: getting that thick, velvety filling ready, and then crowning it with the cloud-like topping. Remember, we are aiming for that bakery-style chocolate pie result we all dream about. If you want a lovely side dish to go with your baking marathon, check out my notes on easy homemade garlic butter, because sometimes you need savory after all that sugar!
Preparing the Rich Chocolate Filling Pie Base
First things first: whisk your sugar, cornstarch, and salt together in a saucepan—whisking dry ingredients first ensures no clumps! Gradually add the milk until it’s smooth, then start cooking over medium heat. You absolutely must stir this constantly until it boils and thickens—seriously, do not walk away! Once it boils for a minute, get that filling off the heat.
This next part builds that amazing rich chocolate filling pie texture: tempering. Slowly drizzle about a cup of the hot milk mixture into your lightly beaten yolks while whisking like crazy. This wakes the yolks up gently. Then, pour those warmed yolks back into the saucepan and cook just until it bubbles again. Now, stir in that chopped chocolate and butter until it’s all silky smooth, and finally, add your vanilla. Pour that gorgeous, thick chocolate straight into your cooled crust!
Baking Perfect Meringue and Sealing the Chocolate Meringue Pie
Time for the tower! Use your electric mixer for the egg whites; beat them until soft peaks form, then stream in that final half cup of sugar slowly until you reach stiff, glossy peaks. That’s the look of baking perfect meringue that won’t collapse on you. Don’t overbeat it, though; we want fluff, not dryness!
Now, the sealing trick: dollop that meringue all over that hot, fresh filling. You MUST make sure that meringue touches the crust edge all the way around. This creates a seal that prevents shrinking and weeping! Shape it into pretty swirls with the back of a spoon, and pop it in the oven at 350°F for just 12 to 15 minutes until it’s lightly kissed with gold. See how easy that was? You can see a similar recipe approach detailed over at Freddy Recipes!
Tips for Success: Mastering the Old Fashioned Chocolate Meringue Pie
We’ve put in the work crafting this old fashioned chocolate meringue pie, and now we need to protect our masterpiece! The biggest question I always get, and the one that caused me so much stress, is how to prevent meringue from weeping. I have two non-negotiables here. First, that mixing bowl for your egg whites must be surgically clean. Any tiny bit of grease or leftover yolk will stop those whites from whipping up into a stable foam. Seriously, wipe it down with vinegar if you have to!
Second, that meringue has to touch the crust all the way around when you place it on the hot filling. That seal traps the steam inside, stopping the sugar from separating and weeping later. Also, while this deliciousness is technically done in under an hour, you have to let it cool slowly on the counter for about four hours before even thinking about chilling it. That slow cool sets the custard perfectly. Owen always says that if you can’t wait patiently, blast some great music to distract yourself—he loves putting on something upbeat while we chill, which feels like such a great announcement of success!
Don’t forget to check out these thoughts on getting icing to dry hard for more stability tips, and if you want other classic pie ideas, I always look at what they are doing over at Countryside Cravings!
Variations on the Chocolate Meringue Pie
While the recipe we just perfected is truly the headline of decadent chocolate desserts, sometimes you want to add your own little news flair, right? I love making small changes—they are like adding an extra musical layer to Owen’s playlists! Don’t go crazy changing things in the filling, though, because that’s where the structure lives, but we can certainly jazz up the flavor profile.
For a subtle twist, try swapping out that vanilla extract for almond extract. Just a half teaspoon makes the chocolate taste deeper and richer, almost like a fancy European truffle. It’s a fantastic little update!
If you’re up for a tiny bit more work, try adding a layer of crunch before the filling goes in. Mix about a quarter cup of extra chopped chocolate or even some finely crushed wafer cookies right into the bottom of that empty, baked pie shell. It gives you a wonderful textural surprise when you slice into the pie later.
And here’s one of Stella’s favorites: adding a little brightness! If you zest half an orange into the filling right before taking it off the stove, it cuts through the richness perfectly. It’s not overly citrusy, just enough to make the chocolate sing! Since you love sweet treats, you absolutely have to check out our strawberry cheesecake cookies sometime soon; they are pure joy!
Serving Suggestions for Your Homemade Chocolate Meringue Pie
We’ve made it! This homemade chocolate meringue pie deserves the best possible presentation. Since the filling is already so deeply chocolatey and the meringue is so light and sweet, you don’t need much else, honestly. A simple cup of strong, hot coffee is my absolute favorite pairing. That bitterness really cuts through the richness for a perfect bite.
If it’s a celebration and you want a fun non-alcoholic pairing, you know Owen loves an excuse to mix something up. Maybe try skipping the heavy drinks and go for something bright later, like our apple-cider-moscow-mule-recipe once you’ve cleared the dessert plates! If, for some reason, your meringue didn’t get quite as high as you wanted, a quick dollop of simple, unsweetened whipped cream on the side will give everyone that extra creamy element they love.
Storage and Reheating for the Ultimate Meringue Pie
Okay, we’ve survived the baking process, and now we need to treat this beautiful ultimate meringue pie right so it stays looking picture-perfect. Moisture is the enemy here, folks! You must let the pie cool completely on the counter after it comes out of the oven—we’re talking at least four hours for that custard to set up nicely. Do not cover it tightly while it’s cooling, or you’ll trap steam and guarantee weeping!
Once it’s totally cool, you can move it into the fridge. But here’s the trick: loosely tent it with plastic wrap or even just set a large bowl over it. Don’t press the wrap down on the meringue! Honestly, you shouldn’t reheat meringue pie at all; warming it up activates that weeping process we worked so hard to eliminate. Just serve it cold or slightly cool straight from the fridge for the best results!
Frequently Asked Questions About Making Chocolate Meringue Pie
It’s time for the final bulletin before you announce your success! People always have last-minute worries when making something as impressive as a classic chocolate pie with meringue, and that’s totally normal. We want you to feel confident when you pull this pie out of the oven. Here are the little bits of extra news that will seal the deal on your beautiful dessert.
We covered a lot of scary topics—weeping, cracking, and runny fillings—but honestly, this recipe is forgiving if you follow the main steps. If you want a fascinating read on another pie where stability is key, check out my notes on stopping lemon meringue pie from weeping; the principles are the same!
Can I make the chocolate filling ahead of time for my chocolate meringue pie?
Absolutely, yes! That’s one of the great things about this easy chocolate meringue pie recipe—you can split up the work. You can cook the rich chocolate filling one day and keep it covered tightly in the fridge. But here is the super important bit of news: that filling needs to be completely cooled down before you even dream about adding the meringue. If the filling is even slightly warm when you pile on the meringue, you are inviting weeping and shrinking!
What is the secret to a crack-free fluffy meringue topping recipe?
The secret isn’t one thing; it’s a few things working together for that gorgeous, crack-free lift! Number one: make sure those egg whites are room temperature. Number two: add the sugar slowly until you get stiff, glossy peaks—this is what creates a strong structure. And finally, the secret that stops cracks: when you spread that fluffy meringue topping recipe on the hot filling, you must make sure it touches the crust edge everywhere. That seal keeps everything contained and prevents the large bubbles trapped underneath from bursting and cracking the top shell when it bakes!
Nutrition Facts for This Rich Chocolate Filling Pie Estimate
Now, before you rush off to announce the good news of dessert being ready, I do have to give you the standard disclaimer about the numbers. Since we’re making everything fresh here, these figures are just an estimate based on our recipe proportions and an 8-serving yield, but they give you a great guideline for this rich chocolate filling pie.
Remember, these numbers can wiggle a bit depending on the brand of chocolate or crust you use. Here’s the breakdown per slice:
- Serving Size:
1 slice - Calories: 380
- Sugar: 45g
- Fat: 18g
- Protein: 7g
This is truly a decadent treat, and every calorie is worth the dancing you’ll do later! Enjoy every last bite!
PrintThe Ultimate Flawless Chocolate Meringue Pie: Rich Filling and No-Weep Topping
You deserve a truly rewarding baking experience. This recipe delivers a deeply rich chocolate filling and a towering, perfectly stable, fluffy meringue topping. Learn the simple steps for this classic chocolate meringue pie so you can announce some good news in your kitchen tonight.
- Prep Time: 25 min
- Cook Time: 30 min
- Total Time: 4 hours 55 min
- Yield: 8 servings
- Category: Dessert
- Method: Baking
- Cuisine: American
- Diet: Vegetarian
Ingredients
- 1 (9-inch) unbaked pie crust
- 1 1/2 cups granulated sugar, divided
- 1/2 cup cornstarch
- 1/4 teaspoon salt
- 1 1/2 cups milk
- 3 large egg yolks, lightly beaten
- 4 ounces unsweetened chocolate, chopped
- 2 tablespoons unsalted butter
- 1 teaspoon vanilla extract
- 4 large egg whites, at room temperature
Instructions
- Preheat your oven to 350 degrees F. Bake the pie crust according to package directions until lightly golden. Let it cool completely on a wire rack.
- For the filling, whisk together 1 cup of the sugar, cornstarch, and salt in a medium saucepan. Gradually whisk in the milk until smooth.
- Cook the mixture over medium heat, stirring constantly, until it thickens significantly and comes to a boil. Boil for 1 minute, stirring constantly. Remove from heat.
- In a separate bowl, whisk the egg yolks. Slowly drizzle about 1 cup of the hot milk mixture into the yolks while whisking constantly to temper them.
- Pour the tempered yolk mixture back into the saucepan with the remaining hot filling. Return to medium heat and cook, stirring constantly, until the mixture thickens again and bubbles. Cook for 1 minute more. Remove from heat.
- Stir in the chopped chocolate and butter until fully melted and smooth. Stir in the vanilla extract.
- Pour the hot chocolate filling into the cooled, baked pie crust.
- For the meringue, beat the egg whites in a clean, grease-free bowl with an electric mixer until soft peaks form. Gradually add the remaining 1/2 cup of sugar, beating until stiff, glossy peaks form. This creates a stable, fluffy meringue topping.
- Spread the meringue evenly over the hot chocolate filling, making sure the meringue touches the inner edge of the crust all the way around to prevent shrinking or weeping. Create decorative swirls with the back of a spoon.
- Bake for 12 to 15 minutes, or until the meringue is lightly golden brown.
- Cool the pie completely on a wire rack at room temperature for at least 4 hours before slicing. Do not refrigerate immediately, as this can cause the meringue to weep.
Notes
- To prevent the meringue from weeping, make sure your mixing bowl for the egg whites is completely free of any grease or yolk.
- For the richest flavor, use high-quality chopped chocolate in the filling.
- Cool the pie slowly at room temperature before chilling to help stabilize the meringue structure.
Nutrition
- Serving Size: 1 slice
- Calories: 380
- Sugar: 45
- Sodium: 180
- Fat: 18
- Saturated Fat: 10
- Unsaturated Fat: 8
- Trans Fat: 0
- Carbohydrates: 52
- Fiber: 2
- Protein: 7
- Cholesterol: 110