

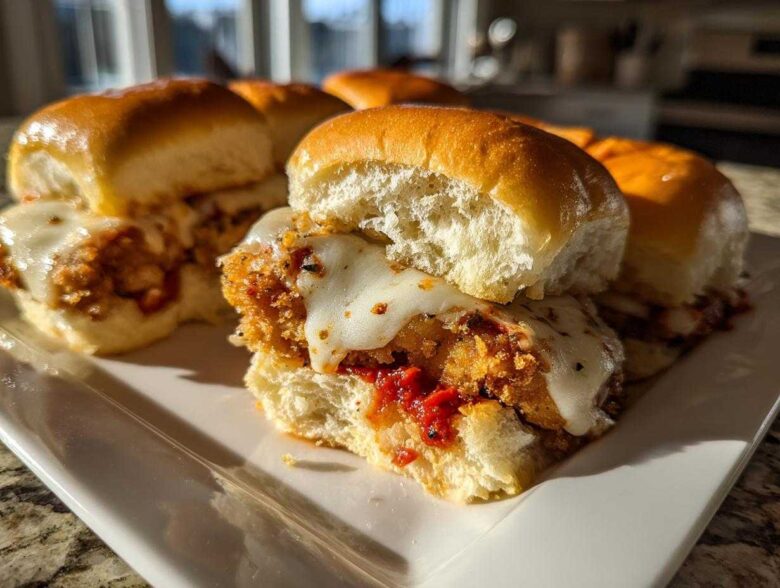
Game day is coming, or maybe you just really, *really* love cheesy comfort food that doesn’t require a fork and endless napkins. I get it! I spent way too long trying to make a full-sized Chicken Parm that still tasted amazing the next day, and frankly, it was a mess. So, I got obsessed with making them portable. You should absolutely check out my other slider recipes if you want more ideas!
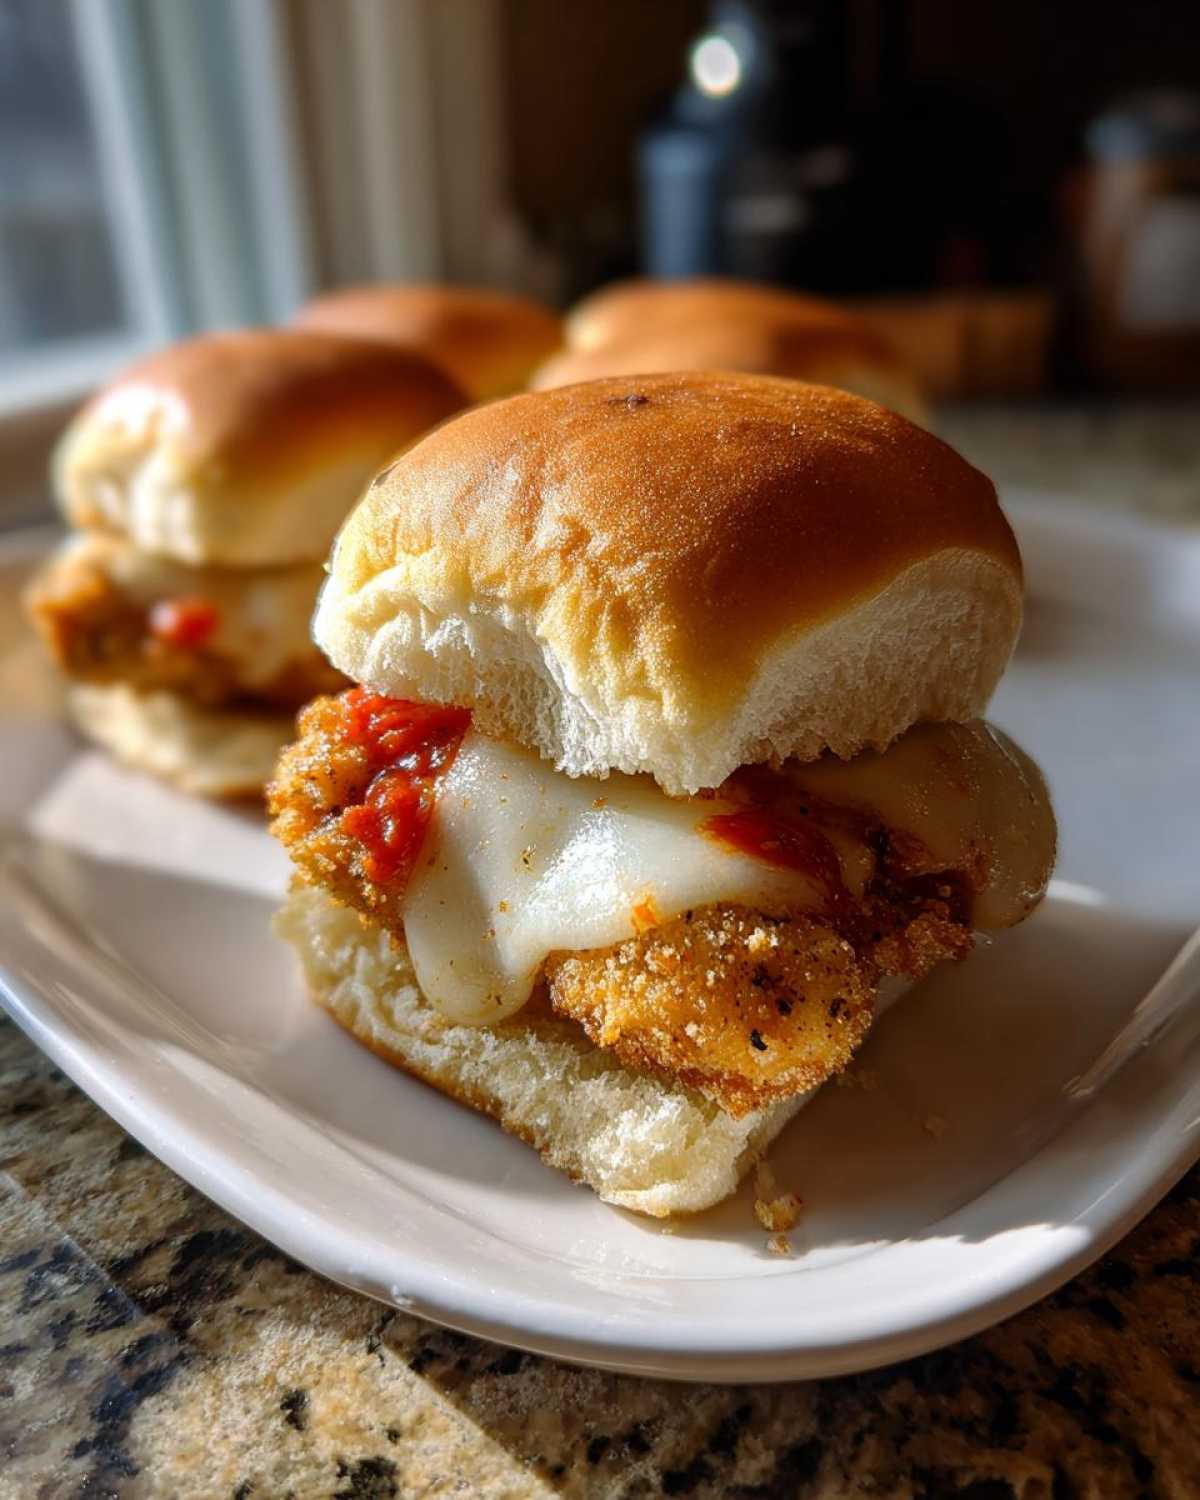
The secret sauce, pun intended, is keeping that chicken crunchy even after it gets loaded with marinara and melts under cheese. Trust me, this batch of Crispy Chicken Parmesan Sliders with Cheese is that perfect bite—gooey, savory, tangy, and you can eat three without feeling guilty. We nail the crispiness first, then we bake them assembly-style. It’s the best party food innovation I’ve made all year, hands down.
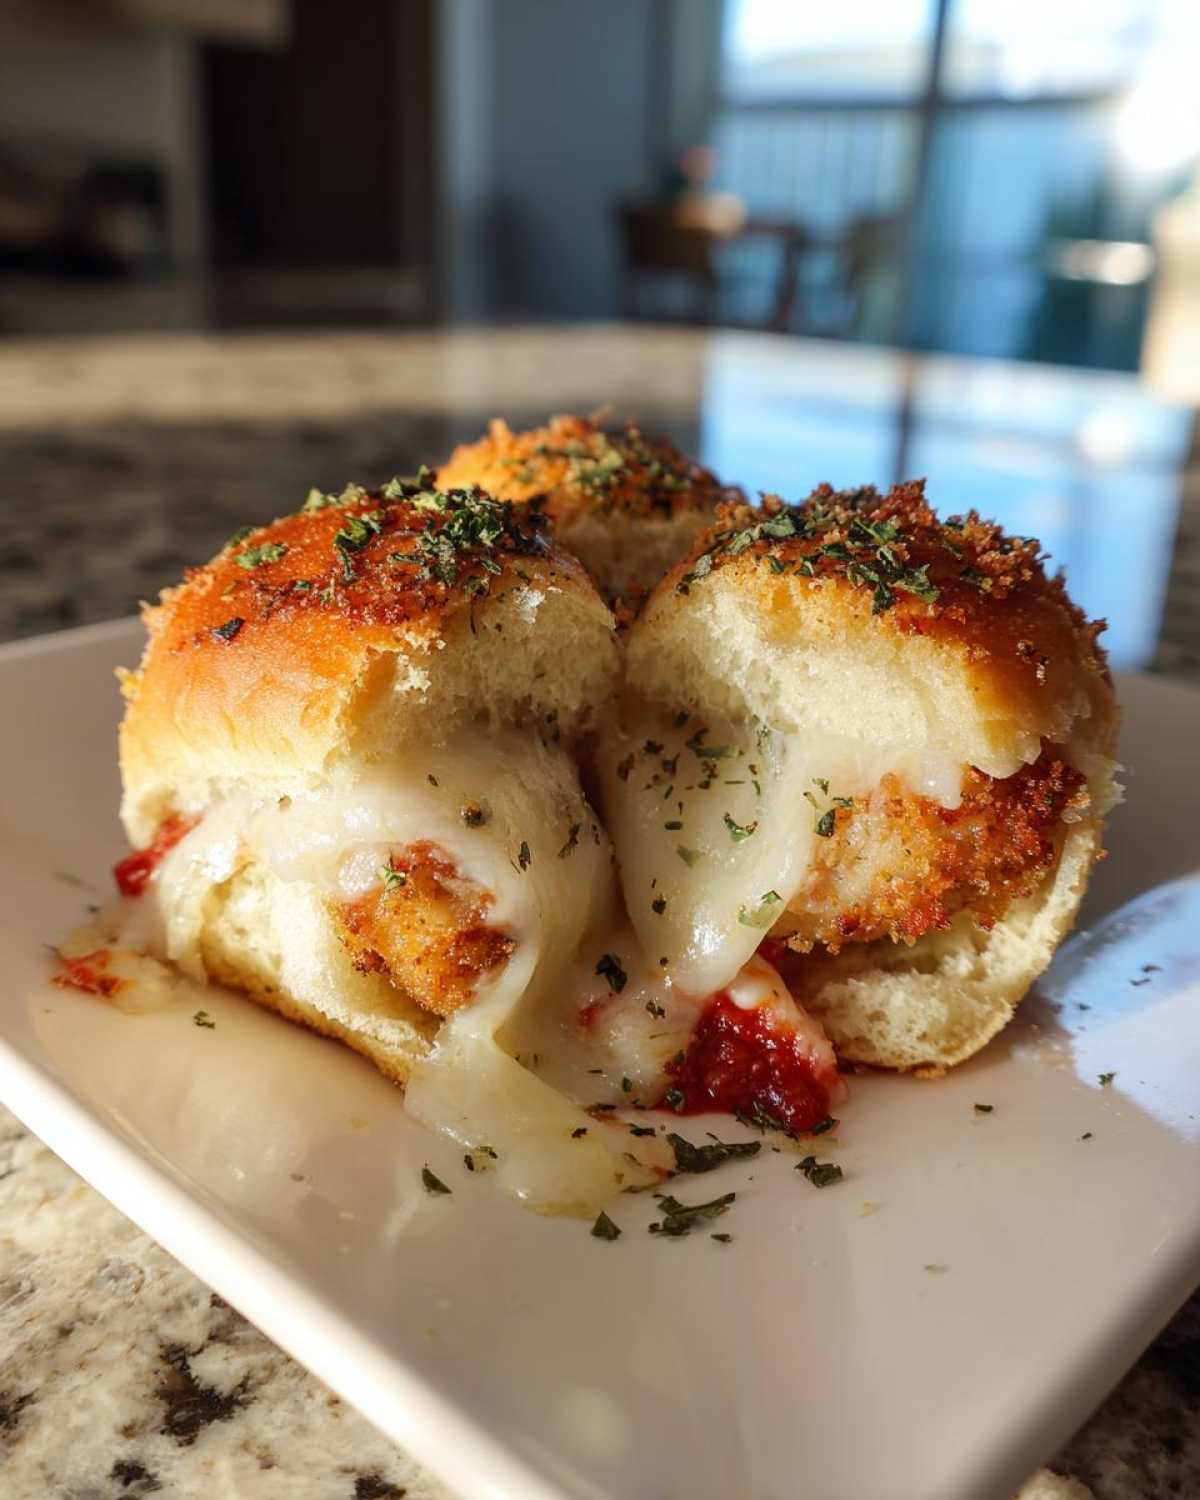
Why You Will Love These Crispy Chicken Parmesan Sliders with Cheese
Look, sometimes you want something fancy, and sometimes you just want maximum flavor payoff with minimum cleanup. These sliders hit that sweet spot perfectly. They are everything you love about Italian night, miniaturized and made totally stackable.
Here’s why these Crispy Chicken Parmesan Sliders with Cheese instantly became a staple in my rotation:
- They are Game Day Gold! You assemble the whole tray, bake it 25 minutes, and suddenly you have 12 perfect, warm portions ready for easy grabbing. No more juggling plates!
- That CRUNCH factor is real. We cook the chicken separately so it doesn’t get soggy under the cheese blanket. That initial crispiness holds up wonderfully.
- They are unbelievably cheesy. Mozzarella pull is non-negotiable, and the final Parmesan and butter crust on top just seals the deal.
- They are practically grab-and-go. If you’re bringing these to a potluck or a Super Bowl party, you get bonus points for making food that people can eat standing up. Check out my other easy slider recipes for crowds while you’re looking for event food!
- Minimal sauce messes! Because they are small and contained in those soft rolls, they hold onto the marinara way better than a giant sandwich.
- The entire process, oven time included, is under an hour. Who has time for lengthy weeknight cooking when a party is looming?
Essential Ingredients for Perfect Crispy Chicken Parmesan Sliders with Cheese
You know, when you’re making something like a baked slider, you might think you can get away with shortcuts, but honestly, the quality of your core ingredients makes or breaks the whole production. For these sandwiches, we need serious structure in the chicken and great cheese pull. Everything relies on careful preparation here, especially since we are trying to maintain crispiness while baking everything together later. I want you to pay close attention to the breading ingredients—that’s where the magic happens! You can find more general inspiration for chicken crusts on my Parmesan crusted chicken recipe page.
Get these items ready:
- 1 pound boneless, skinless chicken breasts, pounded thin (Seriously, thin them out!)
- 1 cup all-purpose flour (Your first dredge station)
- 2 large eggs, beaten
- 1 1/2 cups panko breadcrumbs (The secret weapon for crunch!)
- 1/2 cup grated Parmesan cheese, divided (We use it in the breading AND the topping!)
- 1 teaspoon garlic powder
- 1/2 teaspoon salt
- 1/4 teaspoon black pepper
- 1/4 cup vegetable oil, for frying (Just enough to get that golden color)
- 12 slider buns (The package of soft, usually sweet rolls, like Hawaiian rolls, works best here)
- 1 cup marinara sauce (Use your favorite jarred stuff, no judgment!)
- 8 ounces mozzarella cheese, sliced or shredded (The melty hero)
- 2 tablespoons melted butter
- 1 teaspoon Italian seasoning
Ingredient Notes and Substitution Tips
Okay, let’s talk specifics because I get asked about these things constantly. First, the breadcrumbs: You absolutely must use Panko. Regular breadcrumbs will let you down; Panko gives you the necessary jagged texture to hold that crunch through the oven phase. Don’t try to substitute those!
Next, the buns. I lean toward Hawaiian rolls because that hint of sweetness contrasts beautifully with the salty Parmesan and savory tomato sauce. If you can’t find them, any soft deli slider bun works, but know that the flavor profile will shift slightly from that sweet/savory balance.
For the cheese, mozzarella is vital for the classic cheese pull, obviously. But if you want a little more bite and tang, feel free to swap out half of the mozzarella for Provolone. It melts beautifully and cuts through the richness of the butter topping we add later.
—
How to Make Crispy Chicken Parmesan Sliders with Cheese: Step-by-Step
The success of these sliders hinges on treating the chicken right *before* they go into the oven. We aren’t making soggy chicken cutlets here; we are aiming for pre-cooked, crispy little nuggets that are ready to be smothered. Pay attention to these cooking phases, and you’ll have zero regrets.
Preparing the Chicken for Maximum Crispiness
This is the key to the whole operation! Get your three shallow dishes set up. Flour goes in dish one, whisked eggs in dish two, and mix your Panko, 1/4 cup of that Parmesan, garlic powder, salt, and pepper in dish three. Take your pounded chicken cutlets one by one and dredge them thoroughly. First, the flour—shake off the extra, we just need a coating. Then, dip fully in the egg. Finally, transfer to the Panko mixture. This is important: press that panko mixture firmly onto the chicken. You want it really stuck on there so it doesn’t shed off while frying.
Cooking the Chicken and Prepping the Slider Bake
Now we cook them just enough to set the crust and cook the center. Heat about a quarter cup of oil in a large skillet over medium-high heat. You don’t need a deep fryer, just enough to coat the bottom of the pan nicely. Fry those breaded pieces in batches—don’t overcrowd the pan! They only need about 3 to 4 minutes per side until they are golden brown and cooked through. Pull them out and pop them onto paper towels to drain off that surface oil. Once they’re cool enough to handle (maybe five minutes), slice each piece into bite-sized chunks that fit easily onto a small roll.
Assembling and Baking Your Cheesy Chicken Parmesan Sliders with Cheese
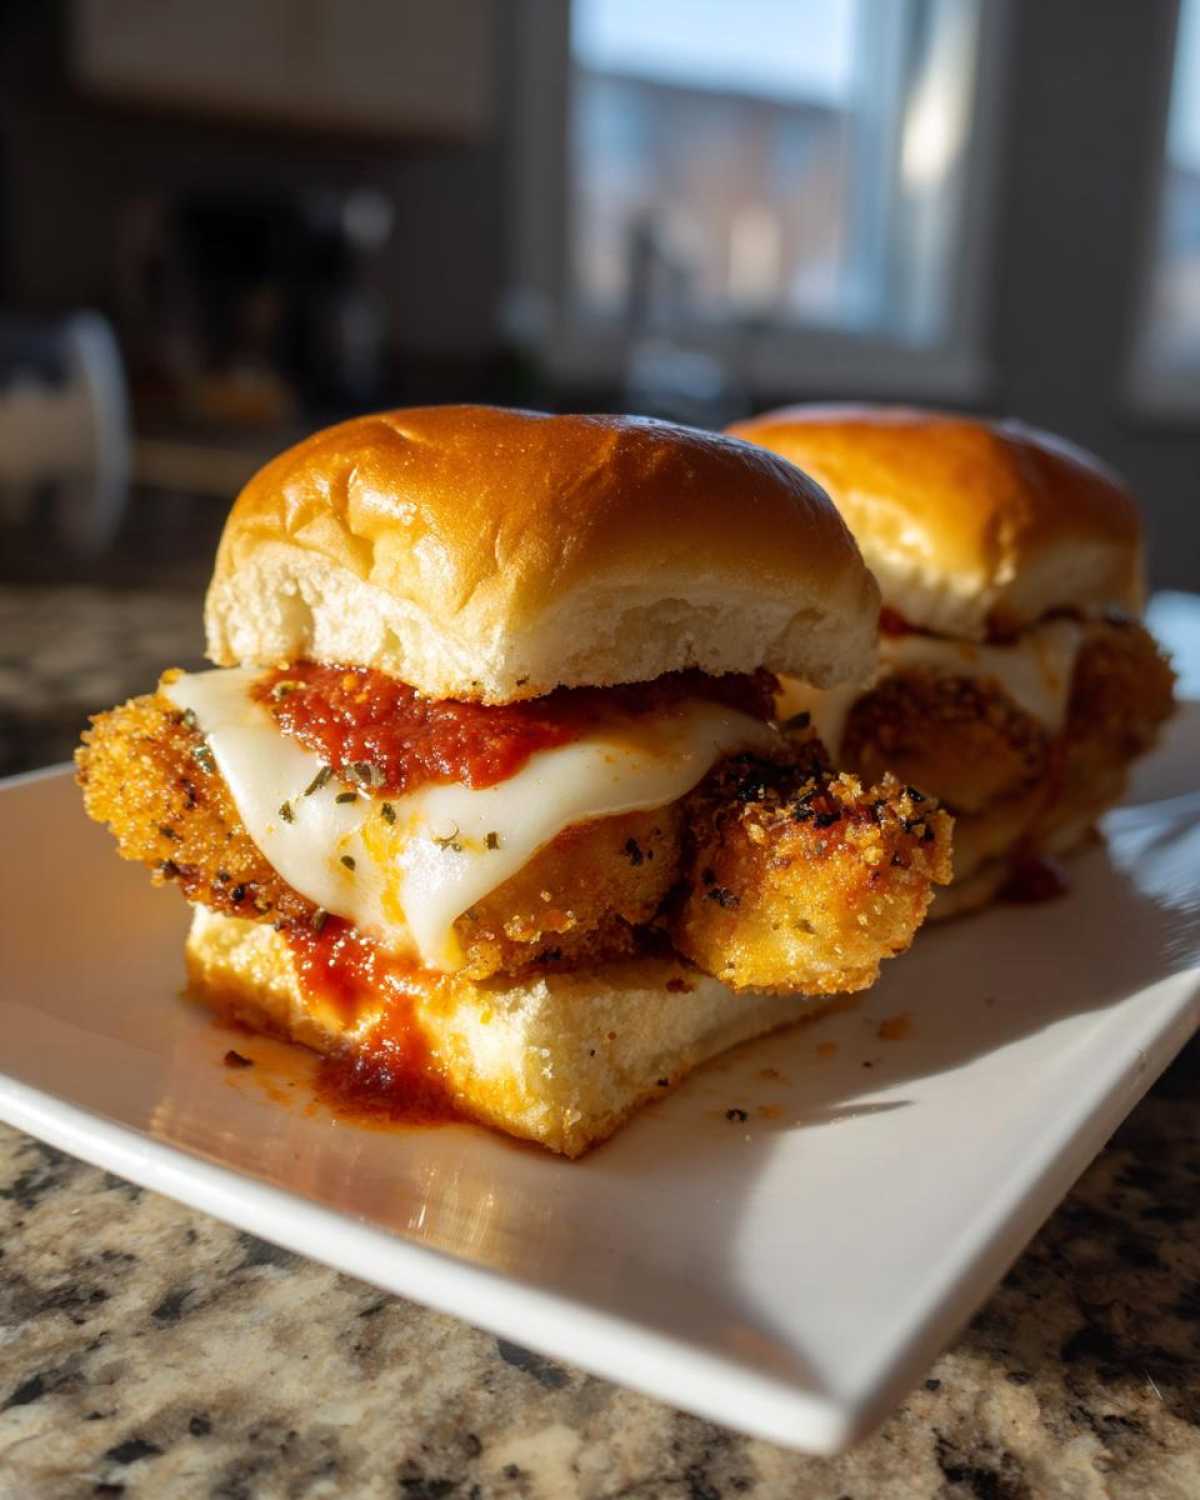
Time for assembly! Slice your whole pack of rolls horizontally, keeping them connected, and set the bottom halves in your greased baking dish. Spread a thin layer of marinara sauce directly onto the bottom buns. Next, layer on those amazing crispy chicken pieces. Top each piece generously with mozzarella. Put the top buns back on. For the finishing touch that takes these Crispy Chicken Parmesan Sliders with Cheese over the top, mix that remaining 1/4 cup of Parmesan with the melted butter and Italian seasoning, and brush it right over the top of the whole roll cluster. Cover it tightly with foil and bake at 375°F for 15 minutes. Then, foil off and bake another 5 to 7 minutes until that mozzarella is bubbling like crazy! Slice them up and dive in immediately.
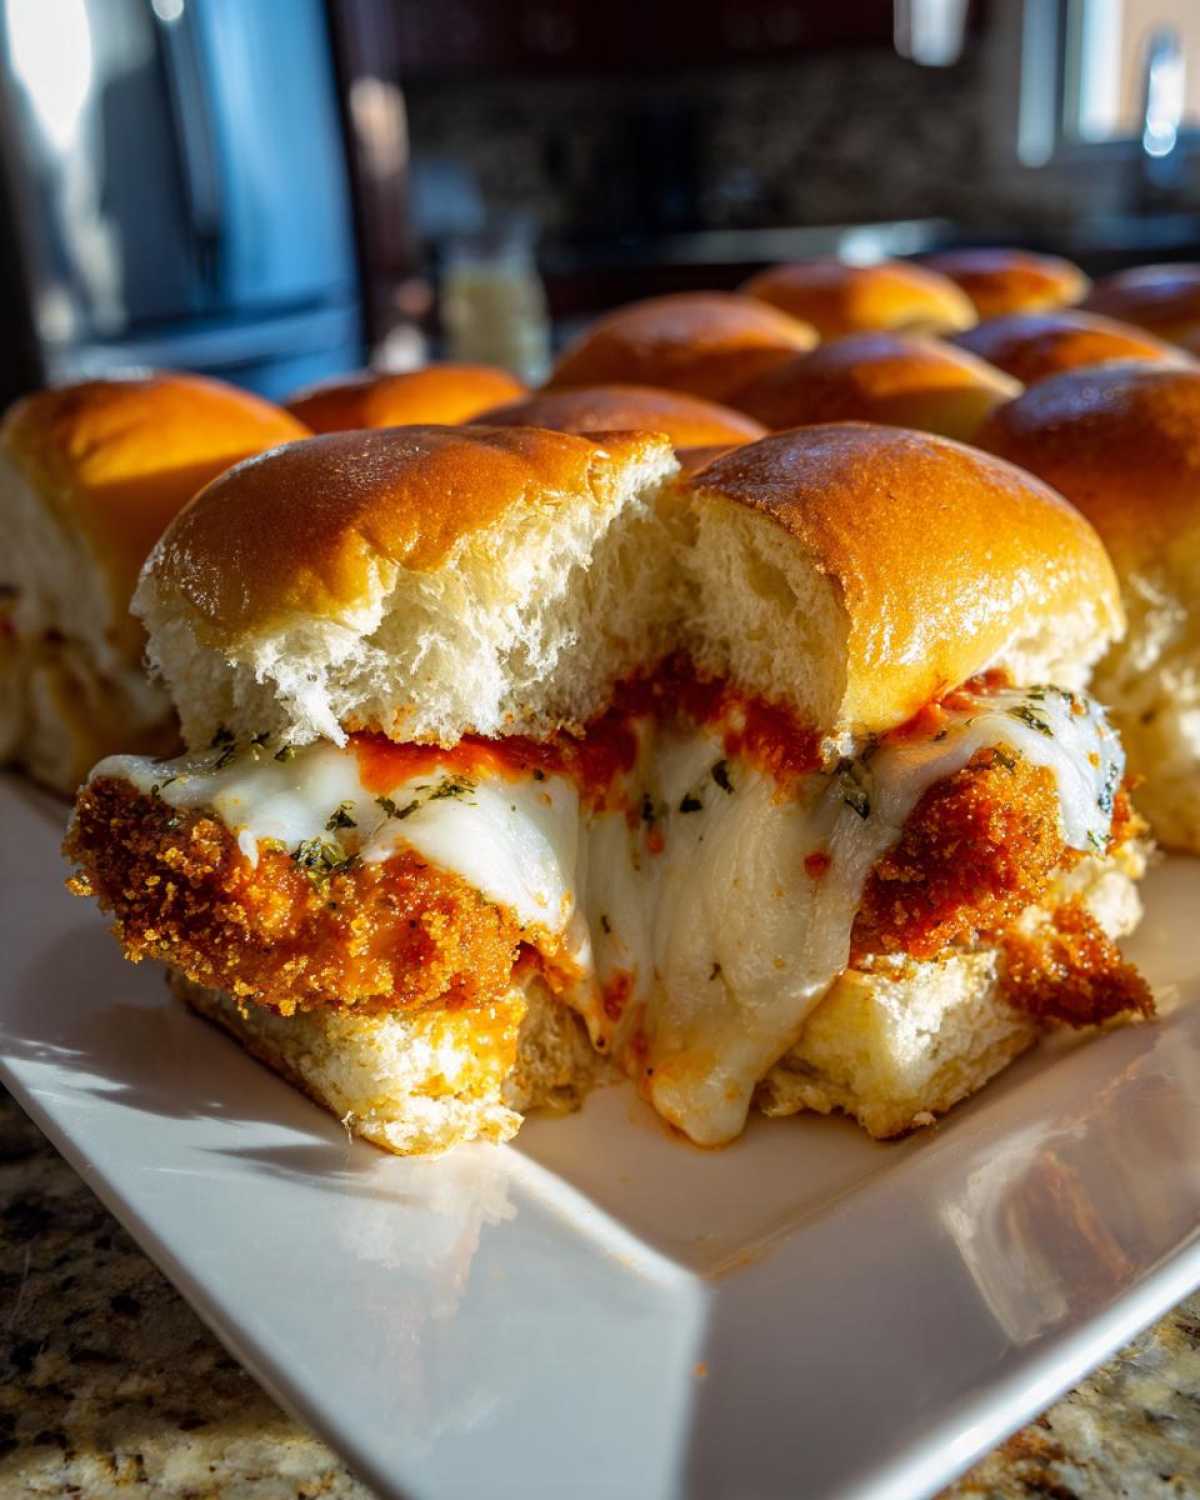
Tips for Success with Baked Chicken Parmesan Sliders
Even though these look super simple—and they are!—a few tiny tricks will prevent disaster, especially when dealing with moisture from the sauce and cheese. I learned these the hard way when my first batch came out a little sad and floppy.
- Don’t Over-Sauce the Bottom Bun: This is the number one enemy of crispiness. Keep the marinara very light on the bottom roll. You want flavor, not a swamp! We rely on the Panko crust to keep things firm.
- Shred Your Own Mozzarella: I know that bag of pre-shredded cheese is convenient, but the anti-caking agents they add prevent that super smooth, gooey melt we are aiming for. Grate fresh mozzarella if you can; it melts better and tastes cleaner.
- Proper Chicken Slicing: Make sure the chicken pieces aren’t too thick when you cut them after frying. If the chunks are too big, they act like a heat sink and steam the bread underneath instead of staying crisp. Small, manageable pieces work best for slider distribution.
- The Two-Stage Baking is Crucial: Don’t skip covering it with foil for the first 15 minutes. That steam bath ensures the rolls warm all the way through and the cheese melts perfectly without burning the butter topping. Only take the foil off at the end to crisp up the very top crust.
Make-Ahead and Storage for Your Crispy Chicken Parmesan Sliders with Cheese
If you’re planning a big bash, you want to simplify things the day of, right? The great news is these sliders handle make-ahead prep really well, though you have to be strategic about which parts you prep in advance. If you’re preparing for a big crowd, check out my advice on freezer-friendly foods for tips on prepping ahead!
For the chicken, you can absolutely bread and pan-fry the chicken cutlets the day before, slice them, and keep them stored flat in an airtight container in the fridge. Just accept that they will lose *some* crispiness—that’s unavoidable in fridge storage. The day of, you skip steps 1 through 4 entirely! Just assemble and bake.
If you assemble the entire tray—sauce, chicken, cheese, topping—but don’t bake it, you can cover it tightly and refrigerate it for up to 12 hours. When you bake it, add about 5 extra minutes to the covered baking time to ensure everything reaches temperature evenly. Don’t freeze them assembled, though; that moisture is just going to turn the rolls mushy.
To reheat leftovers? Don’t microwave them unless you enjoy rubbery bread! Reheat individual portions on a baking sheet in a toaster oven or regular oven at 350°F for about 8 minutes until heated through and the cheese softens again. You won’t get back the original fresh crispiness, but you’ll taste great!
Serving Suggestions for Party Appetizer Sliders
Since these Crispy Chicken Parmesan Sliders with Cheese are such a rich and savory item, they really shine when paired with something light, fresh, or something tangy to cut through that delicious fat from the cheese and the butter topping. They really don’t need much, but presentation matters!
My go-to side is always a bright, simple green salad. We toss a mix of field greens with thinly sliced cucumber, maybe some red onion, and a sharp vinaigrette—nothing creamy. The acid keeps your palate refreshed between those cheesy bites.
If you’re bringing these to a potluck or a Super Bowl party, you get bonus points for making food that people can eat standing up. Check out my other easy slider recipes for crowds while you’re looking for event food! If you’re serving these as a true appetizer spread, consider having a few dipping options available on the side, even though they have marinara inside. A side of my creamy dill dip might sound weird with Parm, but it’s surprisingly good for dipping the crust edges! Or, just stick to easy-to-eat veggies like carrot sticks or celery if you want to keep things cleaner.
Frequently Asked Questions About Crispy Chicken Parmesan Sliders with Cheese
Can I make these Crispy Chicken Parmesan Sliders with Cheese ahead of time?
Yes, you can absolutely tackle the chicken prep ahead! Bread and fry the chicken entirely the day before, slice it, and keep it stored flat in an airtight container in the fridge. Just accept that they will lose *some* crispiness—that’s unavoidable in fridge storage. The day of, you skip steps 1 through 4 entirely! Just assemble and bake.
What is the best way to ensure the chicken stays crispy?
The absolute best way is the frying step! Panko breadcrumbs absorb less oil than regular breadcrumbs and provide superior texture. Also, don’t overcrowd the baking pan; give the rolls a little breathing room in the oven so the steam vents out instead of steaming the bottom of the rolls!
Can I bake the chicken instead of frying it for these sliders?
You totally can! If you want to skip the oil, you can use the air fryer method mentioned in the notes: 380°F for about 10 to 12 minutes, flipping halfway through. Baking straight in the oven without oil tends to dry the chicken out too much before it gets golden, so air frying is my preferred non-fry option.
What kind of rolls work best if I can’t find Hawaiian rolls?
Any soft, slightly sweet, pull-apart dinner roll will do the trick. Look for slider rolls or sweet yeast rolls at your grocery store. Just avoid hard, crusty rolls because they won’t steam together nicely during the covered bake time.
Why do I need to brush butter on top of the finished sliders?
That melted butter mixed with the reserved Parmesan and Italian seasoning is purely for flavor and texture enhancement on the top bun! It toasts up beautifully while the cheese melts underneath, giving that top piece of bread a savory garlic-parmesan crust that keeps it from being dry.
Estimated Nutritional Snapshot for Cheesy Chicken Slider Bites
I always run the numbers, but take these estimates with a grain of salt because my family likes to load up on the cheese, and that changes everything! This snapshot is based on using standard Hawaiian rolls and the exact measurements listed in the recipe. Remember that if you use leaner chicken or less oil during frying, these numbers will drop down.
Nutritional information is usually calculated assuming one slider per serving:
- Serving Size: 1 slider
- Calories: 350
- Sugar: 6g
- Sodium: 650mg
- Fat: 18g
- Saturated Fat: 7g
- Carbohydrates: 28g
- Protein: 20g
You can check out more high-protein meals on my easy egg bites recipe page if you’re tracking macros!
Share Your Ultimate Comfort Food Sliders Experience
I absolutely cannot wait for you to try this recipe. Seriously, send me a message or tag me on social media when you host your next game night or party featuring these amazing sandwiches. I always love seeing how folks stack theirs and what sides you choose to pair them with.
Did you stick to the mozzarella, or did you toss in some provolone? Did you manage to keep them super crispy? Let me know in the comments below! Your feedback helps make this recipe even better for the next person who tries it. If you want to read more about my kitchen philosophy, head over to my About Us page!
How to Make Crispy Chicken Parmesan Sliders with Cheese: Step-by-Step
The success of these sliders hinges on treating the chicken right *before* they go into the oven. We aren’t making soggy chicken cutlets here; we are aiming for pre-cooked, crispy little nuggets that are ready to be smothered. Pay attention to these cooking phases, and you’ll have zero regrets.
Preparing the Chicken for Maximum Crispiness
This is the key to the whole operation! Get your three shallow dishes set up. Flour goes in dish one, whisked eggs in dish two, and mix your Panko, 1/4 cup of that Parmesan, garlic powder, salt, and pepper in dish three. Take your pounded chicken cutlets one by one and dredge them thoroughly. First, the flour—shake off the extra, we just need a coating. Then, dip fully in the egg. Finally, transfer to the Panko mixture. This is important: press that panko mixture firmly onto the chicken. You want it really stuck on there so it doesn’t shed off while frying.
Cooking the Chicken and Prepping the Slider Bake
Now we cook them just enough to set the crust and cook the center. Heat about a quarter cup of oil in a large skillet over medium-high heat. You don’t need a deep fryer, just enough to coat the bottom of the pan nicely. Fry those breaded pieces in batches—don’t overcrowd the pan! They only need about 3 to 4 minutes per side until they are golden brown and cooked through. Pull them out and pop them onto paper towels to drain off that surface oil. Once they’re cool enough to handle (maybe five minutes), slice each piece into bite-sized chunks that fit easily onto a small roll. If you skip frying and opt to air fry, remember to check out my tips for getting crispy skin even on smaller pieces!
Assembling and Baking Your Cheesy Chicken Parmesan Sliders with Cheese
Time for assembly! Slice your whole pack of rolls horizontally, keeping them connected, and set the bottom halves in your greased baking dish. Spread a thin layer of marinara sauce directly onto the bottom buns. Next, layer on those amazing crispy chicken pieces. Top each piece generously with mozzarella. Put the top buns back on. For the finishing touch that takes these Crispy Chicken Parmesan Sliders with Cheese over the top, mix that remaining 1/4 cup of Parmesan with the melted butter and Italian seasoning, and brush it right over the top of the whole roll cluster. Cover it tightly with foil and bake at 375°F for 15 minutes. Then, foil off and bake another 5 to 7 minutes until that mozzarella is bubbling like crazy! Slice them up and dive in immediately.
Tips for Success with Baked Chicken Parmesan Sliders
Even though these look super simple—and they are!—a few tiny tricks will prevent disaster, especially when dealing with moisture from the sauce and cheese. I learned these the hard way when my first batch came out a little sad and floppy.
- Don’t Over-Sauce the Bottom Bun: This is the number one enemy of crispiness. Keep the marinara very light on the bottom roll. You want flavor, not a swamp! We rely on the Panko crust to keep things firm.
- Shred Your Own Mozzarella: I know that bag of pre-shredded cheese is convenient, but the anti-caking agents they add prevent that super smooth, gooey melt we are aiming for. Grate fresh mozzarella if you can; it melts better and tastes cleaner.
- Proper Chicken Slicing: Make sure the chicken pieces aren’t too thick when you cut them after frying. If the chunks are too big, they act like a heat sink and steam the bread underneath instead of staying crisp. Small, manageable pieces work best for slider distribution.
- The Two-Stage Baking is Crucial: Don’t skip covering it with foil for the first 15 minutes. That steam bath ensures the rolls warm all the way through and the cheese melts perfectly without burning the butter topping. Only take the foil off at the end to crisp up the very top crust. Also, make sure that melted butter topping you brush on the top rolls—which is essentially a simple garlic butter without the garlic—is spread edge-to-edge so every roll gets that savory crunch!
Make-Ahead and Storage for Your Crispy Chicken Parmesan Sliders with Cheese
If you’re planning a big bash, you want to simplify things the day of, right? The great news is these sliders handle make-ahead prep really well, though you have to be strategic about which parts you prep in advance. If you’re preparing for a big crowd, check out my advice on freezer-friendly foods for tips on prepping ahead!
For the chicken, you can absolutely bread and pan-fry the chicken cutlets the day before, slice them, and keep them stored flat in an airtight container in the fridge. Just accept that they will lose *some* crispiness—that’s unavoidable in fridge storage. The day of, you skip steps 1 through 4 entirely! Just assemble and bake.
If you assemble the entire tray—sauce, chicken, cheese, topping—but don’t bake it, you can cover it tightly and refrigerate it for up to 12 hours. When you bake it, add about 5 extra minutes to the covered baking time to ensure everything reaches temperature evenly. Don’t freeze them assembled, though; that moisture is just going to turn the rolls mushy.
To reheat leftovers? Don’t microwave them unless you enjoy rubbery bread! Reheat individual portions on a baking sheet in a toaster oven or regular oven at 350°F for about 8 minutes until heated through and the cheese softens again. You won’t get back the original fresh crispiness, but these Crispy Chicken Parmesan Sliders with Cheese will still taste amazing warmed up!
Serving Suggestions for Party Appetizer Sliders
Since these amazing little bites are so rich and cheesy, they really beg for something bright and fresh to go alongside them if you’re setting out a full spread. They are heavy hitters on their own, so you don’t want to weigh the whole plate down!
My absolute favorite thing to pair with a tray of these sliders is a super simple green salad. We’re talking romaine or mixed greens—nothing too fancy, maybe tossed with some shaved carrot and cucumber. The essential part is the dressing: you need a sharp vinaigrette, maybe lemon-based, to cut right through the richness of the melted mozzarella and that butter topping. It’s the contrast that makes the whole meal work.
If you’re serving these as the main event for game day, you’ll definitely want some veggie sticks nearby. Celery and carrot sticks are classic for a reason! Those crunchy raw vegetables are the perfect palate cleanser.
And speaking of dips—even though these sliders already have marinara sauce tucked inside, people love dipping things, right? If you want to get adventurous, a small bowl of my quick, creamy dill dip on the spread is surprisingly addictive. It’s unexpected with Italian flavors, but the cool, herby tang is fantastic against the hot, salty chicken crust. Just lay out a little bowl on the side and see what happens!
Frequently Asked Questions About Crispy Chicken Parmesan Sliders with Cheese
I know sometimes you have little tweaks you need to make to a recipe before you commit. It’s smart! People ask me all the time about substitutions or last-minute changes when making these delicious sandwiches. Since they need to be party-ready fast, having answers handy is a lifesaver. For more snack ideas in general once you master these, pop over and check out the Snacks category on the blog!
Can I make these Crispy Chicken Parmesan Sliders with Cheese ahead of time?
Yes, you can definitely tackle the chicken prep ahead! Bread and pan-fry the chicken cutlets the day before, slice them, and keep them stored airtight in the fridge. The day of the party, you skip those first four steps entirely! Just assemble the whole tray—sauce, chicken, cheese, and top butter treatment—cover it, and bake according to the instructions. Just remember to add about 5 extra minutes to the covered baking time since you are working with cold components.
What is the best way to ensure the chicken stays crispy?
Honestly, the best defense against sogginess happens before the bake! You have to use Panko breadcrumbs; they are superior to regular breadcrumbs because they stay sharper and longer against moisture. Also, you must pan-fry (or air fry) them until they are fully cooked and deeply golden *before* you layer them on the slider bottom. You are essentially setting that crust in oil, which is way more effective than trying to crisp up raw chicken under melted cheese!
Can I bake the chicken instead of frying it for these sliders?
You totally can! If you want to skip the pan-frying step, your best bet is definitely your air fryer. Cook those breaded chicken pieces at about 380°F for 10 to 12 minutes, making sure you flip them halfway through. If you try to bake them in the standard oven without oil, they get kind of pale and dry before they develop that essential coating we need for these slider bites.
What kind of rolls work best if I can’t find Hawaiian rolls?
Any soft, pull-apart dinner roll will work beautifully! Look for a package of sweet rolls or generic slider buns. The softness of the roll is key because it steams and softens up perfectly under the foil cover while the cheese melts. Hard, crusty rolls just won’t give you that classic gooey texture.
Why do I need to brush butter on top of the finished sliders?
That step is pure flavor insurance! Brushing the top buns with that mix of melted butter, Parmesan, and Italian seasoning does two things: it creates an amazing savory crust on the top layer while the cheese is melting underneath, and it stops the top bun from drying out completely during the final uncovered bake. You get flavor right to the edge!
Estimated Nutritional Snapshot for Cheesy Chicken Slider Bites
I always run the numbers, but take these estimates with a grain of salt because my family likes to load up on the cheese, and that changes everything! This snapshot is based on using standard Hawaiian rolls and the exact measurements listed in the recipe. Remember that if you use leaner chicken or less oil during frying, these numbers will drop down.
Nutritional information is usually calculated assuming one slider per serving:
- Serving Size: 1 slider
- Calories: 350
- Sugar: 6g
- Sodium: 650mg
- Fat: 18g
- Saturated Fat: 7g
- Carbohydrates: 28g
- Protein: 20g
You can check out more high-protein meals on my easy egg bites recipe page if you’re tracking macros!
Share Your Ultimate Comfort Food Sliders Experience
I absolutely cannot wait for you to try this recipe. Seriously, send me a message or tag me on social media when you host your next game night or party featuring these amazing sandwiches. I always love seeing how folks stack theirs and what sides you choose to pair them with.
Did you stick to the mozzarella, or did you toss in some provolone? Did you manage to keep them super crispy even using the baking method for the chicken? Let me know in the comments below! Your feedback helps make this recipe even better for the next person who tries it. If you want to read more about my kitchen philosophy and why I share all these secrets, head over to my About Us page!
PrintCrispy Chicken Parmesan Sliders with Cheese
Make crispy, cheesy Chicken Parmesan served in easy-to-eat slider buns. This recipe bakes the assembled sliders for a warm, gooey finish.
- Prep Time: 25 min
- Cook Time: 25 min
- Total Time: 50 min
- Yield: 12 sliders
- Category: Appetizer
- Method: Baking
- Cuisine: American
- Diet: Vegetarian
Ingredients
- 1 pound boneless, skinless chicken breasts, pounded thin
- 1 cup all-purpose flour
- 2 large eggs, beaten
- 1 1/2 cups panko breadcrumbs
- 1/2 cup grated Parmesan cheese, divided
- 1 teaspoon garlic powder
- 1/2 teaspoon salt
- 1/4 teaspoon black pepper
- 1/4 cup vegetable oil, for frying
- 12 slider buns (Hawaiian rolls work well)
- 1 cup marinara sauce
- 8 ounces mozzarella cheese, sliced or shredded
- 2 tablespoons melted butter
- 1 teaspoon Italian seasoning
Instructions
- Preheat your oven to 375 degrees Fahrenheit. Lightly grease a 9×13 inch baking dish.
- Prepare the chicken breading stations. Place flour in one shallow dish. Whisk eggs in a second dish. In a third dish, combine panko breadcrumbs, 1/4 cup of the Parmesan cheese, garlic powder, salt, and pepper.
- Dredge each thin chicken cutlet first in flour, shaking off excess. Dip into the egg mixture, letting excess drip off. Coat thoroughly in the panko mixture, pressing gently to adhere.
- Heat the vegetable oil in a large skillet over medium-high heat. Cook the breaded chicken in batches for 3 to 4 minutes per side until golden brown and cooked through. Remove chicken and place on a paper towel-lined plate. Let cool slightly, then slice each piece into bite-sized chunks suitable for the sliders.
- Slice the slider buns horizontally, keeping the top and bottom halves intact in their cluster. Place the bottom halves in the prepared baking dish.
- Layer the ingredients on the bottom buns: spread a thin layer of marinara sauce on each bottom bun half. Top with the crispy chicken pieces. Place a slice or sprinkle of mozzarella cheese over the chicken on each bun.
- Replace the top halves of the buns. In a small bowl, mix the melted butter with the remaining 1/4 cup of Parmesan cheese and Italian seasoning. Brush this mixture evenly over the tops of the assembled sliders.
- Cover the baking dish tightly with aluminum foil. Bake for 15 minutes.
- Remove the foil and bake for an additional 5 to 7 minutes, or until the cheese is fully melted and bubbly.
- Slice the sliders apart and serve immediately.
Notes
- For extra crispiness, you can air fry the breaded chicken instead of pan-frying. Cook at 380 degrees Fahrenheit for 10-12 minutes, flipping halfway.
- Use your favorite store-bought or homemade marinara sauce.
- If you prefer a sharper flavor, substitute some of the mozzarella with provolone cheese.
Nutrition
- Serving Size: 1 slider
- Calories: 350
- Sugar: 6
- Sodium: 650
- Fat: 18
- Saturated Fat: 7
- Unsaturated Fat: 8
- Trans Fat: 0.5
- Carbohydrates: 28
- Fiber: 1
- Protein: 20
- Cholesterol: 75