

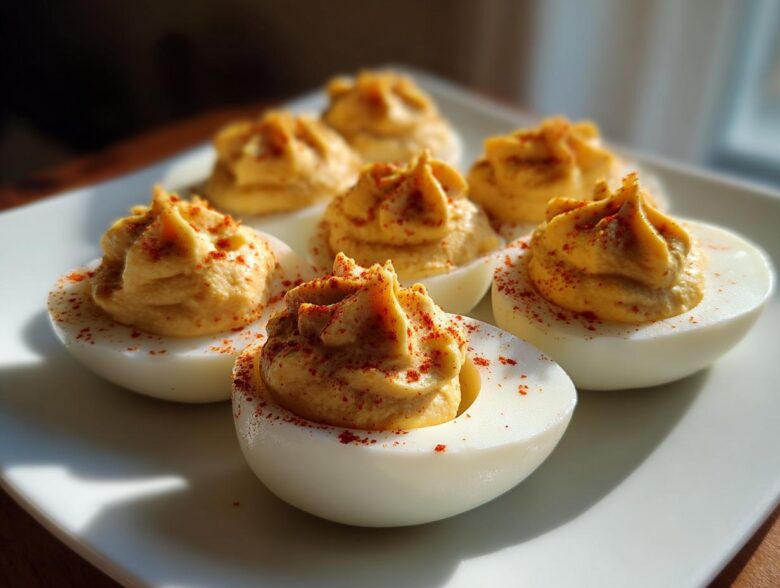
There’s always that one appetizer that vanishes first at every single potluck or family gathering, right? For us, it’s **classic deviled eggs**. I used to dread making them because they always ended up too runny or with those ugly, sad grey rings around the yolk. Boring! But then, making them became our little victory. Owen and I spent a whole afternoon tweaking the ratios of vinegar and mustard until we hit gold—a filling so unbelievably creamy and tangy, it’s completely foolproof. This recipe isn’t just another set of directions; it’s the good news that you can make the absolute **best** appetizer in under 35 minutes. If getting simple, reliable party food on the table brings a little joy back into your busy week, then consider this recipe officially reported! You’ll want to bookmark this one immediately, maybe even ahead of checking out what’s new over at The Wooden Skillet.
If you’re looking for other fast, high-protein wins for busy days, you should definitely see how we make our easy egg bites, too. It’s another great high-protein copycat recipe that always sounds the music in our kitchen.
Why This is the BEST Creamy Classic Deviled Eggs Recipe
What makes this the best deviled egg recipe? Honestly, it comes down to texture and that little kick of flavor you just can’t skip. We solved two big problems right here. First, that chalky, dry filling? Gone. Ours is thick, smooth, and unbelievably creamy. Second, those awful greenish-grey rings screaming, “These were cooked too long!”? Vanished! We nailed the science of the hard boil so you get the cleanest, brightest yellow filling every single time. Nobody wants fussy appetizers, which is why this recipe is such a dependable winner when we need creamy, fluffy scrambled eggs on the side of our breakfast, or just need something fast for a party.
Quick Prep Time for Classic Deviled Eggs
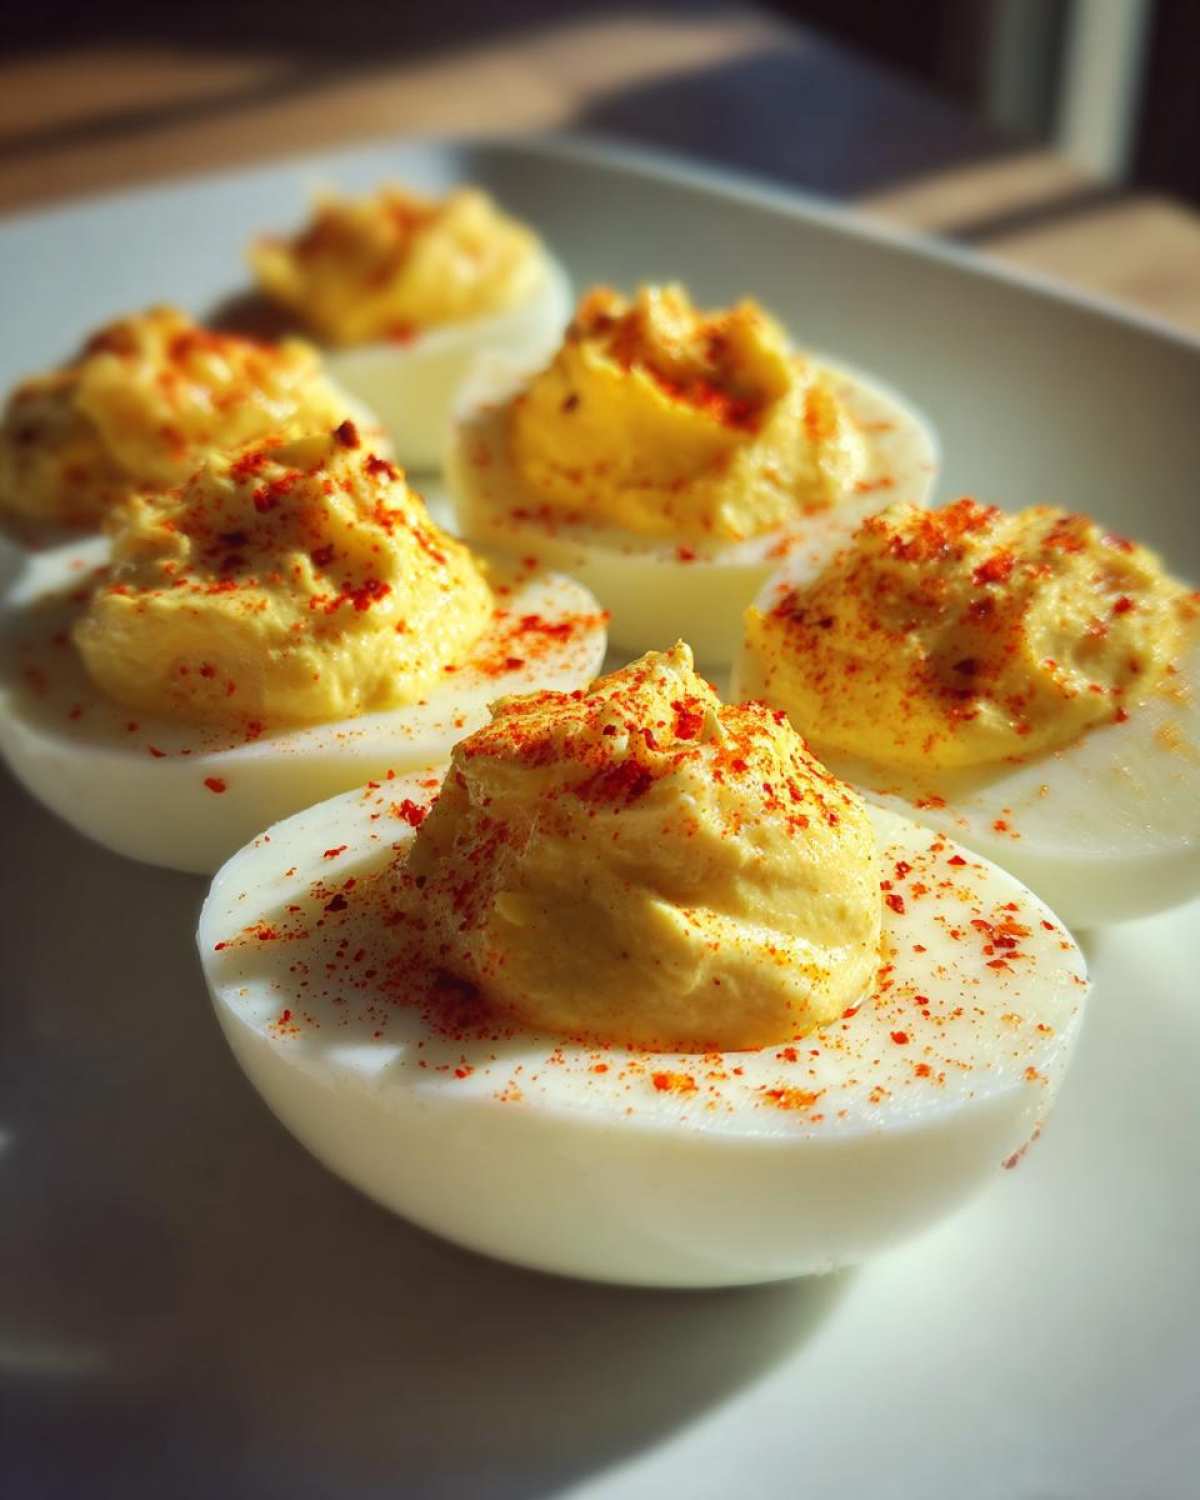
You can get these beauties on the table fast, which is huge when you’re rushing before guests arrive. Total time is just around 35 minutes, with maybe 20 minutes of actual hands-on work. This makes them perfect when you need creamy deviled eggs without spending half your afternoon in the kitchen. It truly counts as one of those great quick appetizer recipes we always fall back on!
Achieving the Perfect Tangy Flavor Profile
If your deviled eggs taste too much like plain yolk and mayo, you’re missing the good news! The tang is what wakes everything up. We use Dijon mustard—don’t even think about swapping it for the bright yellow kind, Trust me on this!—and just a hint of white vinegar. It hits the perfect sweet spot. That balance gives you delightful tangy deviled eggs that everyone keeps reaching for.
Ingredients for Foolproof Classic Deviled Eggs
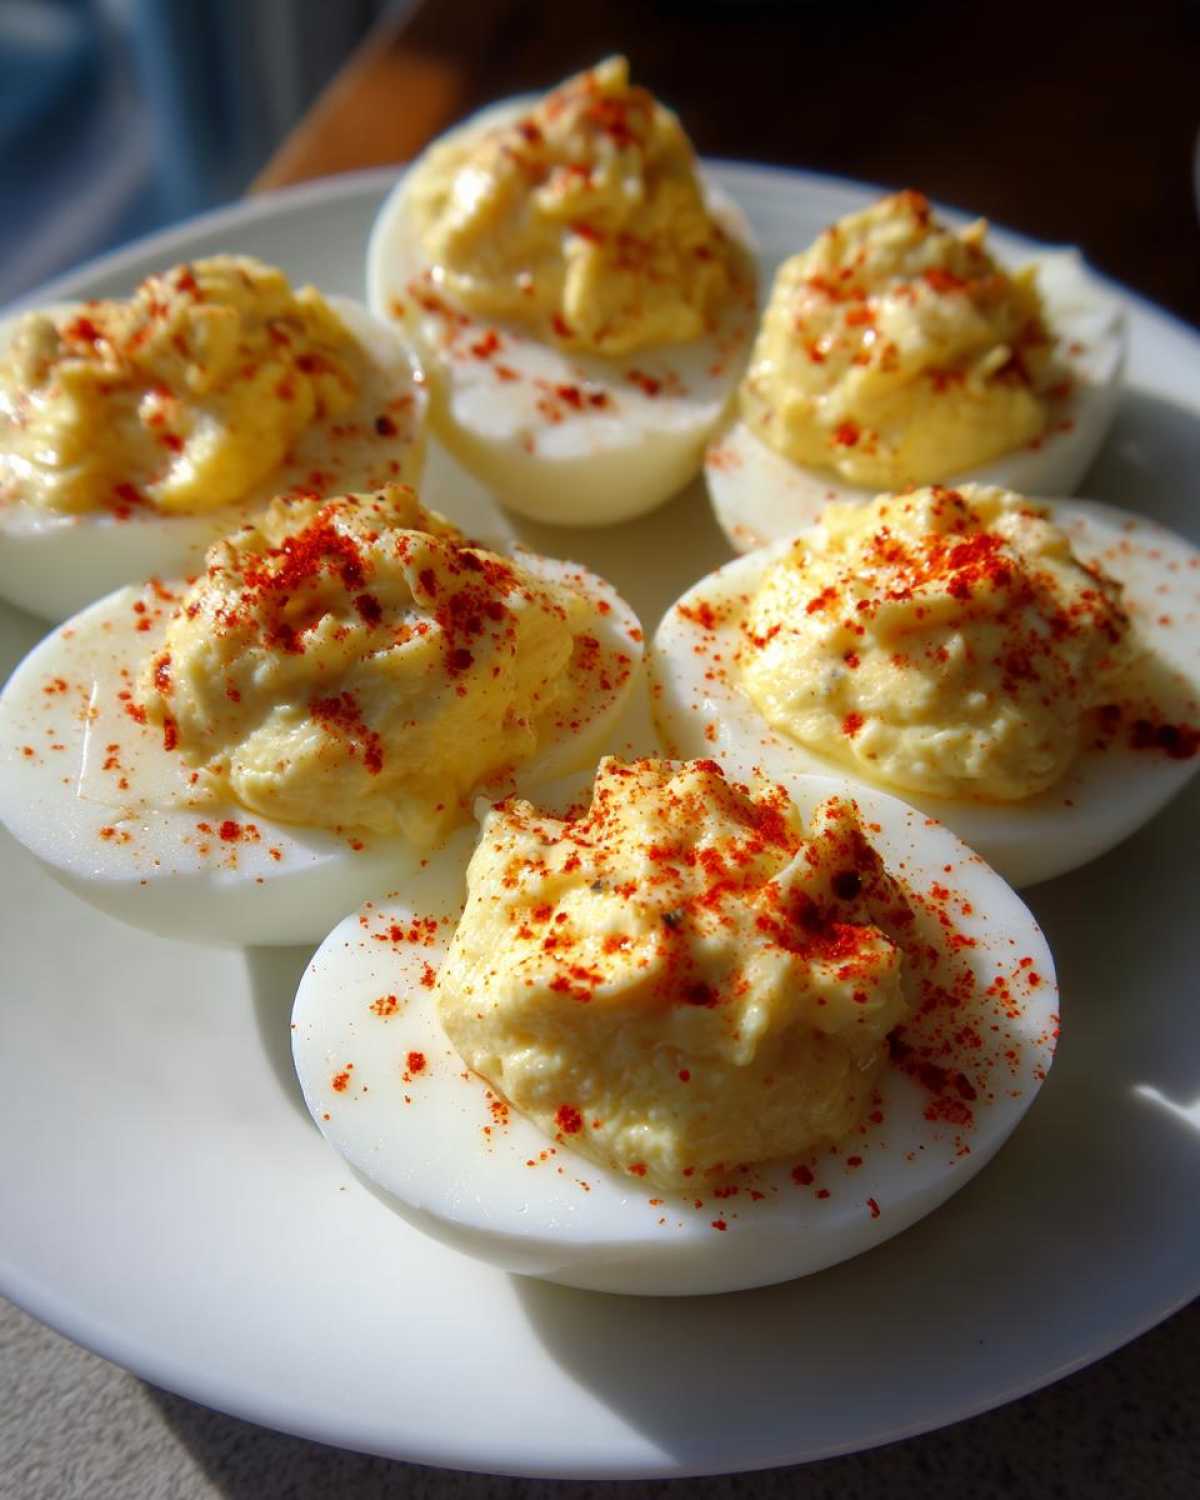
Getting the ingredients right means you’re already halfway to the party table! You need quality components here, because even though this recipe is simple, every ingredient plays a big role in that signature creamy texture we love. I always make sure to pull out everything before I even start boiling the water, keeps my assembly line moving perfectly. When you look at this list, you’ll see that we keep things super traditional—no weird additions here, just the foundations of a great appetizer.
- 12 large eggs
- 1/2 cup mayonnaise (use a good, full-fat one!)
- 2 teaspoons Dijon mustard (this is key for the tang)
- 1 teaspoon white vinegar
- 1/4 teaspoon salt
- 1/8 teaspoon black pepper
- Paprika, for garnish (you need the color!)
- Optional: 1 tablespoon chopped fresh chives, for garnish
Seriously, check out how easy the list is when you see it written out like this. It’s why these are such a reliable choice, especially if you’re looking for the quick results you see on pins like the one from Super Easy Classic Deviled Eggs—same idea, just our specific ratio for the filling!
Ingredient Notes and Substitutions
Okay, let’s talk quality control for a second. The biggest swap you might consider is the mustard. Please, please use Dijon if you can. That mild yellow mustard just doesn’t have the depth we need for that perfect zing. If you’re making these for a huge crowd, you could keep your eggs sitting out on the counter while you prep the filling; sometimes room temperature eggs peel way easier than ice-cold ones, though our 12-minute ice bath method usually handles the peeling for us!
Also, don’t skip the vinegar! It seems minor, but that little splash of acid slices right through the richness of the mayo we use high-quality, full-fat mayo for the smoothet filling possible.
How to Make Perfect Hard Boiled Eggs for Classic Deviled Eggs
This is where we fight back against those ugly green rings! Seriously, dealing with murky yolks used to make me give up on making these for parties altogether. But we cracked the code—literally. The secret to getting the brightest, prettiest yolks, which is essential for a visually stunning appetizer, is all about temperature control. We aren’t slow-simmering these things to death, because that’s what causes the discoloration.
Here is our foolproof method for achieving the perfect hard boiled eggs for deviled eggs: Start by putting your dozen eggs into a saucepan and cover them completely with cold water. Get that water boiling hard, like a rolling boil, over high heat. The moment it hits that rolling boil? That’s your trigger!
Immediately turn off the heat, put the lid on tight, and just let them sit. Not cook, just stand! Owen insists on timing this part exactly: 12 minutes on the dot. Covering the pan traps enough residual heat to cook them perfectly without overdoing it. This little standing trick is the difference between restaurant quality and ‘oh well.’
When the timer goes off, drain that hot water immediately and swap it out for ice water. You want a sink full of ice and cold water ready to go, trust me, dumping hot eggs into the ice bath is therapeutic when you realize you nailed it. Let them chill completely, about 15 minutes. This rapid cooling stops the cooking process instantly, which guarantees you won’t have those grey-green sulfur rings ruining your beautiful egg bites aesthetic.
Once they’re cool, peeling is a breeze. If you want more tips on all things egg, you can see what the folks over at Kefir Cooking suggest too—but trust me, the ice bath is non-negotiable for the best results!
The Classic Deviled Eggs Filling Secrets for Smoothness
This is where we move from a good deviled egg to the absolute best! If your filling texture looks chunky or gritty, you’ve probably added the mayo when the yolks were still too coarse. My absolute biggest tip for amazing creamy deviled eggs comes right at the beginning: you have to mash those cooked yolks until they are basically powder before you even look at the mayonnaise jar.
Use a sturdy fork and really put your back into it. I mean it—mash, mash, mash until you see no lumps whatsoever. If you have lumps here, they won’t disappear when you add the wet stuff. These are the deviled egg filling secrets that people won’t tell you in their quick three-step recipes.
Once the yolks are perfectly fine and silty, *then* you gently fold in the mayo and the vinegar. Mix gently just until it’s uniform and has that decadent, creamy texture. That’s the goal! Stop mixing the second it looks good. Overmixing once the liquids are in can sometimes thin the whole batch out too much.
Piping vs. Spooning the Classic Deviled Eggs Filling
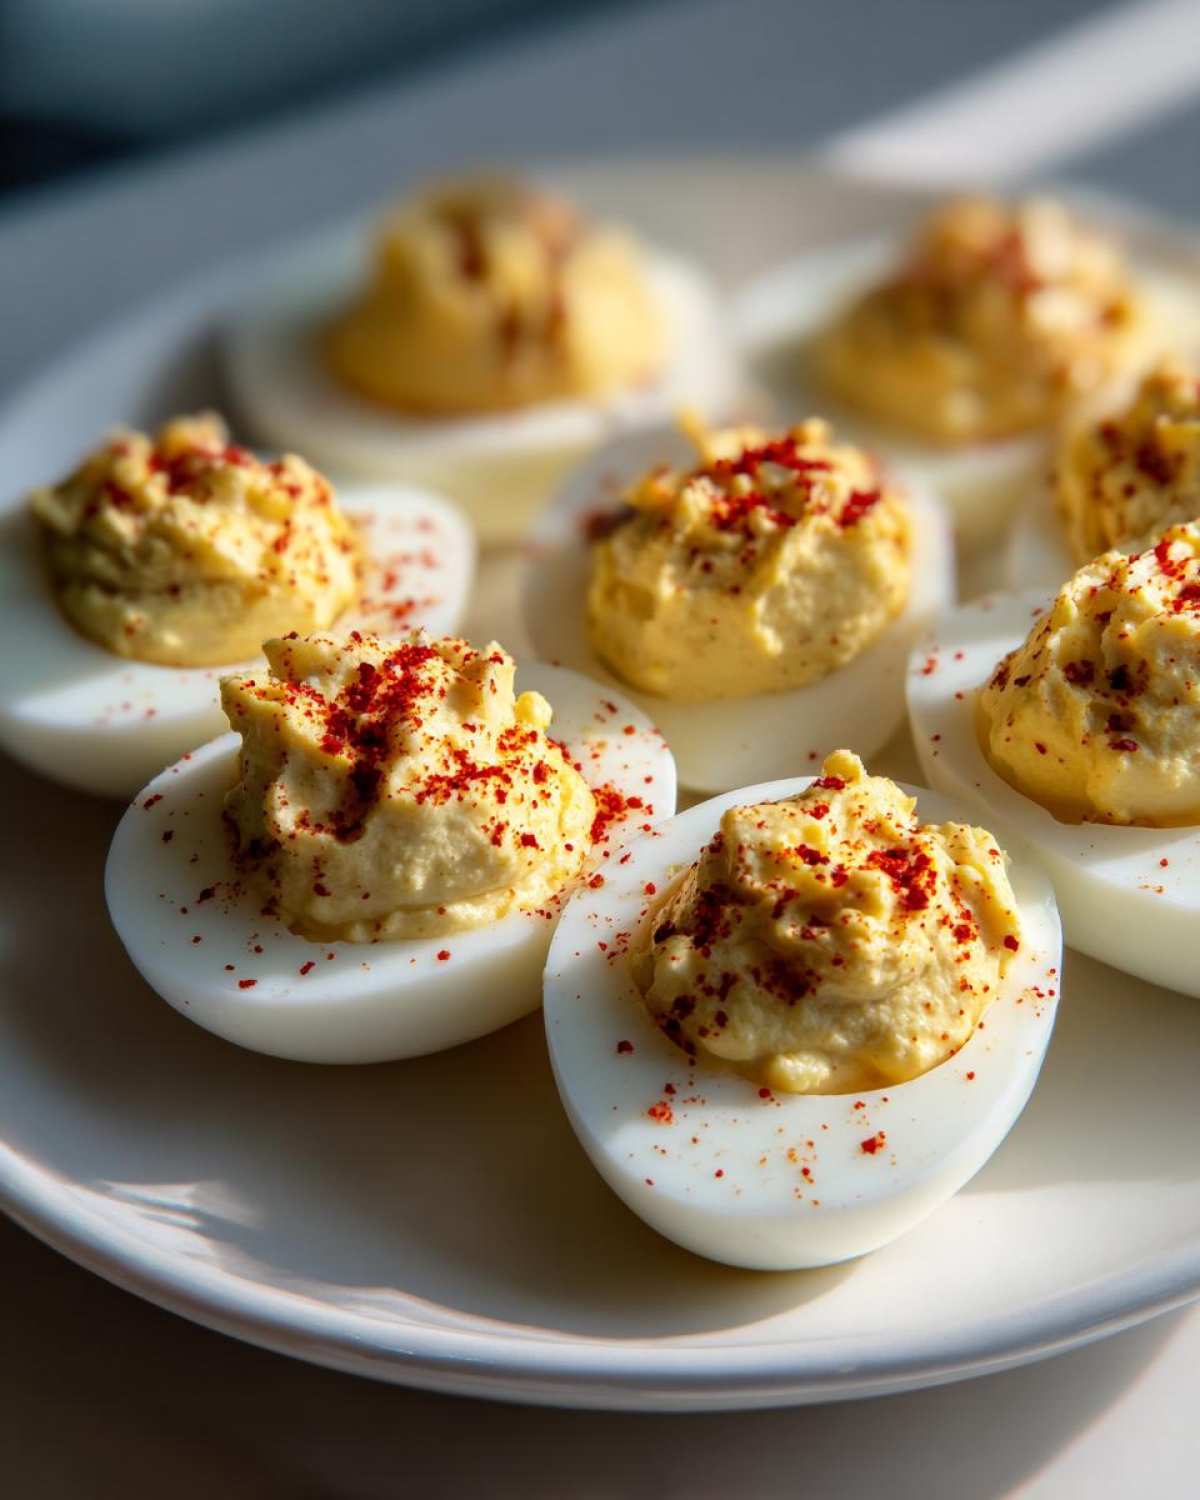
Now that you have this gorgeous, smooth mixture, we have to present it nicely, right? Presentation makes these an appetizer your friends will remember! You absolutely can use a small spoon, and the results are still delicious. But if you want that beautiful, scalloped look that fills the white perfectly, you need a piping bag.
I highly recommend getting a reusable pastry bag fitted with a large star tip—it makes the finished deviled eggs look so professional, like you bought them from a bakery! Carefully spoon your filling into the bag, give the end a twist to seal it, and then gently pipe the mixture back into the reserved egg whites. This little effort transforms them from simple snacks into the headline of your party spread!
Assembling Your Classic Deviled Eggs for Parties
Okay, the hard part is over! You have perfectly cooked eggs and the silkiest, most flavorful filling ready to go. Now we turn this great mixture into a sensational showstopper for your next event. This assembly stage is quick, but trust me, you can’t skip the final resting period if you want the very best flavor!
Take those perfectly hollowed-out egg white halves and arrange them neatly on your serving platter. I like to use a platter with a slight lip, just in case any adventurous guests try to sneak one before everyone has arrived! Then, carefully spoon or pipe that dreamy filling back into the whites. This transformation is always so satisfying to watch!
Once they are all filled up and looking gorgeous, we hit the crucial pause button. You absolutely must chill these babies down for at least 30 minutes before you serve them. Think of it like letting a good stew simmer; the flavors need time to really meld together. The mustard, the vinegar, the salt—they all need that chill time to settle into the yolk mixture and make it taste like the classic crowd-pleaser it’s meant to be. If you serve them warm, they taste fine, but chilled? They taste like celebration!
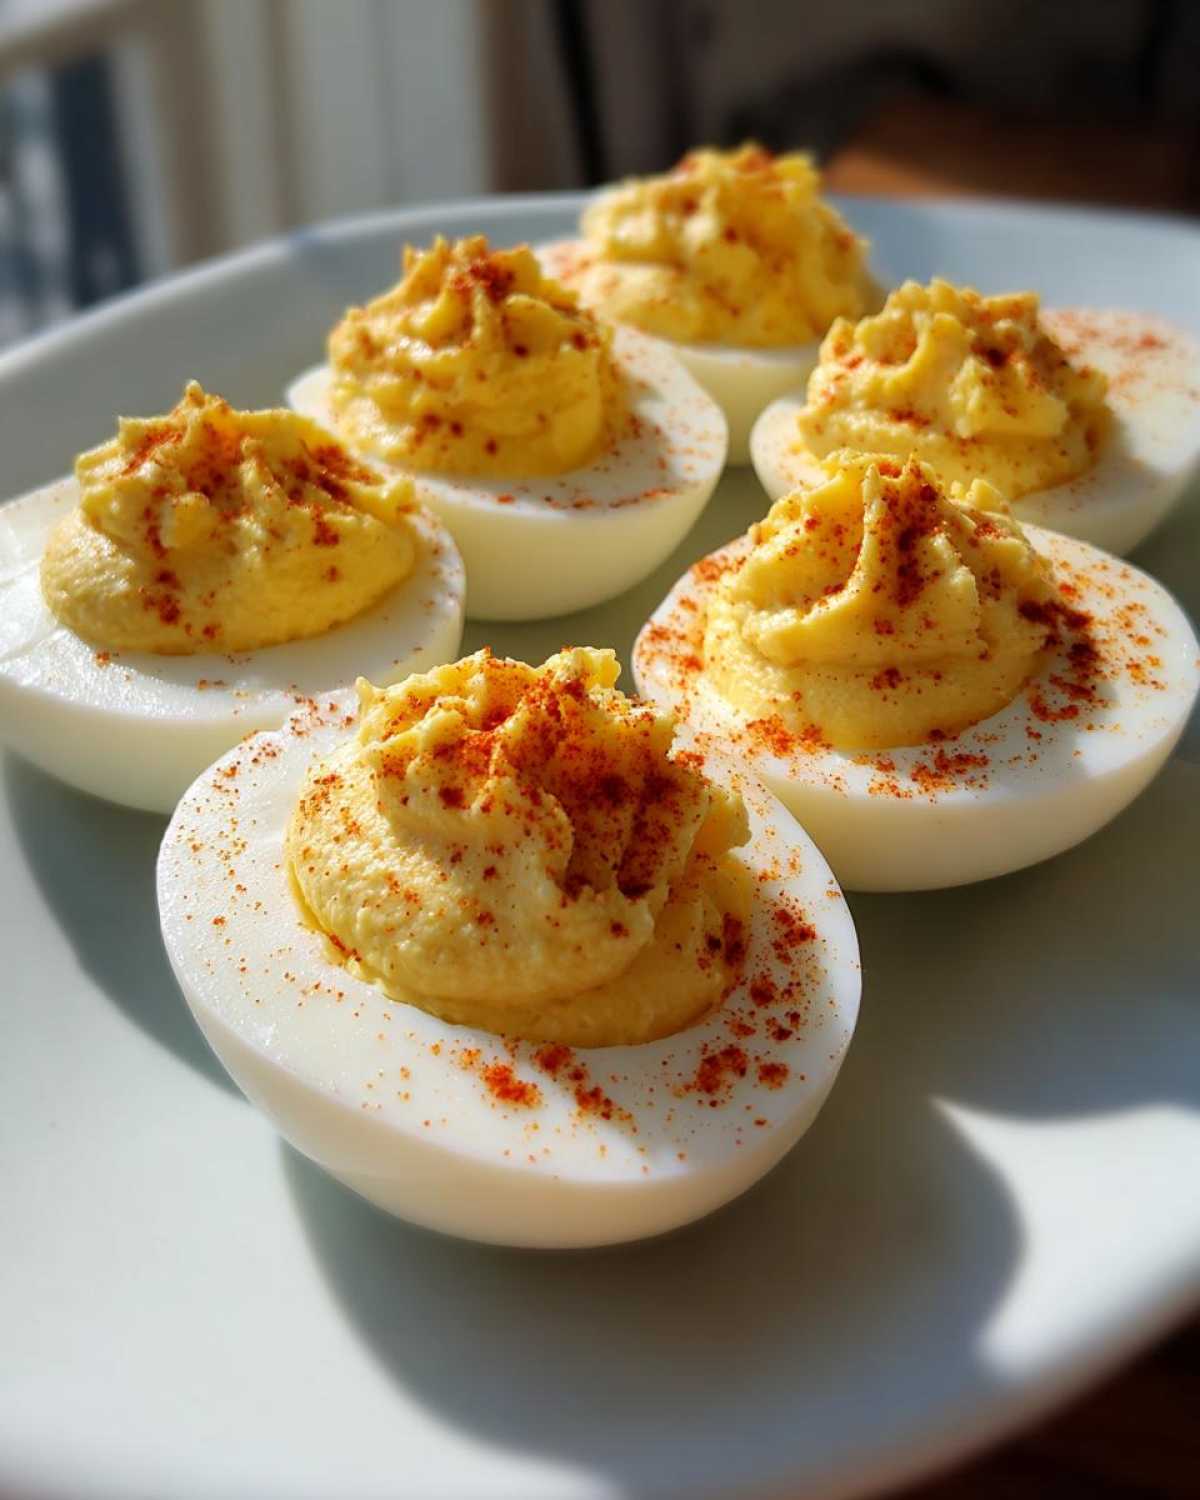
Because they are so easy to move, these are fantastic potluck ideas. They always travel well if you keep them covered tight in the cooler. And honestly, they are one of our absolute go-to party appetizers because they disappear so fast. If you want to see how another great blog presents their eggs, check out the gorgeous presentation tips over at Crisp Crumbs for inspiration on garnishes!
Tips for Making **Classic Deviled Eggs** Ahead of Time
You know how sometimes you need a dish ready before the actual party starts? I get it! Life is too short to be scrambling everything five minutes before the doorbell rings. The great news is that these classic deviled eggs are fantastic make ahead appetizers, but you have to be smart about how you prep them.
If you try to fill the egg whites the day before, the egg white starts to dry out a little on the edges, and sometimes the filling can get a strange film on top. Not pretty news for the Herald!
My favorite method is prepping the components separately. You can whip up that amazing, creamy yolk filling completely, cover it tightly with plastic wrap pressed directly onto the surface (this stops air from getting in and making it crusty!), and store it in the fridge for up to a full day. The whites? You can boil and peel those a day ahead too!
Then, about an hour before you serve, just take that dreamy filling out of the fridge, let it sit on the counter for 10 minutes to warm up just slightly (it mixes better that way!), and then pipe or spoon it into the chilled, peeled egg white halves. Give them that 30-minute chill afterward, and they are perfect. This strategy guarantees your texture is spot-on crunchy outside and silky inside!
Serving Suggestions for These Crowd Pleasing Snacks
Honestly, these are the ultimate crowd-pleasers. If I bring these to any event—whether it’s Thanksgiving, a summer BBQ, or just a Tuesday night impromptu gathering—they are gone before the potato salad. They just scream “celebration,” don’t they? That beautiful presentation you get from piping the filling and dusting it with paprika makes them look impressive, but the secret is they are so incredibly easy to eat.
Because they contain the perfect blend of rich filling and simple presentation, they are reliably the best crowd pleasing snacks you can offer. They travel well, they hold up fine sitting out on a platter for a little while (as long as it’s not too hot out!), and they satisfy everyone. They pair just as well next to fancy cocktails as they do next to a great pitcher of homemade lemonade.
Garnish Ideas Beyond Paprika for **Classic Deviled Eggs**
The classic look requires that beautiful, dusty red sprinkle of paprika, and we include that because tradition matters! But if you want to take your presentation just one tiny step further—which, of course, we encourage because we love a good spectacle—you can get creative with the garnish. These simple additions are fantastic deviled egg garnishes that don’t require you to change the incredible filling one bit.
Try these little touches:
- Smoked Paprika: If you want a deeper, slightly smokier flavor note than the standard sweet paprika, this is your answer. It gives a beautiful burnt-orange color, too.
- Fresh Dill or Chives: We mentioned chives above, but fresh dill is amazing here! Its bright, slightly anise flavor cuts through the richness beautifully. Just sprinkle a tiny bit on top right before serving.
- A Tiny Slice of Pickle: For those who like that extra layer of tang, top the filling with a very thin sliver of a cornichon or a mild dill pickle slice. It adds a fantastic look and a flavor pop.
- Everything Bagel Seasoning: If you’re feeling less traditional and more “fun party food,” a light dusting of EBT seasoning after the paprika is surprisingly good! It adds texture and a nice savory crunch.
Remember, the garnish is the sign-off! It’s the final announcement that your classic deviled eggs are ready for their close-up!
Frequently Asked Questions about Classic Deviled Eggs
It’s totally normal to have a few burning questions when you’re aiming for the perfect party appetizer! We hear from folks all the time about the tricky bits, especially when it comes to texture and timing. Here are the answers to what we hear most often so you can feel 100% confident before you start bubbling that water!
How to Avoid Grey Rings When Making Classic Deviled Eggs
This is the million-dollar question, isn’t it? The grey-green ring is caused by sulfur in the egg white reacting with the iron in the yolk when they cook for too long or cool down too slowly. We fight this with precision timing! Remember our method: bring the water to a rapid, rolling boil, immediately shut off the heat, slap a lid on it, and let those eggs stand for exactly 12 minutes. Then, and this part is critical, dump the hot water and plunge them straight into an ice bath! That rapid temperature shock stops the cooking instantly, preserving that bright, beautiful yellow color we need for these classic deviled eggs. It’s the secret weapon for that perfect-looking filling!
What makes this an easy deviled eggs recipe?
What makes this an easy deviled eggs recipe is that we use straightforward, traditional ingredients—no pickle relish or weird additions here, just the basics done right. The steps are simple: controlled boil, mash, mix, fill. Plus, the prep time is fast—under 20 minutes of actual work! The hardest part is boiling the eggs, and even that is foolproof if you follow the 12-minute standing rule. It’s designed for busy people who want big party results without the fuss!
Nutritional Estimate for This Appetizer
Now, I know some of you folks watching your macros or tracking steps are going to wonder about the nutritional breakdown here. Look, these are rich because they are delicious! We are using full-fat mayo and egg yolks, so they aren’t exactly diet food, but they are certainly better than most appetizers you find out there, especially since we aren’t sticking a bunch of creamy, sugary sauces on them.
Keep in mind that this is just an estimate based on the standard ingredients we listed—every brand of mustard or mayo changes things slightly. But for two small halves, you’re getting a pretty satisfying snack that’s low on carbs and high on that precious protein!
Here’s the estimated rundown per serving (which we counted as two halves):
- Serving Size: 2 halves
- Calories: 90
- Fat: 8g
- Saturated Fat: 2.5g
- Protein: 3g
- Carbohydrates: 0.5g
- Sodium: 110mg
- Cholesterol: 100mg
See? Not bad at all for a genuinely irresistible treat! This is another fun headline we can report in our kitchen: delicious *and* relatively balanced enough for a party staple. If you’re interested in how we handle data privacy here on the Herald, you can always check out our privacy policy, but for now, let’s just focus on eating these beauties!
Share Your Kitchen Dance Party Success
Well, my friends, that’s the full dispatch on how to make the absolute creamiest, tangiest classic deviled eggs that will steal the show at your next event. We’ve covered the perfect boil, the secret to the smooth filling, and all the tips to make sure they are ready to go when your guests arrive!
Now it’s your turn to announce the good news in your kitchen! I truly hope this recipe inspires you to turn up the music and maybe even have a little spontaneous dance break while you’re mixing up that yolk filling. Food is supposed to bring joy, connection, and a great story to tell the next day, so let us know how yours turned out!
Did you try the star tip for piping, or did you scoop them neatly with a spoon? Did you add a little extra zing of vinegar? We genuinely want to hear all about it! Please grab your phone, take a picture of those beautiful, bright yellow appetizers, and tag us online or just send us a little note through our contact page. Hearing about your kitchen successes is the highlight of our week—it’s the best headline we can possibly report!
Happy cooking, and I hope you celebrate something wonderful tonight!
PrintThe BEST Creamy Classic Deviled Eggs: Foolproof Recipe for a Tangy, Smooth Filling
You need a reliable recipe for classic deviled eggs that delivers a wonderfully creamy and tangy filling every time. This simple recipe guarantees a crowd-pleasing appetizer perfect for any party or holiday gathering.
- Prep Time: 20 min
- Cook Time: 15 min
- Total Time: 35 min
- Yield: 24 halves (12 servings)
- Category: Appetizer
- Method: Boiling and Mixing
- Cuisine: American
- Diet: Gluten Free
Ingredients
- 12 large eggs
- 1/2 cup mayonnaise
- 2 teaspoons Dijon mustard
- 1 teaspoon white vinegar
- 1/4 teaspoon salt
- 1/8 teaspoon black pepper
- Paprika, for garnish
- Optional: 1 tablespoon chopped fresh chives, for garnish
Instructions
- Place the eggs in a saucepan and cover them completely with cold water. Bring the water to a rolling boil over high heat.
- Once boiling, immediately remove the pan from the heat, cover it, and let the eggs stand for exactly 12 minutes. This prevents grey rings.
- Drain the hot water and immediately cover the eggs with ice water to stop the cooking process. Let them cool completely, about 15 minutes.
- Peel the cooled eggs. Slice each egg in half lengthwise. Gently scoop the yolks into a medium bowl. Place the egg white halves on a serving platter.
- Use a fork to mash the yolks until they are completely smooth. You want no lumps for the best creamy texture.
- Add the mayonnaise, Dijon mustard, white vinegar, salt, and pepper to the mashed yolks. Mix everything thoroughly until the filling is completely smooth and creamy. Taste and adjust seasoning if needed.
- Spoon or pipe the yolk mixture back into the hollows of the egg white halves. For a professional look, use a pastry bag fitted with a star tip.
- Garnish each deviled egg with a light dusting of paprika and a sprinkle of fresh chives, if using.
- Chill the deviled eggs for at least 30 minutes before serving to allow the flavors to set.
Notes
- For perfectly cooked eggs without green rings, stick strictly to the 12-minute standing time after the water boils.
- If you do not have a pastry bag, use a small spoon to neatly fill the egg white halves.
- You can make the filling up to one day ahead and store it covered in the refrigerator. Fill the egg whites just before serving for the freshest taste.
Nutrition
- Serving Size: 2 halves
- Calories: 90
- Sugar: 0.5
- Sodium: 110
- Fat: 8
- Saturated Fat: 2.5
- Unsaturated Fat: 5.5
- Trans Fat: 0
- Carbohydrates: 0.5
- Fiber: 0
- Protein: 3
- Cholesterol: 100