

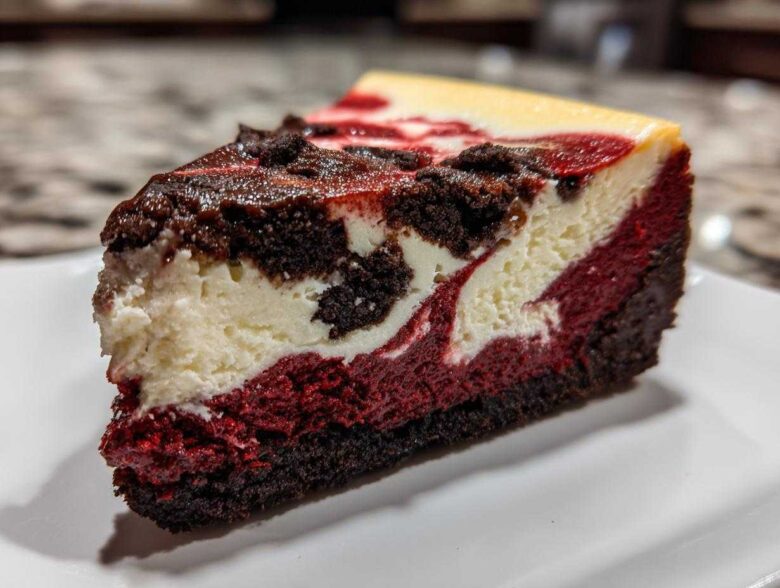
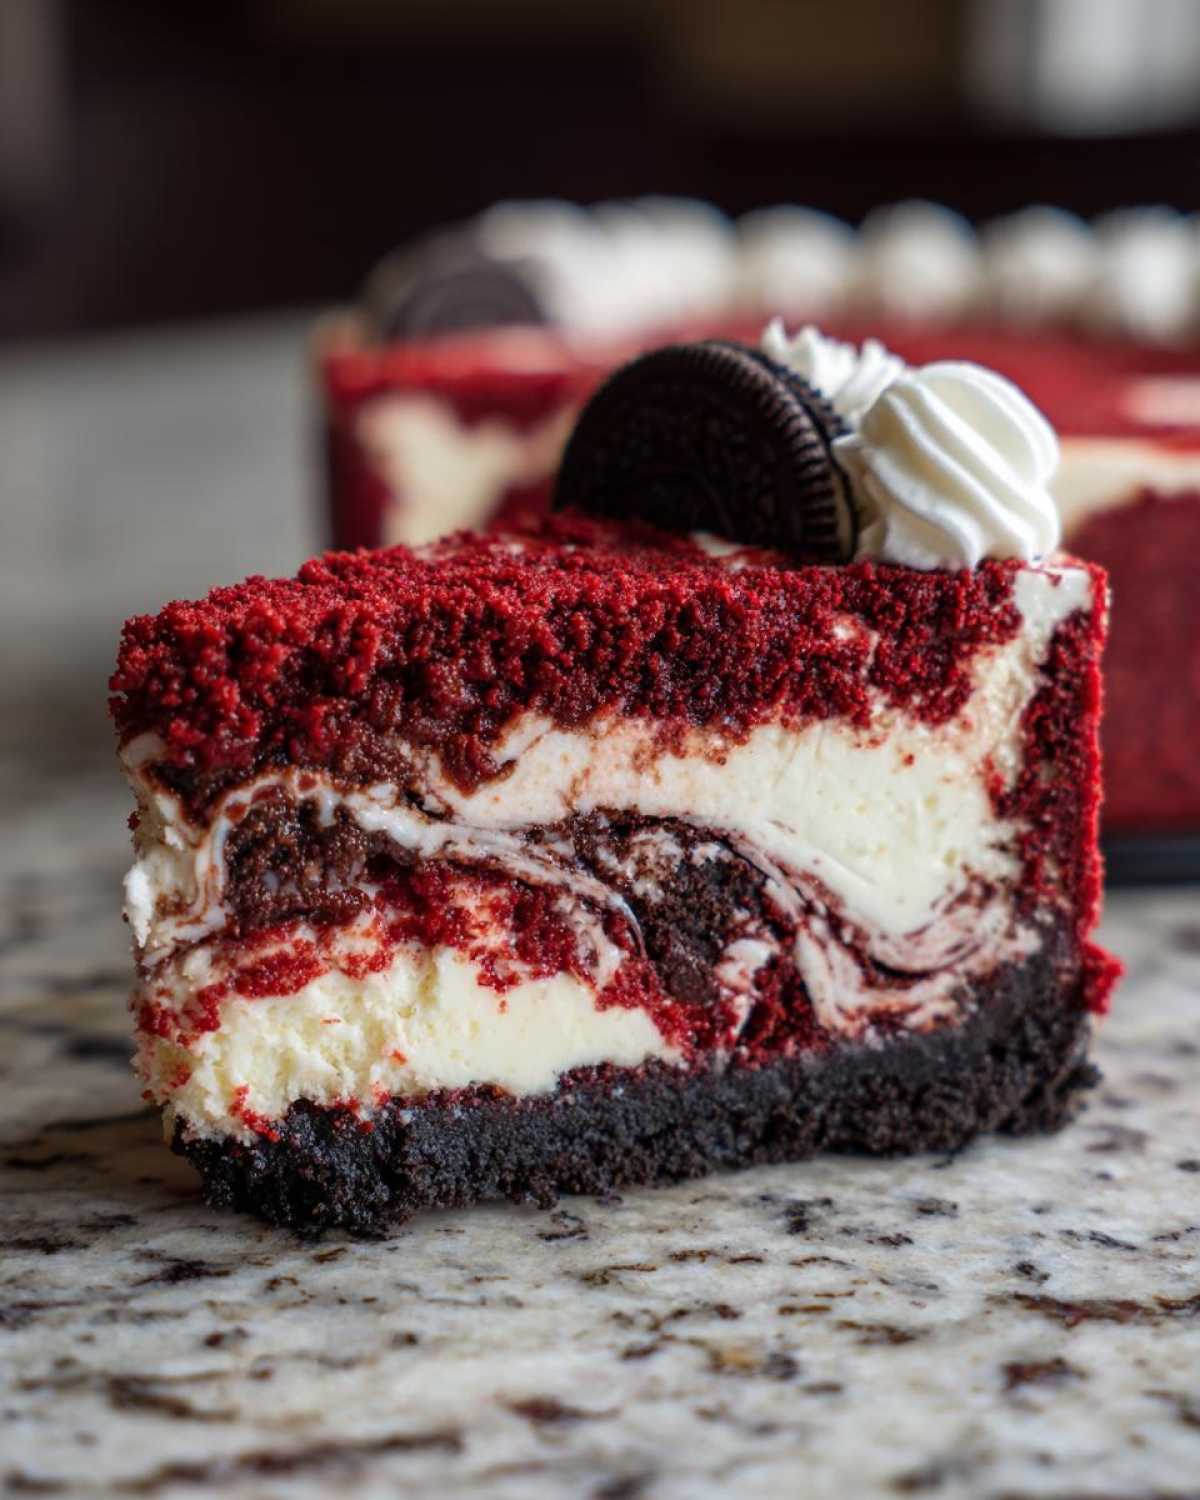
If you’re looking for a recipe that screams “special occasion” and makes everyone stop dead in their tracks when you bring it out, you need a showstopper. For me, that’s always been the red velvet cheesecake. I know, I know, it sounds intimidating—layering cake and cheesecake? But honestly, making something this decadent is where I find the real joy in baking these days. Forget efficient pit stops; this is an event! This recipe, the one Owen begs for every Christmas, delivers that unbelievably ultra creamy texture we all crave, all sitting atop a crunchy Oreo crust, topped off with a beautiful, messy, artistic swirl effect. Trust me, you’re going to want to announce this good news to everyone you know! If you want to know more about why we started sharing these kitchen moments, check out our story on the About Us page.
Why This Ultra Creamy Red Velvet Cheesecake is Your Next Showstopper Dessert
When you bring this dessert to the table, I promise you, the conversation stops. Why? Because it seriously looks like it came straight from a high-end bakery! This isn’t just a treat; it’s a full-blown centerpiece, especially when we’re talking Holiday Cheesecake spreads for Christmas.
- It guarantees that perfect, creamy cheesecake texture that just melts on your tongue.
- We sneak in that rich, crunchy Oreo crust for textural contrast.
- This truly is a showstopper dessert that earns compliments before the first slice is even cut.
- It’s the ultimate decadent dessert for those big family gatherings.
Achieving Velvety Texture Desserts
Listen, the secret to avoiding any grainy texture—which is the enemy of a great cheesecake—is simple but crucial. You absolutely must use ingredients that are fully softened to room temperature. That means no rushing the cream cheese! Also, don’t skip the water bath when baking. That gentle steam is what protects the surface and locks in the moisture, guaranteeing those beautiful velvety texture desserts we are aiming for.
Gathering Ingredients for Your Red Velvet Cheesecake Recipe
Okay, this Red Velvet Cheesecake Recipe has a few moving parts, I won’t lie. But the steps are straightforward if you have everything lined up. Think of it like a production line! Having everything ready keeps the momentum going, especially since we need temperatures to be just right for that creamy cheesecake.
When you pull out the cream cheese, make sure it’s truly soft—like, press-a-finger-in-it soft. Same goes for those eggs; they need to be at room temperature. That’s key for smoothness! We are building this magnificent thing in three main sections: the crust, the creamy filling, and the cake swirl.
For the Decadent Oreo Crust Cheesecake Base
This is where we start building the flavor foundation. You need rich, dark chocolatey power in here!
- 1 ½ cups crushed Oreo cookies (don’t worry about removing the cream filling, that just adds richness!)
- ¼ cup granulated sugar (just a touch for sweetness)
- 6 tablespoons unsalted butter, melted
For the Creamy Cheesecake and Red Velvet Swirl Filling
This is the heart of the operation! Remember, you absolutely need three full packages of cream cheese here, and everything must be room temp to avoid those annoying lumps. I’m serious about checking the temperature on those eggs, too!
- 3 (8 ounce) packages cream cheese, softened (the absolute key to that decadent dessert!)
- 1 ½ cups granulated sugar (for the main filling)
- 1 teaspoon vanilla extract
- ¼ cup sour cream
- 3 large eggs, room temperature
- 1 teaspoon white vinegar (for the red portion)
- 1 teaspoon cocoa powder
- 1 teaspoon red food coloring (seriously, use the gel kind if you have it—it makes the color pop without making the batter watery!)
- 1 cup buttermilk
- 1 teaspoon baking soda
- 1 ½ cups all-purpose flour
- ½ teaspoon salt
- 1 teaspoon white vinegar (for the cake batter portion)
- 1 teaspoon vanilla extract (for the cake batter portion)
- ½ cup unsalted butter, softened (for the cake batter portion)
- ½ cup packed brown sugar (for the cake batter portion)
- 2 large eggs (for the cake batter portion)
- 1 teaspoon red food coloring (for the cake batter portion)
For the Cream Cheese Frosting
We cap this stunner off with a simple, luscious frosting. If you want more tips on making frosting generally fly off the handle, I break down my favorite recipes over here on how to make the best vanilla buttercream, but this cream cheese version is essential here.
- 1 cup powdered sugar
- 4 tablespoons unsalted butter, softened
- 4 ounces cream cheese, softened
- 1 teaspoon vanilla extract
Homemade Cheesecake Tutorial: How to Prepare the Red Velvet Cheesecake
Now for the exciting part! Don’t let the layers scare you away. If you follow these steps carefully, you’ll see that making this Red Velvet Cheesecake Recipe is easier than you think. We’re making a crust, a base filling, a red velvet cake dollop, and then swirling it all together. It’s a fantastic homemade cheesecake tutorial that results in something truly stunning.
This might seem like a long process, but trust me, it sets you up for that ultra creamy layer we are aiming for. Get your springform pan ready and let’s get baking! Once this is done, you’ll think, “Why did I ever stress about baking this before?”
Step 1: Building the Oreo Crust
First things first, we need a sturdy base. Go ahead and preheat that oven up to 350°F (175°C). While it’s warming up, grab your crushed Oreos, the ¼ cup of sugar, and your melted butter. Mix everything until it looks like wet sand—you want it sticking together nicely.
Press that mixture firmly into the bottom of your 9-inch springform pan. Don’t just sprinkle it; really press hard! Then, pop it into the preheated oven for just 10 minutes. We just want to set it. When it comes out, you must let it cool completely. If you put batter on a warm crust, things get messy fast!
Step 2: Mixing the Plain Creamy Cheesecake Filling
Time for the star! In a big bowl, take your softened cream cheese and 1 ½ cups of sugar. Beat these together until they are genuinely smooth—no little cream cheese lumps allowed. This is where we lock in that luscious texture. Next, mix in the vanilla extract and sour cream.
Now, the eggs. Add your three room-temperature eggs in *one at a time*. I mean it, just one, mix until it disappears, *then* add the next. This is so important for avoiding overmixing, which introduces air and causes cracks later. Mix just until combined; don’t whip it into a frenzy!
Step 3: Creating the Red Velvet Batter Components
This takes a tiny bit of organization! You’re actually making two different batters here: the white cheesecake batter (half of what you just made) and the red cake batter that we dollop in.
Take about half of your plain cheesecake batter and set it aside. To the remaining half, you’re going to whisk in the cocoa powder, 1 teaspoon of red food coloring, and 1 teaspoon of vinegar. Set this red mixture aside.
Separately, mix up your red velvet cake portion. Whisk your flour and salt together. In a different bowl, cream your ½ cup softened butter with the brown sugar. Beat in those two eggs one by one. Then, mix in the second batch of coloring, vanilla, and vinegar. Finally, dissolve the baking soda in the buttermilk and alternate adding the flour mix and the buttermilk mix to the wet ingredients until that red velvet cake base is *just* combined.
Step 4: Layering and Creating the Swirl for Your Red Velvet Cheesecake
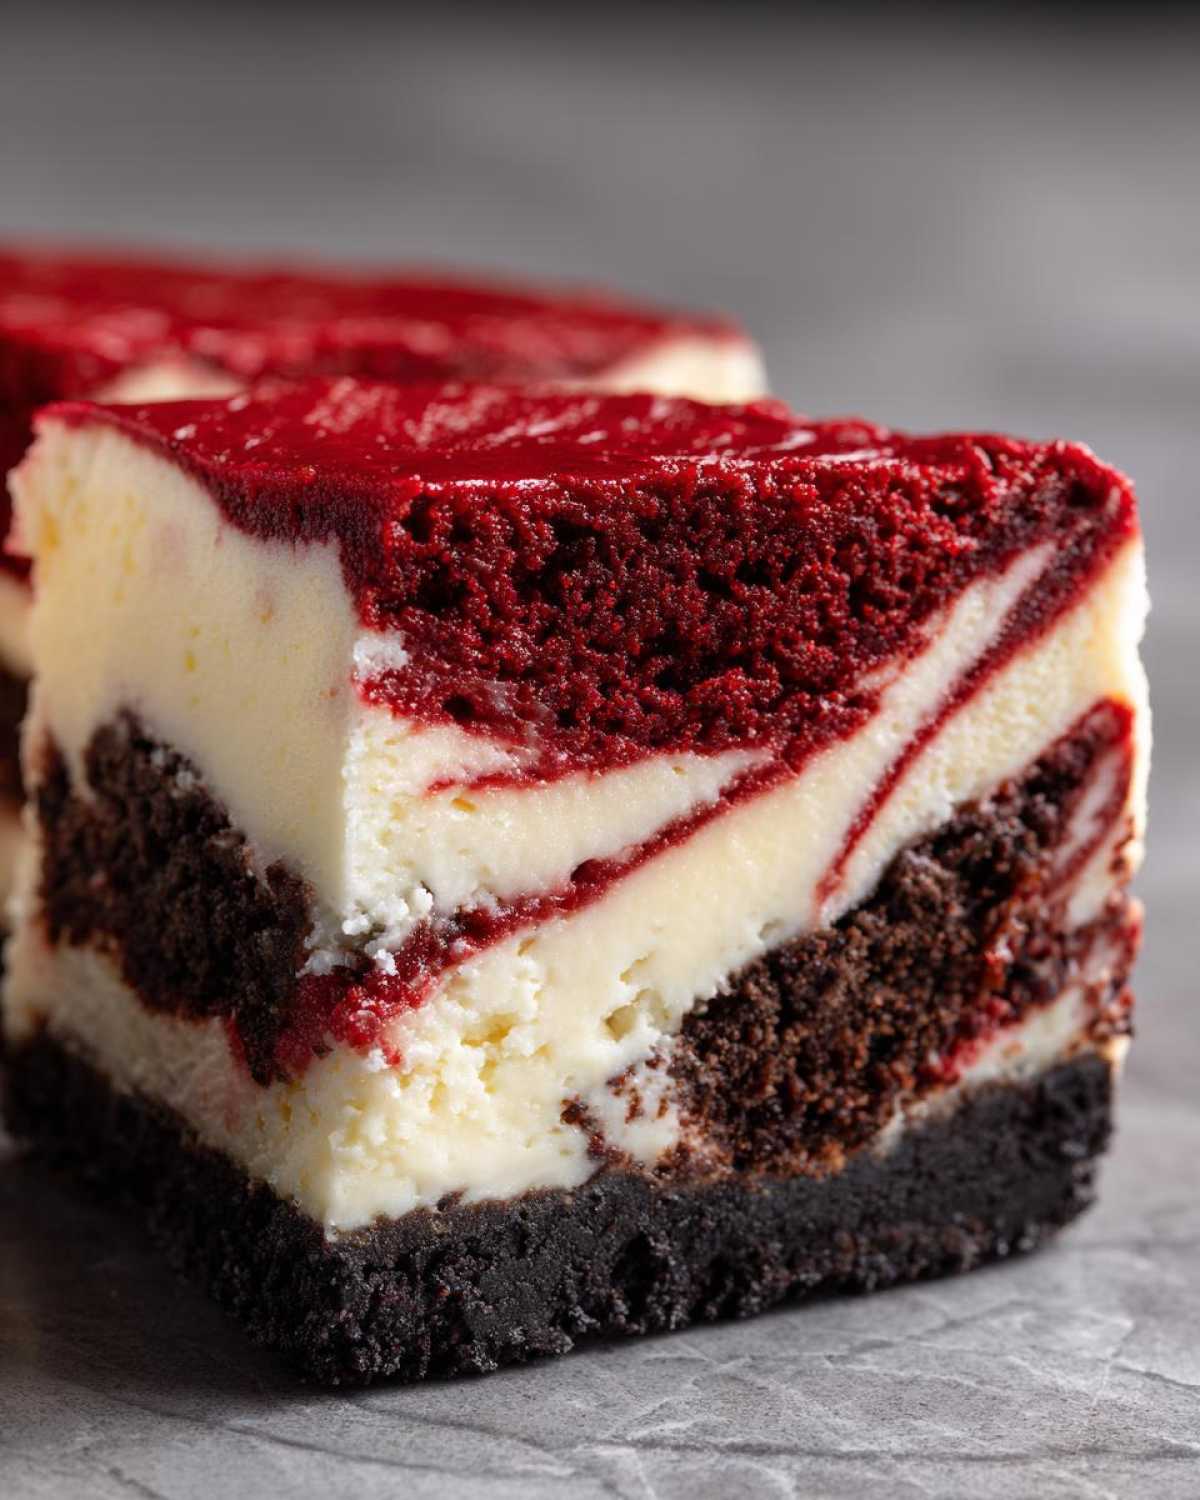
This is the fun part where it starts looking like a cheesecake cookie dream! Pour exactly half of your *white* cheesecake batter over that cooled Oreo crust. Then, carefully spoon dollops of your *red* cheesecake batter over the white layer. Now, take your red velvet cake batter and drop spoonfuls sporadically over everything.
Grab a butter knife or a skewer. Gently draw lines through the batters to swirl them together. Keep your movements slow and minimal! If you swirl too much, everything turns into one muddy color. We want lovely marbled ribbons!
Step 5: Baking the Layered Cheesecake with a Water Bath
To prevent cracks and ensure that super creamy cheesecake center, the water bath is a must-do high-E-A-T step. Take heavy-duty foil and wrap the bottom and sides of your springform pan really well—we don’t want any water sneaking in!
Place your foil-wrapped pan inside a larger roasting pan. Now, carefully pour hot water into the roasting pan until it comes about halfway up the sides of your cheesecake pan. You’re basically creating a gentle steam oven.
Bake this beauty at 350°F (175°C) for about 60 to 75 minutes. You’ll know it’s done when the edges look set, but the very center still has a slight wobble if you gently nudge the pan. Please don’t wait until the center is totally firm, or it will overbake!
Step 6: Cooling, Chilling, and Frosting the Red Velvet Cheesecake
Do *not* rush the cooling! When the time is up, turn your oven off completely. Prop the oven door open just a crack—use a wooden spoon or a rolled-up towel—and let the cheesecake sit in that warming oven for a full hour. This slow cooling prevents the dramatic temperature shift that causes cracking.
After an hour, take it out and let it cool on a wire rack until it’s just warm to the touch. Then, wrap it up tight and move it to the fridge. It needs a minimum of 6 hours, but honestly, this showstopper dessert is always best cheesecake ever quality when chilled overnight. Once it’s perfectly chilled, smooth that cream cheese frosting over the top, and get ready to celebrate!
Tips for Success When Baking Your Red Velvet Cheesecake
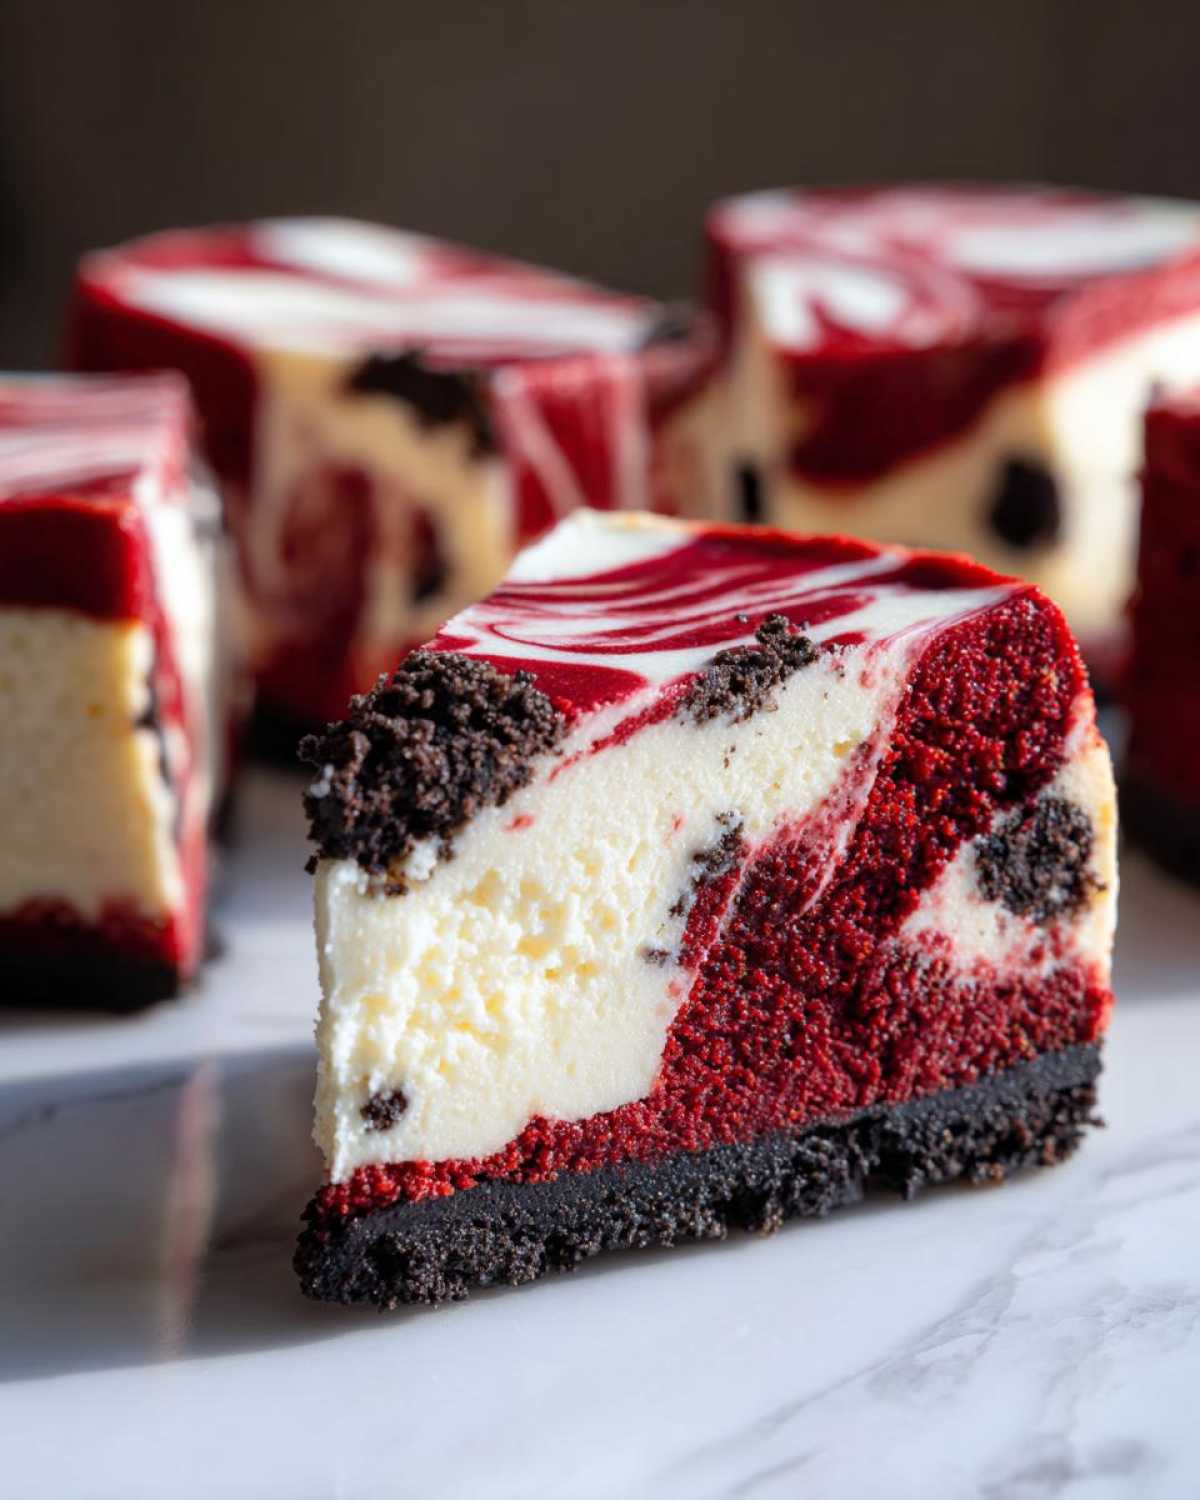
Now that you have all the steps for this magnificent creation, I just wanted to drop a few extra words of encouragement. Baking cheesecake, especially a beautiful layered one like this red velvet cheesecake, requires a little patience and strategy. Think of these little pointers as Owen’s musical cues—follow them, and the whole process will sound beautiful!
I’ve learned the hard way sometimes that rushing even one step can lead to lumps or cracks, and nobody wants a cracked top when they’re aiming for a real showstopper! These tips are about making sure your final product is truly worthy of being announced in the “Hungry Herald” section. If you want to check out how we get perfect skin on our roasted chicken, that technique is all about temperature control, too! You can see that recipe here.
Ingredient Temperature Matters for Creamy Cheesecake
I can’t stress this enough: room temperature ingredients are the secret handshake for any creamy cheesecake. If your cream cheese is cold, it won’t ever mix smooth; you’ll end up with little lumps that just sit there mocking you. That’s the opposite of the velvety texture we want!
Take the cream cheese out an hour or two before you plan to start mixing. For the eggs, if I forget to pull them out, I put them in a bowl of very warm (but not hot!) water for about ten minutes. That quick warm-up does the trick. When everything is the same temperature, they emulsify beautifully, giving you that smooth, rich base.
Why the Water Bath is Non-Negotiable for This Red Velvet Cheesecake
Look, I know wrapping the springform pan in foil and setting it in a roasting pan full of water seems like an extra, fussy step. But when you are making something this decadent, you need to treat that oven gently! That steam from the water bath performs magic.
The steam surrounding the cheesecake keeps the heat even and moist. This gentle environment is precisely what prevents the edges from baking too fast while the middle is still raw. That even baking prevents sticking and those terrible surface cracks. Without the water bath, you risk an overbaked, dry edge and a cracked top. We aren’t aiming for dry here; we are aiming for pure, unadulterated, velvety texture desserts!
Festive Baking Ideas: Serving Suggestions for Your Red Velvet Cheesecake
Once this gorgeous red velvet cheesecake is finally chilled and frosted, the real fun begins: making it look like the centerpiece it deserves to be! Because this recipe screams ‘special occasion,’ I love going a little extra on the presentation, especially when we’re talking about Holiday Cheesecake menus leading up to Christmas.
This dessert is already so dramatic with its deep red and white swirls peeking out, but a few simple garnishes can really elevate it into the ultimate festive baking idea. Owen usually handles the playlist, but I’m in charge of the final flourish!
- Keep it classic Christmas: After spreading that luscious cream cheese frosting, dust the top lightly with powdered sugar to mimic snow. Then, scatter some dark chocolate shavings right in the center. It looks so sophisticated!
- For a pop of color that really plays up the velvet, try using fresh raspberries or halved bright red strawberries around the edge of the cake before you slice it. They look incredible against that deep red layer.
- If you’re serving this up with other fun holiday drinks, I always recommend making a big batch of non-alcoholic punch to serve alongside it! You can find my favorite recipe for a sparkling, fruity punch perfect for celebrations right here.
- If you’re making this for an actual Christmas party, try placing a few sprigs of fresh mint around the outer edge of the frosting—the green and red contrast is stunning, and it just adds a wonderful fresh aroma.
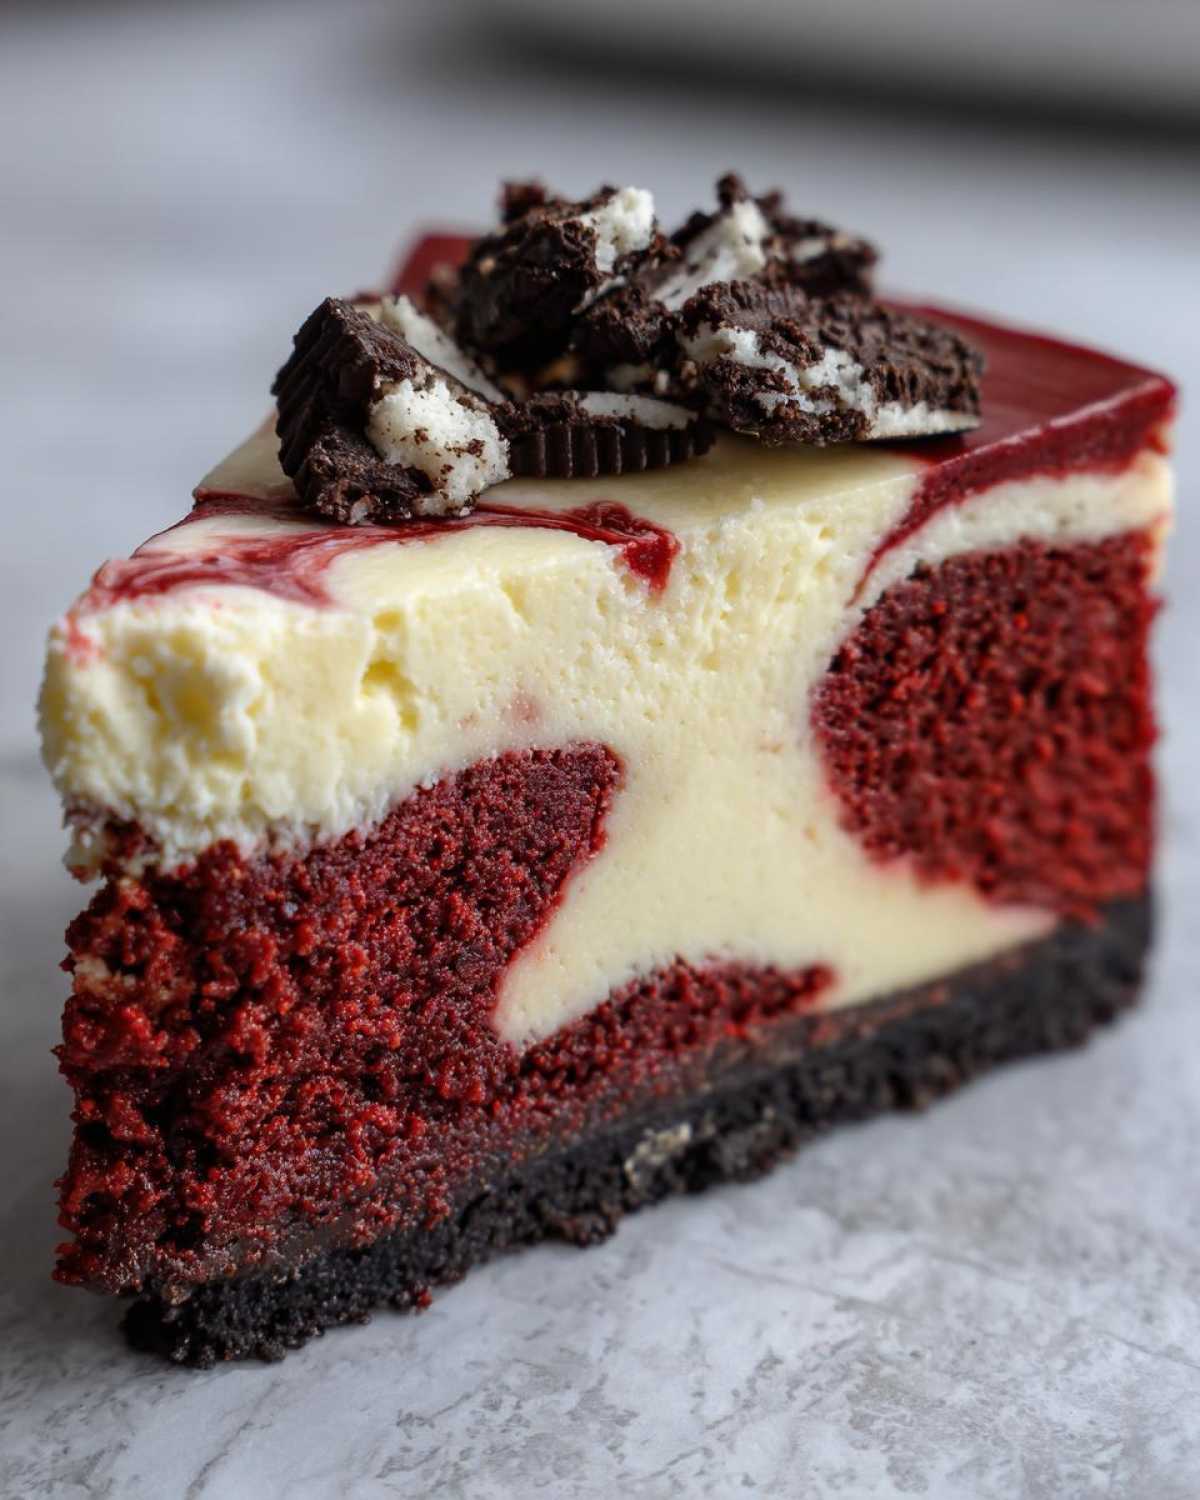
Honestly, because this cheesecake is so rich, you don’t need much else on the platter. A few thin slices, maybe a dollop of extra whipped cream on the side, and you’re done. It’s ready to be heralded!
Storage & Reheating Instructions for Your Decadent Dessert
Okay, you’ve made this beautiful, decadent dessert, and the party is over, or maybe you just made it ahead because you’re smart like that! Storing this stunning red velvet cheesecake is pretty straightforward, but we need to protect that gorgeous frosting, so listen up.
Since this is a baked cheesecake topped with cream cheese frosting, it absolutely must stay cold. I wrap the entire chilled cake loosely but securely in plastic wrap—make sure the wrap doesn’t touch the frosting directly if you can help it, or use toothpicks poked strategically around the top to hold the plastic up a bit. It needs to stay in the refrigerator.
When properly covered, this Red Velvet Cheesecake Recipe holds up wonderfully! You can expect it to taste fantastic for about 4 to 5 days in the fridge. I know, it’s tempting to eat it all in one go, but restraint is required for leftovers!
Now, about reheating—and this cracks me up! We don’t reheat cheesecake, right? That rich, creamy filling turns soupy if you put it near heat. Reheating baked cheesecake is really about *un-chilling* it. You want it to lose that hard, refrigerator chill so the texture softens back up to that perfect, velvety texture we worked so hard for.
So, an hour before you plan to serve any leftovers, just take the cake out of the fridge and let it sit on the countertop, still covered. Test it after 45 minutes. When it’s cooled down to room temperature, the filling will be smooth, luscious, and exactly how it should be. It’s not really reheating; it’s temperature adjustment for maximum decadence. Enjoy those leftovers!
Frequently Asked Questions About Red Velvet Cheesecake
I’ve totally been there—staring at the recipe, wondering if I can accidentally skip a step or if I can modify it for a quick weeknight treat. Cheesecake baking, especially for a layered beauty like this, has a few specific rules, but I’m happy to share what I’ve learned!
We want your baking adventure to be nothing short of announcing good news, so let’s tackle some common roadblocks. If you have other questions after diving in, feel free to shout them out in the comments! And hey, if you’re looking for lighter options sometimes, you can always check out my favorite stuff over in the Snacks category.
Can I make a No Bake Red Velvet Cheesecake instead?
That’s a great question, especially if you’re short on oven time! You absolutely *could* make a no-bake version, but I have to be honest: this recipe is specifically designed around the baking process because that’s what gives you the ultra creamy, dense texture we’re aiming for. A baked cheesecake sets up through the eggs and slow cooling.
If you switch to a no-bake version, you’ll skip the water bath and the long oven time, which is great, but you’ll need stabilizers like gelatin or a lot more powdered sugar mixed into the cream cheese to make sure it holds that perfect shape. For this specific dreamy texture, you really need the oven. Keep this recipe marked for your special occasion sweets, though!
What is the best way to get that vibrant red color in my red velvet cheesecake?
This is so important for making it a true showstopper dessert! You need that deep, velvety crimson hue, not pinkish-orange mush. The secret weapon here is *gel* food coloring over the standard liquid stuff you find in the grocery aisle.
Liquid coloring is mostly water, so when you use a lot of it to get a strong color, you end up thinning your batter, which messes up the texture. Gel coloring is highly concentrated! You only need a few drops, so you get maximum color impact without adding extra moisture. Just mix the gel right into your cream cheese or cake batter until it’s fully incorporated for the brightest, most beautiful red possible!
Can I skip the red velvet cake batter layer and just make a plain red velvet cheesecake?
You could, sure, but then you wouldn’t have *this* recipe, would you? Ha! The reason I insist on swirling in the actual red velvet cake batter (Step 4) on top of the red cheesecake batter is that it builds depth and texture! It gives you that true red velvet flavor profile—that slight tang from the buttermilk—layered against the pure, smooth vanilla cheesecake swirl.
If you just made a single red velvet cheesecake batter, you’d miss that gorgeous contrast you get when the cake rises slightly during baking and marbles with the richer cream cheese layer. That contrast is what makes it an absolute hit at every gathering. It’s the whole point of making it a showstopper!
Estimated Nutritional Data for This Red Velvet Cheesecake
Okay, let’s talk turkey. Since this red velvet cheesecake is definitely a ‘special occasion sweets’ kind of bake, we need to be mindful, but wow, is it worth it! I’ve pulled together some rough estimates based on all those wonderful ingredients—the Oreos, the cream cheese, all that sugar!
Please remember, this is just an estimate, Stella’s best guess based on the components we used, not some highly scientific calculation. If you make substitutions, the numbers will change, of course. But for reference, here’s what we’re looking at per serving:
- Serving Size: 1 slice
- Calories: 550
- Sugar: 45g
- Sodium: 350mg
- Fat: 35g
- Saturated Fat: 20g
- Unsaturated Fat: 15g
- Trans Fat: 0.5g
- Carbohydrates: 55g
- Fiber: 1g
- Protein: 8g
- Cholesterol: 120mg
See? It’s rich, and that’s okay! Because this is a true, decadent dessert, we serve it up in appreciation rather than in volume! Trust me, one slice of this unbelievably creamy cheesecake is usually more than enough to bring the celebration home.
Share Your Red Velvet Cheesecake Creations
Wow, we made it! You’ve got the blueprint for what I truly think is the best cheesecake ever—a showstopping, swirls-and-Oreos, incredibly creamy red velvet cheesecake. Now, the best part of running the Hungry Herald is seeing all of your amazing results. Remember that feeling I talked about, when Owen and I just started dancing in the kitchen because something turned out so perfectly? That’s what I want for you!
When you finish up your water bath, chill time, and that perfect layer of frosting, I genuinely want to see what you created. Did your red pop? Did you manage that swirl without overmixing? Did you serve it with a special holiday punch?
Please drop a comment below! Tell me if this recipe made it onto your yearly Christmas Desserts rotation. Leaving a rating helps other bakers feel confident enough to tackle this magnificent bake. And if you took a stunning photo of your slice, tag us on social media! I love sharing your successes on our main blog feed. Your achievements are the good news I’m always hungry to herald!
PrintShowstopper Red Velvet Cheesecake with Creamy Swirl and Oreo Crust
This recipe delivers an ultra creamy, rich Red Velvet Cheesecake featuring a decadent Oreo crust and a beautiful vanilla cheesecake swirl. It is the perfect showstopper dessert for holidays or any special occasion.
- Prep Time: 45 min
- Cook Time: 75 min
- Total Time: 120 min
- Yield: 12 servings
- Category: Dessert
- Method: Baking
- Cuisine: American
- Diet: Vegetarian
Ingredients
- 1 ½ cups crushed Oreo cookies
- ¼ cup granulated sugar (for crust)
- 6 tablespoons unsalted butter, melted
- 3 (8 ounce) packages cream cheese, softened
- 1 ½ cups granulated sugar (for filling)
- 1 teaspoon vanilla extract
- ¼ cup sour cream
- 3 large eggs, room temperature
- 1 teaspoon white vinegar
- 1 teaspoon cocoa powder
- 1 teaspoon red food coloring (gel preferred)
- 1 cup buttermilk
- 1 teaspoon baking soda
- 1 ½ cups all-purpose flour
- ½ teaspoon salt
- 1 teaspoon white vinegar (for cake batter)
- 1 teaspoon vanilla extract (for cake batter)
- ½ cup unsalted butter, softened (for cake batter)
- ½ cup packed brown sugar (for cake batter)
- 2 large eggs (for cake batter)
- 1 teaspoon red food coloring (for cake batter)
- 1 cup powdered sugar (for frosting)
- 4 tablespoons unsalted butter, softened (for frosting)
- 4 ounces cream cheese, softened (for frosting)
- 1 teaspoon vanilla extract (for frosting)
Instructions
- Prepare the Oreo Crust: Preheat your oven to 350°F (175°C). Mix crushed Oreos, ¼ cup sugar, and melted butter. Press this mixture firmly into the bottom of a 9-inch springform pan. Bake for 10 minutes. Cool completely.
- Make the Cheesecake Filling: Beat the softened cream cheese and 1 ½ cups sugar in a large bowl until smooth. Mix in vanilla extract and sour cream. Beat in eggs one at a time, mixing just until combined after each addition. Do not overmix.
- Prepare the Red Velvet Batter: In a separate bowl, whisk together flour and salt. In another bowl, cream ½ cup butter and brown sugar until light. Beat in 2 eggs, one at a time. Mix in 1 teaspoon red food coloring, 1 teaspoon vanilla, and 1 teaspoon vinegar. In a small cup, dissolve baking soda in buttermilk. Alternate adding the flour mixture and the buttermilk mixture to the wet ingredients, mixing until just combined.
- Create the Swirl: Pour half of the plain cheesecake batter over the cooled crust. Mix the cocoa powder, 1 teaspoon red food coloring, and 1 teaspoon vinegar into the remaining half of the cheesecake batter. Pour this red batter over the white layer.
- Create the Red Velvet Cake Layer: Mix the cake batter ingredients according to the box directions, but use the specified amounts for a 9-inch layer cake. Gently spoon dollops of the red velvet cake batter over the cheesecake layers.
- Swirl the Layers: Use a knife or skewer to gently swirl the red velvet batter into the cheesecake layers to create a marbled effect. Do not over-swirl.
- Bake: Wrap the bottom of the springform pan tightly in heavy-duty foil. Place the pan in a larger roasting pan. Carefully pour hot water into the roasting pan until it reaches halfway up the sides of the springform pan (water bath). Bake for 60 to 75 minutes, or until the edges are set but the center still has a slight wobble.
- Cool: Turn off the oven, crack the door open, and let the cheesecake cool inside for 1 hour. Remove from the water bath, remove the foil, and cool completely on a wire rack. Chill in the refrigerator for at least 6 hours, preferably overnight.
- Make the Frosting: Beat softened butter, cream cheese, powdered sugar, and vanilla until smooth and fluffy. Spread over the chilled cheesecake before serving.
Notes
- Using room temperature ingredients for the cheesecake filling helps prevent lumps and ensures an ultra creamy texture.
- A water bath is essential for preventing cracks and achieving that velvety texture you want in a baked cheesecake.
- If you are making this for the holidays, add a few festive sprinkles on top of the cream cheese frosting.
Nutrition
- Serving Size: 1 slice
- Calories: 550
- Sugar: 45
- Sodium: 350
- Fat: 35
- Saturated Fat: 20
- Unsaturated Fat: 15
- Trans Fat: 0.5
- Carbohydrates: 55
- Fiber: 1
- Protein: 8
- Cholesterol: 120