

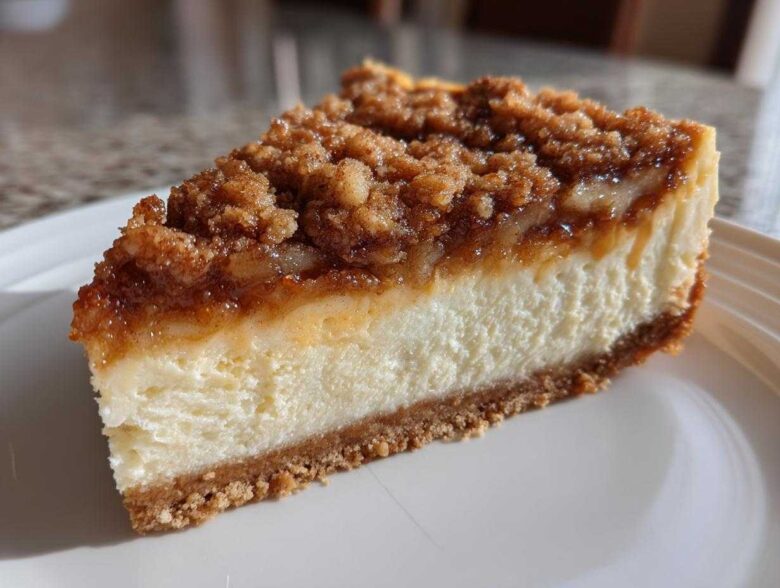
Listen up, because I’ve just perfected the dessert that will change your fall baking game forever! If you’ve ever stared longingly at a slice of homemade apple pie but secretly craved the incredible, smooth texture of baked cheesecake, then I have the answer. This isn’t just a crossover; it’s a triumphant mashup! I’m sharing my absolute reigning champion recipe: the incredible apple pie cheesecake, complete with a crunchy, buttery streusel topping. Trust me, after testing at least ten wildly different ratios of cinnamon to apple, I finally nailed the technique that keeps the filling perfectly creamy while the apples stay just the right amount of tender. You’re getting the secrets to a dessert that looks like it took three days but comes together much more smoothly than you’d think.
We use a creamy filling that gets that unmistakable tang you love, all sitting on a sturdy graham cracker base. Then we pile on the best part—the crisp! It’s a texture clash made in heaven. I highly recommend you stick close to these instructions, especially regarding chilling time, because achieving true cheesecake perfection means patience at the end.
Why This Apple Pie Cheesecake Recipe Delivers Cheesecake Perfection
I know what you’re thinking: another dessert mashup? But seriously, this apple pie cheesecake is the real deal. It’s the ultimate showstopper for any gathering, especially when you’re trying to impress without stressing out. The contrast between that rich, smooth filling and the crunchy topping is just… *chef’s kiss*.
Here’s why you need to ditch everything else and make this one first:
- The incredible texture combination: Creamy filling meets crunchy, buttery crisp.
- Visual appeal that screams “I spent all day making this!” even though you didn’t.
- It perfectly captures the spirit of fall baking recipes in one easy presentation.
When you dive into a slice, you understand the hype immediately. It’s comforting and dazzling all at once. You can check out my whole philosophy on achieving true cheesecake perfection right here, but this recipe is proof positive that the theory works!
The Best Fall Flavors in One Dessert
It’s all about balance, honey. We’re using tart apples—Granny Smith if you want that real zing, or Honeycrisp if you want a sweeter bite—paired against a beautifully sweetened, slightly tangy cream cheese base. The cinnamon and brown sugar in the topping tie everything together beautifully. It tastes exactly like the cozy, warm feeling you want when the leaves start turning!
Gathering Ingredients for Your Apple Pie Cheesecake
Okay, let’s talk inventory! You know I’m big on making sure things go right the first time, and for cheesecake, that starts with having everything measured out and at the right temperature. Don’t try to rush the softening of the cream cheese; it just leads to lumps we don’t want in this beautiful cheesecake mashup. We’re breaking this list down into the three main stars of the show: the crust, the filling, and that irresistible crisp topping.
Grab your ingredients now before any little hands or hungry husbands try to snack on the butter! If you want to check out my favorite way to make homemade cinnamon apple chips (great for snacking while you bake!), that link will take you there.
For the Buttery Graham Cracker Crust
We need structure here, something sturdy enough to hold all that wonderful creamy goodness. This is a classic, rich base, so don’t skimp on the butter!
- 1 1/2 cups graham cracker crumbs
- 1/4 cup granulated sugar (just this little bit for the crust, the rest is for the filling!)
- 6 tablespoons unsalted butter, melted
For the Creamy Apple Dessert Filling
This is where the magic happens. The most important thing here, darling? Make sure your cream cheese is truly softened—it should give easily when you press it. Room temperature ingredients blend into silky smooth batter, zero lumps guaranteed.
- 3 (8 ounce) packages cream cheese, softened (must be softened!)
- 1 1/2 cups granulated sugar
- 1 teaspoon vanilla extract
- 1/4 cup sour cream (this adds that perfect slight tang!)
- 3 large eggs
For the Spiced Apple Crisp Topping
This topping is what officially turns it into an apple pie cheesecake instead of just a fancy cheesecake. We need the apples nice and uniform. I love using Granny Smith because they hold their shape beautifully, or a mix with Honeycrisp!
- 4 medium apples (like Honeycrisp or Granny Smith), peeled, cored, and diced
- 1/4 cup brown sugar (use the packed stuff!)
- 1/2 cup all-purpose flour
- 1/2 cup rolled oats (use the old-fashioned kind, not instant)
- 1/2 teaspoon ground cinnamon
- 4 tablespoons cold unsalted butter, cut into small pieces (this has to be cold so it clumps nicely!)
Step-by-Step Instructions to Make Apple Pie Cheesecake
Alright, this is where the fun really begins! Remember, cheesecake hates temperature shock, so we’re going to be gentle with it. Preheat your oven to 350°F (175°C) right away. Before anything else, wrap that 9-inch springform pan really well—I mean *tightly*—with heavy-duty aluminum foil on the outside. This foil is our shield for the water bath we’ll use later, so make sure it’s well-sealed!
Preparing the Crust and Apple Crisp Dessert Inspiration
First up, the foundation! In a bowl, mix those graham cracker crumbs with the 1/4 cup of sugar and the melted butter until it looks like wet sand. Press that mixture firmly into the bottom of your carefully wrapped pan. Bake this crust for a quick 10 minutes just to set it, then pull it out and let it cool a touch while we handle the apples.
Now, about that topping! Toss your diced apples with the brown sugar and cinnamon in one bowl. In a separate little bowl, use your fingers to cut the cold butter pieces into the flour, oats, and cinnamon until you get that beautiful crumbly texture—that’s the crisp! Mix the apples into the crumbs and set that aside. Isn’t that already smelling amazing?
Mixing the Cheesecake Filling to Achieve Cheesecake Perfection
This part requires a gentle hand. Beat your softened cream cheese with the 1 1/2 cups of sugar until it’s totally smooth. Then add the vanilla and the sour cream. Now, listen closely: add those three eggs in one by one. You want to mix *just* until the yolk disappears before adding the next one. Overmixing those eggs is the number one way to guarantee cracks when you bake your apple pie cheesecake. We want silky smooth, not airy!
Baking the Apple Pie Cheesecake Using a Water Bath
Pour that lovely batter over your cooled crust. Now gently spoon the apple crisp mixture evenly over the top. This is where the water bath comes in to save the day! Place your foil-wrapped springform pan inside a larger roasting pan. Carefully pour hot water into the roasting pan until it comes about halfway up the sides of the springform pan.
Bake it for about 60 to 75 minutes. You’re looking for the edges to be set, but the center should still have a little wiggle—like Jell-O, not soup! The absolute secret to avoiding cracks: don’t tear it away from the water bath right away! Turn the oven off, crack the door open wide, and let it cool *inside* that steamy environment for a full hour. Then, just let it finish cooling on the counter before the very important chilling phase. For the best results, you might want to check out my tips for making cinnamon apple muffins while you wait!
Tips for Success with Your Apple Pie Cheesecake
Okay friends, you’ve baked it, you’ve cooled it, and now it’s time for patience, which is the hardest part of making any great baked good! But before you wedge that knife in for a sneak peek, I want to focus on a few little tweaks that elevate this from ‘very good’ to truly unforgettable. Remember, mastering the basics of baking, especially with delicate desserts like cheesecake, is all about knowing these small details. We want this apple pie cheesecake to be flawless!
For instance, if you’re looking ahead to serving this stunner, you might want to check out my recipe for brown butter chocolate chip cookies—it’s a whole other level of cozy indulgence!
Ingredient Notes and Substitutions for Creamy Apple Dessert
I always say that once you know the basic formula for a good cheesecake, you can start playing around! We included some ideas in the recipe notes, but here are my personal favorite ways to enhance this already amazing dessert. These little swaps take it from great to spectacular.
For the crust, if you’re feeling a little adventurous, try substituting half of those graham cracker crumbs with vanilla wafer crumbs. Honestly, the subtle flavor difference adds such depth to the base of your apple pie cheesecake. It really complements the cinnamon wonderfully!
If you decide you need extra decadence—and who are we kidding, we always do—please, please warm up some store-bought caramel sauce. You don’t need to make it from scratch! Just warm about half a cup until it’s pourable and drizzle it generously over the cheesecake right before you slice into it. It makes this an ideal option for your Thanksgiving Desserts spread.
Also, I noted this earlier, but it bears repeating: room temperature cream cheese and eggs are non-negotiable for that silky cheesecake perfection. If your eggs are cold, just run them under warm water for about 30 seconds. It sounds silly, but trust me, it helps them incorporate gently into the batter without causing stress to the structure.
Storage and Reheating Instructions for Your Festive Cheesecake
This is the hardest part, honestly. After all that work, waiting feels impossible! But with cheesecake, chilling isn’t just a suggestion; it’s a crucial final step in the cooking process. You absolutely must let your gorgeous apple pie cheesecake chill for a minimum of six hours in the refrigerator.
If you can manage it, overnight is truly the way to go. That extended chilling time lets the filling firm up completely and really allows those spiced apple flavors to marry with the cream cheese base. If you cut it too early, you’ll end up with a delicious, messy puddle instead of those gorgeous, clean slices we deserve.
Once it’s chilled, cover the springform pan loosely with plastic wrap or foil—make sure the covering doesn’t touch the streusel topping, or you’ll wreck the crisp texture! It stays perfectly fresh inside the fridge for up to five days. It’s one of the best holiday cheesecake recipes because you can make it days ahead of time.
Now, reheating a slice of cheesecake might sound strange, but sometimes you just want that faint warmth, especially when the house is chilly. Don’t even think about the microwave unless you want rubbery edges! If you truly need to warm up a single slice, wrap it well in foil and pop it into a low oven—say, 300°F—for about 10 minutes until it’s just warmed through. But truly, this dessert sings when it’s cold and creamy, so try it that way first! If you’re looking for another great make-ahead holiday bake, you simply have to try my recipe for pumpkin spice cake with cream cheese frosting; that one is amazing chilled too.
Serving Suggestions for This Impressive Baked Goods Masterpiece
Once your apple pie cheesecake has successfully chilled overnight—and I hope you managed to resist cutting into it before then!—it’s time to think about how to present this beauty. This masterpiece deserves the best supporting cast on the plate!
Because we’ve already got a rich crust and that wonderful crisp topping, the best thing you can do is complement the flavors without burying them. If you’re serving this as the grand finale to your holiday meal, it instantly elevates your whole Thanksgiving Desserts spread.
My absolute favorite way to serve this is slightly chilled, maybe just 20 minutes out of the fridge, so the filling is just starting to soften again—that’s peak creaminess!
- Caramel Drizzle: If you didn’t add extra caramel before chilling, this is the time! A generous, slow drizzle of warm, buttery caramel sauce over the top of each slice is divine. It leans right into those rich, baked sugar notes. These caramel apple cupcakes taught me that caramel never fails!
- Vanilla Ice Cream: You need something cold and clean next to the spice and density of the cheesecake. A small scoop of high-quality vanilla bean ice cream provides the perfect temperature and flavor contrast. The cold vanilla cuts right through the richness beautifully.
- Whipped Cream: Sometimes simple is best. A dollop of freshly whipped cream lightly sweetened with a touch of maple syrup (instead of plain sugar) adds airy fluffiness that balances the heaviness of the baked base.
No matter how you serve it, just know that you’ve made something truly special. It’s visually stunning on its own, but a little flourish on the plate just screams, “You deserve this deliciousness!”
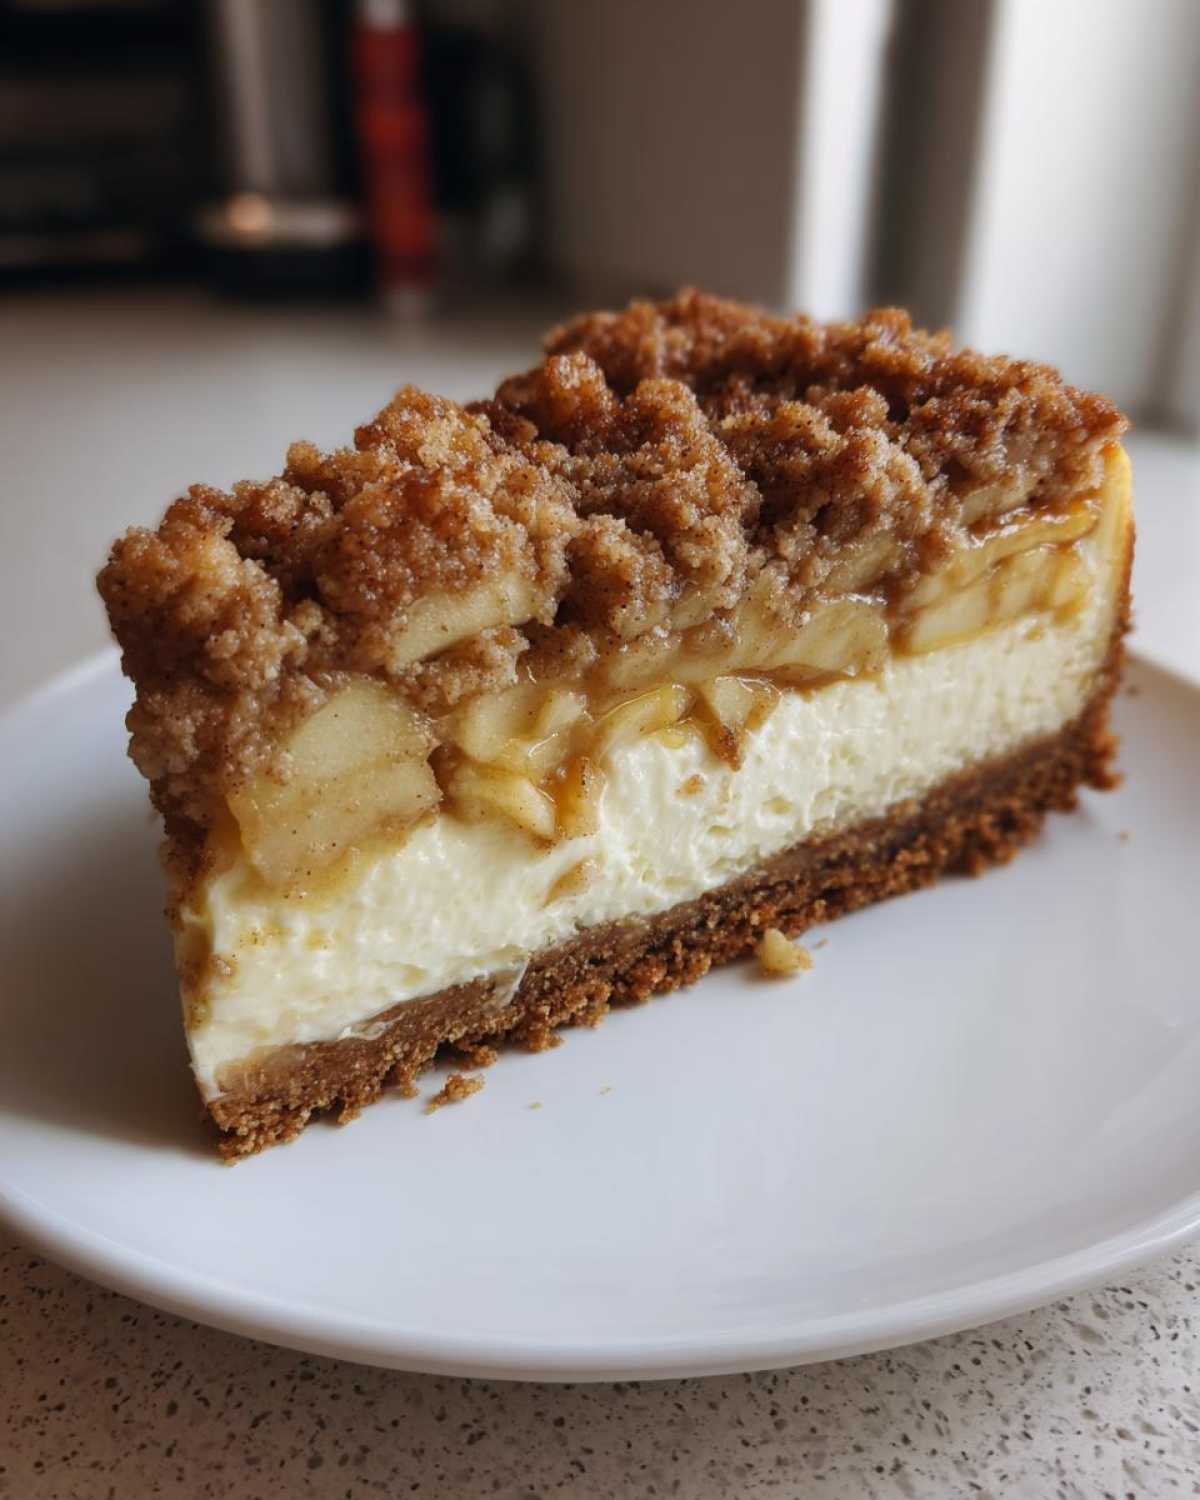
Frequently Asked Questions About Apple Pie Desserts
I always know when a recipe is a winner because my inbox fills up with questions! Everyone seems to want to tweak or confirm details, which is totally fair, especially when you’re tackling something as impressive as this apple pie cheesecake. I’ve gathered the ones I hear most often about making baked cheesecakes, hoping to save you some stress!
If you’re looking for other ways to use those amazing fall spices, you have to check out my recipe for apple pie bars—they are far simpler but just as cozy!
Can I make this apple pie cheesecake recipe without a water bath?
Oh, the water bath dilemma! That’s always the big question for baked cheesecake recipes. Honestly, I strongly advise against skipping it for this recipe. The water bath creates steam in the oven, which basically babysits your cheesecake, keeping the temperature even and preventing those dreaded dry edges and ugly cracks. If you skip it, you take a huge risk of the top curdling slightly or cracking when it cools down because the heat is too direct. If you absolutely, positively cannot use one, you must bake it at a lower temperature (maybe 300°F) and watch it like a hawk. But for true cheesecake perfection, stick to the bath!
What is the best type of apple for this creamy apple dessert?
That’s a fantastic question, especially because we’re baking them right on top of the batter! You need apples that are firm enough not to turn into complete mush during the 75 minutes of baking time. My top choice is always Granny Smith because they offer a wonderful tartness that balances the sugar in the filling perfectly, and they hold their shape amazingly well. Honeycrisp is a close second if you prefer something a bit sweeter right out of the gate. Whatever you choose, make sure you dice them fairly evenly so they all cook at the same rate within that spiced apple crisp topping!
If you were hoping for a No Bake Cheesecake Ideas version, you’d need to cook the apples down separately on the stovetop first, but for this baked spectacular, stick to Granny Smith or Honeycrisp for the best texture!
Estimated Nutritional Data for Apple Pie Cheesecake
Okay, let’s talk fuel! I always put this disclaimer upfront because, while I take precision seriously in baking, measuring nutritional content is an absolute science that requires lab equipment rather than my trusty kitchen scale. So, please view these numbers as a general guideline based on the standard ingredients and serving size we used here. If you go heavy on the caramel drizzle or use extra-fat cream cheese, the numbers will shift!
This apple pie cheesecake is certainly a decadent treat, perfect for special occasions like holidays, not an everyday snack, let’s be honest! We sliced this recipe to yield 12 generous servings, which helps keep that single-slice count reasonable. To see amazing recipes that are lighter on the sugar, you might want to browse some of my apple cinnamon crepes ideas!
Based on our ingredient list and standard estimations, here is a snapshot of what you’re looking at per slice:
- Serving Size: 1 slice
- Calories: Around 450 calories
- Fat: About 28g (Watch that saturated fat!)
- Carbohydrates: 45g
- Sugar: Roughly 35g (That’s why it tastes so good, right?)
- Protein: 7g
It has a fair amount of fat coming from the butter in the crust and topping, and of course, the cream cheese itself gives it that rich mouthfeel we love so much in a festive cheesecake. But look at that protein! You’re getting seven grams to help balance things out. Enjoy every single bite, because you definitely earned it after making this impressive baked goods masterpiece!
Share Your Cozy Weekend Baking Experience
Now that you’ve got the best apple pie cheesecake recipe in your hands, the hard part is over! Well, almost. The truly rewarding part is watching people’s faces when they take that first bite of the creamy filling nestled under that warm, spiced crisp. I genuinely love hearing how my recipes turn out in your kitchens. It gives me such a boost when I know someone out there is enjoying a cozy weekend baking project thanks to something I perfected.
So, I’m begging you—don’t just bake this stunning creation and keep the glory to yourself! If you loved this marriage of pie and cheesecake, please hop down to the comments below right now. Tell me how it went! Were you team Granny Smith or team Honeycrisp? Did you add that caramel drizzle or stick with the simple, beautiful streusel topping? Every little detail you share helps others feel confident trying out this recipe.
And seriously, if you made this and it looked as amazing as it tasted, you absolutely have to share a photo! Tag me on social media so I can see your gorgeous festive cheesecake creations! I always feature reader photos on my main blog page when I get the chance, because seeing your successful bakes is the best motivation a cook like me can ask for. Happy baking this weekend, and enjoy every incredible, creamy, crisp-topped slice!
PrintApple Crisp Cheesecake
A baked cheesecake featuring a buttery crust, a creamy filling, and a spiced apple crisp topping.
- Prep Time: 30 min
- Cook Time: 75 min
- Total Time: 9 hours 45 min
- Yield: 12 servings
- Category: Dessert
- Method: Baking
- Cuisine: American
- Diet: Vegetarian
Ingredients
- 1 1/2 cups graham cracker crumbs
- 1/4 cup granulated sugar (for crust)
- 6 tablespoons unsalted butter, melted
- 3 (8 ounce) packages cream cheese, softened
- 1 1/2 cups granulated sugar (for filling)
- 1 teaspoon vanilla extract
- 1/4 cup sour cream
- 3 large eggs
- 4 medium apples (like Honeycrisp or Granny Smith), peeled, cored, and diced
- 1/4 cup brown sugar (for topping)
- 1/2 cup all-purpose flour (for topping)
- 1/2 cup rolled oats (for topping)
- 1/2 teaspoon ground cinnamon (for topping)
- 4 tablespoons cold unsalted butter, cut into small pieces (for topping)
Instructions
- Preheat your oven to 350°F (175°C). Wrap the outside of a 9-inch springform pan tightly with heavy-duty aluminum foil.
- Prepare the crust: Mix graham cracker crumbs, 1/4 cup sugar, and melted butter. Press the mixture firmly into the bottom of the prepared springform pan. Bake for 10 minutes. Let cool slightly.
- Prepare the apple topping: In a medium bowl, toss the diced apples with brown sugar and cinnamon. In a separate small bowl, combine the flour, oats, and cold butter pieces. Use your fingers to cut the butter into the dry ingredients until a coarse, crumbly mixture forms. Stir the spiced apples into this crumb mixture. Set aside.
- Prepare the cheesecake filling: Beat the softened cream cheese with 1 1/2 cups sugar until smooth. Beat in the vanilla extract and sour cream. Add the eggs one at a time, mixing just until combined after each addition. Do not overmix.
- Pour the cheesecake batter over the cooled crust. Gently spoon the apple crisp mixture evenly over the top of the batter.
- Bake the cheesecake in a water bath (place the foil-wrapped springform pan inside a larger roasting pan, then pour hot water into the roasting pan until it reaches halfway up the sides of the springform pan). Bake for 60 to 75 minutes, or until the edges are set but the center still has a slight wobble.
- Turn off the oven, crack the door open slightly, and allow the cheesecake to cool inside the oven for 1 hour.
- Remove the cheesecake from the oven and the water bath. Let it cool completely on a wire rack. Chill in the refrigerator for at least 6 hours, preferably overnight, before serving.
Notes
- For a richer flavor, substitute half of the graham cracker crumbs with vanilla wafer crumbs for the crust.
- If you prefer a caramel drizzle, warm 1/2 cup of store-bought caramel sauce and pour it over the chilled cheesecake just before serving.
- Ensure your cream cheese and eggs are at room temperature for the smoothest filling texture.
Nutrition
- Serving Size: 1 slice
- Calories: 450
- Sugar: 35g
- Sodium: 250mg
- Fat: 28g
- Saturated Fat: 17g
- Unsaturated Fat: 11g
- Trans Fat: 0.5g
- Carbohydrates: 45g
- Fiber: 2g
- Protein: 7g
- Cholesterol: 95mg