

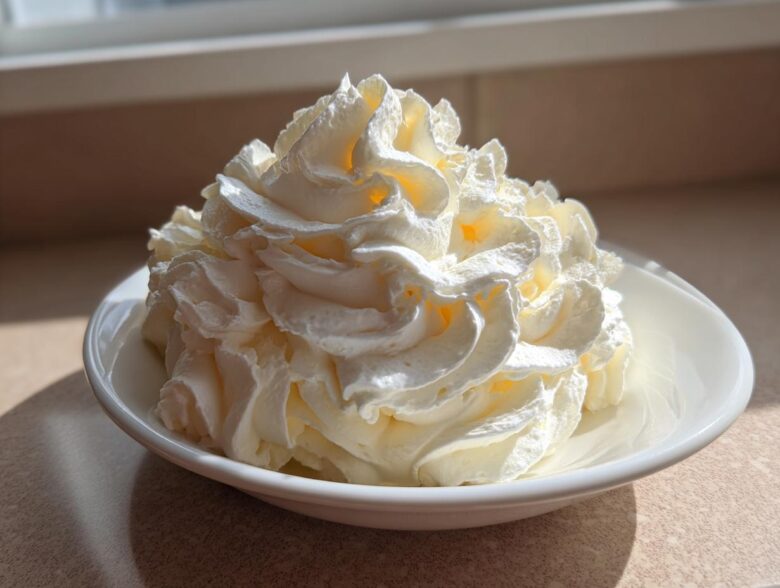
Oh, friends, let’s talk frosting. Because let’s be honest, the cake is just the vehicle; the vanilla buttercream frosting is the real star! I’ve had those disastrous moments where the frosting turned grainy, or worse, melted into a sad puddle before the party even started. It was so frustrating! But I finally perfected a recipe that is nearly foolproof, super simple, and gives you that gorgeous, fluffy texture you see in bakeries. This is hands-down the easiest, creamiest recipe for classic vanilla buttercream frosting that pipes beautifully. You’re going to need about 10 minutes, maybe less, and the result is pure magic that everyone will ask about. If you’re ready to stop stressing about your topping, stick around; I’m sharing all my secrets from my baking journey.
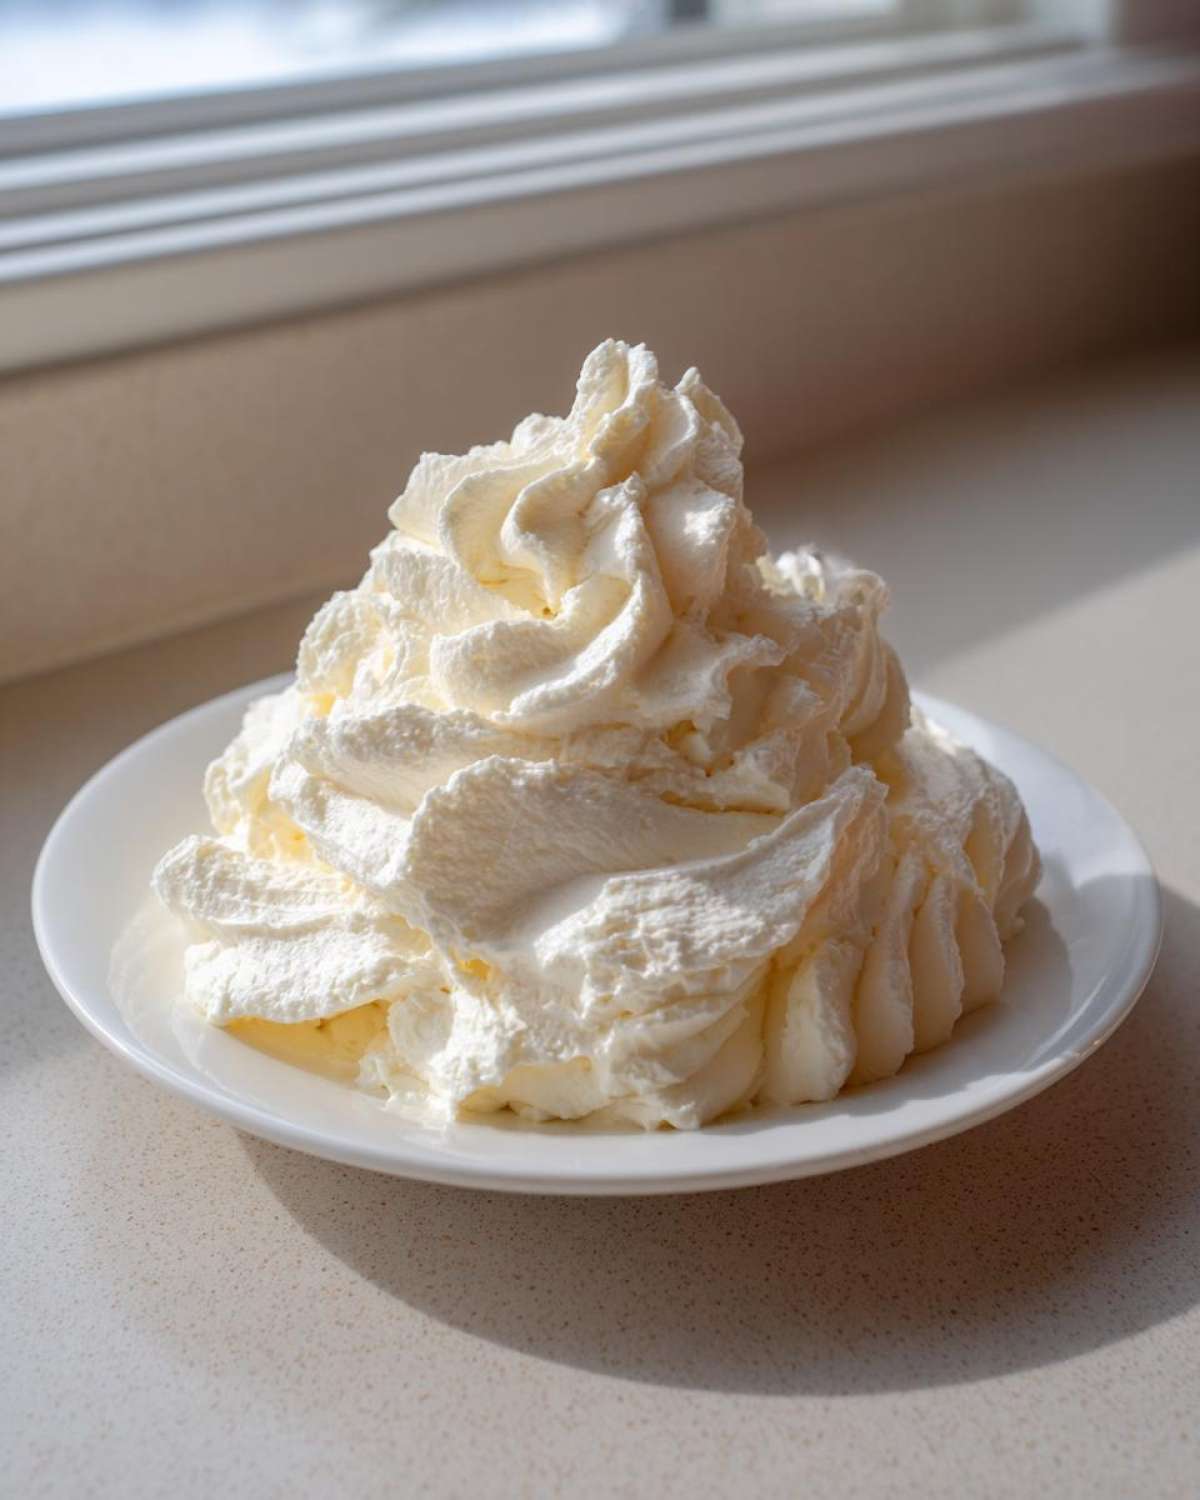
Why This Vanilla Buttercream Frosting Recipe Works (Easy Frosting Recipe)
Honestly, what’s not to love about a sweet, rich topping that comes together faster than you can brew a pot of coffee? That’s what we have here! This recipe is my go-to because it hits every single requirement: it’s lightning fast, incredibly creamy, and it holds its shape like a dream. Forget those complicated meringue-based recipes—this Easy Frosting Recipe is pure, straightforward goodness. It’s the secret weapon for busy bakers everywhere.
The payoff is huge, too. Not only do you get a wonderful fluffy cake icing in minutes, but this specific mixing method ensures it’s stable enough for all your decorating needs. I’m talking defined edges on your layer cakes and perfectly sharp stars on your cupcakes. Trust me, once you try this Classic Vanilla Buttercream, you won’t go back.
Quick Guide: Ready in 10 Minutes
This is proof that you don’t need hours on the clock to make something fantastic. Since this is an American Buttercream Tutorial style, there’s no cooking, no tempering, and very little active time. It’s literally just mixing room-temperature butter until fluffy, adding the sugar slowly, and then whipping in the liquid until it’s perfect. If you suddenly realize you need a cake frosted right now, this is your answer. Seriously, total prep time is around ten minutes, no joke!
Achieving Smooth Cupcake Topping Texture
This is where people often rush, and that’s how you end up with a thin, gloppy mess or grainy sugar. The secret weapon for that light, airy finish is the final whip. After you’ve added the milk or cream, you need to turn the speed up high—medium-high, specifically—and let it beat for a full three to five minutes. That long, steady whip incorporates so much air, turning your dense mixture into that light, smooth cupcake topping texture we desperately want. Don’t skip that final air incorporation step!
Essential Ingredients for Perfect Vanilla Buttercream Frosting
When you’re making something as fundamental as vanilla buttercream frosting, you really can’t cheat on the basics. This list is short, which means quality really matters! Everything needs to be measured correctly, especially the powdered sugar, because that’s what gives us that gorgeous structure. We aren’t cooking anything, so the flavor you put in is exactly the flavor you get out. I’m going to list the components here, but stick around to see why the temperature and type of each ingredient are non-negotiable for that perfect, rich buttercream frosting.
Ingredient Notes and Substitutions for Creamy Vanilla Icing
Let’s talk the specifics needed for a truly superior creamy vanilla icing. First, the butter MUST be unsalted. Why? Because salt levels vary wildly between brands, and if you use salted butter, your final product might taste too sharp or just… weird. We want control! Make sure your butter is soft—leave it out for a good hour—but please, for the love of light frosting, do not let it get shiny or melted. That means soup!
For the liquid component, I highly recommend heavy cream if you have it. It makes the frosting just a bit richer and silkier. Milk works in a pinch, of course. And please, use pure vanilla extract. That imitation stuff smells fake when it bakes, and we are aiming for true, deep vanilla flavor here. Don’t forget the pinch of salt—it’s essential for cutting through that intense sweetness and making the whole thing taste balanced!
Step-by-Step Instructions for Piping Buttercream Recipe
Now we get to the fun part—actually making the stuff! The beauty of this Piping Buttercream Recipe is how sequential and logical the steps are. If you follow the order I lay out here, you minimize the risk of lumps or separation. We are basically building structure layer by layer, starting with the foundation of all great desserts: happy, fluffy butter. Pay close attention to the mixer speed changes, because that’s the key to getting that airy, cloud-like texture in your final vanilla buttercream frosting.
Keep your mixer handy because this process is quick! We’re incorporating that rich butter and powdered sugar just right before we lock in all that flavor with the vanilla. If you happen to be checking out my brown butter cookies later, you know the importance of patience in the mixing stage; it works here too!
Mastering the Butter Creaming Stage for Rich Buttercream Frosting
Step one is non-negotiable: cream that butter! Take your softened butter—remember, room temp, not mushy—and beat it aggressively by itself. You need an electric mixer for this part; your wrist will thank you! For a solid two minutes, just let it run until that butter genuinely shifts color and texture. It needs to go from dense, opaque yellow to something much lighter, almost pale yellow, and look visibly fluffy. This aeration is what prevents your final product from being a hard block of sugar later. This is the foundation for a truly rich buttercream frosting.
Incorporating Sugar and Achieving Fluffy Cake Icing
Once the butter is airy, grab your sifted powdered sugar. And I mean sifted! Trust me, skipping that step guarantees lumps in your beautiful Homemade Vanilla Frosting. You have to add this sugar in stages—one cup at a time—while the mixer is set to low speed. If you dump it all in at once, you’ll create a sugar geyser in your kitchen, and it won’t mix evenly! Once the sugar is incorporated and looks like crumbly wet sand, add your vanilla and salt. Now comes the magic: turn the speed up to medium-high and let it whip for a full three to five minutes. This extended high-speed beating is what incorporates the necessary air, transforming that heavy mix into a truly fluffy cake icing.
Tips for Success with Your Homemade Vanilla Frosting
You know, having a great recipe is only half the battle, right? Sometimes the execution needs a little nudge. Since this Homemade Vanilla Frosting is so straightforward, success really hinges on paying attention to the tiny details. These are the Baking Basics Buttercream rules I learned the hard way so you don’t have to! Follow these small tips, and your frosting will be perfect every single time.
The absolute biggest point of failure for most people is the temperature of the butter—I can’t stress this enough. If your butter is cold, it won’t cream properly, and your frosting will be lumpy. If it’s too warm, it becomes greasy and thin, and you’ll end up adding way too much sugar just to make it pipeable.
Also, don’t try to rush the sifting of the powdered sugar! Imagine trying to mix fine sand into wet cement—that’s what happens when you skip sifting. It takes an extra minute, but getting rid of those pesky clumps ensures you get that super smooth Cupcake Topping texture without having to scrape down the sides every five seconds.
If you decide to color this icing later for special projects, always use gel food coloring, not the liquid kind you find in the grocery store baking aisle. Liquid coloring is water-based, and adding too much water to your Classic Vanilla Buttercream will break down the structure and make it runny instantly. Head over to my baking tips page if you want to see my favorite gel color brands!
Troubleshooting Common Vanilla Buttercream Frosting Issues
Okay, so you’ve followed all the rules, but maybe the mixer got away from you, or perhaps your butter was just slightly warmer than it should have been. Don’t panic! Fixing the consistency of your vanilla buttercream frosting is totally achievable. In fact, knowing how to rescue a batch that’s gone slightly off is what separates the occasionally stressed baker from the confident one. Luckily, this Easy Frosting Recipe is very forgiving!
The fix usually comes down to two ingredients you’ve already added: the liquid (cream/milk) or the dry powder (sugar). You just need to adjust based on what went wrong in your mixing.
If your frosting is too thick: This means it looks stiff, maybe hard to spread, or it’s just not moving well through your piping bag. Resist the urge to dump in a ton of milk! Instead, add your heavy cream or milk just one teaspoon at a time. Mix it in completely on low speed, and then check the texture. You might only need an extra tablespoon or two to bring that stiffness right down to a perfect, spreadable consistency. You’ll be back to making a gorgeous smooth cupcake topping in no time.
If your frosting is too thin: This is the classic issue where your frosting looks more like glaze than the Best Buttercream for Cakes you were hoping for. If you suspect you might have slightly over-added your cream, or if your butter was a little too soft going in, you need backbone! Slowly add more sifted powdered sugar, about one-quarter cup at a time, mixing on low until it’s just incorporated, then beat it again on medium-high. The extra sugar will absorb that excess liquid and help firm up the structure, making it ready for piping.
Remember, achieving that fluffy cake icing is all about balance. A little bit of patience while adjusting consistency means avoiding a total waste of ingredients. See? You’ve got this!
Storage and Reheating Instructions for Classic Vanilla Buttercream
Whew! We have officially made the most amazing vanilla buttercream frosting, and I know you’re going to want to save some of this perfection for later, or maybe you just made a huge batch for a party. Don’t worry about it going bad! Storing this Classic Vanilla Buttercream is pretty simple, but how you store it dictates how much work you have to do to get it back to that perfect, pipeable state. You want that light, fluffy texture preserved, not solidified into a butter brick!
The general rule of thumb is that if you’re using standard, simple desserts without perishables like fresh eggs or cream cheese in the mix, it’s pretty stable. But for the absolute best results, chilling is the way to go if you aren’t using it all right away.
If you plan to use the rest within a day or two, keeping it on the counter at cool room temperature, tightly covered with plastic wrap pressed right against the surface, is fine. Covering it prevents a hard ‘skin’ from forming. However, if your kitchen is warm, or if you need to keep the Homemade Vanilla Frosting for longer than 48 hours, the fridge is your friend. Seal it up airtight—I mean *really* airtight—in a container.
Now for the important part: Reheating! When you pull that cold, beautiful creamy vanilla icing out of the fridge, it will look hard and sad. Don’t fret, this is normal! You absolutely cannot try to pipe it right away, or you’ll break your piping tip!
First, let it sit on the counter for at least an hour, maybe longer depending on how cold your fridge is. You want it completely softened again. Once it’s soft to the touch but still cool, put it back into your mixing bowl. Give it a quick whip—start slow, then kick it up to medium-high for about 60 seconds. That quick burst of mixing reincorporates the air you lost while chilling. Trust me, that short re-whip brings back all the lightness you worked so hard to achieve, turning it back into a perfect, fluffy cake icing ready for decorating!
Serving Suggestions for This Simple Dessert Topping
Once you have this amazing, stable vanilla buttercream frosting made, don’t just save it for layer cakes! This Simple Dessert Topping is so versatile, and I love using it for quick treats when I don’t feel like baking a whole cake. It’s fantastic piped high onto my chocolate chip banana bread—it feels instantly fancy!
Try using it as the filling between thin sugar cookies, or even just swirl a big dollop on top of a fresh-baked brownie. It even works wonderfully on gingerbread. Because it’s such a solid frosting, you can pile it on thickly, and it won’t run off, which is amazing for any last-minute dessert you whip up.
Frequently Asked Questions About Vanilla Buttercream Frosting
Can I make this vanilla buttercream frosting ahead of time?
Absolutely! This is a great benefit of using a standard, butter-based recipe like this vanilla buttercream frosting. You can totally make it a day or two ahead of time. Just pop it into a very tightly sealed container, making sure the plastic wrap touches the surface so it doesn’t form that awful ‘crust.’ Keep it in the fridge. When you’re ready to decorate, just let it sit on the counter until it softens up—gently, no microwaving!—and then give it that final 60-second whip on high speed to bring back all the air and fluffiness. It comes back beautifully!
How do I make the frosting whiter for bright white cakes?
This is a classic baker’s dilemma, because butter is naturally yellow, and that yellow tone comes right through into your icing! If you need a super blinding white color, especially for a wedding cake or just a very crisp look, I have two main tricks. First, you can use shortening instead of all butter, but that changes the flavor, which I don’t love. The best way is to switch out your vanilla extract. Use clear vanilla extract instead of the standard dark brown stuff. It gives you all the vanilla flavor without introducing that golden color from the bean residue. It makes a huge difference if you’re aiming for pure white!
What is the best way to color this frosting?
If you are going for anything beyond white or pale yellow, you *must* use gel food coloring. I cannot stress this enough, especially since this is such a stable Best Buttercream for Cakes. Liquid food colorings are mostly water, and adding too much liquid to your perfectly balanced fat/sugar ratio will instantly start to break down the structure. You’ll end up thinning out your frosting until it’s way too soft to hold any shape. Gel colors are super concentrated, so you only need a tiny toothpick dip to get vibrant colors that look perfect for piping designs or covering your layer cakes evenly!
Nutritional Estimates for Creamy Vanilla Icing
Alright, I know some of you are curious about what you’re eating, even when it comes to the most delicious topping known to man! Since this creamy vanilla icing is made almost entirely of butter and sugar, we know it’s a treat, not a diet food. But seeing the numbers laid out can sometimes help you decide how thickly to spread it on that first slice of cake, right?
I want to be super clear here: these numbers are just estimates based on the standard measurements in the recipe provided. If you use a different brand of butter or a different amount of heavy cream, these nutritional figures will shift slightly. I always recommend checking the disclaimer on my official nutrition page, but for quick reference, here’s the breakdown for about a quarter-cup serving size of this vanilla buttercream frosting:
- Serving Size: 1/4 cup
- Calories: 320
- Fat: 16g (10g Saturated Fat)
- Carbohydrates: 46g
- Sugar: 45g (Yes, almost all carbs are sugar here—it’s frosting!)
- Protein: 1g
- Sodium: 65mg
See? It’s rich, exactly what you expect from a perfect, fluffy dessert topping. The high fat content from the butter and the high sugar content are what help this Classic Vanilla Buttercream hold its shape so beautifully for decorating, but enjoy it responsibly! Every crumb is worth it.
PrintClassic Vanilla Buttercream Frosting
This recipe provides a simple guide to making light, fluffy, and creamy vanilla buttercream that holds its shape well for decorating cakes and cupcakes.
- Prep Time: 10 min
- Cook Time: 0 min
- Total Time: 10 min
- Yield: About 3 cups
- Category: Dessert Topping
- Method: Mixing
- Cuisine: American
- Diet: Vegetarian
Ingredients
- 1 cup unsalted butter, softened
- 4 cups powdered sugar, sifted
- 1 teaspoon pure vanilla extract
- 3 tablespoons heavy cream or milk
- 1/4 teaspoon salt
Instructions
- Beat the softened butter in a large bowl with an electric mixer until it is light and creamy, about 2 minutes.
- Gradually add the sifted powdered sugar, one cup at a time, mixing on low speed until combined.
- Add the vanilla extract and salt. Increase the mixer speed to medium-high.
- Slowly add the heavy cream or milk, one tablespoon at a time, beating until the frosting is smooth and fluffy. Beat for 3 to 5 minutes on medium-high speed to incorporate air for a lighter texture.
- If the frosting is too thick, add a little more cream. If it is too thin, add a little more powdered sugar.
- Use immediately for frosting cupcakes or decorating cakes.
Notes
- For the smoothest results, ensure your butter is truly at room temperature but not melted.
- Sift the powdered sugar before measuring to prevent lumps in your final frosting.
- If you are piping detailed designs, chill the finished frosting for 10 minutes before using.
Nutrition
- Serving Size: 1/4 cup
- Calories: 320
- Sugar: 45g
- Sodium: 65mg
- Fat: 16g
- Saturated Fat: 10g
- Unsaturated Fat: 6g
- Trans Fat: 0.5g
- Carbohydrates: 46g
- Fiber: 0g
- Protein: 1g
- Cholesterol: 40mg