

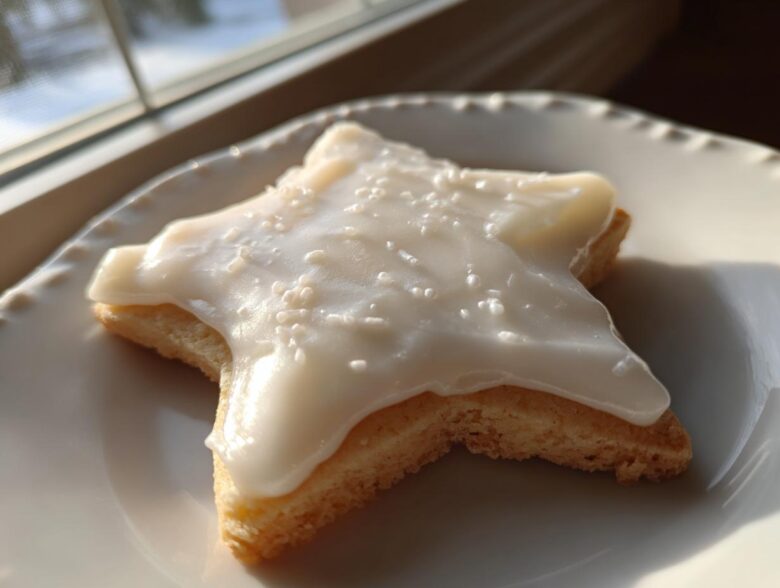
Oh, the tragedy! You spend hours making gorgeous, perfectly shaped sugar cookies, and then comes the icing. If you’ve ever watched your beautiful border melt into a sad, sugary puddle, or realized your beautiful designs won’t stack because the icing is still gummy hours later, you know my pain.
Believe me, I’ve been there, covered head-to-toe in sticky frosting while trying to get that perfect holiday look. But guess what? I finally cracked the code on the sugar cookie icing that actually does what it promises: it dries rock hard, stays unbelievably smooth, and gives you that gorgeous, glossy finish that looks totally bakery-style.
This recipe, which I call my streamlined royal hybrid, is the absolute best! After years of messing around with basic glaze recipes that weep or crack, I landed on this foolproof method. Trust me, once you try this, you won’t ever go back to plain powdered sugar and milk. It’s all about stability, baby!
If you want to stack, ship, or gift your decorated cookies without worry, you need to check out the secret weapon I use. You can learn more about our cooking philosophy over at our kitchen hub!
Why This Sugar Cookie Icing Dries Hard and Looks Professional
So, what’s the actual trick that makes this sugar cookie icing superior to those thin glazes that just dissolve when you look at them funny? It all comes down to meringue powder, my friend! Standard glazes are just sugar and liquid, which means they set soft and sticky—terrible for stacking your beautiful holiday cookies.
Meringue powder is the magic stabilizer here. It’s essentially dried, pasteurized egg whites mixed with stabilizer, and when you whisk it into the sugar, it creates a network that locks everything into place as it dries. This is what gives you that genuine “icing that hardens for cookies” effect. You get structural integrity without the hassle of dealing with raw egg whites, which, honestly, is a huge win for beginners!
This recipe is much more reliable than simple powdered sugar frostings, ensuring your beautiful decorative work stays exactly where you put it. It’s about transforming a simple topping into a protective, edible shell.
Achieving the Perfect Smooth Cookie Glaze
When it comes to appearance, a smooth cookie glaze is your goal. You need gloss, not grit! That’s why I am obsessive about sifting the powdered sugar first—any little lumps will show up immediately in the final, thin layer on your cookie. Seriously, don’t skip it!
But the real secret to that beautiful, glossy sugar cookie icing look is the beating time. I know, I know, you want to stop as soon as it comes together. Resist that urge! You need to beat it on high for those crucial five to seven minutes because you are incorporating air. That trapped air creates tiny bubbles that reflect light beautifully, giving you that showroom shine. When you see it go from murky to bright and shiny, you’ll know you’ve hit that perfect velvety texture!
Gathering Ingredients for Your Sugar Cookie Icing Recipe
Okay, so we know *why* this recipe works—it’s sturdy and glossy! Now, let’s get down to the stuff you need to pull out of your pantry. When you’re making a specialized sugar cookie icing like this that needs to dry hard, precise measurements are your best friend. We can skip the guesswork that plagues simple glazes because we’re using stabilizing ingredients!
Every gram counts here when you want that consistent thickness. Don’t just eyeball the sugar! Have everything ready to go—sifted sugar, measured water—because once the mixer starts, we want to move! Think of it like setting up your station before a big baking day. Trust me, the peace of mind you get knowing everything is measured out is worth the extra minute upfront.
Ingredient Notes and Substitutions for Hardening Icing
Let’s talk specifics, because not every ingredient here is interchangeable if you want this icing to harden properly. First up: Meringue Powder. This is non-negotiable for the structure we’re aiming for! I prefer it way over using fresh egg whites—it’s pasteurized, safer, and gives me a much cleaner white result, which is essential for that bright, bakery style cookie icing look.
If you absolutely cannot find meringue powder, you *can* substitute it with 2 standard egg whites, but you have to be super careful about getting that right consistency and handling raw eggs. Since this recipe aims to be foolproof, I really push for the powder. For the vanilla, use *clear* vanilla extract if you can find it. Regular vanilla will tint your icing a light beige, and we want pure white when we’re making that glossy sugar cookie icing!
And finally, water temperature matters just a touch. It should just be warm—not hot! Warm water helps the meringue powder dissolve much better during the whisking stage, giving you that perfectly smooth cookie glaze without any grainy bits hiding in the bottom of the bowl.
Step-by-Step Guide to Making Easy Sugar Cookie Icing Recipe
Alright, this is the fun part where our hard work actually comes together! Making this foolproof sugar cookie icing is surprisingly fast—you’re looking at about 10 minutes total mixing time, which is a dream compared to old-school royal icing methods. Remember how we talked about getting that perfect texture? It happens right here on the mixer!
First things first: get that sifted powdered sugar and your gorgeous meringue powder into the mixing bowl. Whisk them dry first! I mean it, really whisk them around with a fork so there are no hidden pockets of dry meringue powder hanging out. Nobody wants a weird dry spot in their otherwise perfect icing!
Now, dump in the warm water—don’t use ice cold, it won’t mix right—and the clear vanilla. Start the mixer on the LOWEST speed. This is so important because if you start on high, you’ll shoot sugar dust all over your kitchen. Trust me, I learned the hard way back when I first started perfecting this recipe! You only want low speed until everything is incorporated.
Once everything looks like a thick, pale paste, *then* you can crank that mixer up to medium-high. This is where the magic happens! That 5 to 7 minutes of beating is critical for getting the gloss and the structure. Don’t cheat this step; this long beating time creates the air pockets that guarantee a glossy finish when it sets. You can check out more handy baking walkthroughs over at our main recipe index!
Mastering Piping Consistency Icing
When that icing looks super thick while the mixer is running, you are aiming for stiff peaks. This is your “piping consistency icing,” perfect for outlining your cookies before you flood them. When you pull the beaters out, the peak should stand up straight and tall without drooping over at all. If it immediately flops over like it’s tired, it needs more beating time!
Here’s my little secret for testing: Take a small dollop out onto a scrap cookie. If you try to make a line with a scribe tool or toothpick and the line stays perfectly crisp without puffing up or sinking back into itself, you nailed it! If it starts to look melty or run over the cookie border immediately, you might need a touch more mixing.
Adjusting to Flood Consistency Icing
Piping consistency is great for borders, but to fill in those big spaces, we need “flood consistency icing.” This is where you thin it out just enough to let it flow easily. You need to be cautious here, as adding too much water turns this hardener into a runny mess that won’t dry right!
If your piping mixture is too stiff for flooding, add water just half a teaspoon at a time. Beat it until it’s smooth again. Then, test it with the ribbon test. This is the hallmark for any **beginner cookie decorating icing**: Dip your spoon in, pull it out, and let the icing drizzle back into the bowl. If the line that lands on the surface takes about 10 seconds to fully disappear back into the main icing mass, you are perfect. If it sinks immediately, add a tiny bit more sugar! If it never sinks, you need another drop of water.
Tips for Success with Your Glossy Sugar Cookie Icing
Even with the best recipe, things can occasionally go sideways when you’re decorating, right? Don’t panic! Troubleshooting this perfect sugar cookie icing is usually simple, especially since the meringue powder gives us such a stable base. The most common issue people have after the icing dries is cracking or crumbling when they stack their cookies—that horrible “no crumble cookie icing” failure!
If your icing is cracking badly, it usually means one of two things: either you added too much water during the flood stage, or the humidity is fighting you. If you suspect too much water, you can sometimes save it by quickly mixing in a tablespoon of extra sifted sugar by hand, but be gentle!
Air bubbles are another annoyance that ruins that flawless, glossy finish. The best way to deal with those? After you finish mixing your piping and flooding consistencies, tap the bowl hard against the counter a few times. Then, take a toothpick or a small pin and just gently pop any visible bubbles on the surface before you start decorating. It takes seconds and makes a huge visual difference!
Finally, if your icing just won’t harden, double-check your meringue powder. If it’s old, it loses its power. Also, make sure you aren’t applying this icing too thick on the edges. For the best results and those gorgeous, clean lines, you want a thinner layer of *flooded* icing under the initial piped outline. A thinner application dries faster and harder! You can see how I handle precision over at my brown butter chocolate chip cookie post if you need more tips on tricky baking techniques!
How to Decorate Cutout Cookies Icing Like a Professional
Now that you have this magnificent, rock-solid sugar cookie icing mixed up, it’s time to turn those bland sugar cookies into works of art! This is where many people get intimidated, but trust me, once you have the right consistency (which we nailed in the last section!), it’s just like coloring inside the lines.
The basic professional technique involves two main phases: outlining and flooding. You use that thick piping consistency for the outline, and you use the slightly thinner flood consistency to fill everything in. Think of the outline as a tiny, edible dam wall that keeps your thinner icing neatly contained.
Once you’ve applied your outline, you need to let it dry for just a small amount of time—maybe 10 to 15 minutes. You don’t want it rock hard, but you want it firm enough that when you flood the space, the flood icing doesn’t just rush right out over your dam! That initial firmness keeps your layers crisp.
After you flood the centers, that’s when patience comes in. Because this specific icing is designed to dry hard so you can stack them, you generally need several hours for complete hardening, especially if you live somewhere humid. If you’re in a hurry, keep them in a dry, room-temperature spot. Never try to speed this up in the fridge! A cold, damp environment will make your beautiful glossy sugar cookie icing weep and soften. For more tips on getting crisp edges, take a look at how I apply frosting on my pumpkin spice cake frosting—the application philosophy is the same!
When you are completely done decorating for the day and everything is rock hard, you can stack them gently. That’s the joy of using a proper hard-drying icing; you don’t have to worry about squishing your hard work!
Storing and Reviving Leftover Vanilla Cookie Icing Recipe
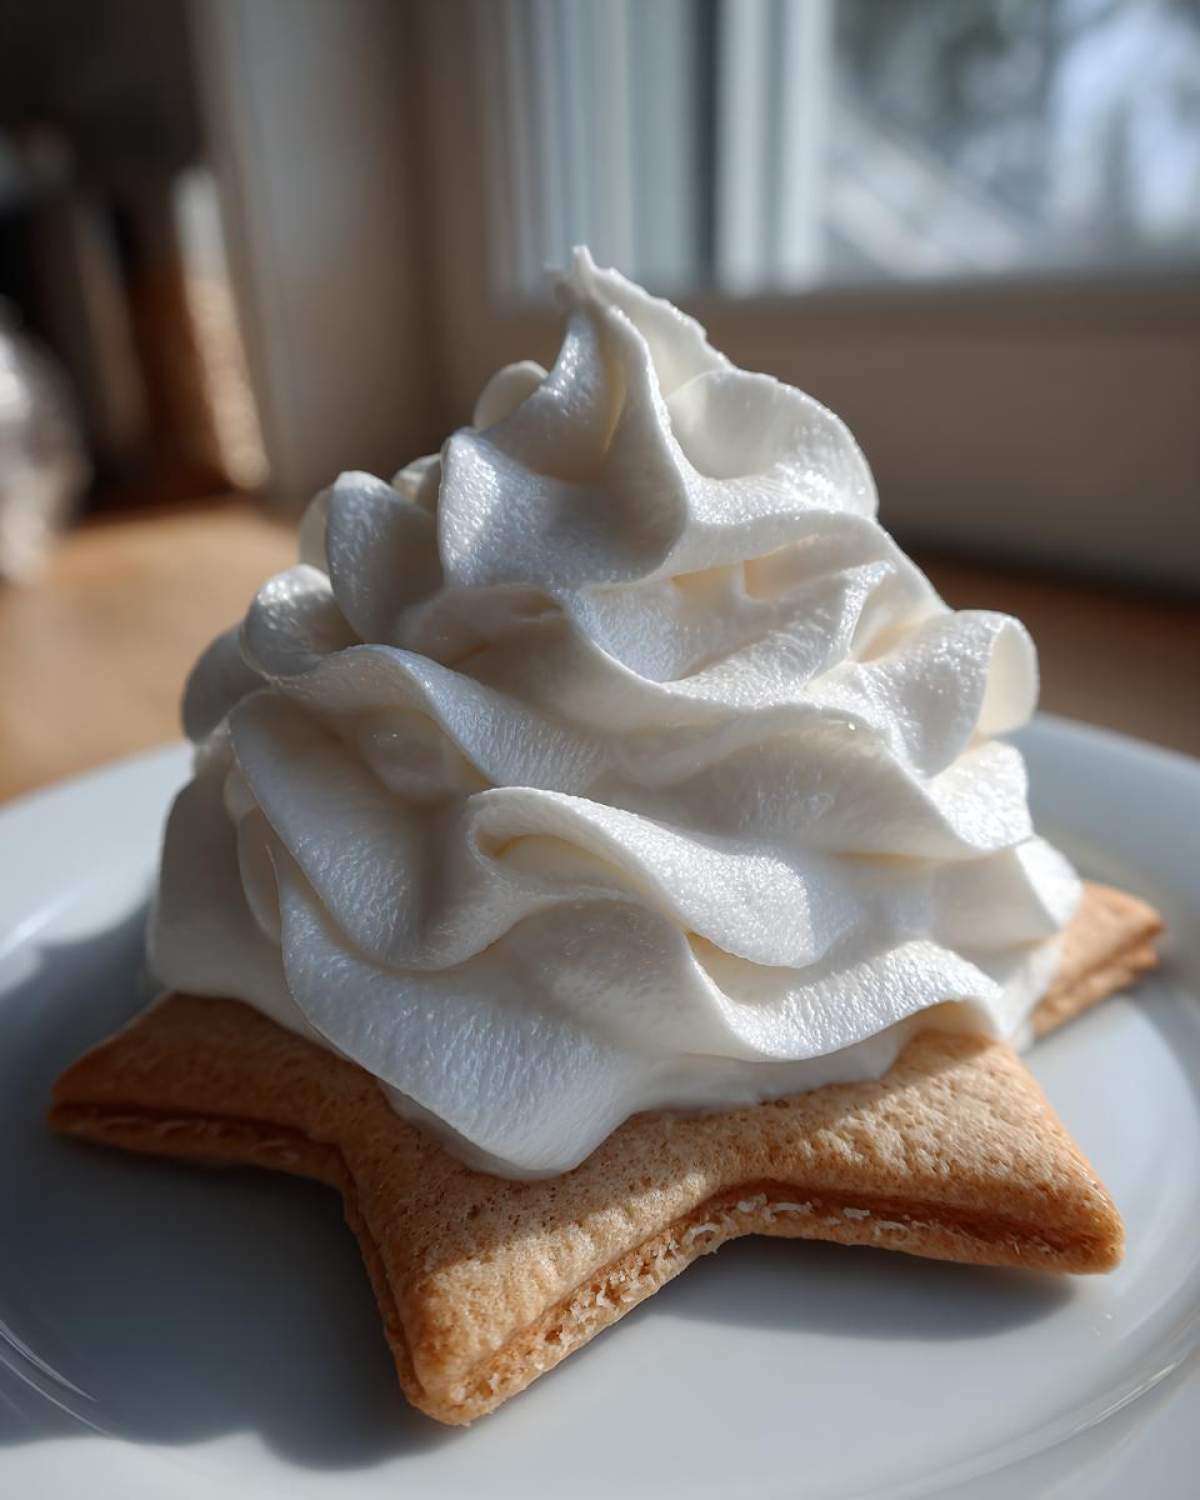
I always make a huge batch of this sugar cookie icing, even if I only need enough for a few cookies. Why? Because it saves major time the next time I need to decorate something fast—like when the kids suddenly decide they need teacher gifts *tomorrow*!
Good news: this icing is super sturdy even when stored! You absolutely must keep any leftover icing in an airtight container. If you just cover the bowl with plastic wrap, the air will grab the sugar, and it will turn into a brick. Think airtight, like a sealed Tupperware or a jar with a tight lid. The best part is you keep it right there on the counter at room temperature. No fridge needed!
I’ve kept leftover icing for a couple of days, and honestly, it holds up beautifully. If you’re leaving it overnight, just make sure the lid is snug. If you’re storing it longer than that, you might see the top layer get a bit stiff. Don’t sweat it, though!
To revive it, you don’t need any fancy ingredients—just a tiny bit of water. Take the amount you need out of the main container and put it in a small bowl. Add water literally half a teaspoon at a time, stirring gently until it comes back to that perfect consistency. If it was piping icing, you’re aiming for that stiff peak again. If it was flood icing, add a drop until the ribbon test works. It comes right back to life! It’s so much easier than starting over from scratch. For other great pantry-friendly recipes, you can check out my thoughts on apple cinnamon muffins!
This stability is honestly part of why I love this vanilla cookie icing recipe so much. It’s ready when you are, and it doesn’t require you to babysit it!
Frequently Asked Questions About Icing That Hardens for Cookies
I know when you’re trying a new recipe, especially one that promises to dry hard and look professional, you have questions! I always do! I gathered up the ones I hear most often about this specific sugar cookie icing so you can bake with confidence. If you have other questions, feel free to reach out on my contact page!
How long does this sugar cookie icing take to dry fast?
This is the eternal question, isn’t it? Because we used meringue powder, this dries much faster than a typical glaze. If you’ve piped thin borders, those can often feel dry to the touch in about an hour if the weather is dry. However, for the flooded areas—the areas you fill in—you really need to give it a solid 4 to 6 hours at room temperature before you plan on stacking them or putting them in a box.
If it’s super humid where you are, that time might stretch to overnight. This is still way faster than old-school royal icing that sometimes takes a full 24 hours, but it’s not instant. Remember, rapid drying happens best in dry air, so keep them off the counter if you’re steaming up the house with a big holiday dinner!
Can I use this as a simple 3 ingredient cookie icing alternative?
That’s a great question for people looking for a simple 3 ingredient cookie icing! Technically, no, you can’t skip the meringue powder and still get the hard-setting results promised by this recipe. The core components are sugar, liquid, and stabilizer (the meringue powder).
However, I argue that this *is* the simplest way to get *professional* results. Traditional royal icing requires separately whipping egg whites and sometimes even using corn syrup, which can be a pain. Since this recipe blends the stabilizer right into the dry sugar, it’s incredibly straightforward. You are essentially using four main ingredients to achieve a result that usually requires much more fuss. It’s simple compared to the complexity of true multi-stage royal icing methods!
What makes this the best tasting cookie icing?
Honestly, the flavor comes down to what you *aren’t* tasting! A lot of powdered sugar recipes end up tasting chalky or overly sweet because they rely only on sugar and milk. Because we use meringue powder instead of just egg whites, this base flavor is much cleaner. It doesn’t have that slightly eggy background note sometimes found in homemade royal icing.
The real flavor punch comes from the vanilla extract. I always specify using clear vanilla extract because it gives you pure vanilla flavor without that slight tan tint. It really lets the sweetness shine through without being dull. When a batch of this is ready, it smells bright, clean, and perfectly sweet—not heavy. It’s the ideal supporting actor for any sugar cookie!
Estimated Nutritional Breakdown for This Sugar Cookie Icing
Now, I always feel a little awkward talking about nutrition when we’re dealing with pure sugar magic like this incredible **sugar cookie icing**!
But let’s be fair and clear about what we’re whipping up here. This nutritional information is based on standard calculations for the ingredients provided, assuming you get one serving size (about 1/4 cup of icing). You have to remember that this is a pure topping, so the numbers reflect that! These figures are estimates only, so if you’re tracking things super closely for health reasons, you should always double-check against the specific brands you use. You can read more about why we post estimates on our disclaimer page.
The good things? It’s totally vegetarian, has virtually zero fat or cholesterol, which is nice! The trade-off, as you might expect for a icing that sets hard and glossy, is the carbohydrate and sugar content. When you’re decorating treats, remember this is the fun crowning jewel, not the main event!
Here’s the quick rundown for a single serving (about 1/4 cup):
- Calories: Around 180
- Sugar: Roughly 45 grams (Yeah, it’s sweet!)
- Protein: About 1 gram
- Fat: Basically zero
When you look at this data, just remember that this small amount is spread across several cookies. A fully decorated cookie only uses a tiny fraction of that serving size, so enjoy your beautiful, stable, and now practically guilt-free decorating session!
Share Your Masterpiece: Perfecting Your Cookie Decorating
Now that you have the knowledge and the recipe for this incredible, hard-setting sugar cookie icing, it’s time to put it to the test! I am so excited for you to move past the runny, gummy icing phase and experience the joy of smoothly decorated cookies that actually survive being packaged.
Once your cookies are decorated and completely dry—and I mean dry, give them those few hours!—I absolutely need to see what you’ve made! Did you go classic Christmas red and green? Or maybe some fun spring pastels? Head over to social media and tag me in your photos!
When you share, please tell everyone how well this icing held up!
- Did it dry fast enough for stacking?
- Did you achieve that glossy finish?
- Did you try the flood consistency test successfully?
Seeing your decorated cookies is honestly the best part of sharing these recipes. It proves that these techniques work for everyone, not just me over here in my kitchen! If you loved how foolproof this recipe was, please don’t forget to circle back here and leave a star rating. It helps other bakers find this amazing recipe for stable, beautiful cookies.
If you need any more general information about how we handle visitor data and privacy while you’re browsing for more recipes, you can review our details over at the privacy policy page. Happy decorating, and I can’t wait to see your hard-drying masterpieces!
PrintSugar Cookie Icing That Dries Hard and Stays Smooth

A simple recipe for a glossy sugar cookie icing that dries firm, perfect for decorating cutout cookies for holidays or gifts.
- Prep Time: 10 min
- Cook Time: 0 min
- Total Time: 10 min
- Yield: Enough to cover 2 dozen medium cookies
- Category: Dessert Topping
- Method: Mixing
- Cuisine: American
- Diet: Vegetarian
Ingredients
- 3 cups powdered sugar, sifted
- 1/4 cup meringue powder
- 6 tablespoons warm water
- 1 teaspoon clear vanilla extract
Instructions
- In a medium bowl, whisk together the sifted powdered sugar and meringue powder until fully combined.
- Add the warm water and clear vanilla extract to the dry ingredients.
- Beat the mixture with an electric mixer on low speed until the ingredients are just incorporated.
- Increase the speed to medium-high and beat for 5 to 7 minutes until the icing is smooth, glossy, and holds stiff peaks. This is your piping consistency.
- To achieve flood consistency for filling in large areas, add water 1 teaspoon at a time, beating well after each addition, until the icing slowly flows off a spoon in a continuous ribbon that disappears back into the bowl after about 10 seconds.
- Use immediately for decorating. Allow cookies to dry completely at room temperature for several hours until the icing is hard to the touch.
Notes
- If the icing is too thick for piping, add water 1/2 teaspoon at a time.
- If the icing is too thin for flooding, add sifted powdered sugar 1 tablespoon at a time.
- Store unused icing in an airtight container at room temperature for up to two days; stir well before reusing.
Nutrition
- Serving Size: 1/4 cup icing
- Calories: 180
- Sugar: 45g
- Sodium: 5mg
- Fat: 0g
- Saturated Fat: 0g
- Unsaturated Fat: 0g
- Trans Fat: 0g
- Carbohydrates: 45g
- Fiber: 0g
- Protein: 1g
- Cholesterol: 0mg