

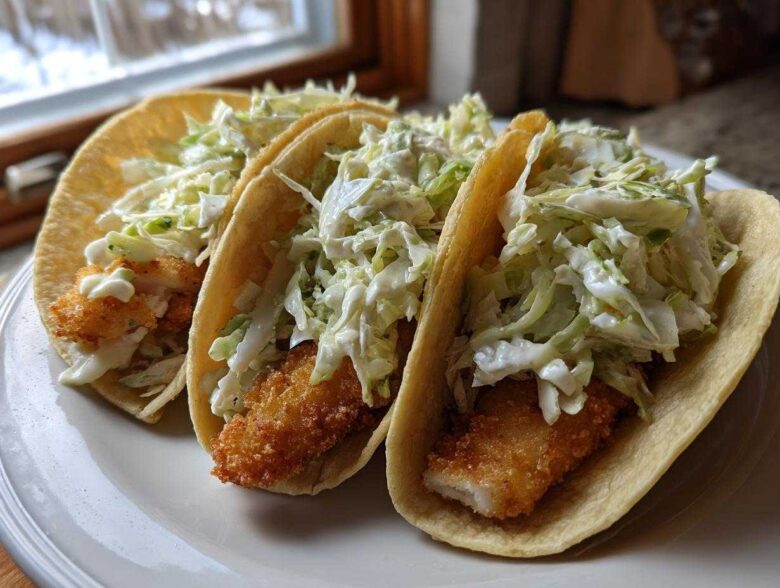
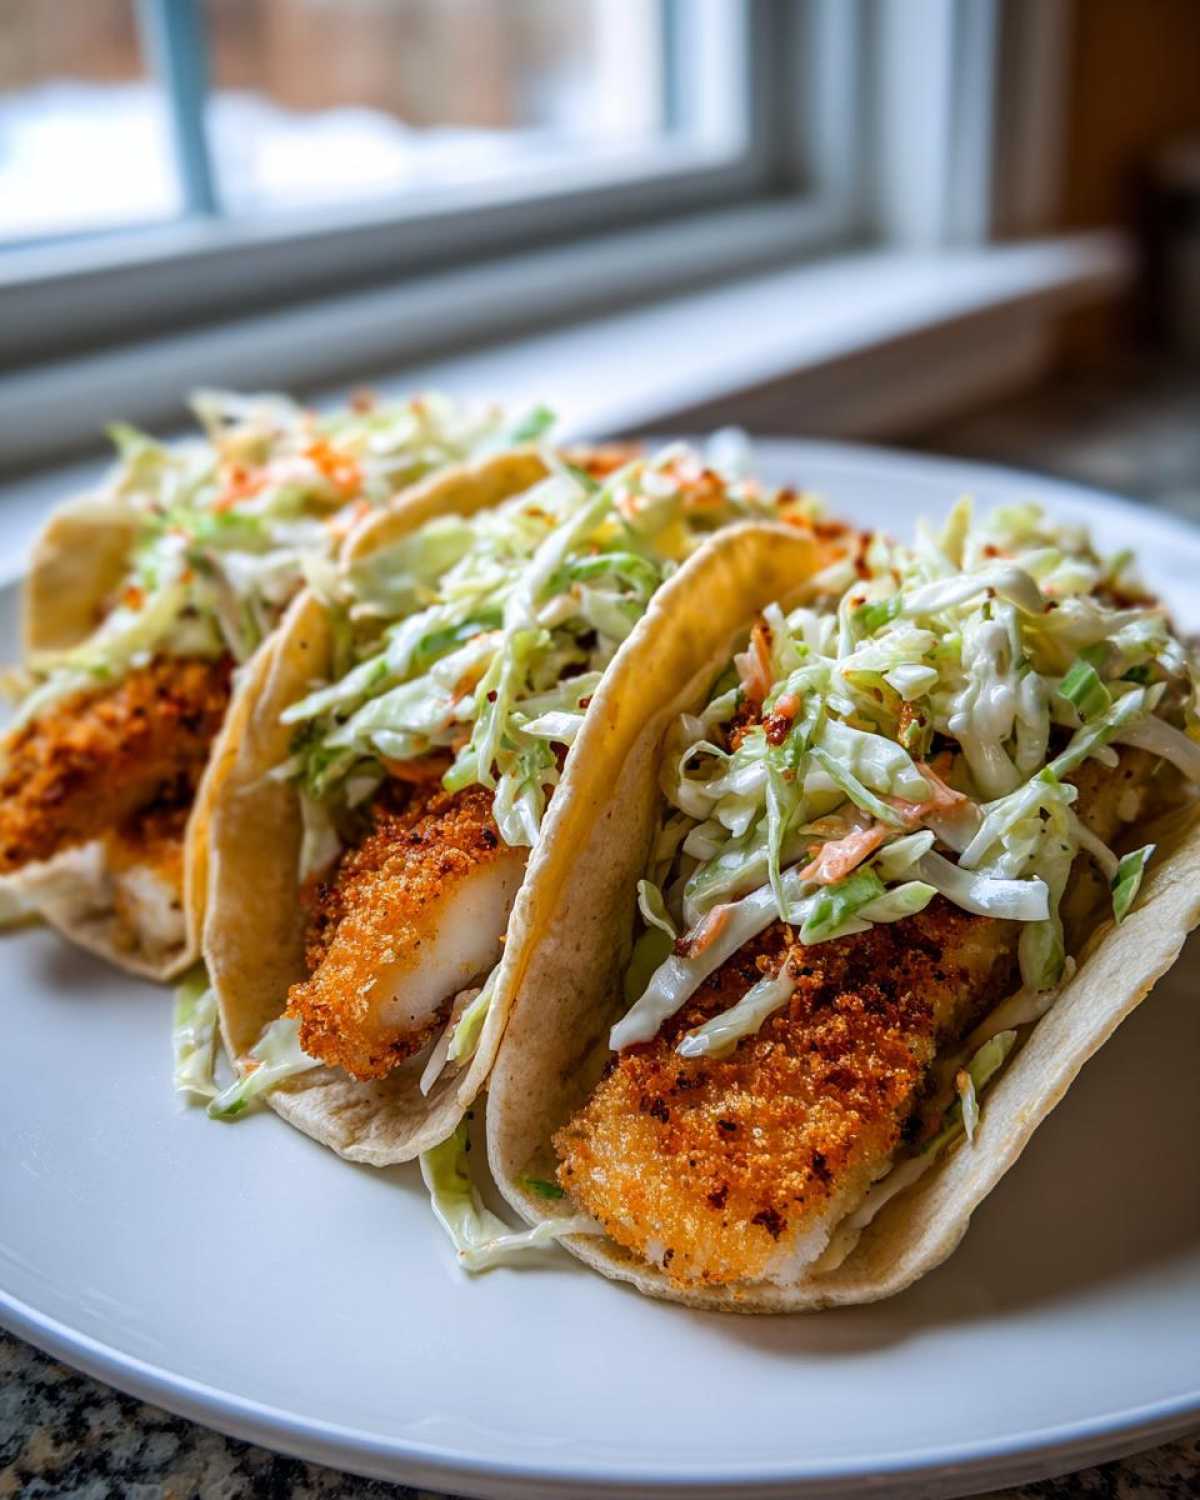
Look, if you think a taco is only as good as its filling, you haven’t lived! The real magic, the absolute showstopper, is the texture contrast. I’m talking about the hot, shatteringly crunchy chicken hitting that cold, tangy, creamy slaw right on your tongue. That’s why I’ve spent ages perfecting this Crispy Chicken Tacos with Creamy Slaw recipe. Forget soggy fillings; we are aiming for auditory crunch here! I learned that the coating has to be aggressive, like a tiny armor plate, to stand up to that cool dressing. Trust me, once you nail this balance, Taco Night changes forever.
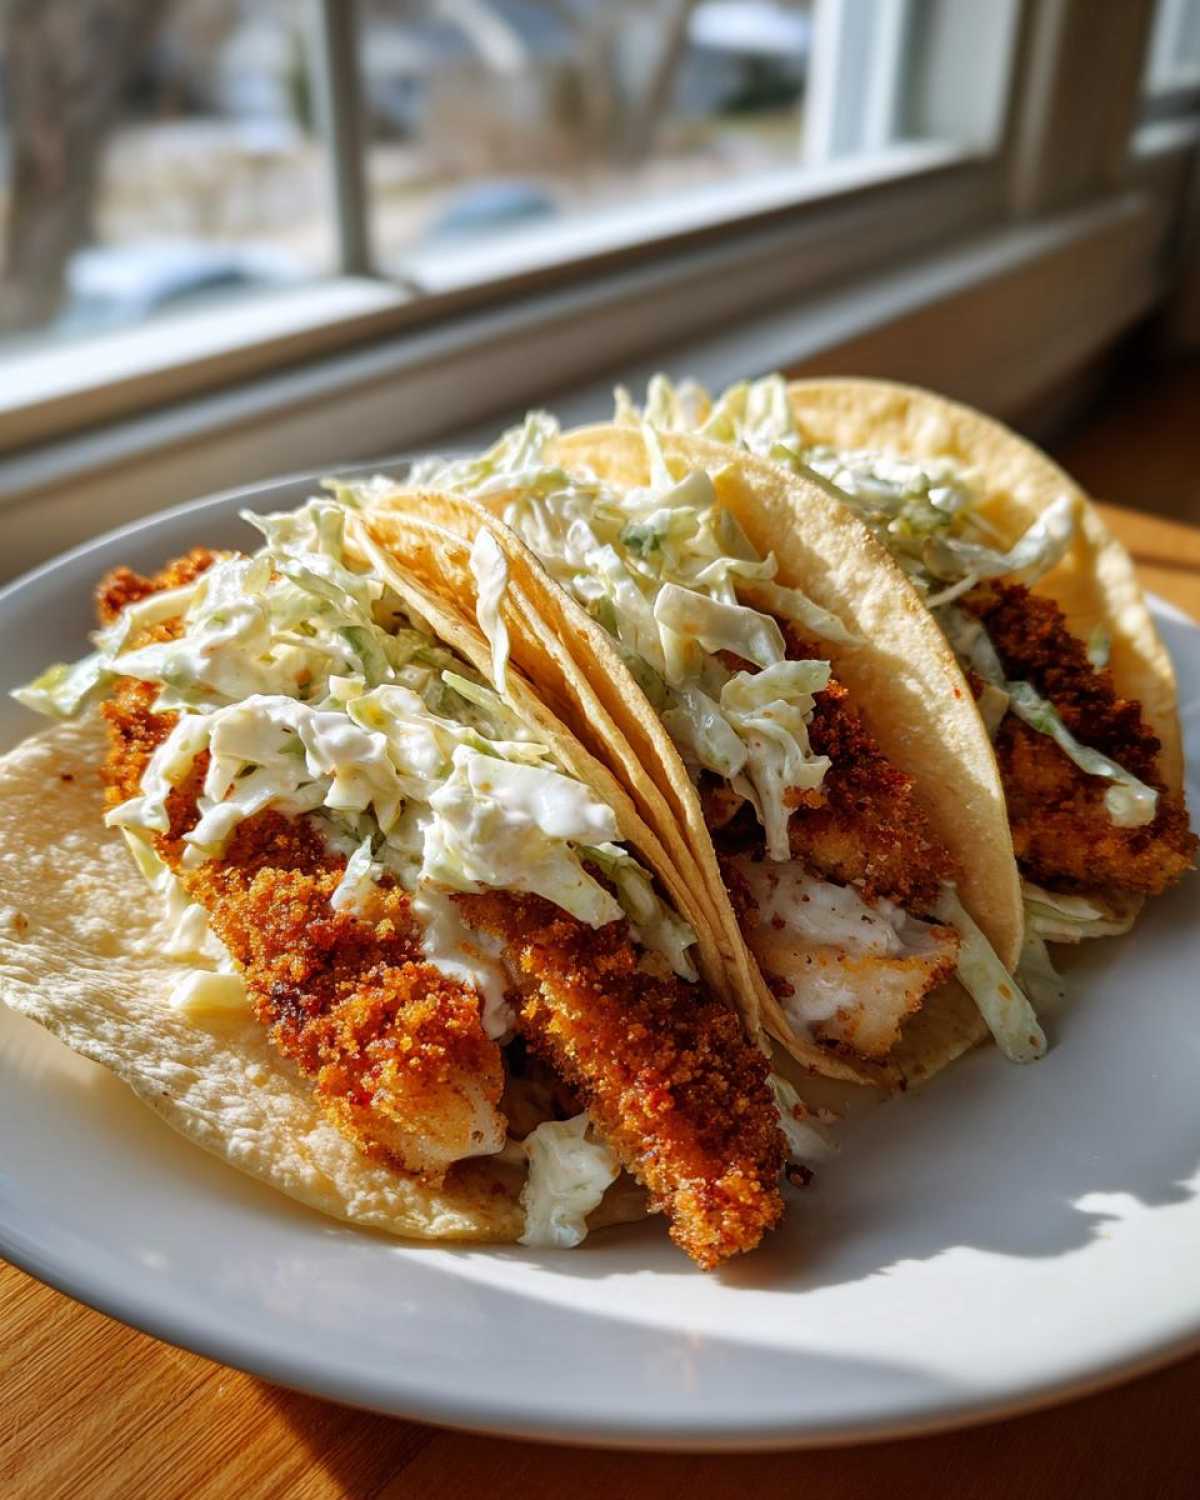
Why You Will Love This Crispy Chicken Tacos with Creamy Slaw Recipe
Honestly, if you are looking for a weeknight dinner that tastes like something special without requiring hours of work, this is the one. Friends always ask me what the secret is! It’s all about that textural interplay we talked about.
- The chicken delivers an unbelievable crunch; we use Panko for a reason—it shatters perfectly! No sad, floppy chicken here.
- The slaw is utterly different from those sad, vinegary versions. This Creamy Slaw Tacos topping is rich, cool, and velvety.
- It’s surprisingly quick! We can get everything prepped and cooking in under 35 minutes, making it my go-to for a quick weeknight meal when cravings hit.
- This recipe is incredibly adaptable. You can swap the spices or even try my air fryer method if you want less oil!
- This becomes your new standard for Best Crunchy Chicken Tacos—the kids ask for it weekly now.
- It perfectly marries hot filling and a cold topping, which is honestly my favorite way to eat anything.
Ingredients for Perfect Crispy Chicken Tacos with Creamy Slaw
I want you to look at this lineup and feel ready to conquer dinner! Getting the ingredients right is half the battle, especially when you’re aiming for that textbook crunch. You need the right base for the chicken and the perfect dressing for the slaw. I always shop for boneless, skinless chicken breasts for this; they hold up beautifully to the panko crust and stay tender inside. Now, if you prefer dark meat, go for thighs! They are more forgiving if you accidentally cook them a minute too long, but breasts tend to keep that nice, cleaner strip shape we’re using here. Check out my tips for getting crispy skin—the principle is the same for achieving that outer shell!
For the Creamy Slaw for Tacos
This slaw is the cooling balm to our spicy, crunchy chicken. Remember, this absolutely has to be mayonnaise-based for that classic creamy texture, not that thin vinegar stuff that just gets watery! We’re keeping it simple here so the chicken shines.
- 3 cups shredded cabbage (I like a mix of green and purple for color!)
- 1/2 cup mayonnaise (Use your favorite quality brand, please!)
- 2 tablespoons apple cider vinegar
- 1 tablespoon granulated sugar
- 1/4 teaspoon salt
- 1/4 teaspoon black pepper
For the Crispy Chicken Filling
This is where the magic happens! It’s a standard three-step breading station, but the secret is definitely pressing that Panko into the strips. You want full coverage so you get that satisfying *c r u n c h* with every single bite of your Homemade Chicken Tacos with Slaw.
- 1.5 lbs boneless, skinless chicken breasts, cut into 1-inch strips (Pat them dry first—moisture is the enemy of crispiness!)
- 1 cup all-purpose flour
- 2 large eggs, beaten (These are your glue!)
- 2 cups panko breadcrumbs (Don’t try to substitute regular breadcrumbs; Panko is key!)
- 1 teaspoon salt
- 1/2 teaspoon black pepper
- 1/2 teaspoon garlic powder
- 1/4 teaspoon paprika (Just a dash for warmth)
How to Make Crispy Chicken Tacos with Creamy Slaw
Okay, this is the game plan. We need to move fast, but with purpose, so the chicken coating doesn’t get soggy before it hits the hot oil. Making Crispy Chicken Tacos with Creamy Slaw is all about setting up your stations correctly. Think of it like an assembly line, but the product is pure crunch!
Preparing the Crunchy Chicken Coating and Dredging
First things first: get your three shallow dishes ready. Flour in the first, beaten eggs in the second, and then mix your seasoned Panko in the third dish—that’s salt, pepper, garlic powder, and paprika all mixed in. Now, take your dried chicken strips. Dredge them through the flour, really shake off the extra coat; you only want a thin dusting sticking. Plunge them into the egg, let the excess drip off, and then—this is vital—press them firmly into that Panko mixture. Rock them back and forth slightly so that crust really sticks on there. That tight seal is what keeps the moisture in and guarantees maximum crunch later.
Mixing the Mayonnaise Based Slaw for Tacos
While you’re setting up your coating station, go ahead and mix up that slaw. In a bowl, just toss together the cabbage, mayo, vinegar, sugar, salt, and pepper. Don’t over-mix it until it’s mushy! Get everything coated evenly, then seriously, put it in the fridge for at least 15 minutes. That chilling time lets the vinegar start working on the cabbage so it’s tender-crisp, not raw-crunchy, but it stays cold and ready for topping.
Cooking the Perfectly Crunchy Taco Filling
Time to fry! Heat about a quarter-inch of vegetable oil in a big skillet over medium-high heat. You know the oil is ready when it shimmers slightly. Carefully place your coated chicken strips in—don’t cram the pan! If they touch, they steam, and we don’t want that. Cook for about 3 to 4 minutes on each side until they are deep golden brown and that internal temperature hits 165°F. When they look perfect, pull them immediately onto paper towels or a wire rack. Draining them properly is important to keep that oily sheen off the outside! You can find more in-depth techniques on how to make crispy chicken if you need extra pointers!
Assembling Your Crispy Chicken Tacos with Creamy Slaw
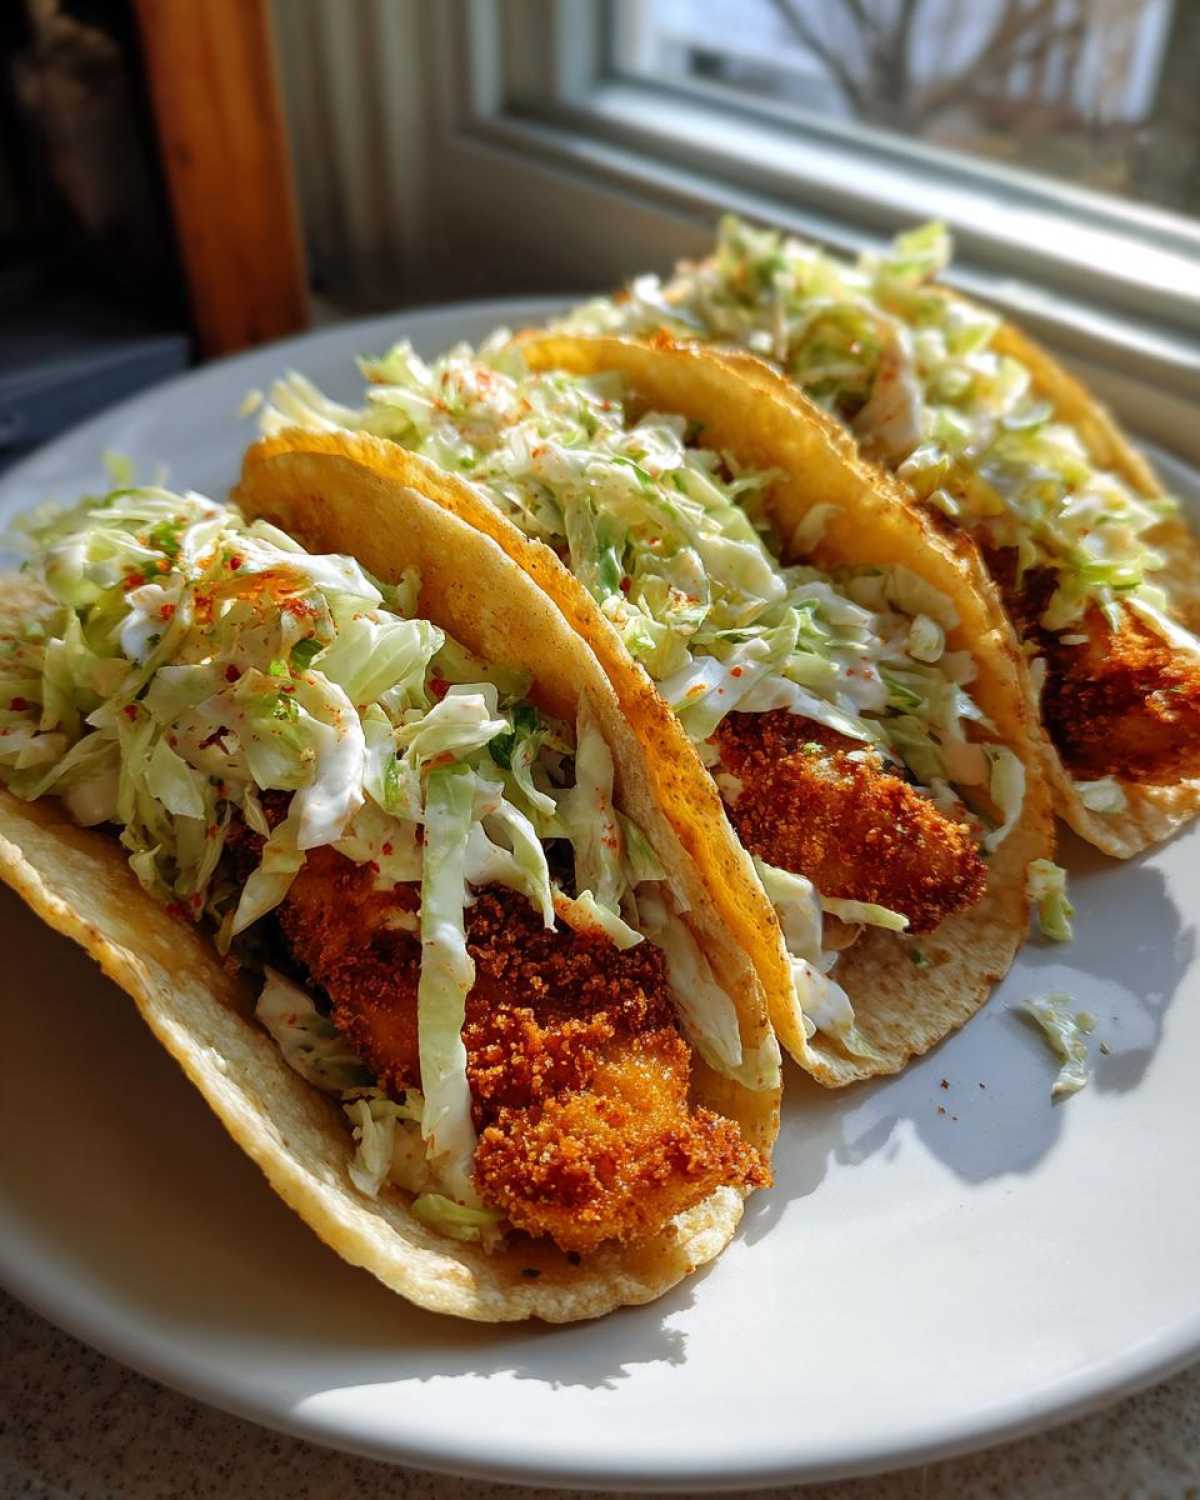
Warm up your tortillas—a little char on a dry skillet works wonders. Layer hot, crunchy chicken strips inside the warm tortilla base. Pile that chilled, creamy slaw right on top. Seriously, serve these immediately! That contrast between the hot, crunchy chicken and the cool, creamy slaw is why we went through all this trouble!
Tips for Achieving the Best Crunchy Chicken Tacos
Okay, you’ve mastered the main cook, but listen up, because getting that *ultimate* crunch that lasts more than two minutes requires a little extra finesse. My goal is for you to still be chewing and hear that crunch, even after the slaw has done its cooling work! This is where you step up from just making dinner to mastering the art of How to Make Crispy Chicken for tacos.
First and most simple tip: Pat the chicken strips bone-dry before they ever touch that flour. Moisture fights crispiness every single time. If the chicken is even slightly damp, your flour coating slides right off, and you end up with rubbery chicken edges instead of that beautiful, craggy crust.
Secondly, you absolutely have to let your coated chicken REST for five minutes on a cooling rack before it hits the oil. Yes, I know you are eager to eat, but that short rest allows the egg and flour mixture to actually hydrate the panko, effectively gluing it onto the chicken. This prevents shedding in the hot oil, leaving you with perfectly intact, crunchy coating.
If you’re watching oil intake, the air fryer is your best friend for these Easy Crispy Chicken Dinner tacos! You use the exact same coating method, but instead of pan-frying, you arrange the strips in a single layer in the air fryer basket. Spray them lightly with oil spray first, and cook at 400°F for about 10 to 12 minutes, flipping halfway through. They come out shockingly crispy, maybe even a little lighter than the pan-fried version!
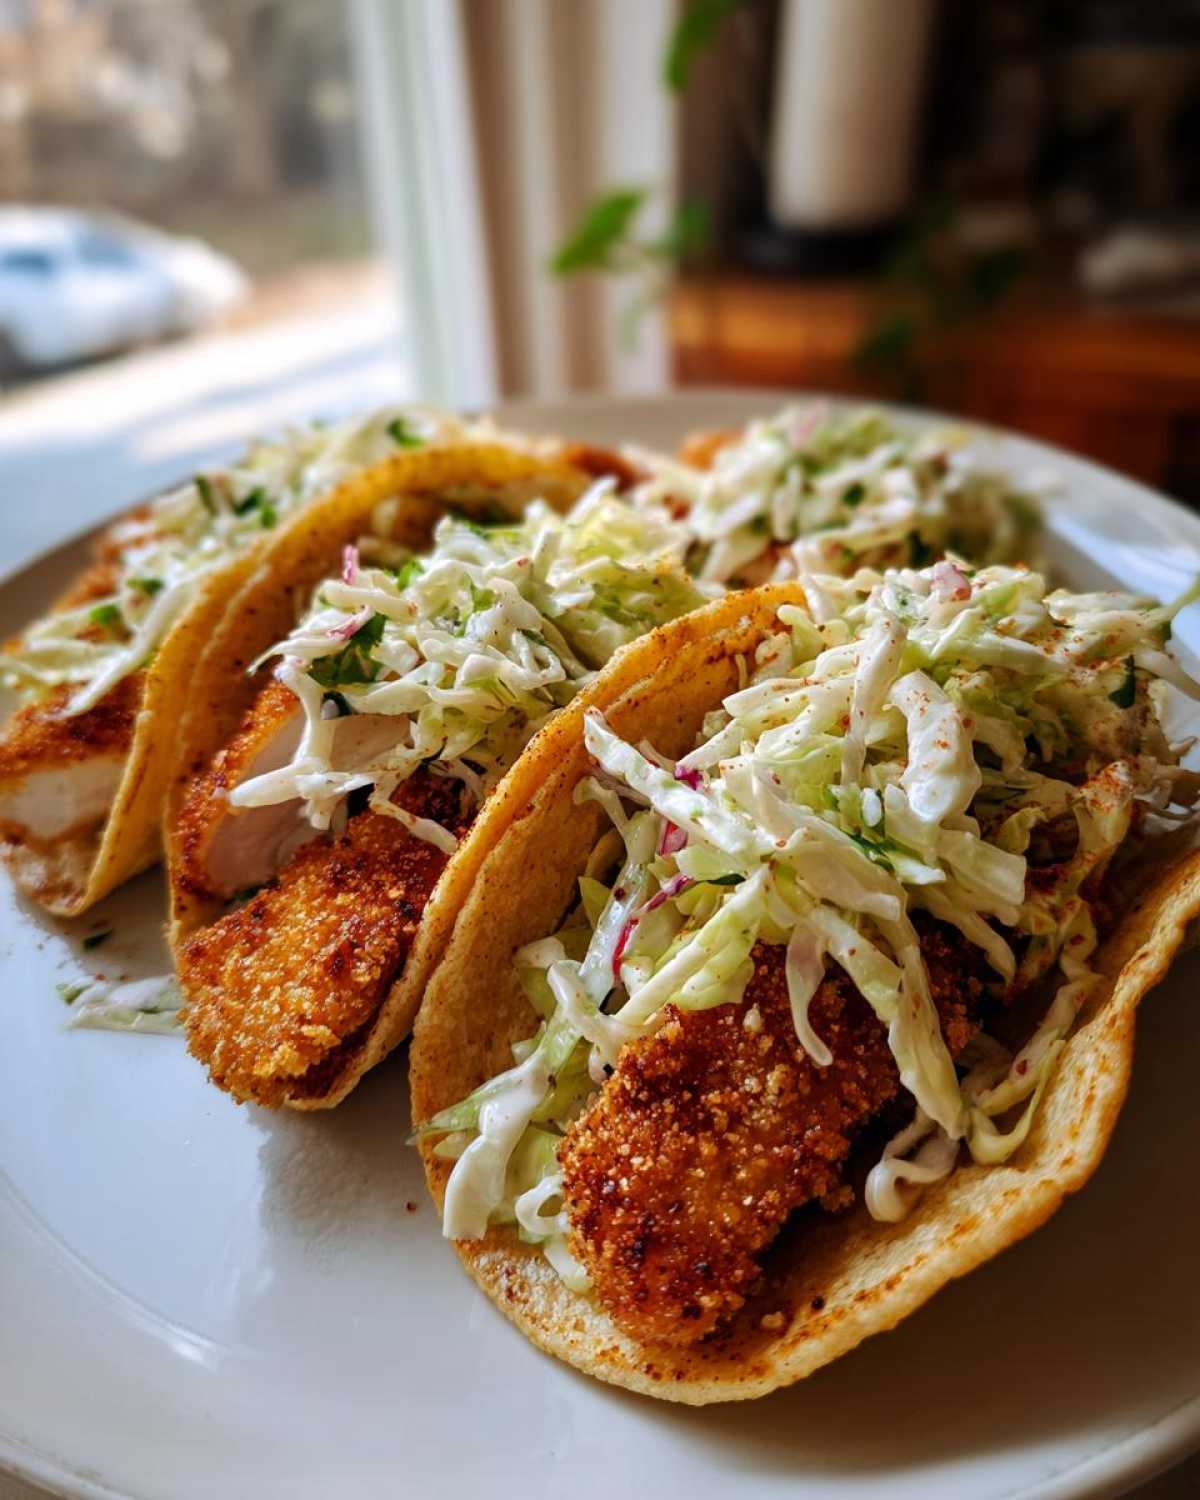
Finally, regarding flavor balance: Don’t skimp on the acid in the slaw! That little bit of apple cider vinegar is key. It cuts through the richness of the mayo and the fried crust, making you want another bite immediately. It keeps the whole taco feeling bright, not heavy.
For perfectly coated, ready-for-anything chicken, remember those key steps. If you want more amazing crispy techniques, check out my guide for crispy fried cornbread—the principles of breading are surprisingly similar!
Variations for Your Homemade Chicken Tacos with Slaw
Part of the fun of making a recipe your own is messing around with the components, right? Since we’ve nailed the fundamental crunch factor and the creamy slaw base, we can start tweaking flavors! These little adjustments can turn your standard batch from ‘great’ to ‘unbelievably memorable.’ Don’t be scared to play around, especially since the core elements—Panko and mayo—are so solid.
My absolute first suggestion for anyone who loves heat is adjusting the spice blend in that Panko breading. We used a bit of paprika, but why stop there? You can easily replace that 1/4 teaspoon of paprika with smoked paprika for a deep, woodsy flavor, or kick it up with cayenne pepper if you like fire! For a real change, try adding a teaspoon of taco seasoning mix right into the dry Panko mixture. That instantly transforms the flavor profile of your entire batch of Crunchy Topping for Tacos.
Spice Swaps and Flavor Boosts in the Breading
When you’re experimenting with spices, remember to test them *before* you start coating all that chicken! A little shake of cumin or even some dried oregano can add complexity. If you are assembling a big dinner spread and want to use different vegetables, this is a great place to remember that these are fantastic Taco Recipes with Shredded Cabbage, but you can absolutely swap some of that shredded cabbage out for shredded carrots or even thinly sliced bell peppers in the slaw! It just adds a little more crunch and color.
Mixing Up the Slaw for Extra Creaminess or Tang
We used mayo as the base, but if you want a slightly lighter, tangier slaw that still reads as ‘creamy,’ try swapping out half the mayonnaise for plain Greek yogurt or sour cream. It tones down the richness just slightly while keeping that luxurious mouthfeel. Keep the vinegar the same, though, because we need that acidity to keep the whole dish balanced.
Also, many home cooks find that adding a bit of finely minced fresh cilantro or even some finely diced red onion to the slaw mix gives it an extra layer of freshness. Don’t chop the onion too big, or you’ll get big, sharp bites; aim for something that blends seamlessly into the creamy dressing.
Adding a Signature Secondary Sauce
While the creamy slaw is technically all you need, sometimes you want that extra drizzle of something bold over the top. My go-to for these Family Friendly Taco Night meals is a quick chipotle lime crema. It’s super simple: just take about a quarter cup of your leftover slaw mayonnaise, mix in a teaspoon of adobo sauce from a can of chipotles (use more if you are brave!), a little squeeze of fresh lime juice, and a pinch of salt. Drizzle that smoky, spicy sauce over the slaw right before serving. That layered condiment effect really makes these tacos feel gourmet!
Serving Suggestions for Your Creamy Slaw Tacos
So, the star of the show is definitely the amazing crunch of the chicken paired with that cool, creamy slaw, but you can’t serve tacos completely naked, can you? They need friends on the plate! Since the chicken is rich from the fry (even if you air fried it!) and the slaw brings the creamy factor, we need sides that are zesty, light, or super simple to balance things out. We’re keeping the focus on fresh, vibrant flavors that keep the whole meal feeling like a fiesta, not a heavy afternoon nap.
When I make these Easy Crispy Chicken Dinner tacos, I usually pull out two or three sides. It’s all about contrast. You want something acidic to cut through that fat, something salty and bright, and then maybe one easy carb component if the family is extra hungry.
Cilantro Lime Rice is a Must-Have Side
If you take away one suggestion, let it be this: Cilantro Lime Rice! It’s so simple, but it brightens up every single bite. All you need to do is make your favorite plain white rice (I use Basmati because it stays fluffy), and while it’s steaming hot, you stir in the juice of one really bright lime and a ridiculously generous handful of freshly chopped cilantro. Don’t hold back on the cilantro—it’s the freshness hero here!
The rice acts as the perfect base. You can pile your chicken and slaw right on top of a scoop of the rice if you want an open-faced ‘bowl’ feel, or serve it right next to the tacos. It neutralizes the richness beautifully.
Simple Black Beans or Refried Beans
You need a protein/fiber anchor on the plate, and beans are always a winner. For a lighter take, take a can of black beans, rinse them well, and heat them up with a splash of water, a teaspoon of cumin, and maybe half a diced jalapeño until they are warmed through. They don’t need to be complicated!
However, if it’s a real comfort food night, you can definitely go for refried beans. If you’re using canned refried beans, I always doctor them up a bit by gently frying them in a little bit of bacon fat or oil first, stirring constantly until they just start to bubble around the edges. That adds a depth of flavor that canned goods usually lack. For heartier sides like that, you might also want to check out my recipe for red beans and rice—it’s savory and comforting!
Acidic Toppings for Extra Zing
Since the slaw is creamy, having a separate element that is purely acidic lets people tailor the zing factor of their taco. I always make a small bowl of quick-pickled onions. If you haven’t done this before, you are missing out! Thinly slice a small red onion and pack it into a jar. Heat up a mixture of equal parts water and white vinegar with a teaspoon of sugar and a pinch of salt until the sugar dissolves. Pour it over the onions and let it sit for at least 30 minutes. They turn bright pink and taste tart and crisp. They are phenomenal on these tacos and act like a salad side all rolled into one!
A bowl of fresh pico de gallo also works wonders here because it brings acidity from the tomatoes and lime juice without adding more richness to the plate!
Storage and Reheating Instructions for Crispy Chicken Tacos
Listen to me very carefully on this next bit: Do NOT, under any circumstances, assemble these tacos ahead of time. If you put that cool, creamy slaw on top of the hot, crispy chicken and then stick the whole thing in the fridge, I guarantee you will end up with sad, steamed tacos. We worked too hard for that crunchy shell to turn into soggy wallpaper! The key to enjoying leftovers from your Crispy Chicken Tacos Recipe is keeping components separate.
The slaw is easy. It’s basically a salad, right? Keep that creamy mix tightly sealed in an airtight container in the fridge. It holds up beautifully for about three days, though honestly, I find it tastes best within the first 48 hours.
The chicken requires a little more attention to keep that crunch factor alive. Once the chicken pieces have cooled down completely after frying, lay them out in a single layer on a plate lined with a couple of paper towels. Cover them *loosely* with another paper towel or foil—not tightly sealed! You want air to circulate so condensation doesn’t form, which would immediately soften that beautiful crust we built.
Reheating for Maximum Crunch
If you try to reheat the chicken in the microwave, I might shed a tear! The microwave is the sworn enemy of crispiness. We need dry, high heat to resurrect that coating. You have two excellent options here, depending on how much time you have.
My favorite way for leftovers is the oven, which brings back a beautiful, even heat. Preheat your oven to a modest 375°F (that’s about 190°C). Spread the leftover chicken pieces on a small baking sheet—make sure they aren’t touching! Bake for about 6 to 8 minutes. You should see the crust start to firm up and look dry again. Perfect.
If you’re in a bigger rush, the air fryer is fantastic for quick reheating. Set your air fryer to 380°F and pop the chicken pieces in for a quick blast of 4 minutes. It crisps them up super fast without drying out the inside too much. Remember, you are only reheating them here; the goal is crunch restoration, not cooking them raw!
The Assembly: Recreate the Magic Texture
Once the chicken is hot and crunchy again, you assemble the tacos according to the original plan: warm tortilla, hot chicken, cold slaw. Get that contrast back in place, and you have an instant Quick Taco Night Recipes encore performance!
Frequently Asked Questions About Crispy Chicken Tacos with Creamy Slaw
I know when I get excited about a new recipe, I always have a million little questions swirling around my head before I even pull out the ingredients. It’s totally normal! You want to make sure you get that perfect crunch and the slaw is just right. Here are a few things folks always ask me when they try this recipe for the first time. Hopefully, these clear up anything stopping you from diving in!
Can I use chicken thighs instead of breasts for a better flavor?
Oh, you absolutely can! I put breasts in the main recipe because they are lean and cook up into those nice uniform strips, but honestly, chicken thighs are packed with more flavor because of the higher fat content. If you use thighs, just make sure you trim off any big chunks of excess fat. They might take a minute or two longer to cook through—maybe 4 or 5 minutes per side instead of 3 to 4—but they stay incredibly juicy. They fit right into our Best Crunchy Chicken Tacos theme, no problem!
I’m trying to keep things lighter. Can I bake this instead of pan-frying for my Easy Crispy Chicken Dinner?
Yes, you can definitely bake them, though I will be honest, pan-frying or air-frying gives you a texture that is just superior crunch-wise. If you must bake, you need to compensate for the lack of direct oil contact. Preheat your oven to 400°F (about 200°C). Arrange the coated chicken strips on a wire rack set over a baking sheet—the rack is crucial so air circulates underneath! Bake for about 18 to 20 minutes, flipping halfway through until they feel hard and golden. They won’t be *as* aggressively crispy as the pan-fried batch, but it’s a solid, healthier option!
What is the secret to keeping the slaw so creamy and not watery?
The secret to the creamy texture in our Mayonnaise Based Slaw for Tacos is twofold, and it’s all in the ingredients we picked! First, using mayonnaise as the primary binder is non-negotiable for this specific creamy style. Second, and this is key for texture, you must let it rest in the fridge for that minimum of 15 minutes! When the cabbage sits with the acid (vinegar) and the sugar, it starts releasing *some* water, which then mixes into the creamy dressing instead of just pooling at the bottom after you serve it. If you leave that resting step out, the slaw ends up soupy!
Can I make the chicken coating mixture or the slaw ahead of time for a Quick Taco Night?
That’s a smart question for planning ahead! You can totally prep the slaw mixture a day ahead and keep it tightly sealed. No problem there. The chicken coating, though? I’d advise against making the Panko coating mixture more than an hour ahead of time. If the breadcrumbs sit too long with the spices, they can dry out and won’t adhere as well to the egg wash. If you *must* prep the chicken, dredge it, place it on a tray lined with parchment, and keep it uncovered in the fridge for about 30 minutes max before frying. Any longer, and that Panko starts falling off.
If you want to check out some great batch-prep ideas for your kitchen in general, take a peek at this guide for making flexible egg bites—it’s all about prepping components!
Nutritional Estimates for This Easy Crispy Chicken Dinner
Okay, let’s talk fuel! I always throw the numbers up here just so we know what we’re working with. We’re frying chicken here, so it’s not *exactly* low-calorie, but it is packed with protein from that chicken breast. I pulled these figures together based on the ingredients listed and keeping in mind that a serving size is about three tacos—which feels about right for a satisfying meal!
Keep in mind these are estimates, you know? The exact amount of oil absorption during the frying process or the specific brand of mayonnaise you choose can shift things around a little bit. For the most accurate information for your specific dietary needs, you’d have to whip up a batch and plug your exact ingredients into a tracker, but this gives you a solid ballpark figure for our Easy Crispy Chicken Dinner.
You can find my full official disclaimer over at my official site, but generally speaking, this is what you’re looking at per serving!
- Serving Size: 3 tacos
- Calories: 550
- Fat: 28g (Where that delicious crunch lives!)
- Saturated Fat: 5g
- Carbohydrates: 45g
- Protein: 35g (That’s a lotta protein!)
- Sugar: 8g (Mostly from the slaw dressing)
See? All that protein makes it a winner, even with the frying! If you want to see how I make other balanced, hearty meals, you should check out my recipe for easy crockpot beef stew—it’s a whole different vibe but equally comforting!
PrintCrispy Chicken Tacos with Creamy Slaw
Follow this recipe to make flavorful, crispy chicken tacos topped with a cool, creamy coleslaw. This method focuses on achieving a crunchy texture for the chicken filling.
- Prep Time: 20 min
- Cook Time: 15 min
- Total Time: 35 min
- Yield: 4 servings
- Category: Dinner
- Method: Pan Frying
- Cuisine: Mexican Inspired
- Diet: Low Fat
Ingredients
- 1.5 lbs boneless, skinless chicken breasts, cut into 1-inch strips
- 1 cup all-purpose flour
- 2 large eggs, beaten
- 2 cups panko breadcrumbs
- 1 teaspoon salt
- 1/2 teaspoon black pepper
- 1/2 teaspoon garlic powder
- 1/4 teaspoon paprika
- 1/4 cup vegetable oil (for pan-frying)
- 12 small corn or flour tortillas
- For the Creamy Slaw:
- 3 cups shredded cabbage (green or mixed)
- 1/2 cup mayonnaise
- 2 tablespoons apple cider vinegar
- 1 tablespoon granulated sugar
- 1/4 teaspoon salt
- 1/4 teaspoon black pepper
Instructions
- Prepare the chicken coating: Set up three shallow dishes. Place flour in the first. Whisk eggs in the second. Mix panko breadcrumbs, salt, pepper, garlic powder, and paprika in the third.
- Dredge the chicken pieces first in flour, shaking off excess. Dip completely in the egg mixture. Press firmly into the panko mixture to coat all sides.
- Prepare the slaw: In a medium bowl, combine shredded cabbage, mayonnaise, apple cider vinegar, sugar, salt, and pepper. Mix well until the cabbage is evenly coated. Refrigerate for at least 15 minutes to allow flavors to meld.
- Cook the chicken: Heat the vegetable oil in a large skillet over medium-high heat. When the oil shimmers, carefully place the coated chicken strips in the skillet, ensuring not to overcrowd the pan.
- Pan-fry the chicken for 3 to 4 minutes per side, turning until golden brown and fully cooked (internal temperature reaches 165°F). Remove chicken and place on a wire rack or paper towel-lined plate to drain excess oil.
- Warm the tortillas: Heat tortillas briefly in a dry skillet or microwave until soft and pliable.
- Assemble the tacos: Place a layer of crispy chicken strips inside each warm tortilla. Top generously with the chilled creamy slaw. Serve immediately.
Notes
- For extra crispiness, you can air fry the coated chicken at 400°F for 10-12 minutes, flipping halfway.
- Add a squeeze of fresh lime juice over the slaw just before serving for brightness.
- Consider adding a dash of hot sauce or a sprinkle of cotija cheese as an optional topping.
Nutrition
- Serving Size: 3 tacos
- Calories: 550
- Sugar: 8
- Sodium: 650
- Fat: 28
- Saturated Fat: 5
- Unsaturated Fat: 23
- Trans Fat: 0
- Carbohydrates: 45
- Fiber: 3
- Protein: 35
- Cholesterol: 110