

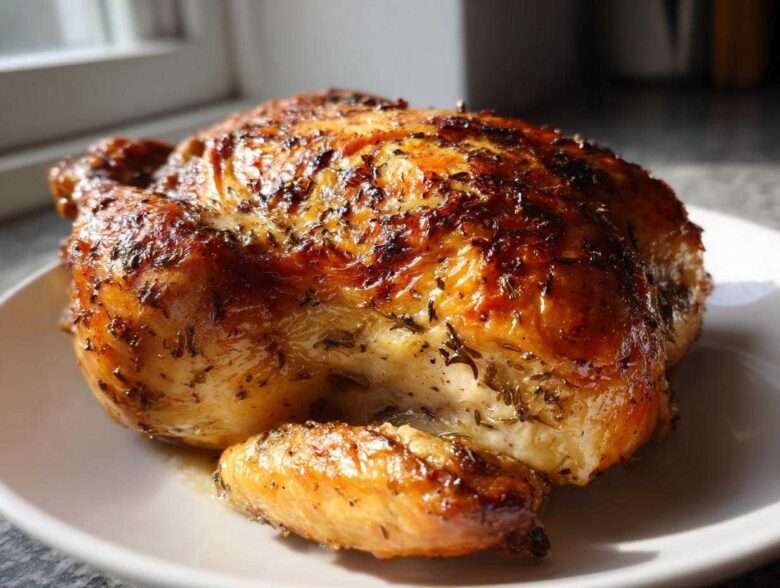
Oh, my friend, let me tell you a secret: I used to be terrified of roasting a whole chicken. Seriously! Every time I took one out of the oven, the skin was either pale and flabby or the meat was so dry you could build a house with the leftovers. It was a culinary disaster movie every Sunday! But after years of dry chicken dinners, I dedicated myself to mastering the ultimate weeknight hero: the roasted chicken. Trust me when I say this Crispy Skin Garlic Herb Butter version is the one. It’s rich, it’s simple, and the smell alone is worth the effort. You are about to make the best roast chicken you’ve ever had, easily.
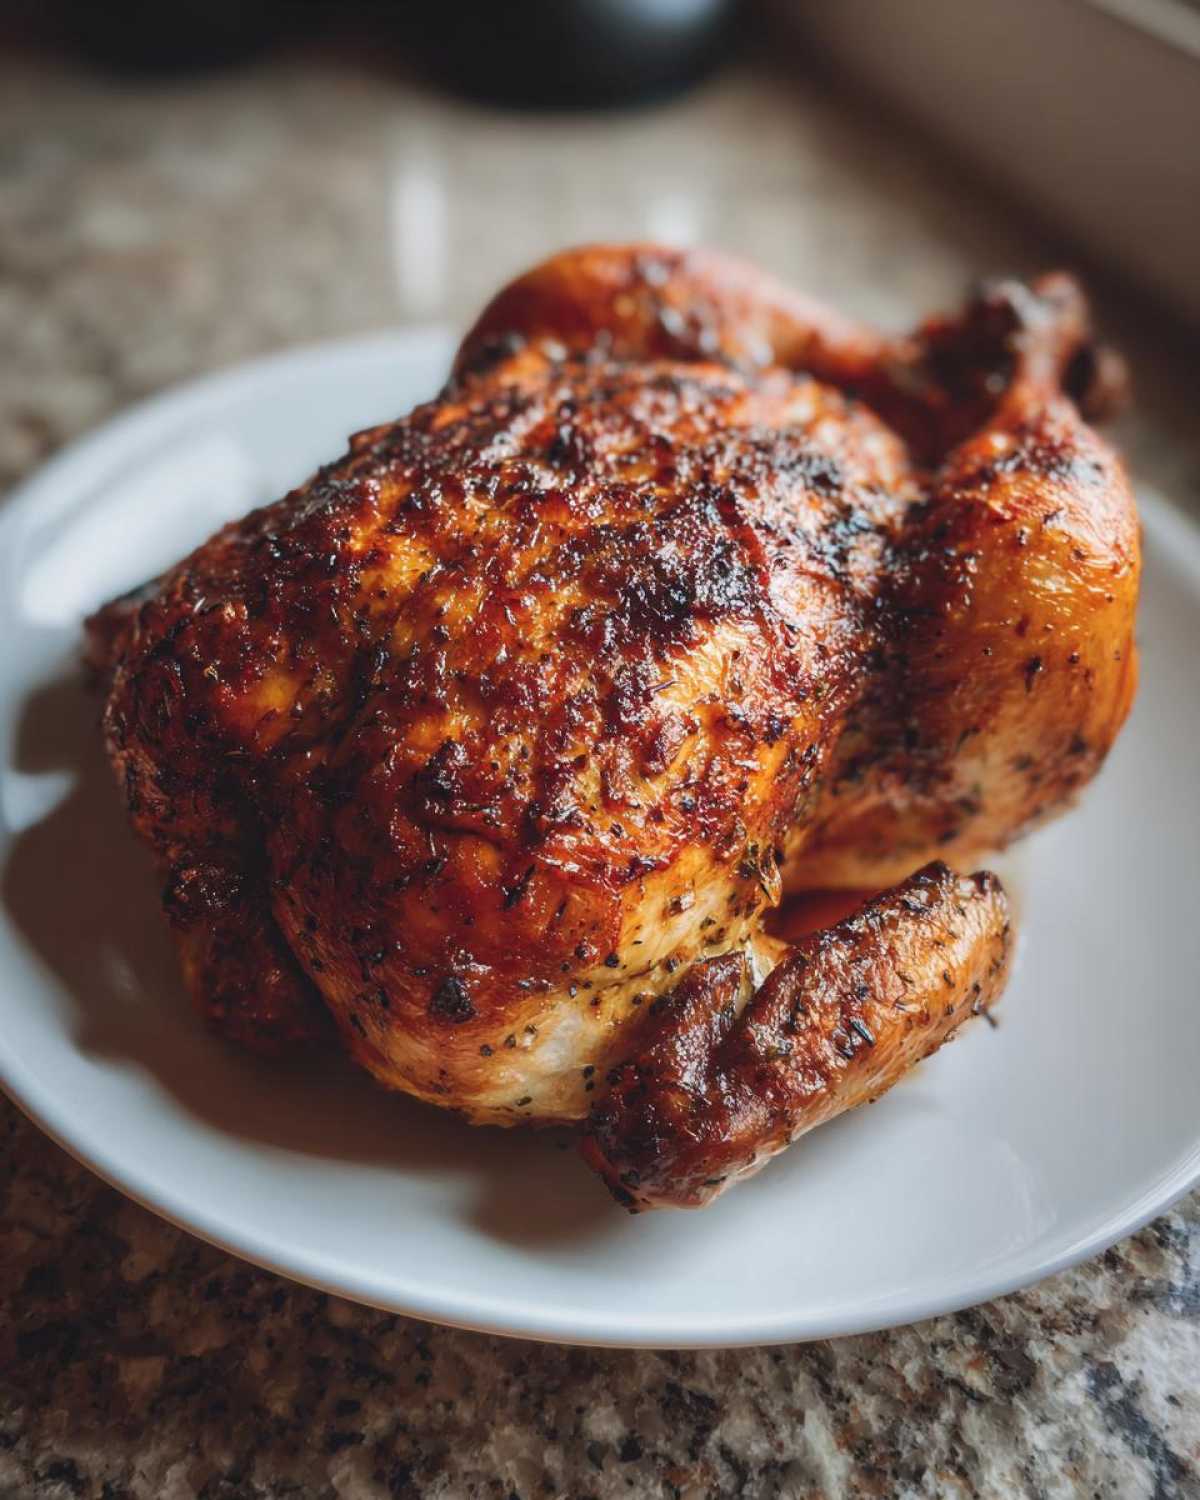
We’re talking golden, crackly skin that shatters when you slice it, and meat so juicy you won’t even need gravy! If you want to see more of my absolute favorite kitchen wins, check out my main recipe hub. This technique I developed right here is how you go from kitchen failure to roast chicken royalty!
Why This Crispy Skin Garlic Herb Butter Roasted Chicken is Your New Favorite
I know you’ve got a ton of basic chicken recipes floating around, but this method is different. It nails the two things everyone wants when they decide to make a roasted chicken: skin that snaps and meat that stays perfectly tender. It truly is the best way to get that restaurant quality right in your own oven without needing a gigantic smoker or hours of babysitting!
- It’s Flavor Bomb Time: We are stuffing garlic and herbs *under* the skin. That’s where all the flavor has to go!
- The Simplest Timeline: It moves fast! A quick blast of high heat gets things started before settling into a gentle roast.
- Guaranteed Results: If you follow my pat-dry rule, you get a crispy skin chicken every single time, no excuses!
Achieving the Ultimate Juicy Roast Chicken Texture
The secret to that luscious texture isn’t just resting, although that helps! It’s all about the butter placement. When you rub that rich, herby butter directly onto the meat underneath the skin, you essentially create your own basting zone. That fat melts down slowly over the breast and thighs during cooking, insulating the meat from drying out. It keeps the inside incredibly moist while the outside crisps up—it’s the best of both worlds for a truly juicy roast chicken.
Tips for Perfect Crispy Skin on Your Roasted Chicken
Okay, if you only take one thing away from this whole guide, let it be this: your chicken must be bone dry before seasoning! I mean, paper towel dry. Water is the enemy of crispiness. Once it’s dry, we hit it with that initial 425°F oven blast. That high temp puffs up the skin and starts the crisping process immediately. This technique sets up the best Crispy Skin Chicken you’ll ever make, making this roasted chicken a showstopper.
Ingredients for the Best Roasted Chicken
Gathering your ingredients is part of the ritual, right? Don’t even think about skimping here; quality ingredients make this simple preparation shine so brightly. You’ll need the right bird and plenty of aromatics to get that deep, savory taste.
- 1 whole chicken (about 4-5 lbs – seriously, stick close to this size!)
- 4 tablespoons unsalted butter, softened until spreadable
- 4 cloves garlic, minced super fine
- 1 tablespoon fresh rosemary, chopped finely
- 1 tablespoon fresh thyme leaves, pulled right off the stem
- 1 teaspoon salt (I recommend kosher salt for this!)
- 1/2 teaspoon black pepper, freshly ground is best
- 1 lemon, cut right in half
- 1 small onion, cut into neat quarters
- 2 tablespoons olive oil
Ingredient Notes and Substitutions for Roasted Chicken
A few quick notes before you start microwaving anything! The chicken weight is important; if it’s too big, the exterior will burn while the inside stays raw. For the herbs, while dried spices work in a pinch, fresh rosemary and thyme smell incredible and infuse the butter so much better. If you absolutely must use dried, only use one teaspoon total of each. Also, make sure that butter is softened—not melted! If it’s oily, it won’t stick under the skin properly.
Equipment Needed for Your Oven Roasted Chicken
You don’t need fancy gadgets to make an amazing bird; honestly, sometimes the simpler tools give you the best results. But there are a few must-haves I insist on having ready before that chicken even leaves its packaging. Setting up your kitchen correctly ensures the process goes smoothly and safely, which is super important when dealing with poultry!
I always keep these items right on the counter before I start mixing that herby butter:
- A sturdy mixing bowl for combining the butter, garlic, and herbs. No one wants buttery herbs splattering all over the floor!
- Plenty of paper towels. I mean a whole roll. You cannot over-dry the skin; I learned this the hard way when my first attempt resulted in rubbery skin.
- A reliable roasting pan or a large, oven-safe skillet. If you’re worried about cleanup, an aluminum pan works just fine and makes tossing it afterward a breeze.
- The MVP: A decent instant-read meat thermometer. This is non-negotiable for perfectly cooked chicken. Guessing games lead to dry dinners, and we are past those days, my friend!
Step-by-Step Instructions for Perfect Roasted Chicken
Alright, let’s get cooking! This is where the magic happens, and I promise it’s straightforward. We’re prepping the bird and then relying on a slight temperature trick to get us the best roasted chicken ever. Make sure your oven is set to 425°F when you start because we want serious heat right away!
First things first, take that beautiful, patted-dry chicken and get all the stuffing out of the cavity—giblets are not needed for this flavor profile! We’re focusing strictly on aromatics today. See the list of ingredients? Time to combine them. If you’ve already got sides going, my sheet pan garlic herb chicken and veggies recipe is a great inspiration for roasting veggies alongside your bird!
Preparing the Garlic and Herb Butter Mixture
In your little bowl, mash that softened butter with the minced garlic, the rosemary, the thyme, salt, and pepper. You need to mix this until it is completely uniform, almost like a thick, fragrant green paste. It needs to be soft enough that when you press it between your fingers, it smears easily. If it’s too hard, it’ll tear the delicate skin when you try to spread it later, and we absolutely cannot have ripped skin!
The Secret to Juicy Roast Chicken: Butter Placement
This next part is what elevates this from a standard bird to a truly Juicy Roast Chicken. Take your fingers and gently, gently work them between the breast meat and the skin, starting near the neck opening. Make a little pocket, okay? Now, take about half of that herby butter and smear it directly onto the actual breast meat. This is your insulation! Rub the rest of that butter all over the outside skin. Seriously coat the whole thing, making sure it looks nice and greasy. That grease is going to render out and baste your entire roasted chicken as it cooks.
Tuck the lemon halves and the onion quarters right inside that empty cavity. Place the chicken in your prepared pan and give the outside a final little drizzle of olive oil. High heat awaits!
Roasting Times and Temperature Adjustments
We are using a two-stage cook. First, pop that bird into the screaming hot 425°F oven for just 15 minutes. This shock treatment sets the skin beautifully. After those 15 minutes are up—and no peeking!—turn your oven temperature way down to 375°F. Keep roasting for another 60 to 75 minutes. The key to knowing it’s done is safety and perfection: stick that thermometer deep into the thickest part of the thigh. If it reads 165°F, pull it out immediately! Then, tent it loosely with foil—don’t crush the skin, just tent it!—and let it relax for a full 15 minutes before you even think about carving.
Tips for Success with Your Garlic and Herb Chicken
Even with the best recipe, sometimes you need a little extra insurance for a show-stopping roasted chicken. I always follow a couple of little tricks I picked up over the years, especially if I’m planning ahead for a busy evening!
For the absolute crispiest skin imaginable, you need to let the seasoned bird chill! Try prepping the whole thing—seasoned with the butter mixture, lemon, everything—and place it on a rack in the fridge uncovered overnight. Seriously, several hours uncovered dries out the skin perfectly, locking in that moisture below. That cold, dry skin hits the hot oven and just explodes into crispiness.
If you’re making this a full Sunday Dinner Chicken night, toss some root veggies like potatoes or carrots with olive oil and place them around the chicken when you drop the heat down from 425°F to 375°F. They roast right in those flavorful chicken drippings! And remember that foil tenting trick—if the skin looks super dark before the temperature hits 165°F inside, just loosely drape foil over the top. That keeps your beautiful skin from burning while the inside finishes cooking. It’s how you guarantee success every time you roast a whole chicken.
If you want another incredible chicken flavor profile for a different night, you have to try my Marry Me Chicken; it’s creamy and totally different!
Serving Suggestions for Your Simple Whole Chicken
Once you’ve carved that beautiful bird and everyone has stopped admiring the crisp skin, you realize you need something wonderful to soak up all those amazing pan juices. A simple whole chicken like this really sings when paired with the right supporting cast. Since our bird is heavy on garlic and herbs, you want sides that are comforting but clean.
My first thought is always potatoes. You can’t go wrong with creamy mashed potatoes to catch all those savory drippings. But if you want to keep things a bit lighter, serving it with creamy butternut squash soup is an unexpectedly delicious pairing during the cooler months—it echoes that savory sweetness we love.
If you’re looking for an easy way to get everything on one pan, definitely look into pairing it with Roast Chicken with Vegetables. Brussels sprouts roasted alongside carrots and onions catch all those thyme and rosemary notes beautifully. Just make sure the vegetables are cut small enough so they cook in time, or toss them in partway through the cooking process, just like I mentioned in the tips section above!
Storage and Reheating Instructions for Leftover Roasted Chicken
Don’t you hate it when leftovers taste sad the next day? We put so much effort into getting that skin crisp and the meat tender, so we can’t let it go to waste by drying it out later. Storing and reheating the perfect bird takes just a little bit of foresight, but it keeps that delicious flavor alive!
You can safely store your cooked chicken in the refrigerator for up to three or four days in an airtight container. Make sure you get it into the fridge within two hours of taking it out of the oven, though! Food safety first, always.
The Best Way to Reheat Sliced Chicken
If you’re just reheating one or two pieces for a fast lunch, skip the microwave if you can. That thing is a drying machine! I love slicing the meat off the bone first. Then, I place the slices in a small oven-safe dish and add just a splash of chicken broth or water—maybe a tablespoon per serving. You just want a little moisture at the bottom of the dish.
Cover that dish tightly with foil, and pop it into a 350°F oven for about 10 to 15 minutes. The steam trapped by the foil keeps everything succulent, and the low heat warms it through without cooking it further. If you absolutely must use the microwave, cover it with a damp paper towel while heating!
Keeping Leftover Skin Crispy (or Trying To!)
Let’s be honest, that perfect snap of the skin is usually gone once it’s cooled down and stored. Don’t try to store the skin attached to the meat; it creates condensation and gets rubbery. If you have leftover pieces of skin that are miraculously still a bit crisp, keep them completely separate in a container at room temperature (not the fridge!) and sprinkle them over a salad or soup the next day for a little crunch boost.
For future batch cooking, slicing the meat and freezing it is a lifesaver. You can freeze portions of the sliced chicken for up to three months. If you’re storing food for longer cooking projects, check out my recipe for freezer breakfast burritos; planning ahead like that keeps the chaos down during the week!
Frequently Asked Questions About Making Roasted Chicken
It’s totally normal to have a few questions pop up when you’re tackling a beautiful bird like this. We’re dealing with whole poultry here, so precision matters! I get asked similar questions all the time when people try to emulate the flavor profile of something like the famous Ina Garten roast chicken. Mine leans heavier on the herbs, which I think gives it a brighter flavor for a weeknight meal, but the goal remains the same: that perfect, juicy interior!
Here’s quick answers to the things I hear most often about getting this roasted chicken just right.
Can I Spatchcock Chicken Instead of Roasting Whole?
You absolutely can! Spatchcocking, or butterflying, means you cut out the backbone and lay the bird flat. The huge benefit there is that it cooks much faster and more evenly—you get amazing crispy skin across the entire surface. However, our specific butter technique, where we push butter *under* the skin onto the breast meat, works best when the bird is intact. This recipe is truly optimized for the classic whole-bird presentation where the cavity holds those lemons and onions. So, stick to the whole bird method here for maximum moisture!
Why is my roasted chicken skin not crispy even though I used butter?
Oh, honey, I bet you didn’t dry it enough! That’s the #1 culprit. If you skip that aggressive pat-down with paper towels or if you put it straight from the fridge into the oven, the water steams the skin instead of crisping it. Remember my tip about letting it sit uncovered in the fridge? Do that if you can! That dry surface is the non-negotiable key to crispy skin.
How can I make this chicken taste even more like Sunday Dinner Chicken?
If you want that deep, comforting flavor, swap out half the butter for softened chicken schmaltz (fat skimmed from a previous roast) if you have it! Also, when you rest the bird, make sure you pour all those lovely pan drippings into a measuring cup and let the fat separate. Spoon that rich fat over the carved meat before serving. It bumps up the richness instantly!
How can I use the drippings if I don’t want to make gravy?
You don’t have to make a full roux-based gravy! If you’re looking for something simpler, take those drippings, skim off the excess fat, and use the liquid base to make a quick pan sauce. Just deglaze the roasting pan with a splash of white wine or chicken stock, let it reduce by half, and swirl in a cold knob of butter right at the end. So easy, and it’s amazing over potatoes or rice. If you’re looking for another great comfort meal, check out my crockpot chicken and dumplings!
Estimated Nutritional Information for This Roasted Chicken Recipe
Okay, real talk time about the numbers. Because we are using a lot of dark meat and skin for flavor maximization, this bird clocks in a bit higher in the fat category than if you were just eating plain baked breast meat. These numbers are just estimates based on the ingredients provided in the recipe card, so yours might vary depending on the exact size of your bird and how much fat renders off!
It’s important to remember that the fat content listed here includes the delicious skin, which is where all that flavor lives! Here’s the quick breakdown per serving size:
- Serving Size: 1/4 chicken
- Calories: 450
- Fat: 28g (Saturated Fat: 10g)
- Protein: 45g
- Sugar: 0g
- Sodium: 450mg
If you are worried about sodium, just cut back on the salt you add in the butter mixture; the chicken itself is quite flavorful from the herbs alone. These estimates help you plan, but deliciousness is what we are measuring most keenly here!
Share Your Perfect Roasted Chicken Experience
I am so excited for you to try this technique! Seriously, once you master getting that skin golden brown and the inside juicy, you’ll never go back to store-bought rotisserie chickens again. This is the foundation of simple, amazing comfort food!
Once you pull that bird out, serve it up, and hear that beautiful crunch when you slice into it, I want to hear all about it! Please leave me a comment below—tell me if you stuck to the herbs, or if you added lemon zest to the butter like some people suggest.
If you made it, snap a picture and tag me online! Seeing your beautiful Sunday Dinner Chicken on your table makes my whole week. If you have any other burning kitchen questions, don’t hesitate to reach out to me directly on my contact page. Happy roasting!
Estimated Nutritional Information for This Roasted Chicken Recipe
Okay, real talk time about the numbers. Because we are using a lot of dark meat and skin for flavor maximization, this bird clocks in a bit higher in the fat category than if you were just eating plain baked breast meat. These numbers are just estimates based on the ingredients provided in the recipe card, so yours might vary depending on the exact size of your bird and how much fat renders off!
It’s important to remember that the fat content listed here includes the delicious skin, which is where all that flavor lives! Here’s the quick breakdown per serving size:
- Serving Size: 1/4 chicken
- Calories: 450
- Fat: 28g (Saturated Fat: 10g)
- Protein: 45g
- Sugar: 0g
- Sodium: 450mg
If you are worried about sodium, just cut back on the salt you add in the butter mixture; the chicken itself is quite flavorful from the herbs alone. These estimates help you plan, but deliciousness is what we are measuring most keenly here!
Share Your Perfect Roasted Chicken Experience
I am so excited for you to try this technique! Seriously, once you master getting that skin golden brown and the inside juicy, you’ll never go back to store-bought rotisserie chickens again. This is the foundation of simple, amazing comfort food!
Once you pull that bird out, serve it up, and hear that beautiful crunch when you slice into it, I want to hear all about it! Please leave me a comment below—tell me if you stuck to the herbs, or if you added lemon zest to the butter like some people suggest.
If you made it, snap a picture and tag me online! Seeing your beautiful Sunday Dinner Chicken on your table makes my whole week. If you have any other burning kitchen questions, don’t hesitate to reach out to me directly on my contact page. Happy roasting!
PrintPerfect Crispy Skin Garlic Herb Butter Roasted Chicken
A straightforward recipe for a whole roasted chicken featuring crispy skin and a juicy interior, flavored with garlic and fresh herbs.
- Prep Time: 15 min
- Cook Time: 75 min
- Total Time: 90 min
- Yield: 4 servings
- Category: Dinner
- Method: Roasting
- Cuisine: American
- Diet: Low Fat
Ingredients
- 1 whole chicken (about 4-5 lbs)
- 4 tablespoons unsalted butter, softened
- 4 cloves garlic, minced
- 1 tablespoon fresh rosemary, chopped
- 1 tablespoon fresh thyme leaves
- 1 teaspoon salt
- 1/2 teaspoon black pepper
- 1 lemon, halved
- 1 small onion, quartered
- 2 tablespoons olive oil
Instructions
- Preheat your oven to 425 degrees Fahrenheit (220 degrees Celsius). Remove the chicken from its packaging and remove any giblets from the cavity. Pat the entire surface of the chicken very dry with paper towels. This step is key for crispy skin.
- In a small bowl, combine the softened butter, minced garlic, chopped rosemary, thyme, salt, and pepper. Mix until well combined.
- Gently loosen the skin over the chicken breasts and thighs. Rub about half of the herb butter mixture directly onto the meat under the skin. Rub the remaining butter mixture all over the outside of the chicken skin.
- Place the lemon halves and onion quarters inside the chicken cavity.
- Place the chicken in a roasting pan or a large oven-safe skillet. Drizzle the skin lightly with olive oil.
- Roast the chicken for 15 minutes at 425 degrees Fahrenheit.
- Reduce the oven temperature to 375 degrees Fahrenheit (190 degrees Celsius). Continue roasting for 60 to 75 minutes, or until a meat thermometer inserted into the thickest part of the thigh registers 165 degrees Fahrenheit (74 degrees Celsius). Baste the chicken with pan juices halfway through the lower temperature roasting if desired.
- Remove the chicken from the oven. Tent loosely with foil and let it rest for 15 minutes before carving.
Notes
- For extra crispy skin, you can place the seasoned chicken in the refrigerator uncovered for several hours or overnight before roasting.
- If you are roasting vegetables like potatoes or carrots, toss them in olive oil and place them around the chicken in the roasting pan during the last 45 minutes of cooking.
- If the skin browns too quickly, loosely tent the chicken with foil for the remainder of the cooking time.
Nutrition
- Serving Size: 1/4 chicken
- Calories: 450
- Sugar: 0
- Sodium: 450
- Fat: 28
- Saturated Fat: 10
- Unsaturated Fat: 18
- Trans Fat: 0
- Carbohydrates: 0
- Fiber: 0
- Protein: 45
- Cholesterol: 150