

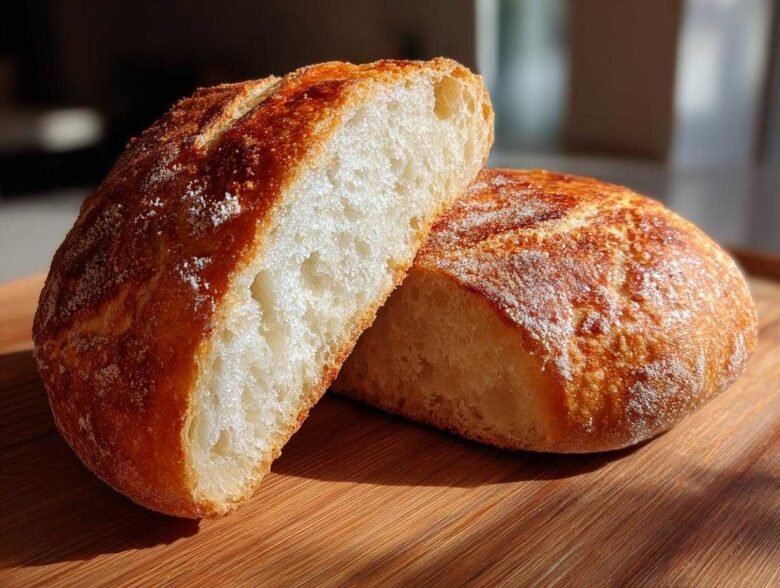
Oh my gosh, you know those days when you just need pure, unadulterated comfort? For me, that always means a bowl of rich, steaming soup, but what you serve it *in* makes all the difference. Forget flimsy ceramic! I spent years chasing that perfect, sturdy, yet chewy vessel you find at those high-end bakeries. And I finally cracked the code!
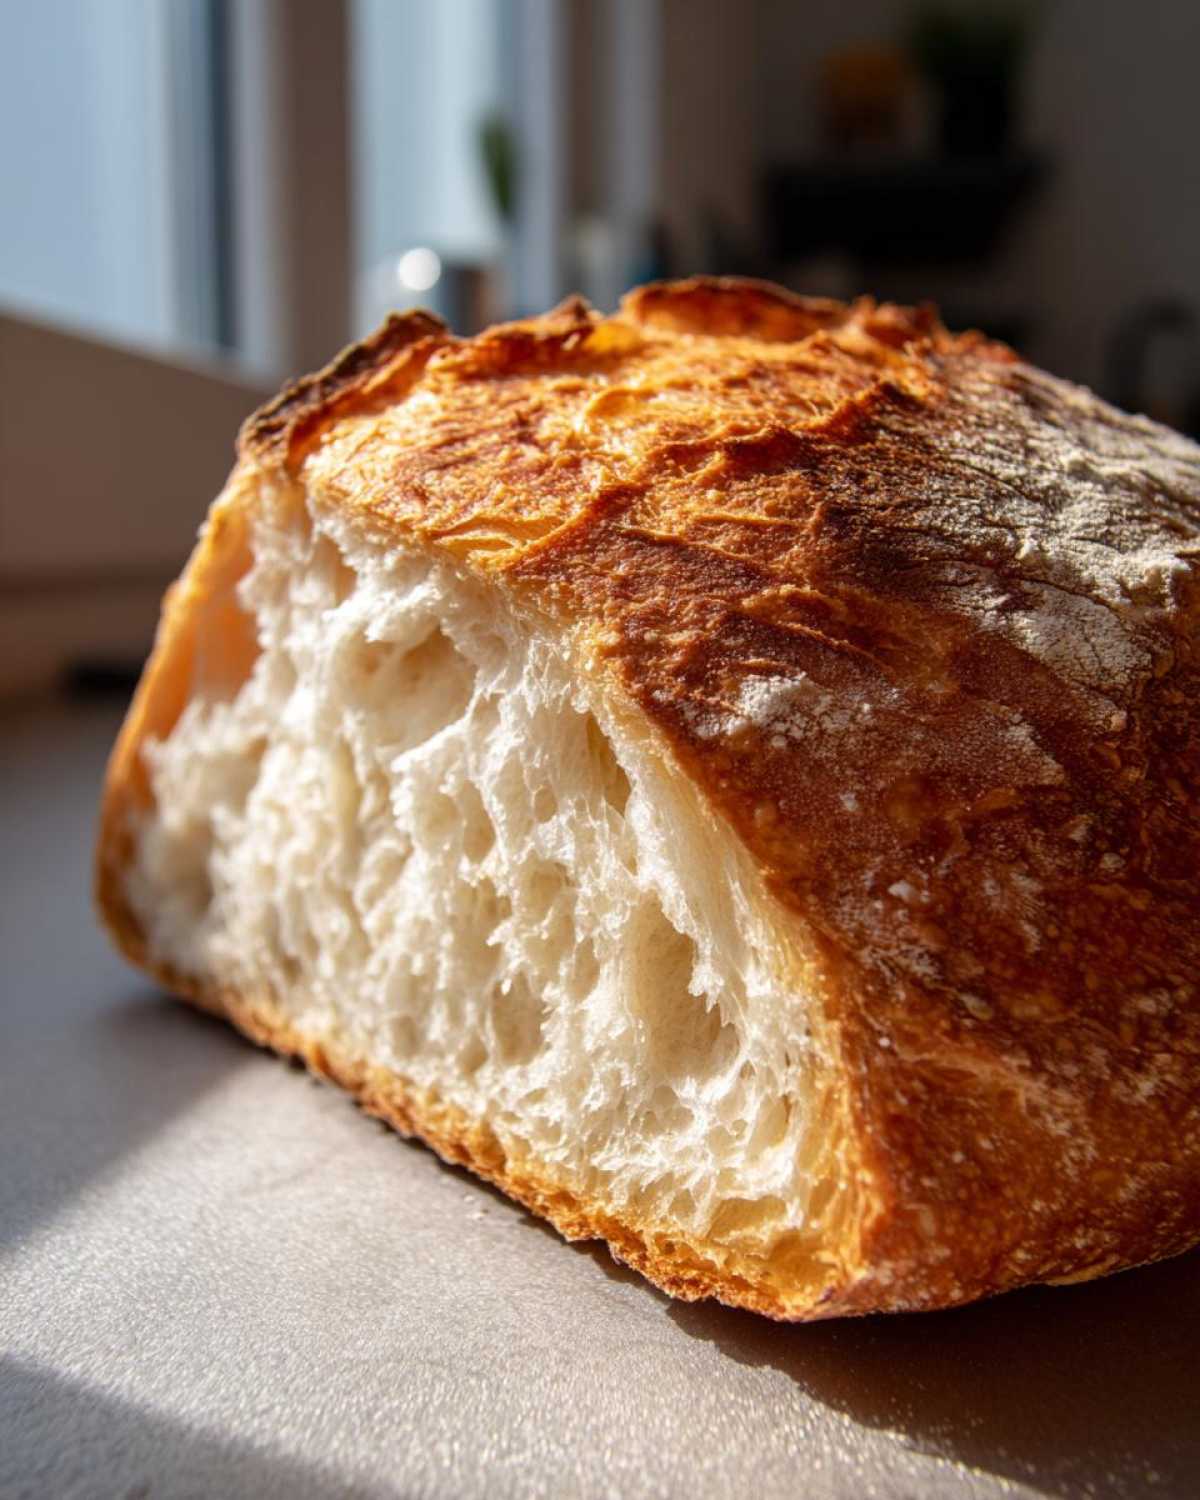
This recipe nails the sweet spot: the outside gets that gorgeous, crackly crust, but the inside stays perfectly soft and airy to soak up all those wonderful liquids. Trust me, mastering homemade bread bowls isn’t just about baking; it’s about elevating dinner night into an event. I perfected this because my family refused to eat chili unless they could eat the bowl afterwards. No waste, all flavor!
Why You Will Love This Bakery Style Bread Bowls Recipe
Seriously, this recipe is a game-changer for quick comfort meals. You absolutely need these in your rotation because:
- The texture is divine—you get that crunchy exterior that practically sings when you bite into it!
- They are incredibly versatile; amazing with chili, stew, or even dips.
- It’s simpler than you might think to make these from scratch, perfect even if you’re a new baker.
- We specifically designed these to be the best soft bread bowls for soup that still hold up beautifully.
Once you wrap up your amazing butternut squash soup in one of these, you’ll never go back to plain bowls again!
Ingredients for Homemade Bread Bowls from Scratch
Okay, let’s gather our simple tools! The beauty of making homemade bread bowls is that you likely have most of this stuff sitting in your pantry already. Yeast, flour, salt, water, and oil—it doesn’t get much more fundamental than that, which is why this bread bowl recipe from scratch is so rewarding.
Make sure you measure everything exactly before you start mixing, especially the water temperature. Getting this foundation right means the difference between success and a flat mess!
- 2 1/4 teaspoons active dry yeast
- 1 1/2 cups warm water (this is crucial! It needs to be between 105-115°F to wake up the yeast!)
- 1 teaspoon sugar
- 3 1/2 to 4 cups all-purpose flour
- 2 teaspoons salt
- 2 tablespoons olive oil
Ingredient Notes and Substitutions for Your Bread Bowls
A little insider knowledge here goes a long way! Remember, we want sturdy but delicious edible serving bowls, so these details matter.
First, that water temperature: If it’s too cold, your yeast just sleeps. If it’s boiling hot, you’ve killed it! 105°F to 115°F is the sweet spot where it gets all happy and foamy. Don’t ever skip that little float test in Step 1!
For the flour, I’ve listed all-purpose, which works great for a nice soft interior. But, if you want something chewier and even sturdier—maybe for a thick stew—go ahead and swap in bread flour. It has higher protein, which means more gluten development, resulting in a beautifully chewy crumb. Just watch how much moisture it soaks up, you might need the full 4 cups!
And the olive oil? It adds a touch of richness, but if you’re feeling fancy, melted unsalted butter works wonderfully too. It just deepens the flavor a bit more, moving it closer to that perfect bakery style bread bowls experience.
How to Make Bread Bowls: Step-by-Step Instructions
Alright, let’s dive into the fun part—learning exactly how to make bread bowls that look like they came straight from a professional bakery counter. Getting the texture right means respecting the yeast and giving the dough enough time to develop its structure, so don’t rush the rising!
Activating Yeast and Mixing the Dough for Perfect Bread Bowls
First things first, we need to wake up that yeast! Mix your active dry yeast and sugar right into that warm water (remember, 105°F to 115°F—not much hotter!). You have to let this sit for a full 5 to 10 minutes. If it doesn’t get foamy on top, that’s your signal that the yeast is grumpy, and you need to start over with warmer water. Don’t waste ingredients on sleepy yeast!
While that foams up, whisk your flour and salt together. Once the yeast looks like a bubbly, pale beer, pour in the olive oil and half of your dry mix. Mix it up until it’s just combined, then slowly start crumbling in the rest of the flour until you have a rough, messy ball of dough. This is where the magic starts!
Kneading and First Rise for Soft Bread Bowls for Soup
Time to get your hands dusty! Turn that shaggy dough out onto a lightly floured counter and just knead it. I mean it, knead it for a solid 6 to 8 minutes. You are developing the gluten that holds up your filling, so you need it to be smooth and look elastic. Once it feels fantastic, toss it into an oiled bowl, cover it up, and hide it somewhere warm for about an hour to an hour and a half. You’re looking for it to look puffy and doubled in size!
After the first rise, gently punch the air out—we don’t want giant, uneven air pockets in our final edible serving bowls. Divide that big pillow of dough into four equal pieces. Roll each piece tightly into a round ball. This tight shaping helps them bake up dome-shaped!
Shaping and Baking Your Crusty Bread Bowls Recipe
Place those four smooth little dough balls onto a baking sheet lined with parchment paper, leaving lots of space between them. Cover them loosely and let them have their final rest, usually about 30 to 45 minutes. They’ll get puffy again, but not quite double.
Now, crank that oven way up to 400°F! This is key for a great crusty bread bowls recipe. Before they go in, brush the very tops lightly with water. This helps create that deep golden color and shatteringly crisp shell. For the best results, I always put a shallow pan of water on the bottom rack while the oven heats up. That steam helps immensely! Bake them for about 25 to 30 minutes. You want them deeply golden brown, not pale.
Once they hit that perfect color, immediately move them to a wire rack to cool completely. Seriously, if you try to hollow them out while they are hot, you’re going to tear them up. Patience is a virtue when you’re finishing up your bread baking!
Tips for Success When Baking Bread Bowls
Look, these are good, but these tips take them from great to legendary bakery quality. If you want the absolute best crusty bread bowls recipe possible, pay attention to these last few essential moves!
First, let’s talk about that crust again. The recipe tells you to use steam, right? That helps a *ton*. But if you’re aiming for the absolute hardest, crispest exterior—the kind that shatters delightfully—you need to give the oven a little extra *oomph* of moisture early on. About three minutes into the bake, quickly open the oven door and give the sides a quick, light spray with a clean water bottle. Be fast so you don’t lose heat! Do this maybe two or three times in the first ten minutes. It makes a huge difference!
My other huge piece of advice for anyone making edible serving bowls centers around the hollowing process. You need to wait until they are completely cool—I mean completely. Then, take a ruler, honestly! Use a serrated knife and cut a circle around the top center, but stop cutting about an inch above the bottom. You need that sturdy base!
Then, gently scoop out the soft interior bread. Don’t throw that center piece away; it’s the best part for dipping! You want walls about one inch thick all the way around. If they are too thin, the soup will leak through before you finish eating. If they are too thick, you won’t have enough bread-to-soup ratio, which is just sad. A one-inch wall gives you structural integrity for the heaviest chili or stew!
Finally, always, always toast the inside before you fill it. Just before serving, pop the hollowed-out bread bowls face-down on a baking sheet for about five minutes at 350°F. This little toast seals the interior crumb so it won’t get soggy too fast when you pour in that hot filling. Seriously, this tiny extra step is what separates the amateurs from the pros when making easy bread bowls baking at home!
What to Serve in Bread Bowls: Filling Ideas
Okay, now that you’ve mastered the art of making the perfect vessel, it’s time for the fun part: deciding what to serve in bread bowls! Honestly, once you have these sturdy, delicious, and edible containers, you go from just making dinner to making an experience. I swear, even boring leftovers taste gourmet when scooped into something freshly baked!
The main requirement is that whatever you’re filling it with has to be nice and thick. If it’s too soupy or watery, it’ll soak through your 1-inch walls faster than you can say ‘second serving.’ You want something that clings to the inside bread!
My absolute favorite things—the ones that justify all that kneading time—are thick, hearty dishes. You cannot go wrong with a rich, spicy creamy white chicken chili. It’s perfectly satisfying and holds its structural integrity in the bread bowl for ages. Another huge crowd-pleaser is a classic beef stew, especially one with chunky root vegetables!
But honestly, you don’t even need a main course! These work just as well as serving dishes for epic appetizers. If I’m having a party, I hollow out two smaller ones and fill them with my famous cheesy spinach artichoke dip. Everyone just digs in with crackers and the discarded soft bread centers. Perfect!
Making Garlic Bread Bowls Recipe Variations
If you happen to have leftover bread bowls that you aren’t filling with soup—or maybe you just love carbs as much as I do—you absolutely have to try turning them into giant garlic bread bowls! This variation leans hard into that rich, buttery comfort food category.
It’s super simple! Once your bread bowls are completely cooled (or even slightly stale the next day), just mix up some softened butter with minced garlic, a tiny splash of olive oil, dried parsley, and a pinch of salt. You have two options here:
- Pre-Bake Fill: If you want maximum garlic flavor absorbed, brush the *inside* of the hollowed-out bowl heavily with this mixture and toast it face-down for about 5 minutes at 400°F until the edges look golden and fragrant.
- Post-Bake Dip: If you’re using it for a dip, brush the garlic butter mixture lavishly onto the crusty exterior and the exposed inside edges before serving. It smells incredible!
Either way, you end up with the most glorious, buttery, garlicky bread you’ve ever eaten. It’s a little extra, but honestly, when you’ve made homemade bread bowls, you should go all the way!
Storage and Reheating Instructions for Bread Bowls
So, you made too many amazing bread bowls? Good problem to have! If you have leftovers, store the hollowed-out bowls uncovered on the counter for up to two days. Keeping them uncovered helps the crust stay that way; covering them traps moisture and makes them soft again.
If they do get a little sad and soft, don’t worry! Pop them back into a 350°F oven for about 5 to 7 minutes to crisp up that shell again. If they were already filled with soup, just cover the whole thing lightly with foil and reheat gently. But honestly, these are best eaten the same day you bake them!
Frequently Asked Questions About Bread Bowl Recipe From Scratch
I get so many questions about these things! Baking bread can feel intimidating, especially when you’re trying to create specific, sturdy shapes like bread bowls. Here are the things folks ask me most often that might help you on your journey to mastering easy bread bowls baking at home!
Can I make sourdough bread bowls using this method?
That’s a fantastic question! Technically, no, you can’t swap straight across using this exact recipe, because this one relies on commercial active dry yeast to give you that speed and predictability. If you want true sourdough bread bowls—which are amazing, by the way, because of that tangy flavor—you’ll need to use established sourdough methods.
That means replacing the yeast, sugar, and 1 1/2 cups of warm water with a good amount of active, mature sourdough starter. You’ll also need to let it ferment for much longer—sometimes 8 to 12 hours—instead of just the two rises we use here. It’s a whole different kind of baking magic, but stick to this recipe if you need beautiful bread bowls ready by dinner time!
How thick should the walls of my edible serving bowls be?
Oh, this is where people cut corners and end up with soup puddles on the table! Remember what I said in the tips section? You need about a one-inch wall thickness all the way around the bottom and sides. Stop your scooping knife about an inch up from the bottom base, and make sure the sides are sturdy enough to support the weight of whatever you’re pouring in.
If you make them too thin, your beautiful crusty bread bowls recipe will betray you mid-meal. If you make them too thick, you just have a ton of bread left over when all the soup is gone, which isn’t really a problem, but one inch is the perfect structural balance for holding even the thickest chili!
Can I use different types of flour in this bread bowl recipe?
I briefly mentioned this earlier, but it’s worth repeating! All-purpose flour (AP) is my go-to here because it yields that great, soft interior that everyone loves for dipping. However, if you want a firmer texture and a chewier bite—which is great if you’re planning on serving something really heavy or wet—swapping in bread flour works fantastic! Bread flour has higher protein, meaning it develops more gluten when kneaded, giving you that structural strength.
Just a heads up: Bread flour absorbs more water than AP flour. So, if you switch flours, keep your extra flour handy. You might need an extra quarter cup or so to get the dough to come together into that smooth ball we talked about. Always trust how the *dough* feels over sticking strictly to the last ‘1/4 cup’ measurement!
If you have any other burning questions about your homemade bread bowls or need anything else for your kitchen adventures, feel free to reach out on my contact page!
Estimated Nutritional Information for Homemade Bread Bowls
Now, listen up, because I know some of you are counting macros, and others just want to know what they are getting into when they devour an entire bread bowl in one sitting! I ran the numbers for this recipe based on the yield of four large bowls. These numbers are a fantastic snapshot of what you’re eating, but remember, this is just an estimate based on the base recipe ingredients.
This information assumes you’re eating one full bread bowl (not including whatever delicious soup or chili you put inside it, which is the best part, right?).
- Serving Size: 1 bread bowl
- Calories: 320
- Sugar: 3g
- Sodium: 350mg
- Fat: 3g (only 0.5g Saturated Fat—yay for low saturated fat!)
- Carbohydrates: 65g
- Fiber: 3g
- Protein: 10g
- Cholesterol: 0mg
Just a quick heads-up: Since we are making these homemade bread bowls from scratch using simple ingredients, the cholesterol count is zero! That’s the magic of not using eggs in the dough itself. If you decide to use butter instead of oil, that saturated fat number will bump up slightly, but honestly, for the flavor, it’s worth it. Don’t stress too much over the numbers, though; these are pure comfort food bread, meant to be enjoyed!
Share Your Experience Making These Bread Bowls
You’ve made it! You’ve conquered the mixing, the kneading, the rising, and you now have these stunning, crusty bread bowls cooling on your rack. Seriously, take a moment to admire your handiwork—you just baked bakery-quality bread!
I really, truly want to see what you filled them with! Did you go with a velvety butternut squash soup, or maybe you took my advice and stuffed one with chili or that amazing spinach dip? Don’t be shy!
Please hop down below and give this recipe a rating. Every time you leave a star rating, it helps other home cooks find this fantastic bread bowl recipe from scratch. It lets me know you loved getting crusty on the outside and soft on the inside!
If you snapped a picture of your glorious creation—especially if you managed a perfect 1-inch wall structure—tag me on social media! I love seeing these babies in action. You can find me sharing all my kitchen adventures over on the About Us page for my handles. Happy dipping, my friends!
PrintBakery-Style Homemade Bread Bowls for Soup
Make crusty, soft-centered bread bowls from scratch perfect for holding your favorite soups or stews.
- Prep Time: 20 min
- Cook Time: 30 min
- Total Time: 2 hours 25 min
- Yield: 4 servings
- Category: Baking
- Method: Baking
- Cuisine: American
- Diet: Vegetarian
Ingredients
- 2 1/4 teaspoons active dry yeast
- 1 1/2 cups warm water (105-115°F)
- 1 teaspoon sugar
- 3 1/2 to 4 cups all-purpose flour
- 2 teaspoons salt
- 2 tablespoons olive oil
Instructions
- Activate the yeast: Mix the yeast, sugar, and warm water in a large bowl. Let it stand for 5 to 10 minutes until foamy.
- Mix dry ingredients: In a separate bowl, whisk together 3 1/2 cups of flour and the salt.
- Combine: Add the olive oil and half of the flour mixture to the yeast mixture. Mix until just combined. Gradually add the remaining flour mixture until a shaggy dough forms.
- Knead: Turn the dough out onto a lightly floured surface. Knead for 6 to 8 minutes until the dough is smooth and elastic.
- First rise: Place the dough in a lightly oiled bowl, turning to coat. Cover with plastic wrap and let it rise in a warm place for 1 to 1.5 hours, or until doubled in size.
- Shape: Punch the dough down gently. Divide the dough into 4 equal pieces. Shape each piece into a tight, round ball.
- Second rise: Place the dough balls on a baking sheet lined with parchment paper, leaving space between them. Cover loosely and let rise for 30 to 45 minutes.
- Preheat and prepare: Preheat your oven to 400°F (200°C). Place a shallow pan on the bottom rack to create steam.
- Bake: Brush the tops of the dough balls lightly with water. Bake for 25 to 30 minutes, or until deep golden brown.
- Cool: Transfer the baked bread bowls to a wire rack to cool completely before hollowing them out.
Notes
- For a crispier crust, spray the inside of the oven with water during the first 10 minutes of baking.
- To hollow the bowl, use a serrated knife to cut a circle around the top, then gently pull out the soft interior bread, leaving a sturdy wall about 1 inch thick.
- Save the removed bread centers to dip into your soup or to make croutons.
Nutrition
- Serving Size: 1 bread bowl
- Calories: 320
- Sugar: 3
- Sodium: 350
- Fat: 3
- Saturated Fat: 0.5
- Unsaturated Fat: 2.5
- Trans Fat: 0
- Carbohydrates: 65
- Fiber: 3
- Protein: 10
- Cholesterol: 0