

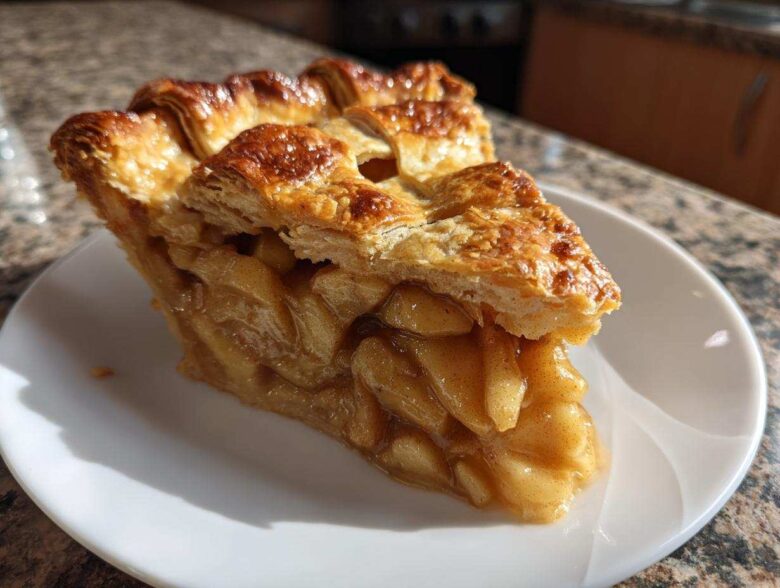
There’s just nothing that beats walking into a house filled with the scent of baking apples and cinnamon, right? Forget store-bought or those fancy bakery pies; making a truly incredible apple pie from scratch is my absolute favorite thing to conquer in the kitchen. I spent years fighting with mushy fillings and tough crusts until I finally cracked the code. Trust me, this is the Best Ever Homemade Apple Pie recipe you’ll ever use, mostly because we focus on two things: achieving that ridiculously flaky, all-butter crust and making sure the spiced apple filling is perfectly tender, not watery. If you love cinnamon flavors in the morning too, you should check out my apple cinnamon muffins!
After countless attempts, I learned that precision in the dough is everything. Once you master keeping things cold, the rest of this apple pie recipe is a breeze. Get ready to make holiday memories!
Why This is the Best Ever Homemade Apple Pie Recipe (E-E-A-T Focus)
So, why am I shouting that this is the absolute best apple pie recipe? It boils down to chemistry and keeping things ice-cold! When we talk about a superior classic apple pie recipe, we are really talking about a magnificent crust. My secret weapon is keeping the butter in pea-sized chunks when I mix the flour. Those tiny frozen pieces melt in the oven and create steam pockets—that’s your flakiness right there!
People often ruin their comfort food desserts by letting the butter get warm. But here, every step fights sogginess and blandness. We use Granny Smiths because they hold their shape beautifully, giving you that perfect texture contrast against the buttery layers. If you’re looking for another amazing baked apple treat, you have to try my caramel apple crisp—it’s equally comforting!
Ingredients for Your Flaky Crust and Sweet Spiced Apple Pie Recipe
Okay, let’s get our ducks in a row here. A spectacular pie lives or dies by its ingredients, especially when you’re aiming for that homemade apple pie from scratch feel. I’ve broken everything down so you aren’t digging through one giant list mid-recipe. Keep everything for the crust in the fridge until the very last second—I mean it!
If you want to make some lighter snacks before the main event, check out these apple cinnamon crepes!
For the All-Butter Double Crust
- 2 1/2 cups all-purpose flour
- 1 teaspoon salt
- 1 cup (2 sticks) very cold unsalted butter, cut into small cubes
- 1/2 cup ice water, plus more if needed—must be icy!
For the Cinnamon Apple Pie Filling
- 6 large Granny Smith apples, peeled, cored, and sliced 1/4 inch thick (this thickness is key!)
- 1/4 cup granulated sugar
- 1/4 cup packed light brown sugar
- 1 teaspoon ground cinnamon
- 1/4 teaspoon ground nutmeg
- 1/8 teaspoon ground allspice
- 2 tablespoons all-purpose flour (this thickens up the juices, don’t skip it!)
- 1 tablespoon lemon juice
- 1 large egg, beaten with 1 teaspoon water (for the egg wash that makes it shiny)
- 1 tablespoon coarse sugar for sprinkling on top
Step-by-Step Instructions for the Perfect Apple Pie Recipe
Alright, this is where the magic happens! Don’t let the steps look intimidating; we’re breaking this down into manageable pieces. Once you nail that crust, the whole apple pie recipe feels easy. Grab your mixing bowls, and let’s get going. We need to move quickly but calmly!
Making and Chilling the Flaky Pie Crust Tutorial
First up is the foundation of our pie. Whisk the flour and salt together in a big bowl—super easy. Now, toss in that stone-cold butter. You need to cut that butter in until what you have looks like coarse crumbs, but you must leave some bigger, pea-sized chunks of butter floating around. Those chunks are pure flakiness, so don’t blend it too smooth! Start adding your ice water slowly, only a tablespoon at a time, just until that dough barely holds together when you squeeze it. No kneading! Divide that dough into two disks, wrap them up tight, and chuck them in the fridge for at least one whole hour. Seriously, don’t skip this chilling time!
How to Make Apple Pie Filling
While the dough is chilling out, we tackle the filling. Into a large bowl, drop all those beautiful sliced apples. Sprinkle over both sugars, the cinnamon, nutmeg, allspice, that little bit of flour for thickening, and the lemon juice. Now, gently—and I mean gently—toss everything together. You want every apple slice coated, but we aren’t going to bruise them. Set this mixture aside while your dough finishes chilling.
Assembling and Baking Your Apple Pie Recipe
Time to roll! On a floured surface, roll one chilled disk into a big 12-inch circle and carefully lay it into your 9-inch pie plate. Pour in all those amazing spiced apples and place a few dabs of extra cold butter right on top of the mound. Roll out the second disk for the top crust. Lay it over, trim the overhang to about an inch, and pinch the edges together firmly to seal everything. Make sure you cut several vents on top—steam needs an escape route! Brush the top lavishly with that egg wash and sprinkle on the coarse sugar. Now for the bake: start high at 425 degrees F for 15 minutes to set that flaky crust structure. Then, drop your oven down to 375 degrees F and bake for another 40 to 50 minutes until that filling is bubbling happy juice. If the edges look like they’re getting too dark, just loosely wrap some foil around them. Don’t forget to check out my apple pie oatmeal if you want pie flavors for breakfast, or try these fun apple pie bars later!
Tips for Success with Your Double Crust Pie Recipe
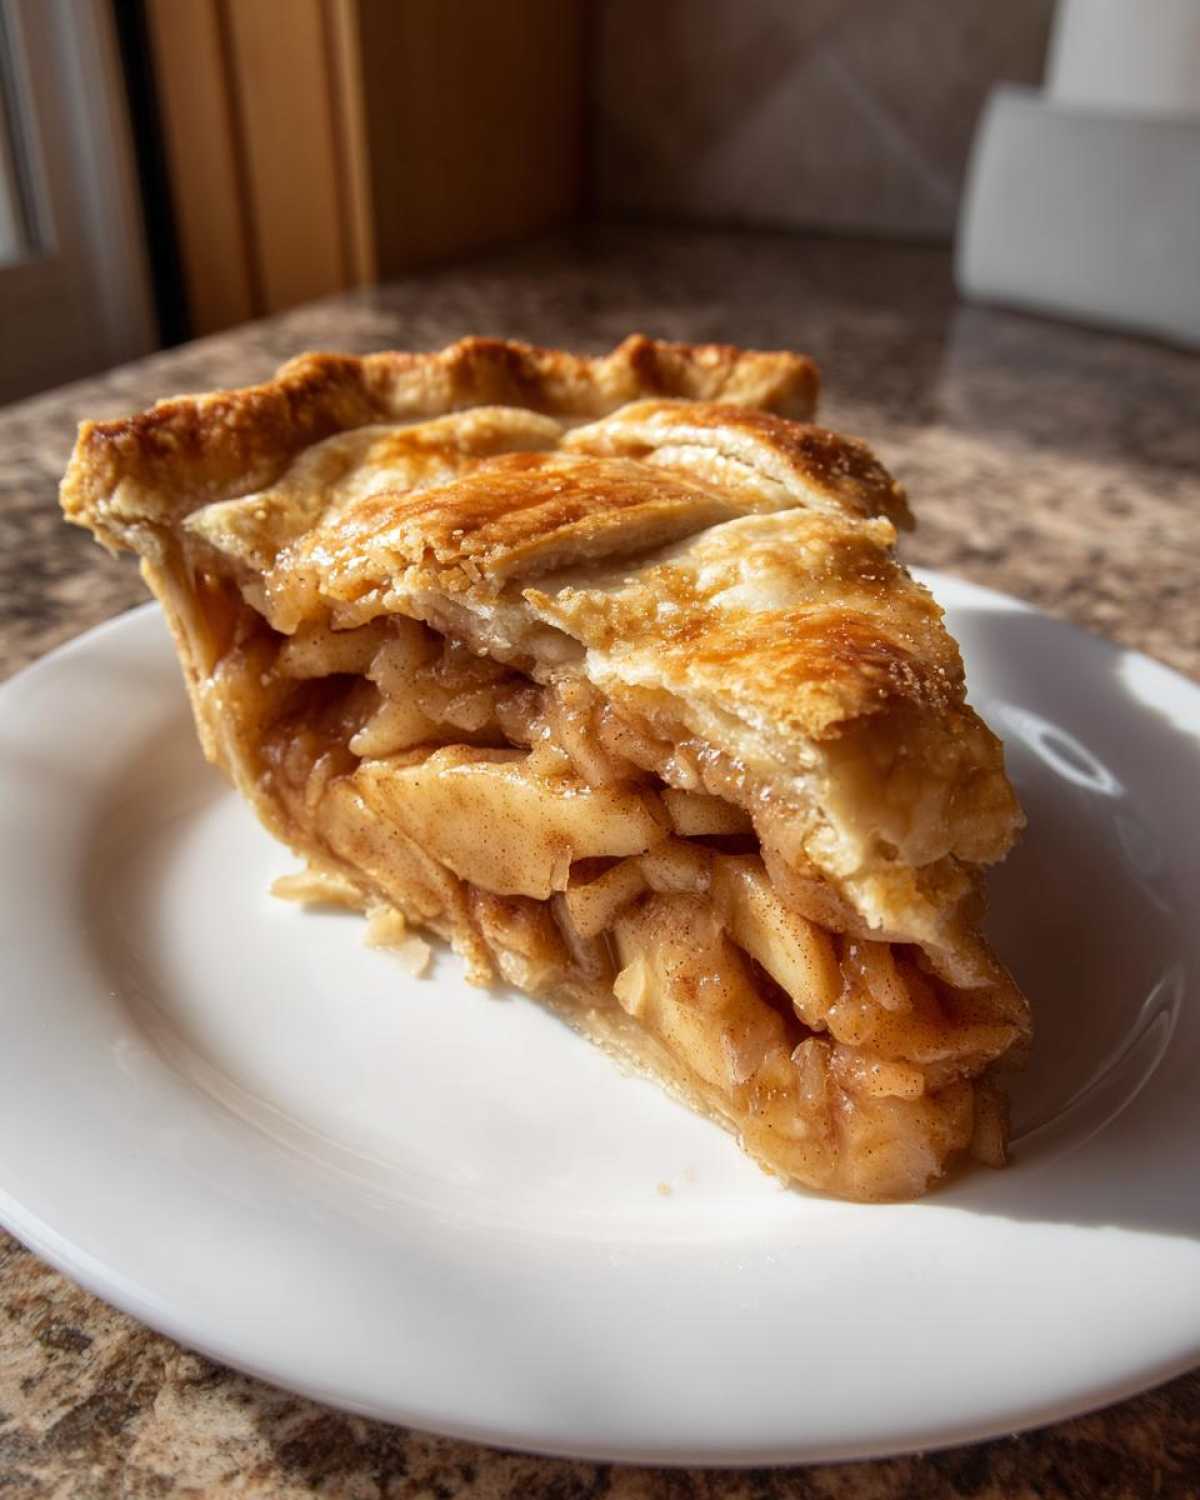
Listen, even with the best apple pie recipe, you can hit a snag if you rush the prep. The number one rule for this beautiful double crust pie recipe? Everything has to be cold! I mean it; butter and water must stay frigid. Those big cold pieces of butter are what separate a good crust from an unbelievably flaky pie crust tutorial success story. They create those gorgeous steam pockets when they hit the heat!
Also, don’t just grab any old apple. For the best flavor balance in your sweet spiced apple pie, you need a mix. I insist on using tart apples, especially those firm Granny Smiths, alongside a sweeter apple like Honeycrisp since they break down a bit more evenly. If you want to get fancy with that top layer—and trust me, a lattice looks amazing—cut those strips evenly wide so they weave together nicely. If you are looking for another cinnamon-filled breakfast treat, try my apple cinnamon french toast bake!
Storage and Reheating Instructions for This Apple Pie Recipe
Oh, the eternal question after you’ve devoured the first slice of this amazing apple pie recipe: how do I keep the rest of it gorgeous? The good news is that this is meant to be leftover food! Since we used all that lovely butter in the crust and the filling has a good amount of sugar, it keeps quite nicely.
If you’ve got leftovers and they are cooling on the counter from that initial 3-hour cool-down (which is non-negotiable, by the way—let that filling set!), you can leave it out at room temperature for maybe four hours max. But if you aren’t going to finish it in one day, you absolutely need to cover it up and pop it in the fridge. It’ll last happily in the refrigerator for about three to four days. Don’t panic about the crust getting a little soft; we fix that easily!
When you’re ready for a slice later in the week, don’t even think about the microwave—that makes the crust soggy faster than you can say ‘Granny Smith’! The best trick to revive that perfectly flaky crust is a low oven reheating. Set your oven to about 350 degrees F (175 degrees C) and just warm individual slices for about ten minutes. This crisps up the butter in the crust again and warms that spiced filling just enough. It’s basically like baking it fresh all over again!
If you’ve ever made my cinnamon apple chips, you know how much I preach about texture preservation. This reheating trick is crucial for retaining the integrity of this classic apple pie recipe.
Frequently Asked Questions About Making Homemade Apple Pie
I know you’re going to love this apple pie recipe, but sometimes questions pop up while you’re standing in the kitchen covered in flour! That’s totally normal, especially when you’re jumping into making a truly old fashioned apple pie from scratch. Here are a few things folks usually ask me.
Can I make this apple pie recipe ahead of time?
Yes, you absolutely can, and I often do, especially around the holidays! My favorite way to cheat slightly when making this homemade apple pie from scratch is to prepare both dough disks the day before. Make the dough exactly as I laid out, wrap them up, and store them in the fridge overnight. Having cold dough ready to go the next morning makes the whole process feel much faster—it’s a lifesaver!
As for the fully assembled pie, you can make it completely, bake it, and let it cool. You can store the baked pie airtight at room temperature for about 8 hours. If you need longer, pop it in the fridge for up to two days. Remember what I said about reheating? Warm it up low and slow to bring that crust back to life!
What are the best apples for this sweet spiced apple pie?
This is crucial if you want a pie that doesn’t turn into apple soup! You need apples that are firm enough to stand up to baking without turning to complete mush. For that perfect combination of sweet and tart, you simply must use a mix. Grannies are non-negotiable for structure and that lovely tart backbone—they are the star of this sweet spiced apple pie for a reason!
But mixing them with something sweeter gives you depth. I usually go half Granny Smith and half Honeycrisp or Fuji. This ensures you get complexity in the flavor while guaranteeing those pieces hold their shape so you see definition in every slice. Anything too soft, like McIntosh, will just break down into sauce, and we want slices, not soup!
If you’re looking for a great cinnamon experience without the crust hassle, you should check out my recipe for the cinnamon maple whiskey sour; it’s fantastic!
Serving Suggestions for Your Classic Apple Pie Recipe
Now that you have created the ultimate classic apple pie recipe—a masterpiece sealed with that beautifully browned crust—it’s time for the presentation phase! This pie is robust enough to be the centerpiece of any meal, especially when thinking about those big Thanksgiving dessert recipes or any chilly evening during fall baking recipes season.
The go-to, can’t-be-beat pairing, of course, is a generous scoop of high-quality vanilla bean ice cream melting right down the warm slice. The temperature contrast is just heavenly. If ice cream feels too heavy, a dollop of freshly whipped cream—made with just a touch of vanilla—is light and airy and lets that cinnamon shine through.
But I have a little trick for when company comes over and you want something a tiny bit different: try serving a warm slice with a drizzle of good quality salted caramel sauce. The salt cuts through the sweetness perfectly, and honestly, anything caramel just screams cozy dessert! If you’re looking for more creative uses for apples and caramel, go check out my caramel apple cupcakes—they are showstoppers!
Remember, this pie needs time to set, so try not to slice into it piping hot. Give it those three hours to cool down so your slices hold their shape!
Estimated Nutritional Data for This Apple Pie Recipe
Okay, friends, let’s talk numbers for a second. I pulled this data together because I know some of you like to keep track, but please remember baking is an art, not an exact science! This pie is rich because it’s made with all that wonderful butter and fruit, so take these figures with a grain of salt. This is just an estimate for one glorious slice of that homemade apple pie from scratch magic.
If you’re looking for another delicious, slightly healthier fall treat, you absolutely must try my maple pecan granola recipe—it’s perfect for topping yogurt!
Here is the breakdown for one serving:
- Serving Size: 1 slice
- Calories: 450
- Sugar: 30g
- Sodium: 250mg
- Fat: 25g (This is where our flaky crust comes from!)
- Saturated Fat: 15g
- Unsaturated Fat: 10g
- Trans Fat: 0g (Hooray for quality butter!)
- Carbohydrates: 55g
- Fiber: 3g
- Protein: 5g
- Cholesterol: 60mg
Honestly, when pie tastes this good and is this much of a labor of love, I try not to worry too much about the calories. Just soak up that cozy, spiced air!
Share Your Homemade Apple Pie Success
Now that you’ve conquered the dough and wrestled those apples into a beautiful, bubbling pie, I need to hear about it! Seriously, creating the perfect apple pie recipe is a journey, and I want to see your finished masterpieces. Don’t be shy!
When you pull that golden, fragrant pie out of the oven—whether you stuck to the double crust or tried a lattice—snap a photo! You can tag me on social media; it absolutely makes my day when I see you succeeding in your kitchen. Did you use a mix of apples I suggested? Did your crust flake perfectly? Let me know!
More importantly, please leave a rating right here on the page. Five stars if it deserves it, of course! And if something didn’t go exactly to plan, drop a comment below. I love reading through the feedback and troubleshooting with you all. That’s how we all get better at making the best apple pie recipe together. Cooking is always better when we share the wins!
If you’re curious about who’s behind all these recipes and why I love baking so much, you can read all about my kitchen adventures over on my About Us page. Happy baking, and I can’t wait to see your pies!
PrintThe Best Ever Homemade Apple Pie with Flaky All-Butter Crust
Follow this step-by-step guide to make a classic apple pie featuring a tender, cinnamon-spiced filling encased in a rich, flaky, all-butter double crust.
- Prep Time: 45 min
- Cook Time: 65 min
- Total Time: 170 min
- Yield: 8 servings
- Category: Dessert
- Method: Baking
- Cuisine: American
- Diet: Vegetarian
Ingredients
- 2 1/2 cups all-purpose flour
- 1 teaspoon salt
- 1 cup (2 sticks) cold unsalted butter, cut into small cubes
- 1/2 cup ice water, plus more if needed
- 6 large Granny Smith apples, peeled, cored, and sliced 1/4 inch thick
- 1/4 cup granulated sugar
- 1/4 cup packed light brown sugar
- 1 teaspoon ground cinnamon
- 1/4 teaspoon ground nutmeg
- 1/8 teaspoon ground allspice
- 2 tablespoons all-purpose flour (for thickening)
- 1 tablespoon lemon juice
- 1 large egg, beaten with 1 teaspoon water (for egg wash)
- 1 tablespoon coarse sugar for sprinkling
Instructions
- Prepare the Crust: In a large bowl, whisk together the 2 1/2 cups flour and 1 teaspoon salt. Cut in the cold butter using a pastry blender or your fingers until the mixture resembles coarse crumbs with some pea-sized pieces of butter remaining.
- Gradually add the ice water, one tablespoon at a time, mixing until the dough just comes together. Do not overmix. Divide the dough in half, form each half into a disk, wrap in plastic wrap, and chill for at least 1 hour.
- Prepare the Filling: In a large bowl, combine the sliced apples, granulated sugar, brown sugar, cinnamon, nutmeg, allspice, 2 tablespoons flour, and lemon juice. Toss gently to coat the apples evenly. Set aside.
- Assemble the Pie: On a lightly floured surface, roll out one dough disk into a 12-inch circle. Carefully transfer the dough to a 9-inch pie plate. Trim the edges, leaving a 1-inch overhang.
- Pour the apple filling into the crust. Dot the top of the filling with a few small pieces of remaining cold butter, if desired.
- Roll out the second dough disk. Place it over the filling. Trim the top crust, leaving a 1-inch overhang. Crimp the top and bottom crust edges together to seal. Cut several slits in the top crust to allow steam to escape.
- Brush the top crust evenly with the egg wash and sprinkle with coarse sugar.
- Bake: Preheat your oven to 425 degrees F (220 degrees C). Place the pie on a baking sheet. Bake for 15 minutes at 425 degrees F. Then, reduce the oven temperature to 375 degrees F (190 degrees C) and continue baking for 40 to 50 minutes, or until the crust is golden brown and the filling is bubbly. If the edges brown too quickly, cover them loosely with foil.
- Cool: Let the pie cool on a wire rack for at least 3 hours before slicing and serving. This allows the filling to set properly.
Notes
- For the flakiest crust, keep all ingredients, especially the butter and water, very cold.
- Use a mix of tart apples, like Granny Smith, and sweeter apples for the best flavor balance.
- If you prefer a lattice top, cut the top dough into even strips and weave them over the filling.
Nutrition
- Serving Size: 1 slice
- Calories: 450
- Sugar: 30g
- Sodium: 250mg
- Fat: 25g
- Saturated Fat: 15g
- Unsaturated Fat: 10g
- Trans Fat: 0g
- Carbohydrates: 55g
- Fiber: 3g
- Protein: 5g
- Cholesterol: 60mg